Sign In
Upload
Manuals
Brands
OKI Manuals
Printer
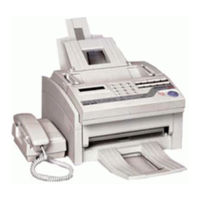
OKIOFFICE44
OKI OKIOFFICE44 Manuals
Manuals and User Guides for OKI OKIOFFICE44. We have
2
OKI OKIOFFICE44 manuals available for free PDF download: Maintenance Manual, Service Manual
Oki OKIOFFICE44 Maintenance Manual (637 pages)
facsimile transceiver
Brand:
Oki
| Category:
Fax Machine
| Size: 7 MB
Table of Contents
Maintenance Manual
1
Table of Contents
3
1 General Information
6
General Performance
6
General User's Function
9
General Maintenance Functions
12
General Appearance
13
Tray-Document
13
Cover-Front
13
Basic Performance Specifications
17
For OKIOFFICE44/OKIFAX 4100
20
Reports and Lists
27
Sender ID Format: (Example)
29
Power Outage Report
31
Activity Report
32
Message Confirmation
34
Broadcast Entry Report
36
Broadcast Confirmation Report
37
Confidential Rx Report
37
Telephone Directory P6
49
2 Installation Procedure
52
Setup Information
52
General
52
Site Selection
54
Installation
54
Unpacking
56
Unpacking for OKIOFFICE44/OKIFAX 4100
56
Unpacking for OKIFAX 5000 Series
58
Check of Contents
61
Installation of Attachments
62
Installation of Attachments for OKIOFFICE44/OKIFAX 4100
62
Installation of Attachments for OKIFAX 5000 Series
67
AC Cord Connection
72
Telephone and Line Connections
74
Packing for Shipment
74
Programming and Initial Settings
75
Initial Settings
75
General Procedure of Key Operation
75
Technical Functions
79
Technical Functions Example
90
Service Bit
90
Local Test
91
Ring Dura. *10 Ms
95
Led Head Strobe
95
Media Type
96
User's Functions
97
Specifications
102
User's Functions Example
113
The Display Shows
117
Ring Response
117
Clock Adjustment
120
Dual Access Operation (for OKIFAX 5000 Series)
121
System Data Programming
122
Dial Parameters Settings
124
Off-Line Tests
128
On-Line Tests
130
Installation of Optional Units
133
3 Brief Technical Description
145
Fundamentals of the Electro-Photographic Process
146
Actual Electo-Photographic Process
148
Boards and Units
149
OKIOFFICE44/OKIFAX 4100 Boards and Units
149
OKIFAX 5000 Series Boards and Units
149
Overall Dimension and Mechanical Structure of OKIOFFICE44/OKIFAX 4100
152
Overall Dimension and Mechanical Structure of OKIFAX 5000 Series
153
For Okioffice44/Okifax 4100
154
Mechanical Disassembly and Reassembly for Okioffice44/Okifax 4100
154
General
154
Precautions for Parts Replacement
154
Tools
155
How to Disassemble and Reassemble
155
LED Print Head
159
ID Unit, Rear-Cover, Cover-NCU, Cover-Main and Board-NCU
160
Unit-048 OPE-Panel
162
Separation Rubber, Roller Assembly Sensor
163
Roller Assembly-ADF, CIS (Contact Image Sensor), Lever-PC1 and PC2
164
Board-R44, OKIOFFICE 44/OKIFAX 4100 Power Supply Unit
167
Option (Board-Memory: MEM, Board-CTR; PC Interface)
168
Printer Unit Section
169
Transfer Roller
170
High-Voltage Power Supply Unit (TLHV/OLHV)
171
Holder Assembly
172
Plate-Side M and Gear-Idle
173
Registration Roller
174
Drive Shaft E (Eject) and Eject Roller
175
Heat Assembly
176
Pressure Roller B (Back up Roller)
177
Hopping Shaft Assembly
178
Paper Sensor E, Paper Sensor Exit and Toner Sensor Assembly
179
Printer Unit
180
Mechanical Disassembly and Reassembly for Okifax 5100 Series
181
For Okifax 5100 Series
181
General
181
Precautions for Parts Replacement
181
Tools
182
How to Disassemble and Reassemble
182
LED Print Head
185
ID Unit, Rear Cover, NCU Cover, Main Cover, Separation Plate, NCU Board, Modem Board
186
Control Panel Assembly, Paper Guide (U) Assembly
188
Sub-Roller, ADF Roller Assembly, Pinch Roller, Contact Image Sensor, Document Detectors
190
Resist Motor, Drum Motor, Release Guide Assembly, Manual Guide Assembly, Stacker Cover, Fusing Unit
192
Lower Base, Motor Assembly, Back-Up Roller, Transfer Roller
194
Resist Roller, Hopping Roller, Sensor Plates
196
MCNT Board, Power Supply Unit, Contact Assembly, Transformer, Sub-PSU
198
5 Adjustments
199
Setting of LED Print Head Drive Time
199
OKIOFFICE44/OKIFAX 4100 Confirmation Items
200
OKIOFFICE44/OKIFAX 4100 Measurement
201
OKIFAX 5000 Series Confirmation Items
202
OKIFAX 5000 Series Measurement
203
6 Cleaning and Maintenance
205
Replacement of Consumable Parts
205
Routine Inspection
208
Routine Inspection for OKIOFFICE44/OKIFAX 4100
208
Routine Inspection for OKIFAX 5000 Series
210
Printer Counter Display/Clear
212
Scan Count
212
Printer Counter Display/Clear
213
Self-Diagnosis Test
214
Sensor Calibration Test
218
Scanning Error
219
LED Test
220
Tone Send Test
221
High-Speed Modem Send Test
222
High-Speed Modem Receive Test
224
MF Send Test
225
Tone (TEL/FAX)
226
Protocol Dump Data Printing
227
Protocol Dump
228
System Reset
231
Service Code
232
7-1.Troubleshooting and Repair for Okioffice44/Okifax 4100
235
Overall Troubleshooting Flow Chart
237
No LCD Operation
238
ALARM LED on
239
Printing Test Failure
240
No Local Copy
241
Auto Dial Failure
242
Transmission Problem
243
Auto Reception Failure
245
Reception Problem
246
Sensor Calibration Test
248
LED Test
249
Tone Send Test
250
High-Speed Modem Test
251
MF Send Test
253
Tone (TEL/FAX) Send Test
254
No Acoustic Line Monitor
255
Power Supply Unit
256
No Document Feeding
265
Multiple Document Feeding
266
Document Skew
267
Document Jam
269
Printer Unit
270
Precautions
270
Troubleshooting Flow Charts of Printer Unit
271
Cover Open
271
7-2.Troubleshooting and Repair for Okifax 5000 Series
287
Overall Troubleshooting Flow Chart
289
No LCD Operation
290
ALARM LED on
291
Printing Test Failure
292
No Local Copy
293
Auto Dial Failure
294
Transmission Problem
295
Auto Reception Failure
297
Reception Problem
298
Sensor Calibration Test
300
LED Test
301
Tone Send Test
302
High-Speed Modem Test
303
MF Send Test
305
Tone (TEL/FAX) Send Test
306
No Acoustic Line Monitor
307
Power Supply Unit
308
No Document Feeding
315
Multiple Document Feeding
316
Document Skew
317
Document Jam
319
Printer Unit
320
Precautions
320
Troubleshooting Flow Charts of Printer Unit
321
Power Supply Unit
328
8 Dipswitchs Setting Table List
337
Appendix Apc Board Descriptions and Operation
361
Unit Configuration and Block Diagram
361
Function of each Unit
366
High Voltage
434
UNC, WN5, FN5 and DN5 Circuit Diagram
445
A3.13 TQSB (Second Tray) Circuit Diagram: Option
495
Appendix B1 Descriptions of Print Operation
505
(Okioffice44/Okifax 4100)
505
Appendix B2 Descriptions of Print Operation (Okifax 5000 Series)
521
Mechanical Components
521
Description of Print Operations
523
B2.2.1 Process Operations
523
B2.3.1 Errors List
534
B2.3.2 Major Trouble Errors
535
B2.3.2.3 Paper Feed Monitoring
536
B2.3.2.5 Cover Open
536
B2.3.3 Recoverable Errors
537
Other Special Cases
540
B2.4.1 Manual Paper Feed
540
Appendix Ccircuit Diagram and Parts List
541
(Okioffice44/Okifax 4100)
544
Section 1 Cabinet Assembly (Fax Nip-Fx048)
545
Carrier Sheet
547
Section 2 Unit-Printer
548
Section 3 Unit-048 Ope Panel
550
Section 4 Opepanel (Operation Panel) Assembly
552
Section 4 OPE PANEL ASSEMBLY
553
Section 5 Frame Assembly-Scanner (L)
554
Section 6 Plate Assembly-Scanner (B)
556
Section 7 Plate Assembly-Scanner (R)
558
Section 8 Frame Assembly-Scanner (U)
560
Section 9 Cover Assembly-Top
562
Section 10 Plate Assembly-Base
564
Section 11 Printer Base Frame Unit
566
Section 12 Printer Heat Assy
569
Section 13 Cables
571
Appendix D1 Mechanical Expanded View Drawing and Parts List
573
Appendix D2 Mechanical Expanded View Drawing and Parts List
573
(Okifax 5200/5300/5500/5600)
573
Section 1 Cabinet Assembly
574
Section 2 Control Panel Assembly
578
Section 3 Printer Assembly
579
Section 4 Base Assembly
582
Section 5 Scan Unit
585
Section 6 Paper Guide U Assembly
587
Section 8 Option Telephone (Us)
591
Appendix Eboard Layout
600
External View and Component Names
601
Appendix Fsecond Paper Feeder Maintenance Manual
601
(Okifax 5000 Series)
601
Mechanism Description
602
General Mechanism
602
Hopper Mechanism
602
Precautions Concerning Parts Replacement
603
Parts Replacement
603
Parts Layout
605
Parts Replacement Methods
606
Precautions Prior to the Troubleshooting
610
Preparations for the Troubleshooting
610
Troubleshooting Method
611
Interconnection Diagram
614
PCB Layout
615
Parts List
616
Section2 Mechanical Assembly
617
Appendix G Rmcs System Manual(for Model 20)
619
Notes to Users
620
Hard Disk Drive
623
New Password
628
Rmcs Basic Operation
631
TEL Directory
632
Selecting Destination Drive
632
Environment Setting
633
Message Modifying Tool
634
Activating the Program
634
File Selection
635
Saving Message
635
Model Selection
635
Loading Message
636
Rmcs System
637
Fax Model
637
Advertisement
Oki OKIOFFICE44 Service Manual (387 pages)
Service Manual
Brand:
Oki
| Category:
Printer
| Size: 7 MB
Table of Contents
Service Manual
1
Table of Contents
3
Section 1: General Information
13
General Performance
13
General User's Function
16
General Maintenance Functions
19
General Appearance
20
Basic Performance Specifications
21
Reports and Lists
32
Power Outage Report
37
Activity Report
38
Broadcast Entry Report
42
Broadcast Confirmation Report
43
Confidential Rx Report
43
Section 2: Installation
49
General Setup Information
49
Site Selection
51
Unpacking
52
Unpacking for OKIOFFICE 44
52
Check of Contents
54
Installation of Attachments
55
AC Cord Connection
60
Telephone and Line Connections
61
Packing for Shipment
61
Initial Settings
62
General Procedure of Key Operation
62
Key Operation Flowchart
63
Technical Functions
66
Service Personnel Initial Settings Table 2.9.1 (1/7)
67
Service Personnel Initial Settings Table 2.9.1 (2/7)
68
Service Personnel Initial Settings Table 2.9.1 (3/7)
69
Service Personnel Initial Settings Table 2.9.1 (4/7)
70
Service Personnel Initial Settings Table 2.9.1 (5/7)
71
Service Personnel Initial Settings Table 2.9.1 (6/7)
72
Service Personnel Initial Settings Table 2.9.1 (7/7)
73
TEL/FAX Automatic Switching
74
TEL/FAX Mode Flow Chart
75
TAD Mode Flow Chart (Type 1)
76
TAD Mode Flow Chart (Type 2)
77
Technical Functions Example
78
Technical Functions 01 to 11 (Table 2.9.2, 1/5)
80
Technical Functions 12 to 16 (Table 2.9.2, 2/5)
81
Technical Functions 17 to 23 (Table 2.9.2, 3/5)
82
Technical Functions 24 to 27 (Table 2.9.2, 4/5)
83
Technical Functions 28 to 31 (Table 2.9.2, 5/5)
84
User's Functions
85
Feature Specifications Table 2.9.3 (1/3)
86
User's Functions
86
Feature Specifications Table 2.9.3 (2/3)
87
Feature Specifications Table 2.9.3 (3/3)
88
One-Touch Key Program Settings (Flowchart)
89
One-Touch Key Program Settings
90
One-Touch Key Program Settings Table [2.9.4] (2/4)
91
One-Touch Key Program Settings [Table 2.9.4] (3/4)
91
One-Touch Key Program Settings [Table 2.9.4] (4/4)
91
One-Touch Key Program Settings [Table 2.9.4] (3/4)
92
One-Touch Key Program Settings [Table 2.9.4] (4/4)
93
Function Program
94
User Function Program Settings Table 2.9.4 (1/4)
94
User Function Program Settings Table 2.9.4 (2/4)
95
User Function Program Settings Table 2.9.4 (3/4)
96
User Function Program Settings Table 2.9.4 (4/4)
97
User's Functions Example
98
Function Program
98
User's Functions Table 2.9.5 (1/2)
99
User's Functions Table 2.9.5 (2/2)
100
Ring Response Time
102
Dial Parameters (Service Bit "OFF")
103
Clock Adjustment
104
Dual Access Operation
105
System Data Programming
106
Dial Parameters Settings
108
Procedure
108
Installation Procedure
109
Dial Parameters Settings (Table 2.9.6)
110
Off-Line Tests
111
Procedure
111
Purpose
111
Self-Diagnosis Print Test (Example) Figure 2.9.4
112
On-Line Tests
113
Reception
113
Transmission
113
Typical Transmission Flow (Fig. 2.9.5)
114
Typical Reception Flow (Fig. 2.9.6)
115
Installation of Optional Units
116
Items
116
Procedure
116
Memory Board Installation
117
CTR (PC Interface) Board Installation
118
Optional Telephone Set Installation
119
Section 3: Brief Technical Description
121
Electrophotographic Process Flow
121
Fundamentals of the Electro-Photographic Process
122
Actual Electrophotographic Process
125
Boards and Units
126
Block Diagram (Figure 3.3.1)
127
Overall Dimension and Mechanical Structure
128
Section 4: Disassembly
129
General
129
Precautions for Parts Replacement
129
Service Caution
130
Tools
131
How to Disassemble and Reassemble
131
Disassembly Procedure Flow Figure 4.1 (1/2)
132
Disassembly Procedure Flow Figure 4.1 (2/2)
133
Whole Unit Picture
134
LED Print Head
135
Image Drum and Covers (Rear, NCU, Main) and NCU Board
136
Unit-048 OPE-Panel
138
Separation Rubber, Sensor Frame Roller Assembly (U)
139
Roller Assembly-ADF, CIS, Lever-PC1 and PC2
140
Option (Board-Memory: MEM, Board-CTR; PC Interface)
144
Printer Unit Section
145
Transfer Roller
146
High-Voltage Power Supply Unit (TLHV/OLHV)
147
Holder Assembly
148
Plate-Side M and Gear-Idle
149
Registration Roller
150
Drive Shaft E (Eject) and Eject Roller
151
Heat Assembly
152
Pressure Roller B (Back up Roller)
153
Hopping Shaft Assembly
154
Paper Sensor E, Paper Sensor Exit and Toner Sensor Assembly
155
Printer Unit
156
Section 5: Adjustments
157
Setting of LED Print Head Drive Time
157
Settings of Technical Function No. 27 (Table 5.1.1)
157
Confirmation Items
158
Service Caution
159
Measurement
160
Service Caution
161
Section 6: Cleaning and Maintenance
163
Consumables Replacement
163
User Replaceable Items Life
163
Service Parts Life
163
Consumables Diagram (Figure 6.1.1)
163
Others
165
Reliability Table (6.1.1.)
165
Preventative Maintenance
166
Preventative Maintenance (Table 6.2.1)
166
Preventative Maintenance Diagram (Figure 6.2.1)
167
Printer Counter Display/Clear (User)
168
Printer Counter Display/Clear (Service)
169
Self-Diagnosis Test
171
Self-Diagnosis Test Sample (Figure 6.5.1.)
172
Explanation of Self-Diagnosis Test Items
173
Sensor Calibration Test
174
LED Test
176
Tone Send Test
177
High-Speed Modem Send Test
178
High-Speed Modem Send and Receive Test Diagram (Figure 6.9.1)
179
High-Speed Modem Receive Test
180
MF Send Test
181
Tone (TEL/FAX)
182
Protocol Data Dump Printing
183
Sample Protocol Data Dump (Figure 6.13.1)
184
Data Analysis (Figure 6.13.2)
185
Facsimile Control Field Conversion Table
186
System Reset
187
Service Code List [Table 6.15.1]
190
Service Code List [Table 6.15.1] (1/2)
191
Section 7: Troubleshooting
193
Overview
193
Service Caution
194
Overall Troubleshooting Flow Chart
195
No LCD Operation
196
ALARM LED on
197
Printing Test Failure
198
No Local Copy
199
Auto Dial Failure
201
Transmission Problem
202
Auto Reception Failure
205
Reception Problem
206
Sensor Calibration Test
208
LED Test
209
Tone Send Test
211
High-Speed Modem Test
212
MF Send Test
214
Tone (TEL/FAX) Send Test
215
No Acoustic Line Monitor
216
No Document Feeding
217
Multiple Document Feeding
219
Document Skew
220
Document Jam
222
Printer Unit
223
Precautions
223
Overall Troubleshooting Flowchart
224
Troubleshooting Flow Charts of Printer Unit
224
1: Top Cover Is Open
225
2: Replace Image Drum Message
226
3: Engine Controller Error
227
4: Fuser Unit Thermal Error
228
5: Paper Jams
229
6: no Paper Tray or no Paper
230
Action Items (Printer Unit-LCD Message) Table 7.1.22.2
231
Image Problems Table
232
Sample Image Problems (Figure 7.1.22.1)
232
7: Light or Blurred Output
233
8: Smeared Background on Output
234
9: Blank Output
235
10: Vertical Black Stripes on Output
236
11: Evenly Spaced Marks on Output
237
12: Missing Print on Output
238
13: Vertical White Stripes on Output
239
14: Poor Fusing
240
Section 8: Dipswitch Settings
241
General Information
241
Appendix A: Board Descriptions
243
Preface
243
Service Caution
243
A1.1 Unit Configuration and Block Diagram
245
Block Diagram Abbreviations
247
A1.2 Function of each Unit
248
Main Control (R44) Board
248
Operation Panel Unit: O4W Board
248
NCU Board (UNC5)
249
Power Supply Unit
249
Memory Board (Option)
249
CTR Board (PC Interface)
249
HOOK Board (Option)
249
TELU Board (Option)
249
A2.1 Signal Flow Explanation
250
Copy Mode
250
G3 Send Mode
252
G3 Receive Mode
254
Bps Send Mode
256
Bps Receive Mode
258
Report Printing
260
Memory Transmission
262
Memory Reception
262
A3.3 OPE (04W) Circuit Diagram
284
A3.5 Power Supply Unit for OKIOFFICE 44
286
A3.5.1 048 POW (120V/230V) Circuit Diagram
286
Service Caution
289
A3.5.2 OLHV/TLHV Circuit Diagram (2/2)
289
A3.7 UNC5 (NCU) Circuit Diagram
293
A3.8 TELU Circuit Diagram (Option)
296
Block Diagram of TEL-U (Option) Fig. A3.8.1
297
A3.10 MEMO (Memory) Circuit Diagram (Option)
298
Related Signals of Memory Board (Option) (Figure A3.10.1)
299
Service Manual, P/N
305
Appendix B: Print Operation Description
305
B1.1 Electrophotographic Processor
305
Layout Drawing of Electrophotographic Processor (Figure B1.1)
305
Paper Feeding Diagram (Figure B1.2)
307
B1.2 Electrophotographic Process
308
B1.2.1 Operations Process Explanations
310
Hopping
310
Printing and Warm-Up
311
Charging
312
Exposure
312
Development
313
Transfer
314
Cleaning
315
Fusing
315
Paper Feed Check List
316
B1.3 Paper Jam Detection
316
Timing Chart for Paper Feed (Tray Feed)
317
B1.4 Toner Low Detection
318
B1.5 Cover Open
320
Appendix C: Circuit Diagrams
321
General Information
321
C.1 General Information
321
Appendix D: Illustrated Parts List
325
Section 1: Cabinet Assembly 2/2
326
Section 2: Printer Unit
328
Section 3: Operator Panel
330
Section 4: Operator Panel Assembly
332
Section 5: Frame Assembly Scanner (L)
334
Section 6: Plate Assembly-Scanner (B)
336
Section 7: Plate Assembly-Scanner (R)
338
Section 8: Frame Assembly-Scanner (U)
340
Illustrated Parts List
341
Section 9: Cover Assembly-Top
342
Section 10: Plate Assembly-Base
344
Section 11: Printer Base Frame Unit (1 of 2)
346
Section 11: Printer Base Frame Unit (2 of 2)
348
Section 12: Cables
350
Section 13: Miscellaneous Items
352
Whole Unit
352
Consumables
352
Options
352
Packaging
352
User's Manuals
353
Service (Technical) Manuals
353
Service Manual, P/N
353
Appendix E: Board Layout
355
Tlhv Pcb
355
E.1 Tlhv Pcb
355
Service Caution
355
Mem Pcb
356
Tel-U Pcb
357
E.3 Tel-U Pcb
357
Hook PCB
358
E.4 Hook PCB
358
Appendix F: Second Paper Feeder
359
General Information
359
F.1 General Information
359
Appendix G: RMCS System
361
Introduction
361
Notes to Users
362
Identifying the Packaged Contents
362
Required Devices
362
Connectable Peripheral Equipment
362
Setup
363
Mounting
363
Mounting Procedures
363
Installation
364
Registering the RMCS Basic System
365
Registering the Facsimile Model no
368
Deleting the Facsimile Model no
369
Updating the Password
370
Updating the Dip Switches
371
Deleting the RMCS Basic System
372
RMCS Basic Operation
373
Activating and Terminating the System
373
Entering the ID and Password
373
To Activate
373
TEL Directory
374
Selecting Destination Drive
374
To Terminate
374
Main Menu
375
Environment Setting
375
Message Modifying Tool
376
Activating the Program
376
Modifying Message
376
File Selection
376
Saving Message
377
Confirmation
378
Loading Message
378
Confirmation
379
Other Message File
379
Service Manual, P/N
379
Appendix H: Product Service Bulletins
381
Faxable Facts
381
H.1 General Information
381
Okidata's Web Site
381
Okilink II
381
Service Caution
383
Appendix I: Recommended Spare Parts List (RSPL)
385
Faxable Facts
385
I.1 General Information
385
Okidata's Web Site
385
Okilink II
385
Advertisement
Related Products
Oki OKIOFFICE84
Oki OKIPAGE24DXn
Oki OKIPAGE24
Oki OKICOLOR8n
OKI OKIJET 2020
OKI OKIPAGE 8w Lite
Oki OKIPAGE 24 Series
OKI OKIPAGE20Plus
Oki OKIPAGE 14i
Oki OKIMATE 10
OKI Categories
Printer
All in One Printer
Printer Accessories
Fax Machine
Label Maker
More OKI Manuals
Login
Sign In
OR
Sign in with Facebook
Sign in with Google
Upload manual
Upload from disk
Upload from URL