Sign In
Upload
Manuals
Brands
Nikon Manuals
Microscope
50i
Nikon 50i Manuals
Manuals and User Guides for Nikon 50i. We have
6
Nikon 50i manuals available for free PDF download: Instructions Manual, Instruction Manual, Specifications, User Manual
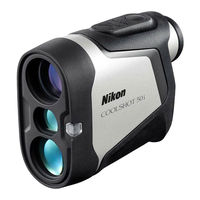
Nikon COOLSHOT 50i - 6x22 Golf Laser Rangefinder Manual
Brand:
Nikon
| Category:
Measuring Instruments
| Size: 1.75 MB
Table of Contents
Getting to know the Laser Rangefinder
Key features
About measurement results
Nomenclature/Composition
Internal display
Functions
First Target Priority algorithm
Dual LOCKED ON (First Target Priority detection notice function)
Actual Distance Indicator
Magnet
Inserting/Replacing battery
Type of battery
Inserting/Replacing battery
Battery level indicator
Navigating the menus
Changing the measurement display mode
Changing the internal display luminance (F1)
Changing the distance display unit (F2)
Operation diagram of the setting menus
Measurement
Adjusting the focus of the internal display
Measuring
Single measurement
Continuous measurement
Technical notes
Specifications
Troubleshooting/Repair
Advertisement
Nikon
ECLIPSE 50i
Instructions Manual
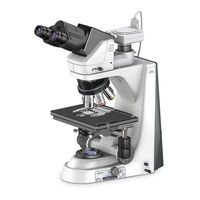
Nikon 50i Instructions Manual (86 pages)
Brand:
Nikon
| Category:
Microscope
| Size: 6.51 MB
Table of Contents
Introduction
4
Warning/Caution Symbols Used in this Manual
4
Meaning of Symbols Used on the Product
5
Safety Precautions
6
Warning
6
Caution
8
Notes on Handling the Product
11
Abbreviations Used in this Manual
13
Table of Contents
14
Chapter 1 Part Names
17
Names of Main Components
17
Names of Parts Used to Make Adjustments
18
Right View
18
Left View
19
Rear View (50I)
20
Rear View (55I)
21
Ergonomic Binocular Tube with Camera Attached
22
With Cytodiagnostic Unit Attached
23
With Epi-Fl Attachment Mounted
24
Chapter 2 Microscopy
25
Bright-Field Microscopy
25
Interpupillary Distance
27
Focus and Center the Condenser
27
Microscopy with Cytodiagnostic Unit Attached
29
Microscopy with Epi-Fl Attachment Mounted
32
Photomicroscopy
35
Chapter 3 Individual Operations
37
Power ON/OFF
38
Microscope
38
Cytodiagnostic Unit
38
Light Source of the Epi-Fl Attachment (Mercury Lamp)
38
Brightness Adjustment
39
Adjustment Using the Brightness Control Knob
39
Adjustment Using the Preset Switch
40
Adjustment with the ND Filter IN/OUT Lever (for 50I)
40
Automatic Adjustment after Magnification Change (Only for a 55I When a Cytodiagnostic Unit Is Attached)
41
Adjustment with the ND Filter of the Epi-Fl Attachment
41
Transmitted Image in Fluorescence Observation
41
Camera Adjustment (Adjusting the Brightness of the Image on the Monitor)
42
Optical Path Switching
42
Optical Path Distribution
42
Disabling the Clicking of the Optical Path Switching Lever
42
Vertical Stage Motion
43
Prohibited Actions
43
Knob Rotation Direction and Stage Motion Direction
43
Number of Knob Turns and Distance of Stage Travel
43
Adjusting the Rotating Torque of the Coarse Focus Knob
44
How to Refocus
44
XY Stage Motion
45
Prohibited Action
45
Knob Rotation Direction and Stage Motion Direction
45
Adjusting the Knob Heights
45
Adjusting the Knob Rotation Torque
45
Diopter Adjustment
46
Interpupillary Adjustment
47
Adjusting the Observation Position
47
Adjusting the Condenser Position
48
Adjusting the Aperture Diaphragm
49
Adjusting the Aperture Diaphragm Opening Using the Condenser Scale
49
Adjusting the Aperture Diaphragm Opening Using the Centering Telescope (Optional)
49
Selecting a Condenser
50
Adjusting the Field Diaphragm
50
Oil Immersion Operation
51
Water Immersion
52
Using the Cytodiagnostic Unit
53
Magnification Switching
53
Marking Specimens
53
Fluorescence Observation
54
Warning
54
Shutter of the Epi-Fl Attachment
54
Light Shielding Plate of the Epi-Fl Attachment
54
Field Diaphragm of the Epi-Fl Attachment
54
Switching Excitation Methods
55
Inserting and Removing the Filter Cubes
55
ND Filters of the Epi-Fl Attachment
56
Selecting Fluorescent Filters
57
Selecting Excitation Filters (EX Filters)
58
Selection of Barrier Filter (BA Filter)
58
Replacing Excitation and Barrier Filters
60
Filter Cube Internal Spacers
60
Image Capture
61
Adjusting Light Intensity
61
Adjusting the Condenser
61
Confirming the Photomicrographic Range
61
Confirming Focus
61
Making Adjustments to Keep out Extraneous Light
62
Anti-Vibration Measures
62
Fluorescence Photomicrography
62
Chapter 4 Assembly
63
Chapter 5 Replacing Consumables
74
Replacing the Lamp (for the 50I)
74
Recharging the Battery (for the 55I)
75
Refilling Cytodiagnostic Unit Ink
76
Chapter 6 Troubleshooting
77
Optical
77
Operational
78
Electrical
78
Chapter 7 Care and Maintenance
79
Lens Cleaning
79
Cleaning the Product
79
Disinfecting the Product
79
Storage
80
Periodic Inspections (Fee Charged)
80
Chapter 8 Technical Specifications
81
Specifications
81
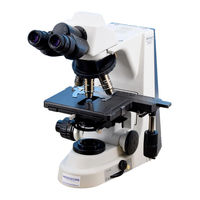
Nikon 50i Instructions Manual (85 pages)
Brand:
Nikon
| Category:
Microscope
| Size: 7.85 MB
Table of Contents
Introduction
3
Warning/Caution Symbols Used in this Manual
4
Meaning of Symbols Used on the Product
4
Safety Precautions
5
Warning
5
Caution
7
Notes on Handling the Product
10
Abbreviations Used in this Manual
12
Table of Contents
13
Chapter 1 Part Names
16
Names of Main Components
16
Names of Parts Used to Make Adjustments
17
Right View
17
Left View
18
Rear View (50I)
19
Rear View (55I)
20
Ergonomic Binocular Tube with Camera Attached
21
With Cytodiagnostic Unit Attached
22
With Fluorescence Attachment Mounted
23
Chapter 2 Microscopy
24
Bright-Field Microscopy
24
Interpupillary Distance
26
Focus and Center the Condenser
26
Microscopy with Cytodiagnostic Unit Attached
28
Microscopy with Fluorescence Attachment Mounted
31
Photomicroscopy
34
Chapter 3 Individual Operations
36
Power ON/OFF
37
Turning on the Microscope
37
Turning on the Cytodiagnostic Unit
37
Turning on the Fluorescence Attachment Light Source (Mercury Lamp)
37
Brightness Adjustment
38
Adjustment Using the Brightness Control Knob
38
Adjustment Using the Preset Switch
39
Adjustment with the ND Filter IN/OUT Lever (for 50I)
39
Automatic Adjustment after Magnification Change (Only for a 55I When a Cytodiagnostic Unit Is Mounted)
40
Adjustment with the ND Filter for the Fluorescence Attachment
40
Transmitted Image in Fluorescence Observation
40
Camera Adjustment (Adjusting the Brightness of the Image on the Monitor)
41
Optical Path Switching
41
Optical Path Distribution
41
Disabling the Clicking of the Optical Path Switching Lever
41
Vertical Stage Motion
42
Prohibited Actions
42
Knob Rotation Direction and Stage Motion Direction
42
Number of Knob Turns and Distance of Stage Travel
42
Adjusting the Rotating Torque of the Coarse Focus Knob
43
How to Refocus
43
Lateral Stage Motion
44
Prohibited Action
44
Knob Rotation Direction and Stage Motion Direction
44
Adjusting the Knob Heights
44
Adjusting the Knob Rotation Torque
44
Diopter Adjustment
45
Interpupillary Adjustment
46
Adjusting the Observation Position
46
Adjusting the Condenser Position
47
Adjusting the Aperture Diaphragm
48
Adjusting the Aperture Diaphragm Opening Using the Condenser Scale
48
Adjusting the Aperture Diaphragm Opening Using the Centering Telescope (Optional)
48
Selecting a Condenser
49
Adjusting the Field Diaphragm
49
Oil Immersion Operation
50
Water Immersion
51
Using the Cytodiagnostic Unit
52
Magnification Switching
52
Marking Specimens
52
Fluorescence Observation
53
Warning
53
Fluorescence Attachment Shutter
53
Light Shielding Plate of the Fluorescence Attachment
53
Field Diaphragm of the Fluorescence Attachment
53
Switching Excitation Methods
54
Installing and Removing the Filter Cubes
54
ND Filters for Fluorescence Attachment
55
Selecting Fluorescent Filters
56
Selecting Excitation Filters (EX Filters)
57
Selection of Barrier Filter (BA Filter)
57
Replacing Excitation and Barrier Filters
59
Filter Cube Internal Spacers
59
Image Capture
60
Adjusting Light Intensity
60
Adjusting the Condenser
60
Confirming the Photomicrographic Range
60
Confirming Focus
60
Making Adjustments to Keep out Extraneous Light
61
Anti-Vibration Measures
61
Fluorescence Photomicrography
61
Chapter 4 Assembly
62
Installing Objectives
69
Chapter 5 Replacing Consumables
73
Replacing the Lamp (for the 50I)
73
Recharging the Battery (for the 55I)
74
Refilling Cytodiagnostic Unit Ink
75
Chapter 6 Troubleshooting
76
Optical
76
Operational
77
Electrical
77
Chapter 7 Cleaning and Maintenance
78
Lens Cleaning
78
Cleaning the Product
78
Disinfecting the Product
78
Storage
79
Periodic Inspections (Fee Charged)
79
Chapter 8 Specifications and Standards
80
Specifications
80
Advertisement
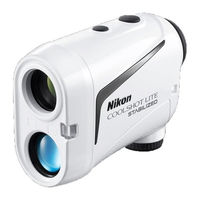
Nikon 50i Instruction Manual (40 pages)
Brand:
Nikon
| Category:
Measuring Instruments
| Size: 2.98 MB
Table of Contents
English
3
Table of Contents
3
Introduction
4
Read this First
4
Safety and Operation Precautions
5
Getting to Know the Laser Rangefinder
8
Key Features
8
Nomenclature/Composition
9
Internal Display
10
Functions
11
STABILIZED Function
11
First Target Priority Algorithm
11
LOCKED on Sign
11
(First Target Priority Detection Sign)
11
Actual Distance Indicator
11
Inserting/Replacing Battery
12
Type of Battery
12
Battery Level Indicator
12
Changing the Measurement Display Mode
13
Changing the Distance Display Unit
14
Measurement
15
Adjusting the Focus of the Internal Display
15
Measuring
15
Single Measurement
16
Continuous Measurement
16
Technical Notes Specifications
17
Troubleshooting/Repair
19
Français
21
Introduction
22
À Lire en Premier Lieu
22
Précautions de Sécurité Et de Fonctionnement
23
Se Familiariser Avec Le TéléMètre Laser
26
Caractéristiques Principales
26
Nomenclature/Composition
27
Écran Interne
28
Fonctions
29
Fonction STABILIZED (Réduction des Vibrations)
29
Algorithme de Priorité À la Première Cible
29
Indicateur LOCKED on (Indicateur de Détection Avec Priorité À la Première Cible)
29
Indicateur de Distance Réelle
29
Insérer/Remplacer la Pile
30
Type de Pile
30
Indicateur de Niveau de Charge de la Pile
30
Changer Le Mode D'affichage de la Mesure
31
Changer L'unité D'affichage de la Distance
32
Mesure
33
Réglage de la Mise Au Point de L'affichage Interne
33
Mesure Unique
34
Mesure en Continu
34
Détails Techniques
35
Spécifications
35
Guide de Dépistage des Pannes/Réparations
37
Nikon 50i Instruction Manual (24 pages)
Brand:
Nikon
| Category:
Measuring Instruments
| Size: 2.04 MB
Table of Contents
Table of Contents
2
Introduction
3
Read this First
3
Safety and Operation Precautions
4
Getting to Know the Laser Rangefinder
7
Key Features
7
Nomenclature/Composition
8
Internal Display
9
Functions
10
First Target Priority Algorithm
10
Dual LOCKED on
10
(First Target Priority Detection Notice Function)
10
Actual Distance Indicator
10
Magnet
10
Inserting/Replacing Battery
11
Type of Battery
11
Battery Level Indicator
11
Navigating the Menus
12
Changing the Measurement Display Mode
13
Changing the Internal Display Luminance (F1)
14
Changing the Distance Display Unit (F2)
15
Operation Diagram of the Setting Menus
16
Measurement
17
Adjusting the Focus of the Internal Display
17
Measuring
17
Single Measurement
18
Continuous Measurement
18
Technical Notes
19
Specifications
19
Troubleshooting/Repair
21
Nikon 50i Specifications (2 pages)
Clinical & Laboratory Microscopes
Brand:
Nikon
| Category:
Microscope
| Size: 0.22 MB
Advertisement
Related Products
Nikon 55i
Nikon Eclipse 50i POL
Nikon 500mm F4G - 500mm f/4.0G ED VR AF-S SWM Super Telephoto Lens
Nikon Coolpix 5000
Nikon Reflex-Nikkor 500mm f/8
Nikon ZoomTouch 500S
Nikon Coolpix 5000 VAA11604
Nikon Coolpix 5000 VAA11602
Nikon 50mm f/1.4G
Nikon AF-S NIKKOR 500mm f/4 ED VR
Nikon Categories
Digital Camera
Camera Lens
Camera Accessories
Microscope
Measuring Instruments
More Nikon Manuals
Login
Sign In
OR
Sign in with Facebook
Sign in with Google
Upload manual
Upload from disk
Upload from URL