Sign In
Upload
Manuals
Brands
MIMAKI Manuals
Printer
JV3-130SPII
MIMAKI JV3-130SPII Manuals
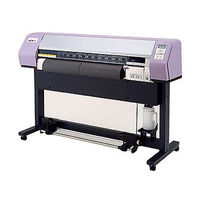
Manuals and User Guides for MIMAKI JV3-130SPII. We have
2
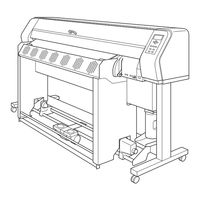
MIMAKI JV3-130SPII manuals available for free PDF download: Maintenance Manual, Operation Manual
MIMAKI JV3-130SPII Maintenance Manual (190 pages)
COLOR INKJET PLOTTER
Brand:
MIMAKI
| Category:
Plotter
| Size: 5 MB
Table of Contents
Table of Contents
4
Chapter 1 Overview of Maintenance
9
Cautions in Maintenance
10
How to Use this Maintenance Manual
11
Tools Required for Maintenance Works
11
Names of Parts
12
Front Face
12
Rear Face
13
Specifications
14
Chapter 2 Explanation of Operation
21
Explanation of Electrical Components
22
Operations
22
Power Supply
23
Main PCB
23
1394 Pcb
27
I/F Connection PCB
27
Io Pcb
28
Io2 Pcb
29
Slider PCB
30
Linear Encoder PCB
31
The Keyboard PCB
31
Take-Up Motor PCB
31
Fan Relay PCB
31
Fan Branch PCB ( X 2)
31
ID Contact Board ( X 8)
31
Ink System
32
Definitions
32
Brief Explanation of the Ink System
33
Parameters Related to the Ink System
36
IC Chip Function
37
Brief Explanation of Media Size Detection Control
38
Chapter 3 Troubleshooting
39
Troubles for Which Error Messages Are Given on the LCD
40
Error Messages and Corrective Measures
41
Error Messages for Troubles for Which Error Numbers Are Given on the LCD
41
Ink-Related Components and Other Components
44
Troubles for Which Error Messages Are Not Given on the LCD
48
The Device will Not be Energized
48
The Device Fails to Perform Plotting
49
Unable to Plot One Side Only
50
Cutting Failure
51
Faulty Cutter
52
Fan Motor
53
Abnormal Nozzle Discharge
53
Abnormal Ink Shot
54
Ink-Filling Cannot be Performed
54
Abnormal Wiper Operation
55
Abnormal Heater Temperature
55
Cannot Read the IC
56
Abnormal Drying Fan
57
Plotting Failure
58
Print Is Not Sharp
58
Abnormal Print
59
Color of Print Is Pale
60
Plotted Drawing Is out of Position
60
Plotted Dots or Lines Are Dirty
61
Stripes Are Always Drawn at the Time of Scanning
62
Black and White Stripes Appear from Side to Side
63
Banding and Blotting Occur
64
Dark and Light Images Occur at each Scan
65
Banding Occur
66
Vertical Stripes
66
Unstable Heater Temperature
67
Ink Drop or Mist
67
Troubles about Ink Cartridge
68
Indications of Remaining Ink
68
A Cartridge Attempts to Print Without Ink
68
Chapter 4 Adjustment
69
Maintenance Flow by Replacement Parts
71
Maintenance Item
72
Adjustment of the X-Motor Coupling
72
Y Motor Maintenance Flow
73
Washing a Single S-Print Head Assy
76
Replacement S-Print Head Assy (Periodical Replacement Parts)
82
Adjustment of the Head Angle
83
Adjustment of the Head Unit
85
Replacement of S-Pump Assy and Cap Slider Assy (Periodical Replacement)
86
Adjustment of the Station Position
88
Adjustment of the Cutter Height
91
Adjustment of the Linear Sensor PCB Assy Height
92
Angle Adjustment of Motor Axis
93
Adjustment of the Y-Motor Belt Tension
94
Heater Replacement
96
Replacement Fuse
104
Chapter 5 Maintenance Mode
105
Maintenance Items
106
Entering into the Maintenance Mode
107
Entering into the Maintenance Mode When Actuating the Plotter
107
Entering into the Maintenance Mode by System Parameters
108
Menu of #ADJUST
109
Printadjust2
109
Head Adjust
116
Wash
117
Replace Counter
119
Default Set
121
Capping
122
Head ID
123
Serial no
124
Dealer no
125
Worm Wheel
126
Adjust Edge
127
500Mmsquare
129
Set Quality
131
Media Comp2
132
TEST Items
134
Check Pattern
134
Parameter Draw
141
All Pattern
142
Servo
143
Y Servo
144
Xy Servo
145
Heater Test
146
Action Test
150
Sensor Test
151
Paper Sensor
155
Keyboard Test
156
Lcd Test
157
Pump Motor
158
Timer Check
159
Memory Check
160
Skew Check
164
Temp Check
165
Encoder Check
166
Ink IC Check
168
PARAMATER Items
169
System Parameter
169
Ink Parameter
172
Maintenance Parameter
172
Servo Parameter
172
Adjustment Parameter
172
Uploading and Downloading Parameters
173
UPLOAD (Plotter >>> Computer)
173
DOWNLOAD (Computer >>> Plotter)
174
Updating the Firmware
176
The Firmware in this Unit
176
Main Unit Side Firmware Version Updating File
176
Interface Side Firmware Version Updating File
177
Checking the Version Updating File
177
Updating Procedure
178
Appendix
181
Maintenance Menu Tree
182
Electrical Component Block Diagram (1/2)
185
Heater Block Diagram (2/2)
187
Advertisement
MIMAKI JV3-130SPII Operation Manual (150 pages)
Brand:
MIMAKI
| Category:
Printer
| Size: 3 MB
Table of Contents
Foreword
3
Table of Contents
5
How to Read this Operation Manual
9
Display on the LCD and Indication of the Keys
9
Pictorial Signs Used in this Manual
10
Example of Pictorial Signs
10
Structure of this Operation Manual
11
Features
12
For Safe Operation
14
Pictorial Signs
14
Example of Pictorial Signs
14
Precautions in Use
16
Cautions and Notes
17
Position of the Warning Label
18
CHAPTER 1 Before Use
20
Moving the Device
20
Where to Install the Device
20
Precautions in Installation
20
Moving the Device
21
Configuration and Function
22
The Front
22
The REAR
23
Operation Panel
24
Heater Panel
25
Carriage
26
Heater
26
Capping Station
27
Pinch Roller and Feed Roller
27
Media Sensor
28
Cutter Blade and Cutting Line
28
Precautions in Handling the Ink Cartridge
29
Precautions in Handling the Media
30
Types of Media that Can be Used
31
Setting the Heater Voltage
32
MENU Mode
33
CHAPTER 2 Operation
35
Operation
35
Operation
36
Switching on the Power Supply
37
Turning the Power on
37
Front Cover /Maintenance Cover
38
Opening/Closing the Front Cover and Maintenance Cover
38
Cautions During Operation
38
Relationships between Ink Station and Head Row
39
Adjusting the Head Height
40
Setting the Media on the Device
42
Changing the Drier Fan Angle
42
Setting a Roll Holder
43
Setting Roll Media on the Device
45
Operating the Lock Pin (JV3-130SPII)
50
Switching the Direction of Winding of the Media
51
Setting the Torque Limiter
51
Setting Cut Sheet Media on the Device
52
Heater-Temperature Control
54
In Case of Faultiness with Heater
55
Checking and Solving Nozzle Clogging (TEST Plotting)
56
Correcting the Media Feed Rate [MEDIA COMP.]
58
Plotting an Image from Source Data
60
Starting the Plotting Operation
60
Interrupting the Plotting Operation
61
Display Detailed Plotting Information
62
Cut off the Media by Hand [MEDIA CUT]
63
When [NEAR END] or [INK END] Appears
64
Turning the Power off
65
CHAPTER 3 Daily Cleaning
68
Routine Maintenance
68
Notes on Cleaning
68
Cleaning the Platen
69
Cleaning the Media Sensor
69
Maintenance for Frame Components
69
Cleaning the Wiper and Ink Caps
70
Cleaning the Head Sides
72
Use the Cleaning Kit
73
Cleaning the Station Interior
73
Cleaning the Nozzle [NOZZLE WASH]
74
When the Waste Ink Tank Becomes Full
76
CHAPTER 4 Setting Function
78
Basic Operations of Menus
78
Function Mode
80
Registering a Type
80
Changing the Type
80
Setup Functions
81
Setting Suitable Heater Temperature
87
Setting Exhaust Fan and Drier Fan
88
Effective Plotting Area
89
Establishing an Origin
90
Correcting the Media Feed Rate During Operation
91
CHAPTER 5 Maintenance
94
Maintenance of the Device
94
Invoking a Maintenance Function
94
Setup Functions
95
Cleaning the Station Interior [STATION]-[Carriageout]
96
When the Message [REPLACE WIPER] Is Displayed [STATION]-[WIPER EXCHANGE]
97
Ink Discharge Way Cleaning [STATION]-[Disway WASH]
99
When Not in Use the Plotter over the Long Term [STATION]-[Custodywash]
101
When Media Thickness Is Changed [PRINT ADJUST]
104
Regular Wiping Function [INT.WIPING]
106
Routine Cleaning [ROUTINE CLN]
108
Sleep Cleaning [SLEEP Clean]
109
If Nozzles Are Clogged Even after the Cleaning Function Is Executed
110
[Fill up Ink]
110
[Head Wash]
111
Reduce Printing Time of Narrow Image [SCAN WIDTH]
113
Switching the Ink from SS to SS2 [SS2< >SSCHG]
114
Drawing Setup Conditions [LIST]
115
Plotting HEX CODE [DATA DUMP]
116
Wiper Life Warning [WIPE LEVEL]
117
When Use the 440Cc Ink Cartridges [USE 440Cc]
118
Setting Time [TIME SET]
119
Displaying Device Information [INFORMATION]
120
Replace the Cutter Blade
121
Ink Exchanging Procedure
122
Using the Small Amount of Remaining Ink in the 440Cc Ink Cartridge
126
Using Further Remaining Ink in the Ink Cartridge
127
CHAPTER 6 When Abnormal Conditions Are Encountered
130
Before Taking a Phenomenon as a Sign of Failure
130
The Device Cannot be Energized
130
The Device Cannot Perform Printing
130
Paper Jamming Arises/Media Is Soiled
131
The [HEAT] or [CONSTANT] Indicator Does Not Go on
131
If Image Quality Declines
132
While Lines/Thin Spots Are Obvious or Dark Stripes Occur (in the Direction of Travel of the Head)
132
Characters Fluctuate Doubly or Triply into Paper Feed
132
Displacement Is Observed between Outward and Inward Printing
132
The Respective Color Ink Injected by the Respective Color Heads Do Not Properly Overlap
132
Large Ink Drop on Media
132
Ink Cartridge Trouble
133
Troubles for Which Error Messages Are Given on the LCD
134
Errors Accompanied by Warnings
134
Error Messages
137
Error Message
138
Appendix
139
Basic Specifications
140
Specification for Ink
142
Function Flowchart
143
Advertisement
Related Products
MIMAKI JV3-130 SP II
MIMAKI JV3-160S
MIMAKI JV33-160
MIMAKI JV3-75 SP II
MIMAKI JV34-260
MIMAKI JV300-160A
MIMAKI JV300-160 A
MIMAKI JV3 S SERIES
MIMAKI JV300-130/160
MIMAKI JV300-130 BS INK
MIMAKI Categories
Printer
Plotter
Printer Accessories
Cutter
Industrial Equipment
More MIMAKI Manuals
Login
Sign In
OR
Sign in with Facebook
Sign in with Google
Upload manual
Upload from disk
Upload from URL