Sign In
Upload
Manuals
Brands
MacDon Manuals
Farm Equipment
M155E4
MacDon M155E4 Manuals
Manuals and User Guides for MacDon M155E4. We have
7
MacDon M155E4 manuals available for free PDF download: Unloading And Assembly Instructions, Assembly Instruction Manual, Installation Instructions Manual, Operator's Manual
MacDon M155E4 Unloading And Assembly Instructions (264 pages)
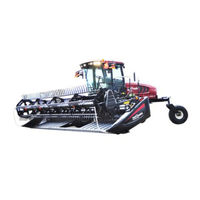
Self-Propelled Windrower
Brand:
MacDon
| Category:
Farm Equipment
| Size: 16 MB
Table of Contents
EC Declaration of Conformity-Windrower Assembly Supports
6
List of Revisions
8
Table of Contents
17
Chapter 1: Safety
23
Signal Words
23
General Safety
24
Tire Safety
26
Battery Safety
27
Welding Precautions
28
Engine Safety
29
High-Pressure Rail
29
Engine Electronics
29
Safety Signs
31
Chapter 2: Unloading the Windrower
33
Unloading Container
33
Moving to Assembly Area
34
Moving to Assembly Area - Crane Method
34
Moving to Assembly Area - Forklift Method
37
Removing Wheel and Step Assembly
39
Removing Drive Wheels
43
Removing Platforms
45
Removing Hand Rails and Exhaust Stack
47
Removing Leg Assemblies
48
Removing Wheel and Platform Support
51
Chapter 3: Assembling the Windrower
53
Assembling Support Stand
53
Lifting Windrower Onto Stand
54
Lifting Windrower Onto Stand - Crane Method
54
Lifting Windrower Onto Stand - Forklift Method
55
Installing Legs
57
Installing Drive Wheels
60
Installing Caster Wheels
62
Installing Hydraulics
66
Removing Battery Shipping Shield
74
Unpacking Ignition Keys
75
Installing Platforms
77
Installing Steps
81
Removing Protective Covering from Exhaust Stack
82
Installing Pre-Cleaner
83
Adjusting Pre-Cleaner
85
Positioning Light and Mirror Assemblies
88
Installing Beacons
89
Installing the Slow Moving Vehicle Sign
91
Connecting Batteries
92
Lubricating the Windrower
93
Lubrication Procedure
93
Lubrication Points
94
Installing AM/FM Radio
95
Performing Predelivery Checks
100
Recording Serial Numbers
100
Checking Tire Pressures
100
Adding Tire Ballast
101
Checking Engine Air Intake
102
Checking Hydraulic Oil Level
103
Checking Fuel Separator
104
Checking Engine Oil Level
104
Checking Gearbox Lubricant Level
105
Checking Engine Coolant
106
Checking Air Conditioning Compressor Belt
106
Replacing the Diesel Exhaust Fluid
106
Starting Engine
108
Priming Hydraulic System
111
Checking and Adding Wheel Drive Lubricant
115
Checking Traction Drive
115
Removing Windrower from Stand
117
Removing Windrower from Factory Stand
117
Removing Windrower from Field Stand
117
Chapter 4: Cab Display Module
119
Cab Display Module - Configuration Functions
119
Cab Display Options
121
Setting the Cab Display Language
121
Changing the Windrower Display Units
122
Adjusting the Cab Display Buzzer Volume
123
Adjusting the Cab Display Backlighting
124
Adjusting the Cab Display Contrast
125
Configuring the Windrower
127
Setting the Header Knife Speed
127
Setting the Knife Overload Speed
127
Setting the Rotary Disc Overload Speed
129
Setting the Hydraulic Overload Pressure
130
Setting the Header Index Mode
131
Setting the Return to Cut Mode
131
Setting the Auto Raise Height
132
Activating the Double Windrow Attachment
133
Activating the Hydraulic Center-Link
135
Activating the Rotary Disc Header Drive Hydraulics
136
Setting the Header Cut Width
136
Activating the Swath Compressor
138
Activating the Hay Conditioner
140
Displaying Reel Speed
141
Setting the Windrower's Tire Size
142
Setting the Engine Intermediate Speed Control (ISC) RPM
143
Clearing Sub-Acres
144
Activating Cab Display Lockouts
145
Activating the Header Tilt Control Lockout
145
Activating the Header Float Control Lockout
146
Activating the Reel Fore-Aft Control Lockout
147
Activating the Draper Speed Control Lockout
148
Activating the Auger Speed Control Lockout
149
Activating Knife Speed Control Lockout
150
Activating Rotary Disc Speed Control Lockout
151
Activating the Reel Speed Control Lockout
152
Displaying Activated Cab Display Lockouts
154
Calibrating the Header Sensors
156
Calibrating the Header Height Sensor
156
Calibrating the Header Tilt Sensor
158
Calibrating the Header Float Sensors
160
Calibrating the Swath Compressor Sensor
162
Troubleshooting Windrower Problems
164
Displaying the Windrower and Engine Error Codes
164
Switching the Installed Header Sensors on or off
165
Displaying Header Sensor Input Signals
167
Forcing a Header ID
168
Troubleshooting Header Problems
170
Testing the Header Up/Down Activate Function Using the Cab Display Module
170
Testing the Reel Up/Down Activate Function Using the Cab Display Module
171
Testing the Header Tilt Activate Function Using the Cab Display Module
172
Testing the Knife Drive Circuit Using the Cab Display Module
174
Testing the Draper Drive Circuit Activate Function Using the Cab Display Module
175
Testing the Reel Drive Circuit Activate Function Using the Cab Display Module
177
Testing the Rotary Disc Drive Circuit Activate Function Using the Cab Display Module
179
Testing the Double Windrower Attachment Drive Activate Function Using the Cab Display Module
180
Testing the Reel Fore-Aft Activate Function Using the Cab Display Module
182
Activating the Hydraulic Purge Using the Cab Display Module
183
Chapter 5: Performing Operational Checks
187
Checking Safety System
187
Checking Operator's Presence System
190
Checking Windrower Startup
191
Checking Engine Speed
192
Checking Gauges and Cab Display Module Display
193
Checking Electrical System
194
Checking Exterior Lights
195
Checking Auto Road Light
199
Checking Horn
200
Checking Interior Lights
201
Checking Air Conditioning and Heater
202
Checking Manuals
203
Performing Final Steps
204
Chapter 6: Attaching Headers
205
Attaching Header Boots
205
Attaching a D Series or D1 Series Draper Header
206
Attaching a D Series or D1 Series Draper Header - Hydraulic Center-Link with Optional Self
206
Alignment
206
Attaching a D Series or D1 Series Draper Header - Hydraulic Center-Link Without Self-Alignment
212
Attaching an a Series Auger Header
218
Attaching an a Series Auger Header - Hydraulic Center-Link with Optional Self-Alignment
218
Attaching an a Series Auger Header - Hydraulic Center-Link Without Self-Alignment
224
Attaching an R Series or R1 Series Rotary Disc Header
230
Attaching an R or R1 Series Rotary Disc Header - Hydraulic Center-Link with Optional
230
Self-Alignment
230
Attaching an R or R1 Series Rotary Disc Header - Hydraulic Center-Link Without Optional
237
Self-Alignment
237
Chapter 7: Reference
243
Torque Specifications
243
SAE Bolt Torque Specifications
243
Metric Bolt Specifications
245
Metric Bolt Specifications Bolting into Cast Aluminum
247
Flare-Type Hydraulic Fittings
248
O-Ring Boss Hydraulic Fittings - Adjustable
249
O-Ring Boss Hydraulic Fittings - Non-Adjustable
251
O-Ring Face Seal Hydraulic Fittings
252
Tapered Pipe Thread Fittings
253
Conversion Chart
254
Definitions
255
Lubricants, Fluids, and System Capacities
258
Fuel Specifications
260
Predelivery Checklist
261
Advertisement
MacDon M155E4 Assembly Instruction Manual (230 pages)
Self-Propelled Windrower
Brand:
MacDon
| Category:
Farm Equipment
| Size: 8 MB
Table of Contents
Table of Contents
7
Chapter 1: Safety
11
Safety Alert Symbols
11
Signal Words
12
General Safety
13
Maintenance Safety
15
Hydraulic Safety
16
Tire Safety
17
Battery Safety
18
Welding Precautions
19
Engine Safety
20
High-Pressure Rail
20
Engine Electronics
21
Safety Signs
22
Installing Safety Decals
22
Chapter 2: Unloading Windrower
23
Using Two Forklifts to Unload Windrower
23
Using One Forklift to Unload Windrower
25
Method 1: Pulling from Trailer Deck
25
Method 2: Lifting from Trailer Deck
26
Chapter 3: Assembling Windrower
29
Installing Drive Wheel
29
Repositioning Right Leg
31
Installing Caster Wheels
33
Repositioning Caster Wheels
35
Installing Steps
37
Installing the Slow Moving Vehicle Sign
38
Lubrication
39
Lubrication Procedure
39
Lubrication Points
40
Installing AM/FM Radio
41
Chapter 4: Performing Predelivery Checks
47
Recording Serial Numbers
47
Checking Tire Pressures and Adding Tire Ballast
49
Checking Tire Pressure
49
Adding Tire Ballast
49
Checking and Adding Wheel Drive Lubricant
51
Opening Hood
52
Checking Engine Air Intake
53
Checking Hydraulic Oil Level
55
Checking Fuel Separator
56
Checking Engine Oil Level
57
Checking Gearbox Lubricant Level
58
Checking Engine Coolant
59
Checking Air Conditioning Compressor Belt
60
Closing Hood
61
Replacing Diesel Exhaust Fluid
62
Starting Engine
64
Chapter 5: Cab Display Module
67
Cab Display Module - Configuration Functions
67
Cab Display Options
69
Setting Cab Display Language
69
Changing Windrower Display Units
70
Adjusting Cab Display Buzzer Volume
71
Adjusting Cab Display Backlighting
72
Adjusting Cab Display Contrast
73
Configuring Windrower
75
Setting Header Knife Speed
75
Setting Knife Overload Speed
76
Setting Rotary Disc Overload Speed
77
Setting Hydraulic Overload Pressure
78
Setting Header Index Mode
78
Setting Return to Cut Mode
79
Setting Auto Raise Height
80
Configuring Double Windrow Attachment Controls
81
Activating Hydraulic Center-Link
83
Activating Rotary Disc Header Drive Hydraulics
84
Setting Header Cut Width
84
Activating Swath Compressor
85
Activating Hay Conditioner
87
Displaying Reel Speed
88
Setting Tire Size
89
Setting Engine Intermediate Speed Control
90
Clearing Sub-Acres
92
Activating Cab Display Lockouts
93
Activating Header Tilt Control Lockout
93
Activating Header Float Control Lockout
94
Activating Reel Fore-Aft Control Lockout
95
Activating Draper Speed Control Lockout
97
Activating Auger Speed Control Lockout
98
Activating Knife Speed Control Lockout
99
Activating Rotary Disc Speed Control Lockout
101
Activating Reel Speed Control Lockout
102
Displaying Active Cab Display Lockouts
104
Calibrating Header Sensors
106
Calibrating Header Height Sensor
106
Calibrating Header Tilt Sensor
108
Calibrating Header Float Sensors
110
Calibrating Swath Compressor Sensor
112
Troubleshooting Windrower Problems
114
Displaying Windrower and Engine Error Codes
114
Enabling or Disabling Header Sensors
115
Displaying Header Sensor Input Signals
116
Forcing Header Identification
118
Troubleshooting Header Problems
120
Testing Header Up/Down Activate Function Using Cab Display Module
120
Testing Reel Up/Down Activate Function Using Cab Display Module
121
Testing Header Tilt Activate Function Using Cab Display Module
123
Testing Knife Drive Circuit Using Cab Display Module
125
Testing Draper Drive Circuit Activate Function Using Cab Display Module
126
Testing Reel Drive Circuit Activate Function Using Cab Display Module
128
Testing Rotary Disc Drive Circuit Activate Function Using Cab Display Module
130
Testing Double Windrow Attachment Drive Activate Function Using Cab Display Module
131
Testing Reel Fore-Aft Activate Function Using Cab Display Module
133
Activating Hydraulic Purge Using Cab Display Module
134
Chapter 6: Performing Operational Checks
137
Checking Safety System
137
Checking Operator Presence System
140
Checking Windrower Startup
142
Checking Engine Speed
143
Checking Gauges and Cab Display Module Display
144
Checking Electrical System
145
Checking Exterior Lights
146
Auto Road Light
149
Checking Horn
150
Checking Interior Lights
151
Checking Air Conditioning and Heater
152
Checking Manuals
153
Chapter 7: Performing Final Steps
155
Chapter 8: Attaching Headers to M Series Windrower
157
Attaching Header Boots
157
Attaching D Series or D1 Series Draper Header
159
Attaching D Series or D1 Series Draper Header - Hydraulic Center-Link with Self-Alignment
159
Attaching D Series or D1 Series Draper Header - Hydraulic Center-Link Without Self-Alignment
164
Attaching a Series Auger Header
170
Attaching a Series Auger Header - Hydraulic Center-Link with Self-Alignment
170
Attaching a Series Auger Header - Hydraulic Center-Link Without Self-Alignment
176
Attaching R Series or R1 Series Rotary Disc Header
182
Attaching R or R1 Series Rotary Header - Hydraulic Center-Link with Self-Alignment
182
Attaching R or R1 Series Rotary Header - Hydraulic Center-Link Without Self-Alignment
188
Attaching R2 Series Rotary Disc Header
195
Attaching R2 Series Rotary Disc Header - Hydraulic Center-Link with Self-Alignment
195
Attaching R2 Series Rotary Disc Header - Hydraulic Center-Link Without Self-Alignment
201
Completing Hydraulic and Electrical Connections
207
Chapter 9: Reference
209
Torque Specifications
209
SAE Bolt Torque Specifications
209
Metric Bolt Specifications
211
Metric Bolt Specifications Bolting into Cast Aluminum
213
Flare-Type Hydraulic Fittings
213
O-Ring Boss Hydraulic Fittings - Adjustable
214
O-Ring Boss Hydraulic Fittings - Non-Adjustable
215
O-Ring Face Seal Hydraulic Fittings
217
Tapered Pipe Thread Fittings
218
Conversion Chart
220
Definitions
221
Lubricants, Fluids, and System Capacities
223
Fuel Specifications
225
Predelivery Checklist
227
MacDon M155E4 Unloading And Assembly Instructions (200 pages)
Self-Propelled Windrower
Brand:
MacDon
| Category:
Farm Equipment
| Size: 7 MB
Table of Contents
List of Revisions
4
Table of Contents
7
Chapter 1: Safety
11
Signal Words
11
General Safety
12
Tire Safety
14
Battery Safety
15
Welding Precautions
16
Engine Safety
17
High-Pressure Rail
17
Engine Electronics
18
Safety Signs
19
Chapter 2: Unloading the Windrower
21
Using Two Forklifts to Unload Windrower
21
Using One Forklift to Unload Windrower
23
Method 1: Pulling from Trailer Deck
23
Method 2: Lifting from Trailer Deck
24
Chapter 3: Assembling the Windrower
25
Installing Drive Wheel
25
Repositioning Right Leg
27
Installing Caster Wheels
29
Repositioning Caster Wheels
31
Installing Steps
33
Installing the Slow Moving Vehicle (SMV) Sign
34
Lubricating the Windrower
35
Lubrication Procedure
35
Lubrication Points
36
Installing AM/FM Radio
37
Chapter 4: Performing Predelivery Checks
43
Recording Serial Numbers
43
Checking Tire Pressures and Adding Tire Ballast
44
Checking Tire Pressures
44
Adding Tire Ballast
44
Checking Engine Air Intake
46
Checking Hydraulic Oil Level
48
Checking Fuel Separator
49
Checking Engine Oil Level
50
Checking Gearbox Lubricant Level
51
Checking Engine Coolant
52
Checking Air Conditioning (A/C) Compressor Belt
53
Draining and Refilling the Diesel Exhaust Fluid (DEF) Tank
54
Starting Engine
56
Checking and Adding Wheel Drive Lubricant Level
59
Chapter 5: Cab Display Module (CDM)
61
Cab Display Module (CDM) Configuration
61
Cab Display Options
63
Setting the Cab Display Language
63
Changing the Windrower Display Units
64
Adjusting the Cab Display Buzzer Volume
65
Adjusting the Cab Display Backlighting
66
Adjusting the Cab Display Contrast
67
Configuring the Windrower
69
Setting the Header Knife Speed
69
Setting the Knife Overload Speed
69
Setting the Rotary Disc Overload Speed
71
Setting the Hydraulic Overload Pressure
72
Setting the Header Index Mode
73
Setting the Return to Cut Mode
74
Setting the Auto Raise Height
74
Activating the Double Windrow Attachment (DWA)
75
Activating the Hydraulic Center-Link
76
Activating the Rotary Header Drive Hydraulics
76
Setting the Header Cut Width
77
Activating the Swath Compressor
79
Activating the Hay Conditioner
80
Displaying Reel Speed
82
Setting the Windrower's Tire Size
83
Setting the Engine Intermediate Speed Control (ISC) RPM
84
Clearing Sub-Acres
85
Activating Cab Display Lockouts
86
Activating the Header Tilt Control Lockout
86
Activating the Header Float Control Lockout
87
Activating the Reel Fore-Aft Control Lockout
88
Activating the Draper Speed Control Lockout
89
Activating the Auger Speed Control Lockout
90
Activating Knife Speed Control Lockout
91
Activating Rotary Disc Speed Control Lockout
92
Activating the Reel Speed Control Lockout
93
Displaying Activated Cab Display Lockouts
95
Calibrating the Header Sensors
97
Calibrating the Header Height Sensor
97
Calibrating the Header Tilt Sensor
99
Calibrating the Header Float Sensors
101
Calibrating the Swath Compressor Sensor
103
Troubleshooting Windrower Problems
105
Displaying the Windrower and Engine Error Codes
105
Switching the Installed Header Sensors on or off
106
Displaying Header Sensor Input Signals
108
Forcing a Header ID
109
Troubleshooting Header Problems
111
Testing the Header Up/Down Activate Function Using the Cab Display Module (CDM)
111
Testing the Reel Up/Down Activate Function Using the Cab Display Module (CDM)
112
Testing the Header Tilt Activate Function Using the Cab Display Module (CDM)
114
Testing the Knife Drive Circuit Using the Cab Display Module (CDM)
115
Testing the Draper Drive Circuit Activate Function Using the Cab Display Module (CDM)
117
Testing the Reel Drive Circuit Activate Function Using the Cab Display Module (CDM)
119
Testing the Rotary Disc Drive Circuit Activate Function Using the Cab Display Module (CDM)
120
Testing the Double Windrower Attachment (DWA) Drive Activate Function Using the Cab Display Module (CDM)
122
Testing the Reel Fore-Aft Activate Function Using the Cab Display Module (CDM)
124
Activating the Hydraulic Purge Using the Cab Display Module (CDM)
125
Chapter 6: Performing Operational Checks
127
Checking Safety System
127
Checking Operator's Presence System
130
Checking Windrower Startup
131
Checking Engine Speed
132
Checking Gauges and Cab Display Module (CDM) Display
133
Checking Electrical System
134
Checking Exterior Lights
135
Auto Road Light
137
Checking Horn
138
Checking Interior Lights
139
Checking Air Conditioning (A/C) and Heater
140
Checking Manuals
141
Performing Final Steps
141
Chapter 7: Attaching Headers
143
Attaching Headers to M Series Windrower
143
Attaching Header Boots
143
Attaching a D Series or D1 Series Header
144
Alignment
144
Attaching a D Series or D1 Series Header: Hydraulic Center-Link Without Self-Alignment
149
Attaching an a Series Header
155
Attaching an a Series Header: Hydraulic Center-Link with Optional Self-Alignment
155
Attaching an a Series Header: Hydraulic Center-Link Without Self-Alignment
160
Attaching an R/R1Series Header
166
Attaching an R/R1 Series Header: Hydraulic Center-Link with Optional Self-Alignment
167
Attaching R/R1 Series Header: Hydraulic Center-Link Without Optional Self-Alignment
172
Chapter 8: Reference
179
Torque Specifications
179
SAE Bolt Torque Specifications
179
Metric Bolt Specifications
181
Metric Bolt Specifications Bolting into Cast Aluminum
183
Flare-Type Hydraulic Fittings
184
O-Ring Boss (ORB) Hydraulic Fittings (Adjustable)
185
O-Ring Boss (ORB) Hydraulic Fittings (Non-Adjustable)
187
O-Ring Face Seal (ORFS) Hydraulic Fittings
188
Tapered Pipe Thread Fittings
189
Conversion Chart
190
Definitions
191
Lubricants, Fluids, and System Capacities
194
Fuel Specifications
196
Predelivery Checklist
197
Advertisement
MacDon M155E4 Installation Instructions Manual (70 pages)
Self-Propelled Windrowers, Auxiliary Lighting Harness Repair Kit
Brand:
MacDon
| Category:
Farm Equipment
| Size: 3 MB
Table of Contents
Table of Contents
5
Chapter 1: Safety
7
Signal Words
7
General Safety
8
Chapter 2: Parts List
11
Chapter 3: Installation Instructions
15
Installing Auxiliary Lighting Roof Harness
15
Installing Auxiliary Lighting Chassis Harness
22
Installing Fuse Box Decals and Breaker
26
Checking Operation of Lights
28
List of Revisions
37
Safety
39
Signal Words
39
General Safety
40
Parts List
43
Installation Instructions
47
Replacing Aspirator
47
Installing Traction Drive Test Fittings
50
Installing Fuse Decal
52
Replacing Pre-Cleaner Support
54
Replacing Fuel and Diesel Exhaust Fluid (DEF) Display Module
55
Replacing Diesel Exhaust Fluid (DEF) Tank Head Assembly
57
Checking High-Intensity Discharge (HID) Auxiliary Light Wiring
65
Installing Remaining Updates
68
MacDon M155E4 Installation Instructions Manual (26 pages)
Self-Propelled Windrower, DEF Head Service Kit
Brand:
MacDon
| Category:
Farm Equipment
| Size: 2 MB
Table of Contents
Table of Contents
5
Chapter 1: Safety
7
Signal Words
7
General Safety
8
Chapter 2: Parts List
11
Serviceable Parts
12
Chapter 3: Installation Instructions
15
Removing DEF Head and Tank Assembly
15
Installing DEF Head and Tank Assembly
20
MacDon M155E4 Operator's Manual (2 pages)
Windrower
Brand:
MacDon
| Category:
Farm Equipment
| Size: 1 MB
MacDon M155E4 Operator's Manual (2 pages)
Windrower Quick Card
Brand:
MacDon
| Category:
Trucks
| Size: 0 MB
Advertisement
Related Products
MacDon M150 2008
MacDon M155 2022
MacDon M155E4 2021
MacDon M1240
MacDon M1170NT5
MacDon M10
MacDon M12
MacDon M14
MacDon M16
MacDon M100 2009
MacDon Categories
Farm Equipment
Tractor
Tractor Accessories
Lawn Mower
Lawn and Garden Equipment
More MacDon Manuals
Login
Sign In
OR
Sign in with Facebook
Sign in with Google
Upload manual
Upload from disk
Upload from URL