Sign In
Upload
Manuals
Brands
Lexmark Manuals
All in One Printer
X925de
Lexmark X925de Manuals
Manuals and User Guides for Lexmark X925de. We have
4
Lexmark X925de manuals available for free PDF download: User Manual, Administrator's Manual, Specifications
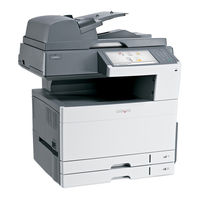
Lexmark X925de User Manual (334 pages)
Brand:
Lexmark
| Category:
All in One Printer
| Size: 6.81 MB
Table of Contents
Table of Contents
2
Safety Information
15
Learning about the Printer
17
Finding Information about the Printer
17
Selecting a Location for the Printer
18
Printer Configurations
19
Configured Model
20
Basic Functions of the Scanner
21
Understanding the ADF and Scanner Glass
22
Understanding the Printer Control Panel
23
Understanding the Home Screen
25
Using the Touch-Screen Buttons
26
Setting up and Using the Home Screen Applications
30
Finding the IP Address of the Printer
30
Accessing the Embedded Web Server
30
Exporting and Importing a Configuration Using the Embedded Web Server
31
Activating the Home Screen Applications
32
Setting up Forms and Favorites
32
Setting up Scan to Network
32
Setting up My MFP
33
Understanding WS-Scan
33
Setting up Remote Operator Panel
33
Additional Printer Setup
35
Installing Internal Options
35
Available Internal Options
35
Accessing the System Board
35
Installing a Memory Card
37
Installing a Flash Memory or Firmware Card
39
Installing an Internal Solutions Port
40
Installing a Printer Hard Disk
43
Removing a Printer Hard Disk
44
Installing Optional Trays
46
Order of Installation
46
Installing a Printer Stand and Optional Tray
46
Installing 550-Sheet Trays
53
Attaching Cables
60
Verifying Printer Setup
61
Printing a Menu Settings Page
61
Printing a Network Setup Page
61
Setting up the Printer Software
61
Installing the Printer Software
61
Updating Available Options in the Printer Driver
62
Setting up Wireless Printing
63
Preparing to Set up the Printer on a Wireless Network
63
Installing the Printer on a Wireless Network (Windows)
64
Installing the Printer on a Wireless Network (Macintosh)
66
Installing the Printer on an Ethernet Network
68
For Windows Users
69
Changing Port Settings after Installing a New Network Internal Solutions Port
71
Setting up Serial Printing
72
Minimizing Your Printer's Environmental Impact
75
Saving Paper and Toner
75
Using Recycled Paper
75
Conserving Supplies
75
Saving Energy
76
Using Eco-Mode
76
Reducing Printer Noise
76
Adjusting Sleep Mode
77
Using Hibernate Mode
78
Adjusting the Brightness of the Display
78
Setting the Standard Exit bin Light
79
Recycling
79
Recycling Lexmark Products
79
Recycling Lexmark Packaging
80
Returning Lexmark Cartridges for Reuse or Recycling
80
Loading Paper and Specialty Media
81
Setting the Paper Size and Type
81
Configuring Universal Paper Settings
81
Loading the Standard or Optional 550-Sheet Tray
81
Loading the Multipurpose Feeder
85
Linking and Unlinking Trays
88
Linking Trays
88
Unlinking Trays
88
Creating a Custom Name for a Paper Type
89
Assigning a Custom Paper Type Name
89
Configuring a Custom Name
89
Paper and Specialty Media Guidelines
90
Paper Guidelines
90
Paper Characteristics
90
Unacceptable Paper
91
Selecting Paper
91
Selecting Preprinted Forms and Letterhead
91
Using Recycled Paper and Other Office Papers
91
Storing Paper
92
Supported Paper Sizes, Types, and Weights
93
Supported Paper Sizes
93
Supported Paper Types and Weights
95
Printing
96
Printing a Document
96
Printing in Black and White
96
Adjusting Toner Darkness
96
Printing from a Mobile Device
97
Printing from a Flash Drive
97
Supported Flash Drives and File Types
98
Printing on Specialty Media
99
Tips on Using Letterhead
99
Tips on Using Transparencies
99
Tips on Using Envelopes
100
Tips on Using Labels
100
Tips on Using Card Stock
101
Printing Confidential and Other Held Jobs
101
Storing Print Jobs in the Printer
101
Printing Confidential and Other Held Jobs
102
Printing Information Pages
102
Printing a Font Sample List
102
Printing a Directory List
103
Using Max Speed and Max Yield
103
Canceling a Print Job
103
Canceling a Print Job from the Printer Control Panel
103
Canceling a Print Job from the Computer
104
Copying
105
Making Copies
105
Making a Quick Copy
105
Copying Using the ADF
105
Copying Using the Scanner Glass
106
Copying Film Photos
106
Copying on Specialty Media
106
Copying on Transparencies
106
Copying on Letterhead
106
Customizing Copy Settings
107
Copying to a Different Size
107
Making Copies Using Paper from a Selected Tray
107
Copying Different Paper Sizes
108
Copying on both Sides of the Paper (Duplexing)
108
Reducing or Enlarging Copies
109
Adjusting Copy Quality
109
Collating Copies
110
Placing Separator Sheets between Copies
110
Copying Multiple Pages Onto a Single Sheet
111
Creating a Custom Copy Job (Job Build)
111
Placing Information on Copies
112
Placing the Date and Time at the Top of each Page
112
Placing an Overlay Message on each Page
112
Canceling a Copy Job
112
Canceling a Copy Job While the Document Is in the ADF
112
Canceling a Copy Job While Copying Pages Using the Scanner Glass
112
Canceling a Copy Job While Pages Are Being Printed
113
Understanding the Copy Screens and Options
113
Copy from
113
Copy to
113
Copies
113
Scale
113
Darkness
114
Sides (Duplex)
114
Collate
114
Content
114
Color
114
Advanced Options
115
Save as Shortcut
115
E-Mailing
116
Getting Ready to E-Mail
116
Setting up the E-Mail Function
116
Configuring E-Mail Settings
116
Creating an E-Mail Shortcut
117
Creating an E-Mail Shortcut Using the Embedded Web Server
117
Creating an E-Mail Shortcut Using the Touch Screen
117
E-Mailing a Document
118
Sending an E-Mail Using the Touch Screen
118
Sending an E-Mail Using a Shortcut Number
118
Sending an E-Mail Using the Address Book
118
Customizing E-Mail Settings
119
Adding E-Mail Subject and Message Information
119
Changing the Output File Type
119
Canceling an E-Mail
120
Understanding E-Mail Options
120
Recipients
120
Subject
120
Message
120
File Name
120
Original Size
120
Resolution
121
Color
121
Content
121
Darkness
121
Send as
121
Page Setup
122
Scan Preview
122
Advanced Options
122
Faxing
123
Getting the Printer Ready to Fax
123
Initial Fax Setup
124
Choosing a Fax Connection
124
Connecting to an Analog Telephone Line
125
Connecting to a DSL Service
125
Connecting to a PBX or ISDN System
126
Connecting to a Distinctive Ring Service
126
Connecting to an Adapter for Your Country or Region
127
Setting the Outgoing Fax or Station Name and Number
127
Setting the Date and Time
128
Configuring the Printer to Observe Daylight Saving Time
128
Creating Shortcuts
129
Creating a Fax Destination Shortcut Using the Embedded Web Server
129
Creating a Fax Destination Shortcut Using the Touch Screen
129
Sending a Fax
130
Sending a Fax Using the Touch Screen
130
Sending a Fax Using the Computer
130
Sending a Fax Using Shortcuts
131
Sending a Fax Using the Address Book
131
Customizing Fax Settings
131
Changing the Fax Resolution
131
Making a Fax Lighter or Darker
132
Sending a Fax at a Scheduled Time
132
Viewing a Fax Log
132
Blocking Junk Faxes
132
Canceling an Outgoing Fax
133
Canceling a Fax While the Original Documents Are Still Scanning
133
Canceling a Fax after the Original Documents Have Been Scanned to Memory
133
Understanding Fax Options
133
Content
133
Resolution
134
Darkness
134
Color
134
Page Setup
134
Scan Preview
134
Delayed Send
135
Advanced Options
135
Holding and Forwarding Faxes
135
Holding Faxes
135
Forwarding a Fax
136
Scanning to an FTP Address
137
Creating Shortcuts
137
Creating an FTP Shortcut Using the Embedded Web Server
137
Creating an FTP Shortcut Using the Touch Screen
138
Scanning to an FTP Address
138
Scanning to an FTP Address Using the Touch Screen
138
Scanning to an FTP Address Using a Shortcut Number
138
Scanning to an FTP Address Using the Address Book
139
Understanding FTP Options
139
Ftp
139
File Name
139
Original Size
139
Send as
139
Color
140
Resolution
140
Darkness
140
Page Setup
140
Content
140
Scan Preview
141
Advanced Options
141
Scanning to a Computer or Flash Drive
142
Scanning to a Computer
142
Scanning to a Flash Drive
143
Understanding the Scan Center Features
143
Using the Scanback Utility
143
Understanding Scan Profile Options
144
Original Size
144
Resolution
144
Color
144
Content
144
Darkness
145
Page Setup
145
Scan Preview
145
Advanced Options
145
Understanding Printer Menus
146
Menus List
146
Supplies Menu
147
Paper Menu
149
Default Source Menu
149
Paper Size/Type Menu
150
Configure MP Menu
153
Substitute Size Menu
153
Paper Weight Menu
153
Paper Loading Menu
155
Custom Types Menu
157
Custom Names Menu
157
Custom Scan Sizes Menu
157
Universal Setup Menu
158
Reports Menu
158
Network/Ports Menu
160
Active NIC Menu
160
Standard Network or Network [X] Menus
160
Network Reports Menu
162
Network Card Menu
162
TCP/IP Menu
162
Ipv6 Menu
163
Wireless Menu
164
Appletalk Menu
165
Standard USB Menu
165
Parallel [X] Menu
167
Serial [X] Menu
169
SMTP Setup Menu
171
Security Menu
172
Editing Security Setups Menu
172
Miscellaneous Security Settings Menu
173
Confidential Print Menu
174
Disk Wiping Menu
175
Security Audit Log Menu
176
Set Date and Time Menu
177
Settings Menu
178
General Settings Menu
178
Copy Settings Menu
187
Fax Settings Menu
191
E-Mail Settings Menu
200
FTP Settings Menu
206
Flash Drive Menu
210
Print Settings
215
Job Accounting Menu
216
Finishing Menu
218
Quality Menu
219
Utilities Menu
222
Postscript Menu
224
Html Menu
227
Help Menu
228
Securing the Memory before Moving the Printer
230
Statement of Volatility
230
Erasing Volatile Memory
230
Erasing Non-Volatile Memory
231
Erasing Printer Hard Disk Memory
231
Configuring Printer Hard Disk Encryption
232
Maintaining the Printer
233
Cleaning the Exterior of the Printer
233
Cleaning the Scanner Glass
233
Cleaning the ADF Parts
234
Cleaning the Printhead Lenses
235
Storing Supplies
238
Checking the Status of Supplies
239
Checking the Status of Supplies from the Printer Control Panel
239
Checking the Status of Supplies from a Network Computer
239
Ordering Supplies
239
Ordering Toner Cartridges
239
Ordering Imaging Units
240
Ordering a Fuser or a Transfer Module
240
Ordering a Waste Toner Bottle
240
Ordering ADF Replacement Parts
240
Replacing Supplies
241
Replacing an Imaging Unit
241
Replacing a Toner Cartridge
243
Replacing the Waste Toner Bottle
245
Moving the Printer
247
Before Moving the Printer
247
Moving the Printer to Another Location
247
Shipping the Printer
247
Administrative Support
248
Finding Advanced Networking and Administrator Information
248
Using the Embedded Web Server
248
Checking the Virtual Display
248
Checking the Status of the Printer
248
Setting up E-Mail Alerts
249
Viewing Reports
249
Restoring Factory Default Settings
249
Clearing Jams
251
Avoiding Jams
251
Understanding Jam Numbers and Locations
251
Paper Jam
253
Paper Jam
254
Paper Jam
255
Paper Jams
256
24X Paper Jam
257
Paper Jam
260
Paper Jams
260
Paper Jams
261
Paper Jam
261
Troubleshooting
262
Solving Basic Printer Problems
262
Understanding Printer Messages
262
Adjusting Color
262
An Error Has Occurred with the USB Drive. Please Remove and Reinsert Drive
262
Change [Paper Source] to [Custom Type Name]
262
Change [Paper Source] to [Custom Type Name] Load [Orientation]
263
Change [Paper Source] to [Custom String]
263
Change [Paper Source] to [Custom String] Load [Orientation]
263
Change [Paper Source] to [Paper Size] [Paper Type]
263
Change [Paper Source] to [Paper Size] [Paper Type] Load [Orientation]
263
Close [Tray] Door
263
Close Front or Side Door
264
Disk Corrupted
264
Disk Near Full. Securely Clearing Disk Space
264
Disk Problem
264
Error Reading USB Drive. Remove USB
264
Insert Tray [X]
264
Install Tray [X]
264
Load [Src] with [Custom Type Name]
265
Load [Src] with [Custom String]
265
Load [Src] with [Size]
265
Load [Src] with [Type] [Size]
265
Load Manual Feeder with [Custom Type Name]
265
Load Manual Feeder with [Custom String]
266
Load Manual Feeder with [Paper Size]
266
Load Manual Feeder with [Paper Type] [Paper Size]
266
Paper Changes Needed
266
Remove Paper from Standard Output bin
266
Replace Separator Pad
266
Restore Held Jobs
266
Some Held Jobs Were Not Restored
267
Supply Needed to Complete Job
267
Tray [X] Paper Size Unsupported
267
Unsupported Disk
267
1565 Emulation Error, Load Emulation Option
267
Missing [Color] Cartridge And/Or [Color] Imaging Unit
267
Missing or Defective [Color] Cartridge
267
Color] Cartridge Part Number Unsupported by Device
267
Incorrect Paper Size, Open [Src]
268
Insufficient Memory to Support Resource Save Feature
268
Printer Service Required
268
Insufficient Memory to Collate Job
268
Insufficient Memory for Flash Memory Defragment Operation
268
Insufficient Memory, some Held Jobs Were Deleted
268
Insufficient Memory, some Held Jobs will Not be Restored
269
Memory Full
269
Complex Page, some Data May Not Have Printed
269
Defective Flash Detected
269
Not Enough Free Space in Flash Memory for Resources
269
Unformatted Flash Detected
269
Serial Option [X] Error
269
Standard Network Software Error
270
Network [X] Software Error
270
Unsupported Option in Slot [X]
270
Parallel Port [X] Disabled
270
Serial Port [X] Disabled
270
Standard Parallel Port Disabled
271
Standard USB Port Disabled
271
USB Port [X] Disabled
271
Configuration Change, some Held Jobs Were Not Restored
271
Input Config Error
271
Too Many Disks Installed
271
Too Many Flash Options Installed
272
Too Many Trays Attached
272
Remove Defective Disk
272
Disk Full
272
Fuser Near Life Warning
272
Fuser Life Warning
273
Replace Fuser
273
Fuser Missing
273
Replace Waste Toner Bottle
273
Waste Toner Bottle Nearly Full
273
Transfer Module Life Warning
273
Transfer Module Missing
273
Replace Transfer Module
273
Defective [Color] Imaging Unit
274
Color] Imaging Unit Nearly Low
274
Color] Imaging Unit Low
274
Replace [Color] Imaging Unit and [Color] Cartridge
274
Unsupported [Color] Imaging Unit
274
Color] Cartridge Nearly Low
274
Color] Cartridge Low
274
Replace [Color] Cartridge
275
Solving Printing Problems
275
Multiple-Language PDF Files Do Not Print
275
Printer Control Panel Display Is Blank or Displays Only Diamonds
275
Error Message about Reading USB Drive Appears
275
Print Jobs Do Not Print
275
Confidential and Other Held Jobs Do Not Print
276
Print Job Takes Longer than Expected
277
Job Prints from the Wrong Tray or on the Wrong Paper
277
Incorrect Characters Print
277
Tray Linking Does Not Work
277
Large Jobs Do Not Collate
278
Unexpected Page Breaks Occur
278
Solving Copy Problems
278
Copier Does Not Respond
278
Scanner Unit Does Not Close
279
Poor Copy Quality
279
Partial Document or Photo Copies
280
Solving Scanner Problems
281
Checking an Unresponsive Scanner
281
Scan was Not Successful
281
Scanning Takes too Long or Freezes the Computer
281
Poor Scanned Image Quality
282
Partial Document or Photo Scans
282
Cannot Scan from a Computer
283
Solving Fax Problems
283
Fax and E-Mail Functions Are Not Set up
283
Caller ID Is Not Shown
283
Cannot Send or Receive a Fax
284
Can Send but Not Receive Faxes
285
Can Receive but Not Send Faxes
286
Received Fax Has Poor Print Quality
286
Solving Home Screen Applications Problems
287
An Application Error Has Occurred
287
Solving Option Problems
288
Option Does Not Operate Correctly or Quits after It Is Installed
288
Paper Tray Problems
288
Cannot Detect Flash Memory Card
289
Cannot Detect Printer Hard Disk
289
Internal Solutions Port Does Not Operate Correctly
289
Internal Print Server Does Not Operate Correctly
289
Memory Card
290
Usb/Parallel Interface Card Does Not Operate Correctly
290
Solving Paper Feed Problems
290
Paper Frequently Jams
290
Paper Jam Message Remains after Jam Is Cleared
290
Jammed Pages Are Not Reprinted
291
Solving Print Quality Problems
291
Characters Have Jagged or Uneven Edges
291
Clipped Images
291
Fine Horizontal Lines Appear on Color Pages
292
Gray Background
292
Incorrect Margins
292
Light Colored Line, White Line, or Incorrectly Colored Line Appears on Prints
293
Paper Curl
294
Print Irregularities
294
Print Is too Dark
295
Print Is too Light
296
Printer Is Printing Blank Pages
297
Repeating Defects Appear on a Page
297
Shadow Images Appear on Prints
298
Skewed Print
299
Solid Color Pages
299
Streaked Horizontal Lines Appear on Prints
300
Streaked Vertical Lines Appear on Prints
300
Toner Fog or Background Shading Appears on the Page
301
Toner Rubs off
301
Toner Specks
301
Transparency Print Quality Is Poor
302
Uneven Print Density
302
Solving Color Quality Problems
302
FAQ about Color Printing
302
Embedded Web Server Does Not Open
305
Check the Network Connection
305
Check the Address Entered in the Web Browser
306
Temporarily Disable Web Proxy Servers
306
Contacting Customer Support
306
Notices
307
Product Information
307
Edition Notice
307
Modular Component Notice
308
Noise Emission Levels
309
Product Disposal
309
Static Sensitivity Notice
309
Power Consumption
310
Industry Canada Compliance Statement
311
Notice to Users of the Canadian Telephone Network
313
Notice to Users of the New Zealand Telephone Network
313
Using this Product in Switzerland
314
Utilisation de Ce Produit en Suisse
314
Verwendung dieses Produkts in der Schweiz
314
Uso del Prodotto in Svizzera
314
Notice to Users in the European Union
315
Regulatory Notices for Wireless Products
315
Exposure to Radio Frequency Radiation
315
Statement of Limited Warranty
318
Limitation of Liability
320
Index
325
Advertisement
Lexmark X925de Administrator's Manual (46 pages)
SafeCom Go Lexmark
Brand:
Lexmark
| Category:
All in One Printer
| Size: 1.1 MB
Table of Contents
Table of Contents
3
1 Introduction
5
Safecom Go Lexmark
5
Requirements
5
Safecom ID Devices
6
Lexmark Universal Print Driver
7
Available Documentation
7
About this Manual
8
Document History
8
2 Safecom Go Lexmark
10
Overview
10
Install Safecom Go Lexmark
10
Configure Safecom Go Lexmark
11
Import the Safecom Security Template
11
Apply Access Control on Device Functions
13
Show/Hide Icons on the Control Panel
14
Install Safecom ID Device (Card Reader)
14
Safecom Go Lexmark Web Interface
15
Login to the Safecom Go Lexmark Web Interface
15
Configuration Web Page
16
Information Web Page
20
Register Web Page
21
Log Web Page
22
Password Web Page
23
Safecom Go Lexmark - How to
24
Get the Safecom Go Lexmark Software
24
Specify Safecom Server
24
Register Device
25
Select User Identification - User Code or Card
25
Login with Windows Without Specifying the Domain
26
Login Without PIN Code
26
Disable Pull Print
26
Enable Copy Control
27
Enable Send to Folder
27
Control User Access Rights
27
Enable Prefilled E-Mail Fields
28
Control Max Length of Encryption Keys
28
Restore Factory Default Settings
30
Determine the Version
31
Use Another Server in a Multiserver Solution
31
Safecom Go Lexmark Update Software
31
Is the Safecom Go Lexmark Software Loaded
31
Uninstall Safecom Go Lexmark
32
3 Using Safecom Go Lexmark
34
Control Panel
34
Login
34
Pull Print - Document List
37
Copy
37
Folder
38
E-Mail
38
Logout
38
Register Card with Windows Credentials
39
Register Card with PUK Code
39
4 Troubleshooting
40
Introduction
40
Safecom Help Desk Assistant
40
Safecom Go Lexmark Software Issues
40
Safecom Go Lexmark Device Trace Facility
40
At the Printer: Login Service Not Available
40
At the Printer: User Unknown
41
At the Printer: Login Denied
41
At the Printer: Restricted Access
41
At the Printer: Error Printing Document
41
At the Printer: Question Mark before the Document Name
41
At the Printer: Login Error <Number
41
At the Printer: Card Reader Not Working
42
Tracking Information
42
Tracking of Blank
42
5 Regulatory Information
43
6 Index
44
Lexmark X925de Specifications (8 pages)
colour MFP
Brand:
Lexmark
| Category:
All in One Printer
| Size: 5.22 MB
Advertisement
Lexmark X925de Specifications (8 pages)
MFP
Brand:
Lexmark
| Category:
All in One Printer
| Size: 4.59 MB
Advertisement
Related Products
Lexmark X925
Lexmark x9350
Lexmark X952
Lexmark X954
Lexmark X950de
Lexmark X95 series
Lexmark x952dte 4
Lexmark x954dhe 4
Lexmark X950de 4
Lexmark X940
Lexmark Categories
Printer
All in One Printer
Printer Accessories
Software
Print Server
More Lexmark Manuals
Login
Sign In
OR
Sign in with Facebook
Sign in with Google
Upload manual
Upload from disk
Upload from URL