Sign In
Upload
Manuals
Brands
Compaq Manuals
Storage
SSL2000 Series
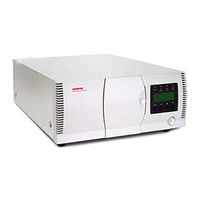
User Manuals: Compaq SSL2000 Series Storage Tape Drive
Manuals and User Guides for Compaq SSL2000 Series Storage Tape Drive. We have
2
Compaq SSL2000 Series Storage Tape Drive manuals available for free PDF download: Reference Manual
Compaq SSL2000 Series Reference Manual (139 pages)
Library
Brand:
Compaq
| Category:
Storage
| Size: 1 MB
Table of Contents
Table of Contents
3
About this Guide
10
Text Conventions
10
Symbols in Text
11
Symbols on Equipment
11
Cabinet Stability
12
Compaq Technical Support
13
Compaq Website
13
Getting Help
13
Compaq Authorized Reseller
14
Introduction
15
System Description
15
Library Models
16
Multi-Unit Library Systems
16
Table 1-1 Library Models
16
Multi-Server Data Sharing
17
SCSI Interface
17
Tape Cartridge Magazine Mail Slot
17
Data Transfer Rate
19
Drives
19
Internal Cabling Configuration
19
SCSI Bus Performance Considerations
19
SCSI Configuration
19
Bus Length Limitations
20
Independent SCSI Buses for SE
20
Physical Configuration
20
Shuttle Lockdown Mechanism
20
Library Features
21
System Description
21
Table 1-2 Library Front View
21
Table 1-3 Library Rear View
22
Control Panel
23
Display
23
Power Supply
23
Tape Cartridge Magazine
24
Bar Code Reader
25
Integral Fan Cooling
25
Robotics
25
Table 1-4 Tape Cartridge Magazine
25
Advanced Design Features
26
Buffer
26
Compression
26
Embedded Diagnostics
26
Error Checking
26
Capacity
27
Media Life
27
Table 1-5 Tape Capacities
27
Installation
28
Introduction
28
Unpacking
28
Figure 2-1. Lockdown Mechanism Screw
29
Releasing the Lockdown Mechanism
29
Figure 2-2. Releasing the Lockdown Mechanism
30
Figure 2-3. Locking the Lockdown Mechanism
31
Setting up the Desktop Model
31
Setting up the Rackmount Model
31
Precaution
32
Removing the Desktop Outside Cover
32
Figure 2-4. Removing the Desktop Outside Cover
33
Installing the Rackmount Top Cover
33
Figure 2-5. Installing the Rackmount Top Cover
34
Installing the Inner Slide Members
35
Figure 2-7. Installing the Inner Slides
36
Table 2-1 Rackmount Slide Parts
36
Figure 2-8. Installing the Panel Extension
37
Installing the Panel Extensions
37
Installing the Rackmount Model into a Storage Cabinet
38
Setting up Interfaces and Cables
38
Power Cord Connector
40
Table 2-2 Connectors, SCSI Terminator, and Cables
40
Interface Cable Specifications
41
SCSI Interface Connectors
41
Configuring the Library
42
Setting a SCSI ID
43
Configuring a Library System
45
The Master Unit
45
The Slave Unit
46
Setting up Reserved Slots
47
Figure 2-10. Reserved Slot Locations
48
How Reserved Slots Are Numbered
48
To Reserve Slots
49
Configuration Options
50
Installation
50
SCSI Options
50
Library Options
52
Bar Code Options
53
Set Default
54
Set Element Base
54
Set Serial Number
54
Configuration Settings
55
Table 2-3 Library Configuration Options
55
Installing and Removing the Pass-Through Mechanism
58
Introduction
58
Figure 3-1. Removing the PTM Port Cover
59
Installing a Pre-Assembled PTM
59
Figure 3-2. Installing the PTM
60
Figure 3-3. Securing the PTM to the Master Unit
61
Figure 3-4. Securing the PTM to the Slave Unit
62
Removing a PTM
63
Figure 3-5. Unplugging the PTM Motor Housing Assembly Control Cable
64
Cabling the PTM and Multi-Unit Library System
65
Connecting to the PTM Motor Housing Assembly
65
Connecting to Library Units
66
Figure 3-6. Connecting a Patch Cable
66
Figure 3-7. Connecting to Library Units
67
Adding a PTM Extrusion
68
Figure 3-8. Location Stop Pin
68
Figure 3-9. Attaching Tie Bars
69
Figure 3-10. Attaching PTM Extrusions
70
Figure 3-11. Attaching Tie Bars to the PTM Extension
71
Figure 3-12. Cutting the Belt
72
Installing a New Belt
72
Figure 3-13. Threading the Belt through the Pulleys
73
Figure 3-14. Attaching the Belt Clamp Bracket
74
Figure 3-15. Replacing the Bottom Pulley End Cap
75
Figure 3-16. Snapping the Spring over the Tension Post
76
Figure 3-17. PTM Layout
77
Removing the Elevator Car
77
Figure 3-18. Releasing the Elevator Car
78
Table 3-1 PTM Components
78
Figure 3-19. Disengaging the Wheels
79
Figure 3-20. Removing the Elevator Car
80
Figure 3-21. Aligning the Belt Tensioner Ramp
81
Removing the Bottom Pulley Assembly
81
Replacing the Elevator Car
81
Figure 3-22. Removing Tension from the Belt
82
Figure 3-23. Releasing the Bottom Pulley Assembly
83
Figure 3-24. Removing the Bottom Pulley Assembly
83
Introduction
84
Operation
84
Figure 4-1. Library Front Panel
85
Front Panel
85
Power Switch
86
Table 4-1 Library Front View
86
Indicators and Buttons
87
LED Indicators
88
Table 4-2 Library Control Panel
88
Buttons
89
Using the Enter Button to Access Main Menu
89
Using the Escape Button to Return to Default Screen
89
Table 4-3 Control Panel Button Functions
90
Using the Escape Button to Access Status Mode
90
Front Panel and Media Locks
91
Power-On Self Test Screen
91
Startup Display Messages
91
Default Screen
92
Initialization Screens
92
Fault Screen
93
Using the Library Menus
93
Figure 4-3. Library Menus
94
Operation
94
Exiting the Status Mode
95
Exploring the Status Mode
95
Library Status Submenu
95
Using the Status Mode
95
Drive Status Menu
96
Map Information Screen
97
Using the Menu Mode
98
Exiting the Menu Mode
99
Load/Unload Menu
99
Navigating through the Menu Structure
99
Remove Magazine Menu
99
Configure Menu
100
Maintenance Menu
100
Security Menu
100
Displaying Firmware Revisions
102
Loading and Unloading
102
Inserting and Removing Cartridges
104
Emergency Magazine Removal
105
Figure 4-4. Magazine in Place
105
Removing the Magazine
105
Figure 4-5. Tape Magazine with Cartridges Installed
106
Inserting Cartridges into the Magazine
106
Inserting the Magazine
106
Figure 4-6. Mail Slot Location
107
Tape Cartridge Requirements
107
Using the Mail Slot
107
Figure 4-7. Tape Cartridge Write Protection Switch
108
Write Protecting Cartridges
108
Bar Code Labels
109
Figure 4-8. Bar Code Label Size
109
Connecting a Multi-Unit Library System
110
Multi-Unit Library System Operation
110
Powering up
110
Introduction
111
Maintenance
111
Running a Cleaning Cartridge
112
Running a Cleaning Cartridge Automatically
112
Running a Cleaning Cartridge Manually
112
Exercising the Library Robotics
114
Removing the Cleaning Cartridge
114
Introduction
115
Platform Problems
115
Troubleshooting
115
Error Recovery
116
General Drive Errors
116
Figure 6-1. Troubleshooting Flowchart
117
Error Recovery Procedures
118
Table 6-1 Error Recovery Procedures
118
Fault Symptom Codes (Fscs)
119
Table 6-2 Fault Symptom Codes
119
Appendix A Specifications
120
Introduction
120
Table A-3 Reliability Specifications (Library System Robotics
122
Table A-4 Power Specifications
122
Table A-10 Acoustic Emission Level
125
Safety
126
Electromagnetic Emission (EM
126
Notice
126
Industry Canada
126
Industrie Canada
126
Table A-11 Regulator Agency Product Safety Certifications
126
FCC Notice
127
Table A-12 Acoustic Noise Declaration Declared Per ISO 9296 and ISO
127
Table A-13 Schallemissionswerte - Werteangaben nach ISO 9296 und ISO
127
FCC and VCCI Requirements
128
Statement for Equipment Meeting FCC Class a Requirements
128
Equipment Meeting VDE Class B Requirements (VFG 1046/84 and VFG 243/91 for Germany
129
VCCI Notice for Japan Class I Equipment
130
Advertisement
Compaq SSL2000 Series Reference Manual (15 pages)
Library
Brand:
Compaq
| Category:
Storage
| Size: 0 MB
Table of Contents
Table of Contents
3
About this Guide
4
Symbols in Text
4
Symbols on Equipment
5
Cabinet Stability
6
Getting Help
6
Compaq Technical Support
6
Compaq Website
7
Compaq Authorized Reseller
7
Adding a Second Drive
8
Introduction
8
Removing the Outside Cover
9
Outside Cover Screw Locations
9
Figure 1. Outside Cover Screw Locations (Tabletop Version)
9
Outside Cover Removal Procedures
10
Figure 2. Outside Cover Screw Locations (Rackmount Version)
10
Removing the Brace Plate and Upper Drive Mounting Plate
11
Figure 3. Brace Plate Removal
11
Figure 4. Upper Drive Mounting Plate Removal
12
Installing Alignment Pins
13
Figure 5. Alignment Pin Installation
13
Installing the New Drive
14
Figure 6. Installing the New Drive
14
Figure 7. Connecting the New Drive
15
Advertisement
Related Products
Compaq SDLT 110
Compaq SLR Tape Drive
Compaq StorageWorks 20 - Modular Smart Array
Compaq Storageworks 1000 - modular smart array
Compaq StorageWorks 4000
Compaq StorageWorks 3000
Compaq StorageWorks DAT 40M
Compaq StorageWorks SDLT 160
Compaq StorageWorks SDLT 220
Compaq StorageWorks SDLT 320
Compaq Categories
Desktop
Laptop
Server
Monitor
Storage
More Compaq Manuals
Login
Sign In
OR
Sign in with Facebook
Sign in with Google
Upload manual
Upload from disk
Upload from URL