Brother DCP-340CW Manuals
Manuals and User Guides for Brother DCP-340CW. We have 5 Brother DCP-340CW manuals available for free PDF download: Service Manual, Network User's Manual, User Manual, Quick Setup Manual
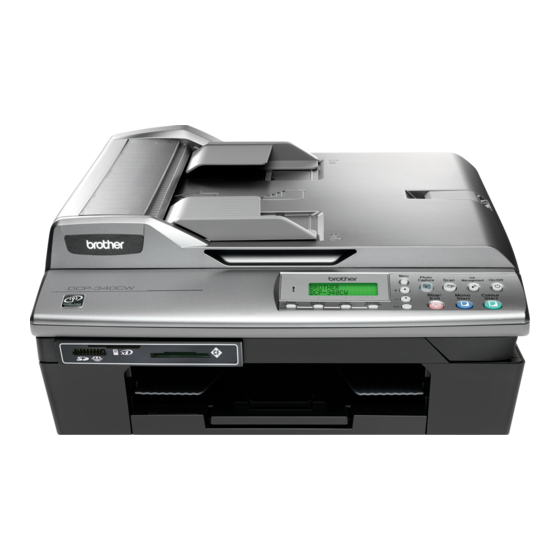
Brother DCP-340CW Service Manual (407 pages)
Brand: Brother
|
Category: All in One Printer
|
Size: 12 MB
Table of Contents
-
Caution7
-
Warning7
-
Front View11
-
Outline11
-
Rear View11
-
Mfc820Cw13
-
Menu Keys14
-
On/Off14
-
Start Keys14
-
Stop/Exit14
-
Dial Pad15
-
Ink15
-
Black Start16
-
Copy Options16
-
Color Start17
-
Mono Start17
-
Photocapture18
-
Scan18
-
Components19
-
-
Overview
39 -
-
-
1 ] Overview48
-
2 ] Features49
-
-
Front End50
-
Back End53
-
Normal53
-
Black Damper54
-
Damping54
-
-
-
Bevel Gear63
-
Head Caps63
-
Tube Pump63
-
-
Purging68
-
Head Wiper69
-
Aging73
-
-
Preparation89
-
-
-
ADF Cover ASSY101
-
-
Upper Cover114
-
Ink Refill ASSY130
-
Ink Absorber Box138
-
-
Top View158
-
Lubrication
161 -
Preparation
166 -
-
On the Main PCB173
-
-
-
Error Indication
252-
Equipment Errors252
-
-
Calling271
-
DCN Reception274
-
ID Checking274
-
Signal Isolation275
-
Introduction277
-
Precautions277
-
Recording Paper278
-
-
All Black282
-
Completely Blank282
-
Random Color282
-
Dark283
-
Light283
-
Ink Splash284
-
Ghost285
-
9 ] Others287
-
1 ] Paper Jams288
-
-
CIS Flat Cable293
-
CIS Unit293
-
-
7 ] Speaker296
-
PF Encoder Disk296
-
9 ] Pcbs297
-
Location302
-
Wsw01317
-
Wsw03319
-
Wsw04320
-
Wsw05321
-
Wsw06323
-
Selectors324
-
Wsw07325
-
Wsw08326
-
Wsw09327
-
T5 Timer327
-
Wsw10328
-
Wsw11329
-
Wsw12330
-
Wsw13331
-
Wsw14332
-
Wsw15333
-
CRP Option333
-
Wsw16334
-
Wsw17335
-
Wsw18336
-
Wsw19337
-
Wsw20338
-
EP Tone Prefix338
-
Wsw21339
-
Wsw22340
-
Wsw23341
-
Wsw24342
-
Wsw25343
-
Wsw26344
-
Wsw27345
-
Wsw28346
-
Wsw29347
-
Wsw30348
-
Wsw31349
-
Wsw32350
-
Wsw33351
-
Wsw34352
-
Wsw35353
-
Wsw36354
-
Wsw37355
-
Wsw38356
-
Wsw39357
-
Wsw40358
-
Wsw42361
-
Wsw43361
-
JPEG Coding361
-
Wsw44362
-
Wsw45363
-
Wsw46364
-
Wsw47365
-
Wsw48366
-
Wsw49366
-
Wsw50367
-
Wsw51368
-
Wsw52369
-
Wsw53369
-
Wiring Diagrams370
-
Circuit Diagrams373
-
Mj Pcb374
-
Power Supply PCB376
-
-
Advertisement

Brother DCP-340CW Network User's Manual (178 pages)
Multi-Protocol On-board Ethernet Multi-function Print Server and Wireless (IEEE 802.11b/g) Ethernet Multi-function Print Server
Brand: Brother
|
Category: Print Server
|
Size: 4 MB
Table of Contents
-
-
-
-
Overview22
-
-
-
-
LAN Menu37
-
-
BOOT Method37
-
IP Address40
-
Subnet Mask42
-
Gateway43
-
Node Name45
-
WINS Config46
-
WINS Server48
-
DNS Server50
-
Apipa52
-
-
-
Setup Wizard53
-
-
-
Setup Misc59
-
Network I/F62
-
-
-
-
Overview66
-
-
Overview71
-
-
-
Overview74
-
-
-
A Appendix A
158-
-
-
Windows® Systems160
-
-
-
Only163
-
-
-
B Appendix B
166 -
Index
177

Brother DCP-340CW User Manual (112 pages)
Brother Printer User's Guide DCP-115C, DCP-120C, DCP-315CN, DCP-340CW
Table of Contents
-
Introduction
14-
About Paper21
-
-
-
Introduction45
-
-
Copy Options50
-
-
Scan to Card57
-
-
-
Nergy Star62
-
-
-
-
Appendix
91-
-
Menu Table91
-
-
Menu Keys92
-
-
Specifications
100-
General100
-
Print Media102
-
Copy103
-
Scanner105
-
Printer106
-
Interfaces106
-
Consumable Items108
-
I - 1 Index
110
Advertisement

Brother DCP-340CW Quick Setup Manual (43 pages)
Brand: Brother
|
Category: Fax Machine
|
Size: 2 MB
Table of Contents
Brother DCP-340CW Service Manual (11 pages)
Brand: Brother
|
Category: Fax Machine
|
Size: 0 MB