Advertisement
Quick Links
Advertisement

Related Manuals for Bodyworx AR350P


Summary of Contents for Bodyworx AR350P
-
Page 2: Table Of Contents
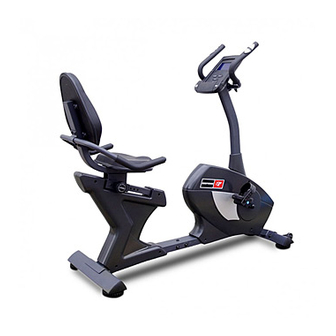
This quality product is designed, manufactured, tested and certified for enhanced Fitness Training. Dear Customer, We want to thank you for having chosen a RECUMBENT BIKE. Wish you a lot of fun and success during training. Please note and follow the enclosed safety and assembly instructions carefully. If you have questions, please do not hesitate to contact us. -
Page 3: Hardware Package
Hardware Package - 3 -... -
Page 4: Exploded Drawing
Exploded drawing Assembly Instructions - 4 -... - Page 5 Step 1 Step 3 1.Fasten rear main frame (1) to front main frame(2),screw 1. Fasten front stabilizer(3) &rear stabilizer(4) to with 4 bolts (51) and 4 washers(59) . front&rear main fram(2)&(1), screw each with 2 bolts(52) and 2 washers(59) from the underside of stabilizer.
- Page 6 Step 5 Step 7 1. Place the saddle (27) onto the saddle post (8) and Screw pedal (left&right) (30) onto crank of front main then secure with 4 bolts (51) tightly. frame (2). 2. Attach the backrest cushion (28) to the saddle post (8) (*Assembly reminder: with 4 bolts (51).
- Page 7 Step 9 Step 11 Attach adaptor (68) to jack of DC wire (22) at backside of 1. Put the hand pulse sensor wire (17) throught wire front main frame (2) securely. plug (70) and get through the hole behind the handle bar post (7).
-
Page 8: Training Instructions
Training Instructions To achieve a considerable improvement of your physical With increasing improvement of fitness, the training resistance and your health, some aspects of how to find intensity should be increased to 70% - 85% of your the most efficient amount of training should be followed: If maximum pulse rate. -
Page 9: Part List
Part List Description Quantity Rear Main frame Front Main frame Front stabilizer Rear stabilizer Transportation wheel Triangle cap for ( front & rear stabilizer) 2set Handlebar post Saddle post Handlebar Slide post Crank 1set Slide tube U type handle bar Hand pulse sensor Sleeve (for slide tube) End cap (for saddle post) - Page 10 Sensor washer Flange nut Washer (for flywheel) Hex.Bolt M8*40mm belt adjuster 2sets Hex. nut (for flywheel) Screws (for slide post) Hex.Bolt M8*15mm Hex.Bolt M8*20mm Bolt (for slide post) Bolt (for saddle post) Screw (sensor fixture *1, rear cover*8, chain cover*6) Screw (chain cover*4, rear cover*2) Bumper Holder...
-
Page 11: Computer Instructions
Computer Instructions The things you should know before exercise A. Input Power Plug in the adaptor to the equipment then the computer will produce a beep sound and turn on the computer at the Manual mode. B. Program select and setting value 1. - Page 12 Note: If no pulse signal input then the computer will show “P” on the PULSE window. If the computer shows “ERR” on the message window, please re-press the PULSE RECOVERY key and please make sure your hands are keeping well on the grips or the chest transmitter is attached well.
- Page 13 the profiles show. Users may exercise in any desirous of resistance level (Adjusting by UP/DOWN keys during the workout) with a period of time or a number of calories or a certain distance. Operations: 1. Use UP/DOWN keys to select one of the above programs from P2 to P13. 2.
- Page 14 Program 22 is the Target H.R.C. - - Workout by your target heart rate value. Users can exercise according to your desired Heart Rate program by setting your AGE, TIME, DISTANCE, CALORIES or TARGET PULSE. In these programs, the computer will adjust the resistance level according to the heart rate detected. For example, the resistance level may increase every 20 seconds while the heart rate detected is lower than the TARGET H.R.C.
- Page 15 Body Fat Program: Body Fat Program 24 is a special program design to calculate users’ body fat ratio and to offer a specific loading profile for users. There are 3 body types divided according to the FAT% calculated. Type1: BODY FAT% > 27 Type2: 27 ≧...
- Page 16 E3 (ERROR 3): After 4 seconds by start mode, the computer detects the faulty motor did not leave the zero point then the LCD bar displays “E3”. Error message: When you press “Pulse Recovery ”Key but don’t hold on hand grips , the computer will show “Err”. Technical data of the current adapter .
- Page 17 USER SETTING PROGRAM PROGRAM 14 USER 1 PROGRAM 15 USER 2 PROGRAM 16 USER 3 PROGRAM 17 USER 4 HEART RATE PROGRAM PROFILES: PROGRAM 18 55% H.R.C. PROGRAM 19 65% H.R.C. - 17 -...
- Page 18 PROGRAM 20 75% H.R.C. PROGRAM 21 85% H.R.C. PROGRAM 22 TARGET H.R.C. WATT CONTROL PROGRAM PROGRAM 23 WATT CONTROL BODY FAT TEST PROGRAMS: PROGRAM 24 BODY FAT (STOP MODE) BODY FAT (START MODE) - 18 -...
- Page 19 One of the Following Six Profiles Will Display Automatically after Measuring Your BODY FAT: Workout Time: 40 minutes Workout Time: 40 minutes Workout time: 20 minutes Workout Time: 40 minutes Workout Time: 40 minutes Workout time: 20 minutes - 19 -...
-
Page 20: Training Pulse Rate
Training Pulse Rate The owner’s manual is only for the customer reference. - 20 -...
Need help?
Do you have a question about the AR350P and is the answer not in the manual?
Questions and answers