
Subscribe to Our Youtube Channel
Related Manuals for Bodyworx ASB800


Summary of Contents for Bodyworx ASB800
- Page 1 Spin Bike BODYWORX BODY WORX Model No: ASB800 Retain this owner’s manual for future reference Read and follow all instructions in this owner’s manual Version A...
- Page 2 GPI Sport & Fitness Warranty Registration Form Congratulations on purchasing your product, we at GPI believe that our product range is of the highest quality and represents great value for money. We back our product range up with our industry leading warranty. Please see below for the step by step instructions on how to register your product warranty online.
-
Page 3: Table Of Contents
TABLE OF CONTENTS SAFETY PRECAUTIONS ASSEMBLY STEP B FEATURES ASSEMBLY STEP C ASSEMBLY INSTRUCTIONS ASSEMBLY STEP D PARTS LIST EXPLODED DRAWING ASSEMBLY STEP A BILL OF MATERIAL IMPORTANT SAFETY PRECAUTIONS & MAINTENANCE INSTRUCTIONS This exercise machine is built for optimum safety. However, certain precautions apply whenever you operate any piece of exercise equipment. - Page 4 Before riding, check the emergency brake is functioning well and properly. For weekly maintenance, make sure the crank bolt and pedal bolt are well tightened. WARNING: BEFORE BEGINNING ANY EXERCISE PROGRAM, CONSULT YOUR PHYSICIAN. THIS IS ESPECIALLY IMPORTANT FOR INDIVIDUALS OVER THE AGE OF 35 OR PERSONS WITH PRE-EXISTING HEALTH PROBLEMS.
-
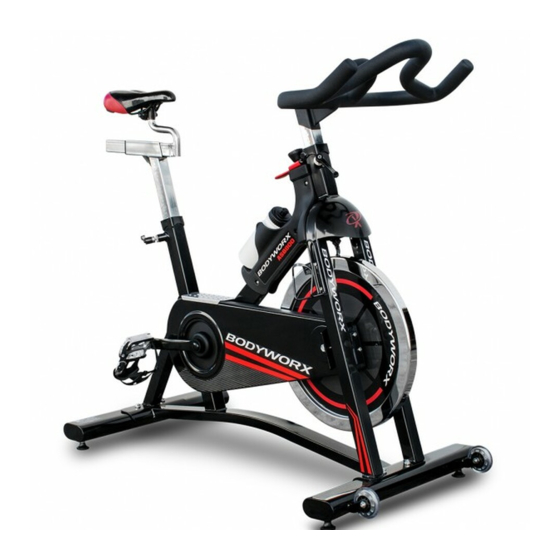
Page 5: Features
FEATURES Sweat Guard with Bottle The integrated design of sweat guard and water bottle cage protects the frame & brake from rusting and holds 1 Litre of bottle of any shape Heavy Flywheel: High-inertia flywheel creates the high momentum Transportation Wheel: Anyone can move this machine using the two 2 attached wheels Belt Driven: Most comfortable and less noisy... -
Page 6: Assembly Instructions
ASSEMBLY INSTRUCTION PARTS LIST... -
Page 7: Assembly Step A
ASSEMBLY STEP A Attach the Front Stabilizer (5) to the frame using two Cap Nuts (2) and two Washers (3) and two Carriage Bolts (4), and secure firmly using the Multi-Wrench (1). ASSEMBLY STEP B Attach the Rear Stabilizer (6) to the frame using two Cap Nuts (2) and two Washers (3) and two Carriage Bolts (4), and secure firmly using the Multi-Wrench (1). -
Page 8: Assembly Step C
ASSEMBLY STEP C Thread the left pedal (7) that has "L" on spindle of the left side arm of the bike using the Multi- Wrench (1). Please note that the L pedal is left-hand threaded which must be turned counter- clockwise to tight. -
Page 9: Exploded Drawing
EXPLODED DRAWING... -
Page 10: Bill Of Material
BILL OF MATERIAL... - Page 11 BODYWORX BODYWORX Model No: ASB800 To register your warranty, please go to www.gpisports.com.au...
Need help?
Do you have a question about the ASB800 and is the answer not in the manual?
Questions and answers