Table of Contents
Advertisement
Quick Links
Advertisement
Table of Contents

Related Manuals for IMPRESSA F8


Summary of Contents for IMPRESSA F8
- Page 1 IMPRESSA F8 Instructions for Use...
-
Page 2: Table Of Contents
Table of contents Your IMPRESSA F8 Control elements Important information Proper use ..............................6 For your safety ............................... 6 1 Preparing and using for the first time JURA on the Internet ............................10 Setting up the machine ..........................10 Filling the bean container ...........................10 First-time use ..............................10... - Page 3 CAUTION draws your attention to potential damage to the machine. Symbols used Prompt to take action. This symbol means that you are being prompted to perform some action. Information and tips to make it even easier to use your IMPRESSA. ‘Espresso’ Display...
-
Page 4: Control Elements
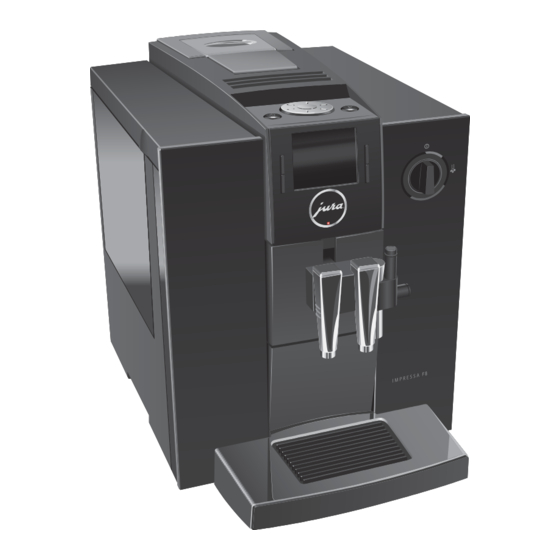
Control elements Control elements Bean container with aroma preservation Filler funnel cover cover Filler funnel for ground coffee Water tank cover Storage compartment cover Water tank Grinder adjustment switch Power switch and mains cable Measuring spoon for ground coffee (back of the machine) Height-adjustable hot-water nozzle Coffee grounds container... - Page 5 Control elements Top of the machine Front On/Off button Display g Rotary Switch Multi-function buttons (button function P button (programming) depends on what is shown in the display) l Switch for hot water and steam preparation The Connector System © permits the use of different cappuccino frothers.
-
Page 6: Important Information
JURA or by an authorised JURA service centre. Make sure that the IMPRESSA and the mains cable are not located close to hot surfaces. Be careful to ensure that the mains cable is not... - Page 7 To completely and safely disconnect the machine from the power supply, first switch off the IMPRESSA using the On/Off button and then at the power switch. Only then should you remove the mains plug from the power socket.
- Page 8 Switch your IMPRESSA off at the power switch before any cleaning operation. Always wipe the IMPRESSA with a damp cloth rather than a wet one, and protect it from prolonged expo- sure to water splash. Only connect the machine to the mains volt- age in accordance with the information on the rating plate.
- Page 9 Important information Children aged 8 and over may only operate the machine without supervision if they have been instructed in how to use it safely. Chil- dren must be able to recognise and under- stand the potential dangers arising from incor- rect use.
-
Page 10: Preparing And Using For The First Time
First-time use When using the machine for the first time, you can choose whether you want to operate IMPRESSA with or without the CLARIS Blue fil- ter cartridge. If the water hardness is 10 °dH or more, we recommend using the filter cartridge. If you do not know the hardness of your water, you can find this out first (see Chapter 1 ‘Preparing and using... -
Page 11: Water Tank
Precondition: The bean container has been filled. T Insert the mains plug into a power socket. 3 T Switch on the IMPRESSA using the power switch on the back of the machine. Q T Press the On/Off button to switch the IMPRESSA on. - Page 12 ‘Machine is rinsing’, the system is rinsed. The rinse stops automatically. ‘Please select product’ appears on the display. Your IMPRESSA is ready for use. E The display shows the products you can prepare. First-time use without filter cartridge activation CAUTION Milk, sparkling mineral water or other liquids can damage the water tank or the machine.
-
Page 13: Determining The Water Hardness
The rinse stops automatically. ‘Please select product’ appears on the display. Your IMPRESSA is ready for use. E The display shows the products you can prepare. Determining the water You can find out what the water hardness is by using the Aquadur®... -
Page 14: Connecting Milk
1 Preparing and using for the first time Connecting milk Your IMPRESSA creates fine, creamy, feather-light milk foam with a perfect consistency. The most important requirement for frothing milk is a milk temperature of 4–8 °C. We would therefore recom- mend using a milk cooler or a vacuum milk container. -
Page 15: Preparation
(see Chapter 4 ‘Permanent settings in programming mode – Adjusting the product settings’). Ways of preparing a The IMPRESSA offers various ways of preparing a speciality coffee, beverage milk foam or hot water: Preparation using the start screen: Simply press the corre- sponding preparation button for the product shown on the display (start screen) that you want. -
Page 16: Ristretto, Espresso And Coffee
2 Preparation Turn the Rotary Switch to bring the product you want into focus. Start preparation by pressing the Rotary Switch or the ‘Prepare’ button. The following additional products are shown in the product selector view: ‘Ristretto’ ‘2 ristretti’ ‘2 espressi’ ‘2 coffees’... -
Page 17: Latte Macchiato, Cappuccino
Preparation stops automatically. Your IMPRESSA is once more ready for use. Latte macchiato, Your IMPRESSA can prepare a latte macchiato and cappuccino at the cappuccino touch of a button. E This chapter applies to the professional fine foam frother and the fine foam frother. -
Page 18: Milk Foam
To ensure that the fine foam frother always works properly, you must clean it daily when you have been preparing milk (see Chap- ter 5 ‘Maintenance – Cleaning the fine foam frother’). Your IMPRESSA will not prompt you to clean the fine foam frother. -
Page 19: Ground Coffee
To ensure that the fine foam frother always works properly, you must clean it daily when you have been preparing milk (see Chap- ter 5 ‘Maintenance – Cleaning the fine foam frother’). Your IMPRESSA will not prompt you to clean the fine foam frother. -
Page 20: Permanently Setting The Amount Of Water For The Cup Size
2 Preparation T Open the cover of the filler funnel for ground coffee. ‘Please add ground coffee’ T Place one level measuring spoon of ground coffee into the filler funnel. T Close the cover of the filler funnel. ‘Please select product’ T ... -
Page 21: Adjusting The Grinder
2 Preparation E You can also permanently set the amount of water for all spe- ciality coffees and hot water in programming mode (see Chapter 4 ‘Permanent settings in programming mode – Adjusting the product settings’). Adjusting the grinder You can adjust the grinder on a continuous scale to suit the degree of roast of your coffee. - Page 22 2 Preparation T Open the storage compartment cover, take out the hot- water nozzle and close the cover again. T Attach the hot-water nozzle to the connector. T Place a cup under the hot-water nozzle. l T Turn the switch to the m position. ‘Hot water’, the preset amount of water flows into the cup.
-
Page 23: Daily Operation
You should therefore change the water daily. Precondition: Your IMPRESSA is switched on at the power switch. T Place a receptacle under the coffee spout. Q T Press the On/Off button to switch the IMPRESSA on. ‘Welcome to JURA’ ‘Machine is heating’... -
Page 24: Switching Off
The operation stops automatically. Your IMPRESSA is switched off. E When the IMPRESSA is switched off with the On/Off button, the machine consumes less than 0.1 W of standby energy. The machine can be completely disconnected from the power... -
Page 25: Permanent Settings In Programming Mode
‘Machine settings’ ‘Choose language’, T Select your language. (‘4/7’) ‘Switch off after’, T Set the time after which the IMPRESSA ‘Save energy’, should switch off automatically. ‘Factory setting’ T Select an energy-saving mode. T Reset the machine to its factory setting. -
Page 26: Product Settings
4 Permanent settings in programming mode Product settings In the programme item ‘Product settings’ (‘3/7’) you can make the following settings: ‘Expert mode’ Set individual settings for all speciality coffees, milk and hot water (see Chapter 4 ‘Permanent settings in programming mode –... -
Page 27: Replacing Products On The Start Screen
4 Permanent settings in programming mode Permanent settings in programming mode always follow the same model. Example: Proceed as follows to change the coffee strength for one coffee from ‘ normal ’ (;;) to ‘strong’ (;;;). Precondition: ‘Please select product’ is displayed. ... -
Page 28: Renaming A Product
4 Permanent settings in programming mode T Press the ‘Expert mode’ button. ‘Expert mode’ T Press the ‘ > ’ button (bottom right) several times until ‘Macchiato’ is displayed. T Press the ‘Macchiato’ button. ‘Macchiato’ g T Press the ‘ > ’... -
Page 29: Automatic Switch-Off
O T Press the P button to exit programming mode. ‘Please select product’ Automatic switch-off By instructing your IMPRESSA to automatically switch itself off, you can cut down your energy consumption. If this function is activated, your IMPRESSA switches off automatically after the preset time fol- lowing the last action on the machine. -
Page 30: Energy-Saving Mode
‘Save energy’ can permanently set an energy-saving mode (Energy Save Mode, E.S.M. © ‘Active’ Soon after the last preparation, the IMPRESSA stops heating up. After about 5 minutes the message ‘Energy Save’ is dis- played. Before you can prepare a speciality coffee, speciality coffee with milk, or hot water, the machine must heat up. -
Page 31: Setting The Water Hardness
E If you are using the CLARIS Blue filter cartridge and have acti- hardness vated it, it is not possible to set the water hardness. The harder the water is, the more frequently the IMPRESSA needs to be descaled. It is therefore important to set the water hardness accu- rately. -
Page 32: Display Settings
4 Permanent settings in programming mode g T Turn the Rotary Switch to adjust the water hardness. T Press the ‘Save’ button. ‘Saved’ appears briefly on the display. ‘Maintenance settings’ O T Press the P button to exit programming mode. ‘Please select product’... -
Page 33: Restore Factory Settings
‘Factory setting’ the machine can be reset to its factory setting: All user settings (apart from the ‘filter’ and ‘water hardness’) are reset to factory set- tings. Your IMPRESSA then switches off. Precondition: ‘Please select product’ is displayed. O T Press the P button. -
Page 34: Querying Information
4 Permanent settings in programming mode T Press the ‘Deutsch’ button. ‘Gespeichert’ appears briefly on the display ‘Geräteeinstellungen’ O T Press the P button to exit programming mode. ‘Bitte wählen’ Querying information In the programme item ‘Information’ (‘7/7’) you can view the follow- ing information: ‘Product counter’: Number of prepared coffee speciality cof-... -
Page 35: Maintenance
(programme item ‘Maintenance status’). E Your IMPRESSA will not prompt you to clean the fine foam frother. In the interests of hygiene, you should clean the fine foam frother daily when you have been preparing milk. Rinsing the machine You can initiate the rinse operation manually at any time. -
Page 36: Rinsing The Fine Foam Frother
To ensure that the fine foam frother always works properly, you must clean it daily when you have been preparing milk. Your IMPRESSA will not prompt you to clean the fine foam frother. CAUTION If the wrong cleaning agent is used, the machine could be damaged and/or traces could be left behind in the water. -
Page 37: Dismantling And Rinsing The Fine Foam Frother
Your IMPRESSA will not prompt you to disman- tle and rinse the frother. T Remove the milk pipe and rinse it thoroughly under running water. -
Page 38: Inserting And Activating The Filter
T Firmly attach the fine foam frother to the Connector Sys- © Inserting and activating Your IMPRESSA no longer has to be descaled if you are using the the filter CLARIS Blue filter cartridge. If you did not activate the filter cartridge the first time you used the machine, you can do this now as follows. -
Page 39: Changing The Filter
Changing the filter E After 50 litres of water have flowed through, the filter will cease to work. Your IMPRESSA will automatically prompt you to change the filter. E After two months, the filter will cease to work. Set the date on the date plate on the filter holder in the water tank. - Page 40 5 Maintenance Precondition: ‘Change the filter’ is displayed. O T Press the P button. ‘Maintenance status’ (‘1/7’) T Press the ‘Change the filter’ button. ‘Change the filter’ T Press the ‘Start’ button. T Press the ‘Start’ button again. ‘Change filter’ T ...
-
Page 41: Cleaning The Machine
5 Maintenance Cleaning the machine After 200 preparations or 80 switch-on rinses, the IMPRESSA will prompt you to clean it. CAUTION If the wrong cleaning agent is used, the machine could be damaged and/or traces could be left behind in the water. -
Page 42: Descaling The Machine
Cleaning is now complete. Descaling the machine The IMPRESSA builds up deposits of limescale over time and auto- matically prompts you to descale it when necessary. The degree of calcification depends on the hardness of your water. - Page 43 5 Maintenance T Empty the drip tray and coffee grounds container and put them back into the machine. ‘Agent in tank’ T Remove and empty the water tank. T Completely dissolve the contents of one blister (3 JURA des- caling tablets) in a receptacle holding 500 ml of lukewarm water.
-
Page 44: Cleaning The Bean Container
5 Maintenance y T Turn the switch to the ° position. ‘Machine is being descaled’, the descaling operation is con- tinued. The operation is interrupted, ‘Machine is being descaled’. Water flows out of the coffee spout. ‘Empty drip tray’ T Refit the fine foam frother on the Connector System ©... -
Page 45: Display Messages
T Replace the CLARIS Blue filter cartridge filter’ works. (see Chapter 5 ‘Maintenance – Changing the filter’). ‘Clean The IMPRESSA is prompting you T Perform cleaning (see Chapter 5 ‘Mainte- machine’ to clean it. nance – Cleaning the machine’). ‘Decalcify... -
Page 46: Troubleshooting
7 Troubleshooting 7 Troubleshooting Problem Cause/Result Action Insufficient foam is The fine foam frother is dirty. T Clean the fine foam frother (see produced when the Chapter 5 ‘Maintenance – Cleaning the milk is frothed or milk fine foam frother’). sprays out of the fine T Dismantle and rinse the fine foam foam frother. - Page 47 Other ‘Error’ messages – T Switch the IMPRESSA off at the power are displayed. switch. Contact customer support in your country (see Chapter 11 ‘JURA contact details / Legal information’). E If you were unable to solve the problem, contact customer support in your country (see Chapter 11 ‘JURA contact details /...
-
Page 48: Transport And Environmentally Friendly Disposal
8 Transport and environmentally friendly disposal 8 Transport and environmentally friendly disposal Transport / Emptying the Keep the packaging for your IMPRESSA. It should be used to protect system the machine during transport. In order to protect the IMPRESSA from frost during transport, the system must be emptied. -
Page 49: Technical Data
9 Technical data 9 Technical data Voltage 220–240 V ~, 50 Hz Power 1450 W Conformity mark Energy consumption approx. 6 Wh ‘Save energy’ ‘Active’ Energy consumption approx. 13 Wh ‘Save energy’ ‘Inactive’ Pump pressure static, max. 15 bar Holding capacity of water tank 1.9 l Holding capacity of bean container 310 g Holding capacity of coffee grounds max. -
Page 50: Index
10 Index 10 Index Cover Filler funnel for ground coffee 4 Addresses 56 Storage compartment 4 Adjusting the product settings 26 Aroma preservation cover Water tank 4 Cup grille 4 Bean container with aroma preservation Customer support 56 cover 4 Automatic switch-off 29 Descaling Machine 42... - Page 51 10 Index Grinder adjustment switch 4 Permanently setting the water for the cup Ground coffee 19 size 20 Permanent settings in programming Measuring spoon for ground coffee 4 mode 25 Grounding point 49 Power switch 4 Preparation 15, 17 Height-adjustable coffee spout 4 2 coffees 16 Hotline 56 2 espressi 16...
- Page 52 10 Index Querying information 34 Water hardness Determining the water hardness 13 Setting the water hardness 31 Renaming a product 28 Water tank 4 Rinses Descaling 44 Cappuccino frother rinsing 36 Filling 14 Rinsing Website 10 Fine foam frother 36 Machine 35 Ristretto 16 2 ristretti 16...
-
Page 56: Jura Contact Details / Legal Information
We reserve the right to make technical changes. The diagrams used in these instructions for use are for illustration purposes only and do not represent the original colours of the machine. Some details of your IMPRESSA may vary. Feedback Your opinion is important to us! Use the contact details at www.jura.com.
Need help?
Do you have a question about the F8 and is the answer not in the manual?
Questions and answers