Unify OpenStage M3 Operating Instructions Manual
Openstage m3/m3 plus
openstage m3 ex/m3 ex plus
on hipath cordless enterprise
hipath 4000
Hide thumbs
Also See for OpenStage M3:
- Operating instructions manual (130 pages) ,
- Safety notes (104 pages) ,
- Administrator documentation (53 pages)

Related Manuals for Unify OpenStage M3


Summary of Contents for Unify OpenStage M3
- Page 1 OpenStage M3/M3 Plus OpenStage M3 Ex/M3 Ex Plus on HiPath Cordless Enterprise HiPath 4000 Operating Instructions A31003-M2000-U103-2-7619...
- Page 2 Availability and technical specifications are subject to change without notice. Unify, OpenScape, OpenStage and HiPath are registered trademarks of Unify GmbH & Co. KG. All other company, brand, product and service names are trademarks or registered trademarks of their respective holders.
-
Page 3: Safety Notes
(see the appendix in the operating manual). See also the notes in the declaration of con- formity. OpenStage M3 Ex and OpenStage M3 Ex Plus were designed for use in potentially explosive working environments (Ex zones) and in compliance with fire prevention regulations. Local and operational factors may lead to an explosive atmosphere in an Ex zone. -
Page 4: Using Openstage M3, Openstage M3 Plus, Openstage M3 Ex And Openstage M3 Ex Plus
Using OpenStage M3, OpenStage M3 Plus, OpenStage M3 Ex and OpenStage M3 Ex Plus Attention: • Do not use OpenStage M3 and OpenStage M3 Plus handsets in potentially explosive en- vironments! • Please observe local safety regulations when using the handset. -
Page 5: Compliance With Bgr 139 (Personal Alarm Functionality)
Safety notes Compliance with BGR 139 (personal alarm functionality) Only for OpenStage M3 Plus and OpenStage M3 Ex Plus! Notes: • For BGR-compliant operation as a personal alarm signal device with a voice communica- tion capability (PNG-S), the handset must operate in conjunction with an alarm server. -
Page 6: Controls, Parts Of The Device
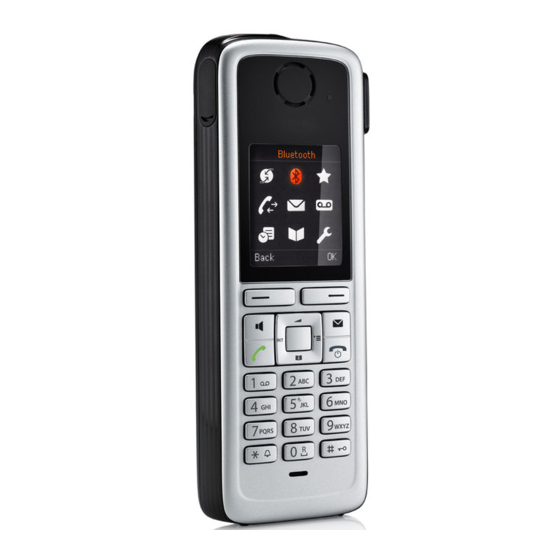
LED for indicating mode activation 13 Hash key and alarm status Example of a 2.5 mm jack for head- 14 Number keys set (not for OpenStage M3 Ex/ OpenStage M3 Ex Plus) Earpiece 15 On-hook and on/off key Display 16 Message key... -
Page 7: Table Of Contents
Using OpenStage M3, OpenStage M3 Plus, OpenStage M3 Ex and OpenStage M3 Ex Plus. . 3 Using the battery pack for OpenStage M3 and OpenStage M3 Plus ..... 3 Compliance with BGR 139 (personal alarm functionality). - Page 8 Contents Corded headset ............29 Cordless headset .
- Page 9 Contents Bluetooth interface ............71 Activating/deactivating Bluetooth mode .
- Page 10 Contents Charging shells ............105 Accessories.
-
Page 11: Operating Instructions
An integrated time alarm function is used to determine whether the person being monitored is still responsive. A pull cord is used to check whether the OpenStage M3 Plus is still on the monitored person. -
Page 12: Putting The Handset Into Service
– Attachment clip – Holder for attachment clip – Dummy plug (OpenStage M3 and OpenStage M3 Ex only) – Connector with cord for man down alarm (OpenStage M3 Plus and OpenStage M3 Ex Plus only) • Document "Information on Handset"... -
Page 13: Fitting The Attachment Clip
Putting the handset into service 1. Connect the flat plug from the power adapter to the charger. 2. Plug the power adapter into the plug socket. To disconnect the flat plug from the charger, press the release button and dis- connect the flat plug. - Page 14 Putting the handset into service 3. Secure the handset with the attachment clip to the belt. To do this, open the brackets by squeezing the free end and attach it to the belt. To remove the handset, press the opener on the attachment clip and slide the handset from the pin.
-
Page 15: Inserting The Battery
Putting the handset into service Inserting the battery The handset is supplied with an approved battery. The battery is not charged when supplied. It is first charged in the handset. • Do not remove the battery in Ex zones. • Please observe the safety notes Page 2. -
Page 16: Charging And Using The Battery
Putting the handset into service Closing the battery compartment 1. Replace the battery cover at the bottom of the housing into the recesses. 2. Then press down the battery cover until it rests firmly on the seal. 3. Insert and tighten the Allen screw. Charging and using the battery To charge the battery, insert the handset into the charging shell with the keypad facing forwards. -
Page 17: Inserting The Dummy Plug Or Connector
Make sure the dummy connector is positioned correctly. If you do not require the man down alarm function on the OpenStage M3 Plus or OpenStage M3 Ex Plus you can also use the connector without a cord as a dum- my connector. -
Page 18: Connecting A Usb Data Cable
Putting the handset into service Connecting a USB data cable The USB cable must not be connected in Ex zones! You can connect a USB data cable into the port under the battery cover of your handset. 1. To do this, open the battery cover, as when inserting the battery Page 14. -
Page 19: Description Of Controls
Description of controls Description of controls Function keys The following function keys are available: Name Usage On-hook and on/off • End a call • Cancel functions • Go back to the next menu level up • Activate or deactivate the handset Talk key •... -
Page 20: Control Key
Description of controls Control key The control key is assigned different functions depending on the operating situation: Situation Press bottom of key Press left side of key Press right side of key Press top of key In idle status Call volume Open the handset's –... -
Page 21: Menu Icons In The Main Menu
• Configuration (only with Service PIN) • Operating Mode (only with Service PIN, only with OpenStage M3 Ex and OpenStage M3 Ex Plus) • Display Rotate (only with OpenStage M3 Ex and OpenStage M3 Ex Plus) For information on configuring and selecting the operating mode, see the "Alarm and Emergency Call Configuration"... - Page 22 Description of controls Icon Name Usage Ï Settings Configure handset: • Date/Time • Audio Settings – Handset Volume – Advisory Tones – Silent Alert – Ringtones(Handset) • Display + Keypad – Screensaver – Large Font – Colour Schemes – Display Backlight –...
-
Page 23: Conducting Calls - The Basic Functions
Conducting calls – the basic functions Conducting calls – the basic functions You can use your handset to make both internal and external calls. Internal calls are calls that • you make within the range of a communications system, for example, within your company, •... -
Page 24: First Seize The Line, Then Dial
Conducting calls – the basic functions Language If your preferred language for the display texts is not set, you can set this your- self Page 17. First seize the line, then dial c or d When the handset is in idle status: Press and hold the Talk or Speakerphone key. Enter the number you wish to dial. -
Page 25: Manual Redial
Conducting calls – the basic functions Manual redial The last 20 phone numbers dialled are saved in the redial list. A phone number that was dialled several times is only saved once. When the handset is in idle status: Press the Talk or Speakerphone key briefly. The redial list is displayed. -
Page 26: Consultation
Conducting calls – the basic functions Deleting a callback request Open the system menu. > < Select the menu item and confirm. CALLBACK > < MUELLER MOBILE The oldest entry is displayed first. TH 06.02 09:23 > < Select the required command. Displaying the next entry: >... -
Page 27: Answering Or Rejecting A Call
Conducting calls – the basic functions Ending a consultation call and returning to the waiting call Either: > < TO WAIT. CALL If the consultation call/enquiry function was activated but a number was not yet entered: Select the menu item and confirm. >... -
Page 28: Ending A Call
Conducting calls – the basic functions Ending a call a or Press the On-hook key briefly or place the handset in the charging shell. The call charges are displayed, depending on the communications system. Activating or deactivating the keypad lock This feature protects against accidentally pressing buttons when the handset is in a pocket, for example. -
Page 29: Conducting Calls - Enhanced Functions
Conducting calls – enhanced functions Conducting calls – enhanced functions Speakerphone mode Features Speakerphone mode offers you the following advantages: • Other persons can listen to and participate in the call. • Your hands are free. • When dialling, you can hear the ring tone, for example, without having to lift the handset to your ear. -
Page 30: Conducting Calls With The Headset
The handset can be used with a corded and cordless headset. Corded headset Not for OpenStage M3 Ex and OpenStage M3 Ex Plus! You can connect a corded headset via the jack on the side of the handset, see Page 16. The headset must have a (2.5 mm) jack plug. - Page 31 Conducting calls – enhanced functions Select the menu item and confirm. Trust Device If necessary, enter and confirm the Bluetooth PIN for your headset (see the user agreed PIN: manual supplied with your headset). The device is saved in the list of known de- vices.
-
Page 32: Number Redial
Conducting calls – enhanced functions Number redial The last 20 phone numbers dialled are saved in the redial list. A phone number that was dialled several times is only saved once. If you tried to call a party from the handset's telephone directory, the name of the party is displayed in case of number redial. -
Page 33: Adding A Telephone Number To The Phonebook
Conducting calls – enhanced functions Adding a telephone number to the phonebook During dial preparation, you can add a number from your handset's redial list to your phonebook. Press the Talk key briefly. The redial list is displayed. Select the required telephone number. Press the display key. -
Page 34: The Handset's Phonebook
Conducting calls – enhanced functions The handset's phonebook You can save contact information for frequent call partners in the phonebook. Once a phone number has been saved in this way you no longer have to enter it in full when you want to call someone. All you have to do is select the required phonebook entry. -
Page 35: Saving An Entry
Conducting calls – enhanced functions Saving an entry Open the phonebook. Select the menu item and confirm. The input mask is displayed. New Entry Enter the relevant information, see above. Jump to the next line. etc. Functions for text input: Switches mode from abc to Abc, from Abc to 123 and from 123 to abc If predictive text is off: ... -
Page 36: Finding And Dialling An Entry
Conducting calls – enhanced functions Finding and dialling an entry Open the phonebook. You can scroll to the required entry or enter the first letters of the relevant entry. If necessary, press a key several times in succession to enter the required letter (e. -
Page 37: Marking A Vip (Very Important Person) Entry
Conducting calls – enhanced functions Marking a VIP (Very Important Person) entry An incoming call for a VIP-marked entry is signalled with a VIP ringtone. When the handset is idle: Open the phonebook. Select the entry you want. Open the menu. Options VIP Entry Select the menu item and confirm. -
Page 38: Sending An Entry Or List Of Entries From The Local Phonebook To The System And Receiving Them Back
Conducting calls – enhanced functions Sending an entry or list of entries from the local phonebook to the system and receiving them back You can send individual entries or the entire phonebook to the communications system. For phonebook transfer from handset to handset via Bluetooth see Page 75. - Page 39 Conducting calls – enhanced functions Deleting a list in the communications system Prerequisite: A currently unused list or entry is saved on the communications system. If the handset with phone number 00 was used to send the list or entry to the communications system, any handset can be used to delete this list or entry.
-
Page 40: Making Calls Using Project Assignment (Cost Billing)
Conducting calls – enhanced functions Making calls using project assignment (cost billing) You can assign external calls to certain projects. Prerequisite: Project numbers (from 1 to 5) have been configured for certain projects and you have an account code (ACCT) for the project. The function must be approved for your communications system. -
Page 41: Using A Different Telephone In The Same Way As Your Own
Conducting calls – enhanced functions Using a different telephone in the same way as your own You can log on to another telephone belonging to the HiPath 4000 system via a personal identification number or PIN (this includes telephones of networked HiPath 4000 systems, for example, at other branches of your company). -
Page 42: Caller Id Suppression
Conducting calls – enhanced functions Call forwarding - follow me after successful identification: > < Select the menu item and confirm. VARY FORWARD SAVE Confirm the option shown. Call forwarding is activated immediately. Caller ID suppression The caller ID display can only be suppressed for one subsequent call and the setting is not saved if the number is redialled. -
Page 43: Activating/Deactivating Do Not Disturb
Conducting calls – enhanced functions Activating/deactivating do not disturb If you do not wish to take calls, you can activate do not disturb. Internal callers will hear the ringing tone and the announcement "Do Not Disturb"; external calls will be diverted to the attendant. The service personnel can also set up call forwarding destinations for the Do Not Disturb function, to which you can forward your internal and external calls. -
Page 44: Call Forwarding
Conducting calls – enhanced functions Call forwarding Using call forwarding You can program two types of call forwarding: • Fixed call forwarding and • Variable call forwarding. For fixed call forwarding, you program a forwarding destination that will remain valid until you change or delete it. You can activate and deactivate this forward- ing function. - Page 45 Conducting calls – enhanced functions Activating and deactivating fixed forwarding You can only activate and deactivate fixed forwarding if a destination number has been programmed. Open the system menu. > < Select and confirm the basic service. BASIC SERVICE > < Select the menu item and confirm.
-
Page 46: Variable Forwarding
Conducting calls – enhanced functions Variable forwarding For variable forwarding you can choose between six different call forwarding types: • Variable forwarding (unconditional forwarding) • Forwarding for internal • Forwarding for external • Forwarding on busy • Call forwarding no reply •... - Page 47 Conducting calls – enhanced functions Programming a forwarding destination Open the system menu. > < Select and confirm the basic service. BASIC SERVICE > < Select the menu item and confirm. DESTINATIONS Confirm the option shown. The display shows "Variable forwarding". FORWARD Confirm the option shown.
-
Page 48: Automatic Call Forwarding
Conducting calls – enhanced functions To select a different variable forwarding type, proceed as described on Page 45. Checking forwarding To check the status of the forwarding types, proceed as described on Page 45. The forwarding destination is shown in the second line if this vari- ... - Page 49 Conducting calls – enhanced functions Call forwarding with codes You can use codes to set up the following forwarding types: Forwarding type Code (example) * 51 Program and activate fixed forwarding * 41 Activate fixed forwarding # 51 Delete (and deactivate) fixed forwarding # 41 Deactivate fixed forwarding * 42...
- Page 50 Conducting calls – enhanced functions Programming and activating call forwarding Press the Talk key. Enter the code, for example, *51 (ask service personnel). You will hear the dial- ling tone. Enter the destination number. Enter the termination character. You will hear a confirmation beep and call for- warding is activated.
-
Page 51: Delayed Call Forwarding
Conducting calls – enhanced functions Delayed call forwarding This is configured for the entire system by service personnel. Prerequisite: The second call function must be activated Page 60. If "Forwarding on busy / after timeout" or "Forwarding after timeout" is activated on your handset Page 45 and a second call comes in, you will automatically ... - Page 52 Conducting calls – enhanced functions Enter the number of the other telephone. FINISHED? Confirm the option shown. Enter the PIN (only if your own station does not have the "Call forwarding for remote terminal" class of service). Confirm the option shown. FINISHED? Deactivating or checking: DEACTIVATE...
-
Page 53: Entering Commands Via Tone Dialling (Dtmf Suffix Dialling)
Conducting calls – enhanced functions Entering commands via tone dialling (DTMF suffix dialling) After dialling a phone number, you can activate DTMF tone dialling (dual-tone multifrequency signalling) in order to operate devices, such as answering ma- chines or automatic directory enquiry and switching systems by means of com- mand inputs. - Page 54 Conducting calls – enhanced functions Resuming a parked call The handset is not in the charging shell. Press the Talk key or Speakerphone key. Enter the system parking code (consult service personnel if you need assis- tance). Enter the parking position number between 1 and 9 that you have noted and 1 ...
-
Page 55: Conducting Calls - With Multiple Users
Conducting calls – with multiple users Conducting calls – with multiple users Call waiting You need to speak to a user in your communications system urgently, even though his line is busy. You can send a call waiting signal during his call to let him know you want to talk to him. -
Page 56: Busy Override
Conducting calls – with multiple users Busy override You need to speak to an internal user urgently, even though his line is busy. The "Override" function allows you to interrupt the ongoing call to pass on a mes- sage. The user is busy. >... -
Page 57: Toggling (Switching Between Calls)
Conducting calls – with multiple users Toggling (switching between calls) The Toggle function allows you to switch between two users without allowing them to speak to each other directly. The two users can be either external or in- ternal users. You can also start a conference. You are conducting a call. -
Page 58: Conducting A Conference
Conducting calls – with multiple users Conducting a conference In a system-assisted conference you can include up to 8 internal and external users. Users with system telephones can execute and/or use all functions listed below at the same time. ISDN telephones and external users are passive users and can only be added to the current conference. -
Page 59: Expanding A Conference
Conducting calls – with multiple users Setting up a conference from a consultation call You are connected to one user and you call a second user. Confirm the option shown. CONSULT Call another user. The second user answers, you announce the conference. >... -
Page 60: Transferring The Conference
Conducting calls – with multiple users Expanding the conference from a consultation call You wish to make a consultation call during the conference. > < CONSULT Select the menu item and confirm. The conference is placed on hold. Call a user. Make the consultation call. Either: >... -
Page 61: During The Conference
Conducting calls – with multiple users Announce that you are transferring the conference > < CONF. TRANSFER Select and confirm the option shown. You are disconnected from the conference. Press the On-hook key. During the conference You are taking part in a conference with 3 to 8 members and you wish to know about the other members or to disconnect a certain member or to disconnect the last member added to the conference. - Page 62 Conducting calls – with multiple users Activating and deactivating the camp-on function Open the system menu. > < Select and confirm the basic setting. BASIC SERVICE Either: Enter the service code. > < Select the menu item and confirm. SWITCHES >...
-
Page 63: Message Functions
Message functions Message functions Using the mailbox Callers who have tried to reach you during your absence can leave a callback request in your mailbox. In the mailbox you will also find voice or fax messages from the mail server (if this has been set up). -
Page 64: Using The Caller List
Message functions Using the caller list Callers who have tried to reach you during your absence are saved in the "Caller list". Callback requests Page 62 are also recorded here. Retrieving the caller list An advisory message appears and the message key flashes when one or more information messages or voicemails have been received for you. -
Page 65: Additional Functions
Additional functions Additional functions Handset alarm clock function When the alarm clock is activated, it rings every day or every day from Monday to Friday at the set time. The alarm clock is deactivated during automatic num- ber redial. The alarm will only sound with the set melody if the handset is in idle sta- tus. -
Page 66: Handset Appointment Reminder Function
Additional functions Handset appointment reminder function You can use your handset to remind yourself of up to 30 appointments. The handset must be in idle status at the time of the appointment reminder. The ap- pointment reminder function is deactivated during automatic number redial. The date and time must be set. -
Page 67: Deactivating An Appointment Reminder
Additional functions Deactivating an appointment reminder The handset is in idle status. Open the handset's main menu. á Select the menu icon and confirm. Organizer Calendar Select the menu item and confirm. The calendar for the current month is dis- played. -
Page 68: System Appointment Function
Additional functions System appointment function You can arrange for the communications system to remind you of an appoint- ment. For this to happen, you need to save the times at which you wish to be reminded. This is possible for a period of up to 24 hours in advance. Saving an appointment Open the system menu. -
Page 69: Selecting A Base
Additional functions Selecting a base If your handset is registered at multiple bases (cordless systems), then you can set a specific base or the base with the best reception as the base to be used. The handset then switches automatically to this base. You can change the base name that is displayed on the handset at any time. -
Page 70: Setting The Base
Additional functions Setting the base You can configure individual settings on your system with your handset depend- ing on how your system is configured. Open the handset's main menu. Ï Select the menu icon and confirm. Settings System Select the menu item and confirm. Base Reset Select the menu item and confirm.... -
Page 71: Changing Display Key Assignments
Data communication with the PC To enable your handset to communicate with the PC, the Gigaset QuickSync program must be installed on your PC (free to download at http://wiki.unify.com/ wiki/DECT_Handset_accessory) After installing "Gigaset QuickSync", connect the handset to your computer us-... -
Page 72: Bluetooth Interface
Additional functions Bluetooth interface Before you can use your Bluetooth device, activate Bluetooth, ensure the devic- es are visible and then register the handset. You can register one Bluetooth headset at the handset. You can also register up to five data devices (PCs, PDAs and handsets) to send and receive address book entries as vCards or exchange data with the computer ( Page 75). -
Page 73: Registering Bluetooth Devices
Additional functions Registering Bluetooth devices The distance between the handset in Bluetooth mode and the activated Blue- tooth device (headset or data device) should be no more than 10 m. To connect a Bluetooth headset, see Page 29. If the Bluetooth connection is not yet established between the handsets, perform the following steps: Searching on your handset Open the handset's main menu. -
Page 74: Editing The List Of Known (Trusted) Devices
Additional functions Editing the list of known (trusted) devices Opening the list Open the handset's main menu. ò Select the menu icon and confirm. Bluetooth Select the menu item and confirm. Known Devices A corresponding icon appears next to each device name in the list displayed: Icon Explanation ô... - Page 75 Additional functions Rejecting/accepting an unregistered Bluetooth device If a Bluetooth device that is not registered in the list of known devices tries to connect with the handset, you will be prompted on the display to enter the PIN for the Bluetooth device (bonding). Rejecting Press the On-hook key briefly.
-
Page 76: Phonebook Transfer
Additional functions Phonebook transfer To transfer the phonebook data to or from the system without using Blue- tooth, see Page 37. Prerequisite: The Bluetooth connection between the devices is established Page 72. Open the phonebook. Select the entry. Press the display key.... -
Page 77: Setting The Handset
Setting the handset Setting the handset You can change the standard settings of the handset if you are not happy with them. Setting the speaker volume During a call You can adjust the speaker volume during a call via the earpiece or speaker- phone using a menu function. -
Page 78: Setting Advisory Tones
Setting the handset Setting advisory tones Can only be set if this menu item is visible. To set, see Page 86. The advisory tones have the following meaning: Advisory Explanation Key Tones Every key press is confirmed. Confirmation • Confirmation tone when saving inputs/settings and when placing the handset in the charging shell •... -
Page 79: Setting The Ringer
Setting the handset Setting the ringer Tones and melodies are saved on your handset. If you select the menu items Volume and Melodies, the ringtone sounds at the current setting. Open the handset's main menu. Ï Select the menu icon and confirm. Settings Audio Settings Select the menu item and confirm.... -
Page 80: Setting Ringing Tones And Pictures With Resource Directory
Setting the handset Setting time control for external calls Specify a time period when you do not want the telephone to ring, for example during the night. Select the menu item and confirm. Time Control Specify On or Off. If active: Select the required menu item. -
Page 81: Renaming And Deleting Screensavers/Caller Pictures/Sounds
Setting the handset Screensavers/caller pictures Press the display key. Show Toggle between the pictures. If you have saved a picture in an invalid file format, you will see an error mes- sage after selecting the entry. Press to exit the menu level. Sounds The selected sound is played immediately. -
Page 82: Checking The Available Memory
Setting the handset Checking the available memory You can show how much memory is left. Open the handset's main menu. · Resource Di- Select the menu icon and confirm. Select the menu item and confirm. Available Memory Activating or deactivating the ringer Deactivating the ringer Hold down the key until a confirmation tone is emitted. -
Page 83: Activating/Deactivating Automatic Call Answering
Setting the handset Activating/deactivating automatic call answering Can only be set if this menu item is visible. To set, see Page 86. This function allows you to accept calls by removing the handset from the charg- ing shell. Open the handset's main menu. Ï... -
Page 84: Setting The Display
Setting the handset Setting the display A number of options are available for setting the display. You can set the screen- saver (screen picture), the colour scheme, the font size and the display lighting. Screensaver/slide show A picture or slide show (all the pictures are displayed one after the other) from the resource directory Page 79 or the time can be displayed as a screensaver ... - Page 85 Setting the handset Colour scheme Five colour schemes are saved on your handset. By selecting a colour scheme you define the colours to be used for the font, menu items and background. If you change to a different colour scheme during a setting, it is immediately pre- viewed to show how it will appear later for all menus.
-
Page 86: Setting Keypad Illumination
Edit ³ = on). Rotating the display automatically Only OpenStage M3 plus and OpenStage M3 Ex plus! You can activate and deactivate the automatic position-dependent rotation of the information on the display. When activated, the display is rotated by 180° (upside down) in non movement and call statuses when you move the handset from a vertical to a horizontal position. -
Page 87: Setting The Conversion List For Vcard Transfer
Setting the handset Setting the conversion list for vCard transfer Can only be set if this menu item is visible. To set, see Page 86. See also Gigaset QuickSync Page 70, Phone numbers are usually specified as follows in e-mail programs, such as Mi- crosoft Outlook for example: +49 (30) 11111111. -
Page 88: Resetting The Defaults
Setting the handset Resetting the defaults Can only be set if this menu item is visible. To set, see Page 86. This function allows you to reset your mobile phone to the defaults, for example, if you want to pass it on to someone else or reset it. The handset features are handled as follows: Feature Action... - Page 89 Setting the handset Default settings Setting Explanation/notes Levels Default state Tones and Ringer volume signals Ringer melody, external Ringer melody, internal Alerting tone Earpiece volume Volume in speakerphone mode Timed reminder Melody Sonic Volume Cannot be set Key tones, audible each time a key is pressed Warning tone, audible approximately five minutes be-...
-
Page 90: Telephone Blocking
Enter the value "0000" again to deactivate the PIN. If you have forgotten your PIN, please contact Unify Service. It will be re- set at your own expense. The handset is returned to the default state (see Page 87). -
Page 91: Locking The Telephone Line To Prevent Misuse
Telephone blocking Locking the telephone line to prevent misuse You can prevent unauthorised persons from using your telephone (and the sys- tem directory) during your absence. Prerequisite: You have been assigned a personal identification number (PI N) by the service personnel responsible for your communications system. As an alternative, however, you can lock your handset against misuse Page 89. -
Page 92: Accessing System Functions
Accessing system functions Accessing system functions The system functions can be accessed via the Service menu. The following ex- ample shows how to select the "Camp-on" function. Opening the Base menu. > < BASIC SERVICE Select and confirm the basic service. The Service menu is displayed. >... -
Page 93: Personal Alarm Functionality
Terms Operating modes The OpenStage M3 Plus and OpenStage M3 Ex Plus handsets can be used as personal alarm devices with voice communication capability (PNG-S) in Alarm Mode and PNG Mode. Various settings are performed on the handset for this purpose, which enable automatic or manual alerting. - Page 94 Personal alarm functionality Alarm key The alarm key initiates a manual alarm. The alarm destination (default: phone number 112) can be configured. The alarm key also works even if monitoring mode is not activated. When the alarm key is pressed, the current function is first interrupted or ended and the configured alarm function is then executed.
- Page 95 Personal alarm functionality Alarming signal If an alarming signal is triggered, the handset automatically generates alarm calls to the configured alarm destination. The alerted party recognises the alert- ing party from the caller's phone number for example. The alarm subscriber's phone number has to be transmitted for this purpose. The communications system used must support the caller ID function.
- Page 96 Personal alarm functionality Alarm signal An alarm signal/positioning tone can be issued by the handset in order to locate the alerting party. Depending on the alarm type, it can be established whether or not a positioning tone is to be issued in the event of an alarm. The manual alarm can also be triggered with/without a positioning tone depend- ing on the situation: •...
-
Page 97: Alarm Types (Overview)
Personal alarm functionality Alarm types (overview) Alarm Type Explanation Manual personal alarm Triggered by pressing the red alarm key on the handset. Automatic personal alarm Triggered independently by the handset after a specific time if a defined event occurs and the pre- alarm (see below) was not confirmed by the per- son in question: •... -
Page 98: Activating Monitoring
Personal alarm functionality Activating monitoring Note: The alarm functionality must be configured prior to initial use. Press the centre key three times. Open the handset's main menu. É Extras Select the menu icon and confirm. [Mode] Activation Select the menu item and confirm. The procedure for activating the alarm func- tionality is started. -
Page 99: Prealarm
Personal alarm functionality Prealarm The prealarm signals a pending alarm. If you do not confirm this prealarm, the handset sends emergency alarm signals to the configured location. Note: If a prealarm is signalled during a call, you have to first confirm the prealarm in order to prevent the pending alarm. -
Page 100: Sending An Emergency Alarm Signal/Calling For Assistance
Personal alarm functionality Sending an emergency alarm signal/calling for assistance In monitoring mode The handset is in monitoring mode. Automatic alarming signal The alarm sensors in the handset recognise operating statuses that trigger an alarming signal. Certain alarm types initially generate a prealarm (configurable). If you do not ac- knowledge this alarm, the handset sends emergency alarm signals to the con- figured alarm destination. -
Page 101: Deactivating Monitoring
Personal alarm functionality Deactivating monitoring Press the centre key three times. Open the handset's main menu. É Select the menu icon and confirm. Extras Select the menu item and confirm. The procedure for disabling the alarm func- [Mode] Activation tionality is started. The handset disables the alarm functionality automatically. -
Page 102: Function Test When Activating Alarm Mode And Png Mode
Personal alarm functionality Function test when activating Alarm Mode and PNG Mode A function test has to be performed before the Alarm Mode or PNG Mode is used. This test is performed automatically by the handset. Please follow the instructions on the display. 1. -
Page 103: Appendix
Appendix Appendix Troubleshooting Some malfunctions can be resolved without outside intervention. The following table provides a list of such malfunctions. All other malfunctions should be reported to the relevant service person- nel. Error Possible cause Remedy No display. The handset is not switched on. Press the On-hook key until con- firmation is received. -
Page 104: Cleaning The Handset
Appendix Error Possible cause Remedy The following appears: Speed-dial number not availab- Correct your input, select a per- le, appointment entered incor- mitted option, enter the phone Feature not avail. rectly, entry blocked or not allo- number in full. wed, prerequisite not fulfilled Incorrect entry. -
Page 105: General Specifications
OpenStage M3 Plus Type for OpenStage M3 Ex and V30145-K1310-X453 OpenStage M3 Ex Plus The handset is supplied with the recommended battery. Only an original battery may be used. Re- placement batteries can be ordered if necessary from Unify Service. -
Page 106: Handset Operating Times/Charging Times
Appendix Handset operating times/charging times The operating time of your handset depends on the capacity and age of the battery and the way it is used. (All times are maximum possible times). Stand-by mode (hours) 200/160 Talktime (hours) Charging time in charger (hours) without/with display backlight Charging shells European Union... -
Page 107: Accessories
Use only original accessories. This will avoid possible health risks and personal injury and also ensure that all the relevant regulations are complied with. Source For information on accessories (such as headsets, protective pouches), contact Unify at the fol- lowing address: http://wiki.unify.com/wiki/DECT_Handset_accessory) -
Page 108: Writing Names
Accessing additional functions via the PC interface To enable your handset to communicate with the PC, the Gigaset QuickSync program must be installed on your PC (free to download a http://wiki.unify.com/wiki/DECT_Handset_accessory) Transferring data After installing Gigaset QuickSync, connect the handset to your computer Seite 17 using Blue- ... -
Page 109: Declaration Of Conformity
Appendix Declaration of conformity Your handset is supplied for use within a specific country, which is displayed on the underside of the device. Country-specific requirements have been taken into consideration. The device complies with the basic requirements of the R&TTE Directive and therefore displays the CE symbol. -
Page 110: Index
Index Index Bluetooth interface ........... 71 Busy override ............55 Numerics Call 2.5 mm jack ..............5 Parking ..............52 Placing on hold ............. 25 Transferring ............55 Call forwarding ............43 Accessories ............106 Activating/deactivating .......... 47 Activating ..............22 Automatic .............. - Page 111 Index Deactivating ............. 22 Hash key ...............5 Declaration of conformity ........108 Headset ..............29 Default state ............. 87 Holding ..............25 Delayed call forwarding ..........50 Deleting Entry ..............31 Phonebook ............36 Identification number ..........40 Redial list ............... 31 Information message, viewing ........
- Page 112 Index Mailbox ............40 Parking a call ............52 Deleting entries ............. 62 Parts of the device ............. 5 Viewing ..............62 Personal alarm Making anonymous calls .......... 41 Automatic .............. 96 Making calls ............. 23 Manual ..............96 Man Down Alarm ............96 Phonebook Manual redial ............
- Page 113 Index Safety notes ............... 2 Talk key ..............5 Saving a phone number ........... 34 Technical data ............104 Screw for battery cover ..........5 Technical warning ......... 93 Second call ............... 60 Technical warning signal .......... 93 Second connection (consultation) ......25 Telephone volume ...........
Need help?
Do you have a question about the OpenStage M3 and is the answer not in the manual?
Questions and answers