Table of Contents
Advertisement
Quick Links
Download this manual
See also:
User Manual
Advertisement
Table of Contents

Related Manuals for Xerox DocuPrint C2255


Summary of Contents for Xerox DocuPrint C2255
- Page 1 DocuPrint C2255 Quick Reference Guide...
- Page 2 The data saved in the hard disk of the machine may be lost if there is any problem in the hard disk. Fuji Xerox is not responsible for any direct and indirect damages arising from or caused by such data loss.
-
Page 3: Preface
These illustrations are current as of March 2008, however the machine and its specifications may be changed without notice. Fuji Xerox shares the global concern about environmental conservation and has integrated that concern in its business activities from research and development to disposal. We have implemented a number of programs to lessen the burden on the environment. -
Page 4: Security Features
DocuPrint C2255 Features High Speed, High Image Quality • A4 (monochrome/color): 25 ppm • The oil-free fusing technology produces prints you (Continuous one-sided printing of a single can easily write and place sticky-notes on. document) • Prints all types of documents in the optimal print quality. -
Page 5: Table Of Contents
Contents Preface ..........3 Printing......... 38 DocuPrint C2255 Features....4 Printing from a Computer......38 Contents ..........5 Paper ........... 40 Contents of the User Guide About Paper ..........40 (Reference)........7 Supported Paper ........40 Types of Manuals ......... 8 Unsupported Paper ......44... - Page 6 Appendix........81 Options ............ 81 Life of Consumables and Regular Replacement Parts ......82 Obtaining Product Information ....83 Obtaining the Latest Print Driver Version ..........83 Updating the Printer's Firmware ... 83 Installing Additional Memory....83 Procedure for Installing Additional Memory ..........
-
Page 7: Contents Of The User Guide (Reference)
Contents of the User Guide (Reference) Preface Control Panel Settings DocuPrint C2255 Features Overview of the Common Menus Common Menus Setting Contents Types of Manuals Troubleshooting Using This Guide Clearing Paper Jams Safety Notes Hardware Problems (Power Failure, Licenses Abnormal Noise, etc.) -
Page 8: Types Of Manuals
Fuji Xerox software. •This guide is on the Driver CD Kit CD-ROM. < > : Indicates key cap text for keys on your... -
Page 9: Safety Notes
Any unauthorized alteration including an addition of new functions or connection to external devices may not be covered by the product warranty. Contact your local Fuji Xerox representative for more information. Follow all warning instructions marked on this product. The warning marks stand for the followings: Used for item that if not followed strictly, can lead death or severe or fatal injuries and the possibility to do it is comparatively high. - Page 10 Consult your local Fuji Xerox representative to check if an outlet is grounded. Hold the plug not the cord when unplugging this product, or it may damage the cord and cause electric shock or a fire accident.
-
Page 11: Machine Installation
Machine Installation Keep the minimum clearance as follows for ventilation and an access to the power plug. Unplug the product if an abnormal condition is noted. Do not locate this product where people might step on or trip over the power cord. Friction or excessive pressure may generate heat and eventually cause electric shock or a fire accident. -
Page 12: Operational Safety
“High Temperature” or “High Voltage” promptly in the following conditions, then marks on. contact your local Fuji Xerox representative. Keep electrical and mechanical safety interlocks active. Keep the safety interlocks • The product emits smoke or its surface is unusually hot. - Page 13 If you spill a large volume Press the <TEST> button located on of toner, contact your local Fuji Xerox the rear left side of the product, with a representative. thin stick or similar object.
-
Page 14: Warning And Caution Labels
Warning and Caution Labels Be sure to follow the warning and caution labels placed on the machine. Do not touch areas with labels indicating high voltage or temperature. This can cause an electric shock or burn. In China In other countries Safety Notes... - Page 15 Appendix 2, the test was performed under the condition of monochrome copying, using the toner type, DocuPrint C2255 Toner (Black), that • Product Safety Certification (CB) is recommended for this product. This product has been tested and found to comply with IEC60950-1:ed.1.
-
Page 16: Licenses
Licenses PROFITS; OR BUSINESS INTERRUPTION) HOWEVER CAUSED AND ON ANY THEORY OF LIABILITY, WHETHER IN CONTRACT, STRICT LIABILITY, OR TORT (INCLUDING NEGLIGENCE OR OTHERWISE) ARISING IN RSA BSAFE (For the Models ANY WAY OUT OF THE USE OF THIS Other than those Available in SOFTWARE, EVEN IF ADVISED OF THE China) POSSIBILITY OF SUCH DAMAGE. - Page 17 OpenLDAP Except as contained in this notice, the name of a copyright holder shall not be used in advertising or otherwise to promote the sale, use or other Copyright 1998-2006 The OpenLDAP Foundation dealings in this Software without prior written All rights reserved.
- Page 18 The names of the copyright holders may not be FOUNDATION, ITS CONTRIBUTORS, OR THE used to endorse or promote products derived from AUTHOR(S) OR OWNER(S) OF THE this software without their specific prior written SOFTWARE BE LIABLE FOR ANY DIRECT, permission.
-
Page 19: Illegal Copies And Printouts
Illegal Copies and XPS (XML Paper Specification) Printouts This product may incorporate intellectual property owned by Microsoft Corporation. The terms and conditions upon which Microsoft is licensing such intellectual property may be found at http:// go.microsoft.com/fwlink/?LinkId=52369. Copying or printing certain documents may be illegal in your country. -
Page 20: Printer Environment Settings
Printer Environment Settings When you are finished installing your printer using the ‘Setup Guide’, go on to set up its operating environment. Supported Operating Environments The printer can be used both as a local and a network printer. When used as a local printer, the printer is connected directly to a computer. - Page 21 Supported Operating Systems and Operating Environments Note • The supported operating systems are subject to change without prior notice. Visit our web site for the latest information. Connectivity Local Network Port Ether Port Name NetWare Parallel 9100 Talk TCP/ TCP/ IPX/ TCP/ TCP/...
-
Page 22: Connecting A Cable
Connecting a cable Plug the network cable into the interface connector on the printer. Connect the printer to your computer using an interface cable appropriate for your connection method. An interface cable is not included with the printer. You must purchase it separately. USB Connection When using a USB connection, install the print driver on your computer before connecting the... -
Page 23: Switching The Control Panel Display Language
Switching the Control Setting the Network Panel Display Language Environment Set either [English], [Korean], [Simp. Chinese], or This section explains how to install your printer in [Trad. Chinese] as the display language for the a TCP/IP environment. When installing the printer control panel of the printer. - Page 24 The following explains how to set up an IP Press the < > or <OK> button to select. address on the Control Panel. Depending on your [IP Mode] is displayed. network environment, your printer also needs a TCP/IP Settings subnet mask and gateway address. Consult your network administrator for the settings required for IP Mode your printer.
- Page 25 14. Press the < > or <OK> button to select. 21. Press the <Return> button to return to The current IP address is displayed. [Subnet Mask]. IP Address IPv4 Settings •000.000.000.000 Subnet Mask 15. Enter the value in the first field using the 22.
-
Page 26: Setting An Ip Address (Ipv6)
Configuring the Printer Setting an IP Address (IPv6) Using CentreWare Internet The printer can use an IPv6 address in an IPv6 Services network environment. By default, the printer [IP Mode] is set to [Dual Stack] to automatically detect either IPv4 or IPv6. If you connect the printer to an IPv6 network, an Overview of CentreWare Internet IPv6 address is automatically set. -
Page 27: Setting Up The Printer
Setting Up a Web Browser When using CentreWare Internet Services, we recommend you specify the address of the printer without using a proxy server. Note • If you access CentreWare Internet Services using a proxy server, the response from the service may be slow or the service may not be displayed. -
Page 28: Centreware Internet Services Settings
Custom Services settings. You can configure settings related to accouting. Accounting • Setting Xerox Standard Accounting / Accounting Configuration / Accounting Login Screen Settings Security You can configure settings related to security • Setting Authentication Configuration / User Details Setup / Remote Authentication Servers / IP Filtering / Audit Log / Machine Digital Certificate Management / IPSec / Certificate Management / 802.1x /... -
Page 29: Using Centreware Internet Services
Using CentreWare Internet Using the Online Help Services For information about the settings on each screen, refer to the online help for CentreWare Internet Follow these steps when accessing CentreWare Services. Click [Help] to display the [Help] Internet Services. window. Start your computer and launch a web browser. -
Page 30: Basic Operation
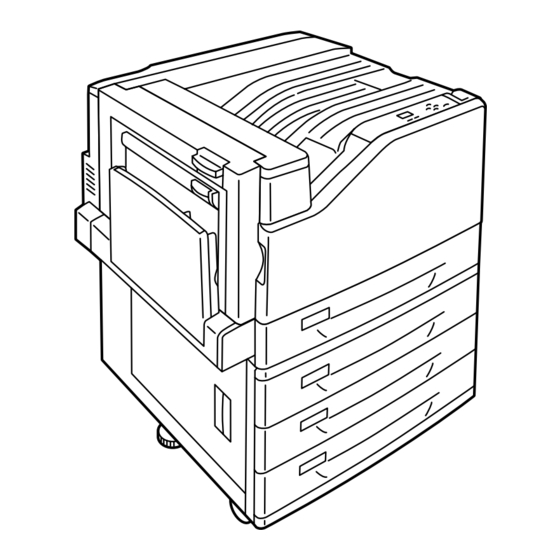
Basic Operation Main Components and Functions Main Unit Front view Note • The illustrations in this guide show the printer with the Duplex unit and 3 Tray Module installed. Name Description Center tray Delivers printed output face down here. Power switch Switches the printer on/off. - Page 31 Back Name Description Parallel connector (option) Installing a Parallel Port (option) allows connection of a Centronics interface cable. USB 2.0 connector Allows connection of a USB 2.0 cable. Ethernet connector Allows connection of a 10Base-T/100Base-TX Ethernet interface cable. Expansion device connector Allows connection of expansion devices supported by the printer.
- Page 32 Interior Name Description Lever Unlocks the drum cartridge cover when replacing the drum cartridges. Toner cartridges For loading of four toner (imaging agent) colors: black (K), cyan (C), magenta (M), and yellow (Y). Waste toner bottle For loading of a waste toner bottle to collect used toner. Drum cartridge cover Open to replace the drum cartridges or to clean the interior.
-
Page 33: Control Panel
Control panel 13 12 Name Description Indicators In the event of an error, use this to verify the location indicated in an error message displayed on the display. <Online> button Pressing the <Online> button takes the printer offline. The <Ready> lamp is off and printing is not done while the printer is offline. -
Page 34: Switching On/Off The Power
Switching On/Off the Press the < > side of the printer’s power switch to turn off power. Power Switching On the Power Press the <|> side of the printer’s power switch to turn on the power. About the Ground Fault Interrupter A ground fault interrupter is located on the back left of the printer. -
Page 35: Setting/Exiting The Energy Saver Modes
Setting/Exiting the Energy Canceling a Print Job Saver Modes Print jobs can be canceled either from your computer or the control panel. Entering the Energy Saver Canceling a Print Job Being Modes Processed on a Computer The printer has Energy Saver modes that reduce electric power consumption while the printer is in Double-click the printer icon on the task... -
Page 36: Importing Printer Information To A Print Driver
Press the <Delete Job> button. Click [Get Information from Printer]. This starts the cancellation process. [Off-line] reappears after the process is complete. All data: Deleting… Off-line Press the <Online> button. The [Ready to print] screen reappears. Ready to print The printer information is imported to the print driver. - Page 37 Press the < > or <OK> button to select. [Job History] is displayed. Print Reports Job History Press the < > button until [Configuration] is displayed. Print Reports Configuration Press the < > or <OK> button to select. A print start confirmation screen appears. Configuration Use OK to print Press the <OK>...
-
Page 38: Printing
Printing This chapter describes various printing methods using a PCL print driver. Printing from a Computer This section outlines the basic procedure for sending print jobs from Windows applications. The procedure uses Windows XP WordPad as an example. (The actual procedure may vary depending on the application being used.) On the [File] menu of your application, select [Print]. - Page 39 Print Features in the Properties Dialog Box The following introduces some of the print features available on each tab of the print driver. For details on each feature, refer to the online help for the print driver. Feature Paper/Output • 2-Sided Print •...
-
Page 40: Paper
Capacity Bypass tray 100 sheets (Fuji Plain (60 - 79 g/m , B4 , A4 , A4 Xerox P paper) or 10 Recycled (60 - 79 g/m mm max. , B5 , A5 , A5 Bond (80 - 105 g/m , B6 , 11 x 17"... - Page 41 560 sheets per tray Plain (60 - 79 g/m , B4 , A4 , A4 (optional) (Fuji Xerox P paper) Recycled (60 - 79 g/m , B5 , A5 , 11 x 17" Bond (80 - 105 g/m 8.5 x 14"...
-
Page 42: Through 4
Supported Paper Specifications If using general paper (commercially available paper), make sure that it meets the following specifications. To achieve the best print quality, however, we recommend you to use standard paper instead. Paper Tray Specifications (G.S.M.) Bypass tray 55 - 256 g/m Tray1 60 -256 g/m Tray 2 - 4 (optional) - Page 43 Image Paper Type Product Name G.S.M. Quality Paper Characteristics and Precautions Setting Process P (Thick) Paper Plain Thick paper with little see-through, optimal 78 g/m for duplex printing. Green Paper Plain High-speed printer paper with minimal lint 75 g/m generation and outstanding write ability Ncolor081 Bond Color printing paper with higher whiteness...
-
Page 44: Unsupported Paper
Loading Paper Unsupported Paper Do not use the following types of paper or media. This section explains how to load paper in the They can cause paper jams or printer failure. bypass tray or trays 1 - 4. • Transparencies other than those recommended Loading Paper in the Bypass •... - Page 45 Bypass Tray Feed Orientations for Important • If the paper will not feed into the machine when printing Envelopes thick paper, curl the leading edge of the paper as shown in the illustration and then load it into the tray. However, Make sure to use the proper orientation whenever paper that is overly curled or creased will cause paper jams.
- Page 46 Loading paper into Trays 1 Load the paper with its print side facing up and its leading edge aligned with the left side through 4 of the drawer. The following example shows how to load paper into Tray 1. Use the same procedure to load paper into trays 2, 3, and 4.
-
Page 47: Setting The Paper Sizes Of Trays 1 Through 4
Paper Sizes/Paper Types for Trays 1 Press the < > or <OK> button to select. [Network/Port] is displayed. through 4 Admin Menu Though the printer can detect the size and Network/Port orientation of paper loaded in paper trays 1 through 4, use the control panel to configure the size setting after loading custom size paper. -
Page 48: Changing The Paper Type Settings Of Trays 1 Through 4
Changing the Paper Type 11. Press the < > or <OK> button to select. The current set value is displayed. Settings of Trays 1 through 4 Portrait (Y) Size If the paper type setting does not match the actual •140 mm type of the paper, toner may not fuse properly to the paper, resulting in poor print quality. - Page 49 Press the < > or <OK> button to select. [Tray 1] is displayed. Paper Type Tray 1 Press the < > button until the desired paper tray is displayed, and then press the < > button to display its current setting. The current set value is displayed.
-
Page 50: Troubleshooting
• Do not attempt to remove a paper jammed deeply inside the product, particularly a paper wrapped around a fuser or a heat roller. Otherwise, it may cause injuries or burns. Switch off the product promptly and contact your local Fuji Xerox representative. Important •... -
Page 51: Paper Jam In The Bypass Tray
Paper Jam in the Bypass Tray Remove the jammed paper and any paper that is wrinkled. If the paper is torn, check to make sure that Inspect the area of the paper tray where the there are no pieces of paper left inside. paper enters the printer and remove the jammed paper. -
Page 52: Paper Jam Inside Cover B (Optional Duplex Unit Installed)
If the edge of the jammed paper is coming Press the center of cover A and gently close out in the direction of the center tray, pull the it. Next raise the bypass tray. paper straight out in the output direction. Important •... -
Page 53: Paper Jam Inside Cover C
Close cover B and then raise the bypass tray. Paper Jam Inside Cover C In the following example, the printer has a 3 Tray Module (option) installed. While pulling the release lever, gently open cover C. Remove the jammed paper. Gently close cover C. -
Page 54: Hardware Problems
Hardware Problems (Power Failure, Abnormal Noise, etc.) Symptom Cause/Remedy The printer is not on. Is power switched off? Switch the power on by pressing the <|> side of the power switch. Is the power cord firmly plugged into the power outlet? Switch off the printer, and then disconnect and reconnect the power cord from the power outlet and the printer. -
Page 55: Printing Problems
Printing Problems Symptom Cause/Remedy The <Error> lamp is blinking. An error occurred that cannot be resolved by the user. Make a note of the error message or error code displayed on the control panel, switch the power off, unplug the power cord from the power outlet, and contact our Customer Support Center or your dealer. - Page 56 Symptom Cause/Remedy Printing is slow. The buffer capacity may be too low. If you are printing a high-resolution document, use [Allocate Memory] on the control panel to reduce the memory capacity of unused items, which increases the capacity of the print page buffer. Increasing the buffer capacity can speed up printing.
-
Page 57: Print And Image Quality Problems
Print and Image Quality Problems Symptom Cause/Remedy Output is too light. The paper is damp. Load fresh paper. (Faded or unclear) The paper is not appropriate for the printer. Load appropriate media. Refer to • “Supported Paper” (P. 40) A drum cartridge or the fuser unit is damaged or has deteriorated. Depending on its condition, the drum cartridge or fuser unit may need replacement. - Page 58 Symptom Cause/Remedy The whole page is printed A drum cartridge is damaged or has deteriorated. Depending on its condition, the drum black. cartridge may need replacement. Contact our Customer Support Center or your dealer. There may be something wrong with the high-voltage power supply. Contact our Customer Support Center or your dealer.
- Page 59 Symptom Cause/Remedy Text is smeared. The paper is not appropriate for the printer. Load appropriate media. Refer to • “Supported Paper” (P. 40) The paper is damp. Load fresh paper. Condensation may have formed in the printer. On the control panel, set the Sleep mode trigger time to more than one hour, and let the printer stand with its power on.
- Page 60 Symptom Cause/Remedy Print quality on transparencies Unsupported transparencies or envelopes are loaded in the printer. Load appropriate or envelopes is poor. media. Refer to • “Supported Paper” (P. 40) Check if the paper type setting on the print driver or control panel is set correctly. Refer to •...
-
Page 61: Paper Feed Problems
Paper Feed Problems Symptom Cause/Remedy Paper does not feed properly. Is the paper loaded correctly? Paper jams occur. Reload the paper correctly. Before loading labels, transparencies, or envelopes, fan Multiple sheets feed at once. them to make sure that they are separated. Paper feeds skewed. -
Page 62: Error Messages And Error Codes
Error Messages and Error Codes Error Messages (in Alphabetical Order) The following table lists the error messages that appear on the control panel. Note • If the message text cannot fit on a single screen, use the < > and < >... - Page 63 Message Symptom/Cause/Remedy The correct type of paper is not loaded in the paper tray N. Check Tray N Load paper of the size, orientation, and type indicated by the message, into paper <size and orientation> <type> tray N. (N: Whichever from 1 to 4) Note •...
- Page 64 Message Symptom/Cause/Remedy Paper Jam A paper jam occurred in the printer. Open Cover A, Open cover A and pull lever A1. After confirming the location of the paper jam, pull Lever A1 and remove the jammed paper. pull paper up Refer to •...
- Page 65 Message Symptom/Cause/Remedy Ready to print Drum cartridge X needs to be replaced soon. Have a new replacement for the displayed drum cartridge ready. There is enough left Order Drum: X to print approximately 1500 pages. (X: Whichever from R1 to R4) Ready to print The X toner cartridge needs to be replaced soon.
- Page 66 Message Symptom/Cause/Remedy Ready to print The Fuser Kit has reached the end of its replacement life. Contact our Customer Support Center or your dealer. Replace Fuser R8 • Replace Fuser Note Cartridge R8. • Pressing the <Information> button will display detailed information on the control panel.
-
Page 67: Error Codes
Error Codes Error codes are six-digit numbers that appear on the control panel when errors occur. Such errors include abnormal print jobs and printer malfunctions. Error codes provide important information that identifies the causes of errors. Please have the applicable error codes on hand when calling our Customer Support Center or your dealer. - Page 68 Error Code Cause/Remedy 042-337 The vents on the right side of the printer may become clogged. After removing the blockage from the right side, wait a few minutes and turn the printer back on. If the same error code is displayed again, contact our Customer Support Center or your dealer. 077-215 A communication error occurred between the printer and optional Single Tray Module and 3 Tray Module (paper trays 2 to 4).
-
Page 69: Replacing Consumables
Replacing Consumables Types of Consumables This printer uses the consumables listed below. To order them, contact the dealer where you purchased the printer. Important • This printer is designed to provide the most stable performance and print quality when used with genuine consumables. If you use consumables with specifications different from those of the genuine consumables, printer performance may not be at its optimum. -
Page 70: Handling Consumables
• Never throw a toner cartridge into an open flame. Remaining toner in the cartridge may catch fire and cause burn injuries or explosion. If you have a used toner cartridge no longer needed, contact your local Fuji Xerox representative for its disposal. -
Page 71: Replacing Toner Cartridges
Replacing Toner Important • Make sure that the power is on when replacing the toner Cartridges cartridges. • When placing a used toner cartridge on the floor or on a table, place a few sheets of paper under the cartridge to The printer has toner cartridges for four colors: catch any toner that may spill. -
Page 72: Replacement Procedure
Replacement Procedure With the label of the toner cartridge facing upwards, insert it as far as it will go. After confirming that the printer is not performing any operation, open the front cover. Press the toner cartridge in so it sets securely in place. -
Page 73: Replacing Drum Cartridges
Replacing Drum Replacement Procedure Cartridges Important • Make sure that the power is on when replacing a drum cartridge. The following messages appear on the printer's • Check the position of the applicable drum cartridge (R1, control panel when a drum cartridge is near or R2, R3, R4) on the left side of the control panel, and reaches the end of its life. - Page 74 Grasping the handle of the drum cartridge With the protrusions inserted into the holes, indicated by the displayed message, pull out the black protective sheet from the carefully pull out the cartridge. top of the drum cartridge. Here we will use cartridge R1 as an example. Slide the orange knob towards the printer, Important which will push the drum cartridge inside the...
-
Page 75: Replacing The Waste Toner Bottle
Replacing the Waste Toner 10. Close the drum cartridge cover. Bottle Toner that remains on the drum after printing is complete is gathered into the waster toner bottle. The following messages appear on the printer's control panel when the waste toner bottle is near or reaches the end of its life. - Page 76 Rotate the lever on the front left side to Important • Make sure you pull the cleaning rods out as far as they unlock it. will go. Also push them in as far as they will go. • Do not use excessive force when pulling the cleaning rods.
-
Page 77: Replacing The Fuser Unit
Replacing the Fuser Unit Grasp the waste toner bottle with your other hand as shown in the illustration, and pull it out of the printer. The following messages appear on the printer’s control panel when the fuser unit is near or reaches the end of its service life. - Page 78 Unplug the power cord from the power outlet Remove the new fuser unit from its package. and the printer. Holding it with both hands, slide it into the printer. Wait 40 minutes for the machine to cool off. Lower the bypass tray. While raising the release lever, carefully open cover A.
-
Page 79: Resetting The Counter
Replacing the Transfer Resetting the Counter Belt Cleaner After replacing the fuser unit, perform the required control panel operations to reset their respective counters. Replace the fuser unit and the transfer belt cleaner at the same time. When replacing the fuser unit, be sure to reset the counter on the control panel. - Page 80 Pull out the transfer belt cleaner with both Rotate the transfer belt cleaner cover to the hands and lower it to remove it. left to close it. Important Close the front cover. • When pulling out the transfer belt cleaner, grasp it with both hands so you do not drop it.
-
Page 81: A Appendix
Xerox P paper). Installs directly under the printer unit. 3 Tray Module EL300696 Three paper trays for loading up to 560 sheets of plain paper (Fuji Xerox P paper). Installs directly under the printer unit. Duplex unit EL300698 Required for 2-sided printing. -
Page 82: Life Of Consumables And Regular Replacement Parts
Life of Consumables and Regular Replacement Parts Regular Replacement Parts Part Name Replacement Life Maintenance kit (200K) Approx. 200,000 pages Life of Consumables Maintenance kit (480K) Approx. 480,000 pages Important • The printer has certain components that need to be Consumables Page Yield replaced periodically in order to maintain its functionality... -
Page 83: Obtaining Product Information
Kit CD-ROM that comes with the printer. To access the are based on the printer's initial factory default settings. web site, click [Fuji Xerox Web Site] on the startup The require memory capacity depends on the printer's window of the CD-ROM. - Page 84 Memory Memory Memory Memory capacity capacity capacity capacity 1-sided 2-sided 1-sided 2-sided Image Supported Supported Image Supported Supported Paper Size Paper Size Quality Output Output Quality Output Output High Standard (256 MB) High 512 MB Quality Quality (Standard+256 MB) Custom Custom Size Size...
-
Page 85: Procedure For Installing Additional Memory
Procedure for Installing Pull out the handle on the control board and then carefully pull the control board out of the Additional Memory printer. Place the control board on a table top or some other flat surface. This section describes how to install additional memory on the printer. -
Page 86: Installing The Hard Disk
Reinsert the control board back into the Note • After installing additional memory, use the properties printer. Holding its handle, slide the control dialog box of the print driver to change the printer board back into the printer. configuration. For details, refer to the online help for the print driver. - Page 87 Loosen the two screws on the back right side Connect each of the hard disk connector of the printer. cables to the connectors on the control board. Pull out the handle on the control board and then carefully pull the control board out of the Reinsert the control board back into the printer.
-
Page 88: Installing The Feature Enhance Kit
Connect the power cord to the printer. Loosen the two screws on the back right side Press the <|> side of the printer's power of the printer. switch to turn on the power. 10. Print the [Configuration Report] and confirm that [Hard Disk] is included for the [Machine Configuration] item in the [System Settings] section. - Page 89 Aligning the notch in the ROM card with the Tighten the two screws to secure the control tab in the R2 slot, insert the card straight into board in place. the slot. Next, press the ROM card down firmly into the slot. Insert securely as far as it can go.
-
Page 90: Installing The Parallel Port
Installing the Parallel Port 14. Press the < > button until [Software Options] is displayed. This section describes how to install the Parallel System Settings Port on the printer. Software Options Before performing the following procedure, assemble the Parallel Port and frame in 15. - Page 91 Unplug the power cord from the power outlet Aligning the Parallel Port (with frame) with and the printer. the control board connectors, insert the Parallel Port from above into the connectors. Loosen the two screws on the back right side of the printer.
-
Page 92: Connecting A Cable
Installing the TC/SC Font Tighten the two screws to secure the control board in place. This section describes how to install the TC/SC Font ROM on the printer. TC/SC Font ROM 10. Connect the connector conversion cable to the Parallel Port connector. Switch the power off by pressing the <... - Page 93 Pull out the handle on the control board and Reinsert the control board back into the then carefully pull the control board out of the printer. Holding its handle, slide the control printer. Place the control board on a table top board back into the printer.
-
Page 94: Installing The Korea Font Rom
Installing the Korea Font Pull out the handle on the control board and then carefully pull the control board out of the printer. Place the control board on a table top or some other flat surface. This section describes how to install the Korea Font ROM on the printer. - Page 95 Reinsert the control board back into the printer. Holding its handle, slide the control board back into the printer. Press the control board in as far as it will go. Tighten the two screws to secure the control board in place. Connect the power cord to the printer.
-
Page 96: Index
Index Symbols, Numerics Korea Font ROM ..... 94 Parallel Port......90 <... -
Page 97: Paper Feed Problems
Regular Replacement Parts ....82 Replacing consumables......69 drum cartridges . -
Page 98: Control Panel Menu Tree
Control Panel Menu Tree Control Panel Menu Tree Basic Control Panel Functions Character/Number Entry Functions To increase or decrease a value: < > or < > button To move up and down the menus: < > or < > button To move between digits or fields: <... - Page 99 •Disabled, Enabled Network/Port Parallel Port Status •Auto, PS, ESCP, HP-GL/2, PCL, Print Mode TIFF, HexDump, KS, KSSM, KS5895 •Enabled, Disabled •Normal, Binary, TBCP Adobe Protocol •30 Seconds Auto Eject Time 5 - 1275 Seconds(increment: 5 sec.) •Enabled, Disabled Bi-directional Disabled, •Enabled Port Status •Auto, PS, ESCP, HP-GL/2, PCL, Print Mode...
- Page 100 From B (previous page) ([Network / Port] continued) Disabled, •Enabled Port 9100 Port Status •Auto, PS, ESCP, HP-GL/2, PCL, Print Mode TIFF, HexDump, KS, KSSM, KS5895 Disabled, •Enabled •60 Seconds Connect Time-Out 2 - 65535 Seconds(increment: 1 sec.) •9100 Port Number 1-65535 •Disabled, Enabled TBCP Filter...
- Page 101 •Off, On System Settings Alert Tone •Off, On Panel Settings Panel Lock Reenter Passcode Change Passcode Unlimited,•Limit Max.LoginAttempts •5 Time(s) Login Attempts 1 - 10 times • Off Menu Auto Clear 1 - 30 Minutes 1 - 30 Minutes (increment: 1 min.) Low Power Mode •Enabled, Disabled •1 Minutes...
- Page 102 From D (previous page) ([System Settings] continued) •No Login Required, Local Accounts, Remote Accounts Authentication Login Type •NVM, Hard Disk User Detail Setup StoreUserDetails FailedAccess Log •On Failed Attempts 1-600 Time(s) •10 Time(s) •Disabled, Enabled SaveRemoteAccount •Off, On Charge Print PJLReceiveCommand •Off, On PJL OutputCommand...
- Page 103 Printer Settings • Off, Use Larger Size, Substitute Tray Use Closest Size, Select Bypass PaperTypeMismatch • ConfirmationScreen, Print Paper Type Tray 1 •Plain, Recycled, Bond, Plain S2, Heavyweight, Heavyweight A, Heavyweight B, Heavyweight C, Heavyweight S, HW S2, HW A S2, HW B S2, HW C S2, HW S S2, Extra Heavyweight, X-Heavyweight A, X-Heavyweight B, X-Heavyweight C, X-Heavyweight D, X-Heavyweight S, X-HW S2, X-HW A S2, X-HW B S2, X-HW C S2, X-HW D S2,...
- Page 104 •24.00M Allocate Memory 16.00 - 96.00 MB : 0.25 MB units •64K HPGL Auto Layout 64 - 5120 KB : 32 KB units Hard Disk •64K Parallel Receiving Buffer 64 - 1024 KB : 32 KB units •Off •1024K 1024 - 2048 KB : LPD Spool 32 KB units Hard Disk...
- Page 105 Use OK to init Init/Delete Data Use OK to init Hard Disk Use OK to init Initializing... Initialized. Delete All Data Or, Delete Job Reboot printer Use OK to init Print Meter Use OK to init Job Counters Maximum number of forms With HDD : 64 Del ESCP Forms 0001.abcdefgh...
Need help?
Do you have a question about the DocuPrint C2255 and is the answer not in the manual?
Questions and answers