Xerox CopyCentre C20 User Manual
Hide thumbs
Also See for CopyCentre C20:
- User manual (162 pages) ,
- Evaluator manual (16 pages) ,
- Brochure & specs (4 pages)

Related Manuals for Xerox CopyCentre C20


Summary of Contents for Xerox CopyCentre C20
-
Page 1: User Guide
CopyCentre C20 WorkCentre M20/M20i User Guide 604E07110 Downloaded From ManualsPrinter.com Manuals... - Page 2 , the digital X and all Xerox products mentioned in this publication are trademarks of Xerox Corporation. Product names and trademarks of other companies are hereby acknowledged. Changes, technical inaccuracies and typographical errors will be corrected in subsequent editions. Downloaded From ManualsPrinter.com Manuals...
-
Page 3: Table Of Contents
Machine Setup ..................2-19 Installing Software................... 2-23 3 Copy ..................3-1 Copying Procedure..................3-2 Basic Copy Features ................. 3-6 Special Copy Features ................3-10 Using Interrupt ..................3-14 Xerox CopyCentre C20, WorkCentre M20 and WorkCentre M20i User Guide Page i Downloaded From ManualsPrinter.com Manuals... - Page 4 TWAIN Scanner Program ................8-2 Scanning Procedure.................. 8-3 9 Machine Administration ............9-1 Machine Setup ................... 9-2 Reports ....................... 9-6 ControlCentre..................... 9-8 Department Codes................... 9-15 Passcode Protection ................9-22 Page ii Xerox CopyCentre C20, WorkCentre M20 and WorkCentre M20i User Guide Downloaded From ManualsPrinter.com Manuals...
- Page 5 Printer Specifications................12-3 Fax Specifications ................... 12-4 Scanner and Copier Specifications ............12-5 General Specifications ................12-6 Media Specifications ................12-7 13 Index ..................1-1 Xerox CopyCentre C20, WorkCentre M20 and WorkCentre M20i User Guide Page iii Downloaded From ManualsPrinter.com Manuals...
- Page 6 Page iv Xerox CopyCentre C20, WorkCentre M20 and WorkCentre M20i User Guide Downloaded From ManualsPrinter.com Manuals...
-
Page 7: Welcome
Regulations - Canada ..... 1-17 Environmental Compliance ....1-18 Xerox CopyCentre C20, WorkCentre M20 and WorkCentre M20i User Guide Page 1-1... -
Page 8: Introduction
Introduction The Xerox CopyCentre C20, WorkCentre M20 or WorkCentre M20i are a family of digital devices capable of being used for copying, printing, faxing, scanning and e-mail. The features and functions available on your machine depend on the model purchased: Xerox CopyCentre C20 This model is a digital copier and copies at 21 pages per minute. -
Page 9: About This Guide
Throughout this User Guide some terms are used interchangeably: Paper is synonymous with media. Document is synonymous with original. Xerox CopyCentre C20, WorkCentre M20 or WorkCentre M20i is synonymous with the machine. The following table offers further information about the conventions used within this Guide. -
Page 10: Related Information Sources
- This User Guide - The Quick Start Guide - The Quick Install Sheets - The System Administration Guide - The Xerox website http://www.xerox.com Page 1-4 Xerox CopyCentre C20, WorkCentre M20 and WorkCentre M20i User Guide Downloaded From ManualsPrinter.com Manuals... -
Page 11: Customer Support
If you require further assistance, call our experts at the Xerox Welcome Center, or contact your local representative. When telephoning please quote the machine serial number. Use the space below to make a note of the machine serial number:... -
Page 12: Safety
Safety Your Xerox product and supplies have been designed and tested to meet strict safety requirements. These include Safety Agency approval, and compliance to established environmental standards. Please read the following instructions carefully before operating the product and refer to them as needed to ensure the continued safe operation of your product. - Page 13 Quality Standards: The product is manufactured under a registered ISO9002 Quality system. If you need additional safety information concerning this XEROX product or XEROX supplied materials you may call the following number: EUROPE +44 (0) 1707 353434...
-
Page 14: Safety Standards
Safety Standards EUROPE This XEROX product is certified by the following Agency using the Safety Standards listed. Agency: TUV Rheinland Standard: IEC60950 3rd Edition Amendments A1, A2, A3, A4 and A11. USA/CANADA This XEROX product is certified by the following Agency using the Safety Standards listed. -
Page 15: Regulatory Information
Regulatory Information The CE marking applied to this product symbolizes Xerox Limited Declaration of Conformity with the following applicable Directives of the European Union as of the dates indicated: January 1, 1995: Council Directive 73/23/EEC amended by Council Directive 93/68/EEC, approximation of the laws of the member states related to low voltage equipment. -
Page 16: Laser Safety
Reference CFR Changes or modifications to this equipment not specifically approved by the XEROX 47 Part 15 Corporation may void the user's authority to operate this equipment. - Page 17 Xerox equipment which has been properly and regularly serviced and maintained should not have to undergo additional specific safety tests pursuant to the 1989 Regulation. Customers wishing to complete safety testing should contact Xerox Limited (see page 1-13 for details) for advice prior to any test implementation.
- Page 18 This will include ensuring XEROX equipment in such premises is safe. XEROX Limited’s Product Safety function has prepared a guide which contains a list of tests which may be completed by your XEROX Limited Customer Service Organization.
- Page 19 In the event of any defect being noted, the XEROX equipment will be switched off and disconnected from the supply until the defect has been corrected. You will be advised of such action to enable such defects to be corrected.
-
Page 20: Regulations - Europe
Finland Italy Spain In the event of problems, you should contact your local Xerox representative in the first instance. This product has been tested to and is compliant with TBR21, a technical specification for terminal equipment for use on analogue-switched telephone networks in the European Economic Area. -
Page 21: Regulations - Usa
WARNING: Ask your local Telephone Company for the modular jack type installed on your line. Connecting this machine to an unauthorized jack can damage Telephone Company equipment. You, not Xerox, assume all responsibility and/or liability for any damage caused by the connection of this machine to an unauthorized jack. - Page 22 Telephone Company may request that you disconnect the equipment until the problem is resolved. Repairs to the machine should be made only by a Xerox representative or an authorized Xerox service agency. This applies at any time during or after the service warranty period. If unauthorized repair is performed, the remainder of the warranty period is null and void.
-
Page 23: Regulations - Canada
This precaution may be particularly important in rural areas. CAUTION: Users should not attempt to make such connections themselves, but should contact the appropriate electric inspection authority or electrician, as appropriate. Xerox CopyCentre C20, WorkCentre M20 and WorkCentre M20i User Guide Page 1-17 Downloaded From ManualsPrinter.com Manuals... -
Page 24: Environmental Compliance
Environmental Compliance ® Energy Star XEROX Corporation designed this product to comply with the guidelines of the ENERGY ® ® STAR program of the Environmental Protection Agency. As an ENERGY STAR Partner, ® XEROX has determined that this product meets the ENERGY STAR guidelines for energy efficiency. -
Page 25: Getting Started
Machine Setup......2-23 Xerox CopyCentre C20, WorkCentre M20 and WorkCentre M20i User Guide Page 2-1... -
Page 26: Unpacking
( moved, push the switch to the lock position ( Pull open the paper tray and remove the packing material from the tray. Page 2-2 Xerox CopyCentre C20, WorkCentre M20 and WorkCentre M20i User Guide Downloaded From ManualsPrinter.com Manuals... - Page 27 Country. User AC Power Cord Documentation Drum Cartridge Starter Toner Cartridge WorkCentre M20 and M20i only: USB Cable Telephone Line Cord Software Xerox CopyCentre C20, WorkCentre M20 and WorkCentre M20i User Guide Page 2-3 Downloaded From ManualsPrinter.com Manuals...
-
Page 28: Machine Overview
Direct Scanning Standard Standard Standard E-mail Option Standard Paper Tray 2 Option Option Option Cabinet and Stand Option Option Option Foreign Interface Option Option Option Page 2-4 Xerox CopyCentre C20, WorkCentre M20 and WorkCentre M20i User Guide Downloaded From ManualsPrinter.com Manuals... -
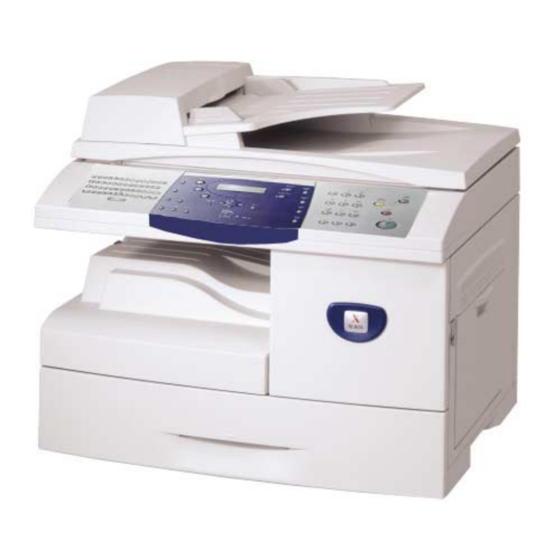
Page 29: Component Location
Front Cover Paper Tray 2 NOTE: The components on each model vary, this picture represents the WorkCentre M20i with the optional Paper Tray 2. Xerox CopyCentre C20, WorkCentre M20 and WorkCentre M20i User Guide Page 2-5 Downloaded From ManualsPrinter.com Manuals... -
Page 30: Rear View
Paper Exit Extension Power Switch Parallel Connector USB Connector NOTE: The components on each model vary, this picture represents the WorkCentre M20i, standard configuration. Page 2-6 Xerox CopyCentre C20, WorkCentre M20 and WorkCentre M20i User Guide Downloaded From ManualsPrinter.com Manuals... -
Page 31: Control Panel Overview
Use to access the menu functions and also to move up through the menu levels. Enter Use to confirm the selection on the display. Xerox CopyCentre C20, WorkCentre M20 and WorkCentre M20i User Guide Page 2-7 Downloaded From ManualsPrinter.com Manuals... - Page 32 Use to redial the last phone number called or to add a pause when storing a number in the dial directory. (WorkCentre M20i only.) Numeric Keypad Use to enter alphanumeric characters. Page 2-8 Xerox CopyCentre C20, WorkCentre M20 and WorkCentre M20i User Guide Downloaded From ManualsPrinter.com Manuals...
- Page 33 Press once to clear a current entry e.g. an incorrect number or character entry. Press twice to clear all programmed settings, the display requests confirmation. Xerox CopyCentre C20, WorkCentre M20 and WorkCentre M20i User Guide Page 2-9 Downloaded From ManualsPrinter.com Manuals...
-
Page 34: Installing Drum And Toner Cartridges
Open the front cover. If the cartridge locking lever is in the lower position, turn the lever upward until it locks into place. Page 2-10 Xerox CopyCentre C20, WorkCentre M20 and WorkCentre M20i User Guide Downloaded From ManualsPrinter.com Manuals... - Page 35 Close the front cover and the side message cover. displays. The product returns to Standby mode. Xerox CopyCentre C20, WorkCentre M20 and WorkCentre M20i User Guide Page 2-11 Downloaded From ManualsPrinter.com Manuals...
-
Page 36: Making Connections
#26 or larger tele- communication machine. line cord. If required, plug the cord of your extension phone into the EXT jack. Page 2-12 Xerox CopyCentre C20, WorkCentre M20 and WorkCentre M20i User Guide Downloaded From ManualsPrinter.com Manuals... - Page 37 If this occurs, select the Slow mode. For information about changing the USB mode, refer to “Machine Setup” on page 2-19. Xerox CopyCentre C20, WorkCentre M20 and WorkCentre M20i User Guide Page 2-13 Downloaded From ManualsPrinter.com Manuals...
-
Page 38: Powering On The Machine
The power cord must be plugged into a grounded power socket. Press the ON/OFF switch to the ON ( I ) position. The machine displays ’Warming Up Please Wait...’. Page 2-14 Xerox CopyCentre C20, WorkCentre M20 and WorkCentre M20i User Guide Downloaded From ManualsPrinter.com Manuals... -
Page 39: Loading Paper
The Paper Trays can hold a maximum of 550 sheets of 80 g/m (20 lb) plain paper. You can use A4, Letter or Legal size paper only. Xerox CopyCentre C20, WorkCentre M20 and WorkCentre M20i User Guide Page 2-15 Downloaded From ManualsPrinter.com Manuals... - Page 40 Ensure that the paper is positioned under the snubbers. Corner snubbers Do not fill above the Maximum Fill Line. Max Fill Line Page 2-16 Xerox CopyCentre C20, WorkCentre M20 and WorkCentre M20i User Guide Downloaded From ManualsPrinter.com Manuals...
- Page 41 Refer to “Machine Setup” starting on page 2-19 to set the correct size for the Paper Tray. For more detailed information about Paper Supply, refer to the Chapter “Paper and Other Media” starting on page 4-1. Xerox CopyCentre C20, WorkCentre M20 and WorkCentre M20i User Guide Page 2-17 Downloaded From ManualsPrinter.com Manuals...
-
Page 42: Help List
E-Mail Feature Help List Printing... displays. Help List The Help List is printed. Press [Menu/Exit] to exit each menu level and return to standby mode. Page 2-18 Xerox CopyCentre C20, WorkCentre M20 and WorkCentre M20i User Guide Downloaded From ManualsPrinter.com Manuals... -
Page 43: Machine Setup
Press [Enter] to save your selections. Press [Menu/Exit] to exit each menu level and return to standby mode. Xerox CopyCentre C20, WorkCentre M20 and WorkCentre M20i User Guide Page 2-19 Downloaded From ManualsPrinter.com Manuals... - Page 44 Sets the number of seconds the Seconds machine remains idle before switching to Power Save mode. The period set here starts after the last print job. Page 2-20 Xerox CopyCentre C20, WorkCentre M20 and WorkCentre M20i User Guide Downloaded From ManualsPrinter.com Manuals...
- Page 45 PSTN system pertaining to each country. NOTE: The Country option is not applicable to North America and Canada. Xerox CopyCentre C20, WorkCentre M20 and WorkCentre M20i User Guide Page 2-21 Downloaded From ManualsPrinter.com Manuals...
- Page 46 Margins can be set between 0 - 30mm (1.2") Page 2-22 Xerox CopyCentre C20, WorkCentre M20 and WorkCentre M20i User Guide Downloaded From ManualsPrinter.com Manuals...
-
Page 47: Installing Software
Administrator or refer to the System Administration Guide. The Xerox WorkCentre M20 and M20i can be connected directly to the USB or Parallel Port of a host Workstation. A document file can be sent or received from the host Workstation via the appropriate port to the Xerox WorkCentre M20 or M20i. -
Page 48: Driver Installation
Check the boxes for the drivers required, PostScript, PCL, PC Scan and ControlCentre. Select [Continue]. You can choose to install as many drivers as you require by checking the appropriate boxes. Page 2-24 Xerox CopyCentre C20, WorkCentre M20 and WorkCentre M20i User Guide Downloaded From ManualsPrinter.com Manuals... - Page 49 Windows will automatically detect new hardware and install the appropriate driver. Follow the instructions for “Workstation Setup” starting on page 2-26 to continue the installation. Xerox CopyCentre C20, WorkCentre M20 and WorkCentre M20i User Guide Page 2-25 Downloaded From ManualsPrinter.com Manuals...
-
Page 50: Workstation Setup
The window displayed is for a Windows XP operating system. Click on the Printer and select [Properties] from the File menu or the right mouse menu. A properties window will be displayed. Page 2-26 Xerox CopyCentre C20, WorkCentre M20 and WorkCentre M20i User Guide Downloaded From ManualsPrinter.com Manuals... - Page 51 For a USB connection, check the USB box. Click [OK]. Follow the instructions for “Test Print or Scan” starting on page 2-28 to continue the installation. Xerox CopyCentre C20, WorkCentre M20 and WorkCentre M20i User Guide Page 2-27 Downloaded From ManualsPrinter.com Manuals...
-
Page 52: Test Print Or Scan
Test Print or Scan To ensure the Xerox WorkCentre M20 or M20i has been installed correctly a test print or scan should be submitted from the Workstation. Test Print Perform the following steps: Open a document on the Workstation. Select the Xerox WC M20 Series as the printer to which the document will be sent. -
Page 53: Copy
Using Interrupt ......3-14 Compatible Features ..... . 3-17 Xerox CopyCentre C20, WorkCentre M20 and WorkCentre M20i User Guide Page 3-1... -
Page 54: Copying Procedure
Auto Tray Switching feature is active. When one tray runs out of Paper Supply paper, the machine will switch to the other selected tray. Page 3-2 Xerox CopyCentre C20, WorkCentre M20 and WorkCentre M20i User Guide Downloaded From ManualsPrinter.com Manuals... - Page 55 (12.5 - 28lb). Sizes range from B5 to Legal (7” x 10” to 8.5” x 14” ). Refer to “Scanner and Copier Specifications” on page 12-5 for full Document Feeder specifications. Xerox CopyCentre C20, WorkCentre M20 and WorkCentre M20i User Guide Page 3-3...
- Page 56 3-6, and “Special Copy Color Original Features” on page 3-10. Using the Navigation Keys, select the setting required for the feature and press [Enter]. Page 3-4 Xerox CopyCentre C20, WorkCentre M20 and WorkCentre M20i User Guide Downloaded From ManualsPrinter.com Manuals...
- Page 57 Select [No] when all the originals have been scanned, and press [Enter]. Printing commences and copies are delivered to the Output Tray. Xerox CopyCentre C20, WorkCentre M20 and WorkCentre M20i User Guide Page 3-5 Downloaded From ManualsPrinter.com Manuals...
-
Page 58: Basic Copy Features
400%, Document Feeder. Keypad. The selected number appears on the depending on display. the input area used. Press [Enter] to save the selection. Page 3-6 Xerox CopyCentre C20, WorkCentre M20 and WorkCentre M20i User Guide Downloaded From ManualsPrinter.com Manuals... - Page 59 2-1 Sided Use when originals are Long printed on both sides, with the conventional "head to head" layout, and 1 sided copies required. Xerox CopyCentre C20, WorkCentre M20 and WorkCentre M20i User Guide Page 3-7 Downloaded From ManualsPrinter.com Manuals...
- Page 60 Use when scanning color Press [Copy]. originals. Press [Color Original]. Use when scanning a color Use the Navigation Keys to select [On] and press original. [Enter]. Page 3-8 Xerox CopyCentre C20, WorkCentre M20 and WorkCentre M20i User Guide Downloaded From ManualsPrinter.com Manuals...
- Page 61 Use the Navigation Keys to in the Bypass Tray. select the Paper Type being loaded and press [Enter]. If using the Bypass, remember to load the required stock. Xerox CopyCentre C20, WorkCentre M20 and WorkCentre M20i User Guide Page 3-9 Downloaded From ManualsPrinter.com Manuals...
-
Page 62: Special Copy Features
Document Glass and press [Start]. Repeat for Side 2 when [Press Start S.2] displays. The machine prints both sides of the ID document on one side of paper. Page 3-10 Xerox CopyCentre C20, WorkCentre M20 and WorkCentre M20i User Guide Downloaded From ManualsPrinter.com Manuals... - Page 63 Keypad and press [Enter]. Use to enter a shift Margin amount for the top margin. Bottom Use to enter a shift Margin amount for the bottom margin. Xerox CopyCentre C20, WorkCentre M20 and WorkCentre M20i User Guide Page 3-11 Downloaded From ManualsPrinter.com Manuals...
- Page 64 Use to add a blank or and press [Enter]. Back printed front and back Select [Blank] or [Printed] depending on your cover to the copies. requirement, and press [Enter]. Page 3-12 Xerox CopyCentre C20, WorkCentre M20 and WorkCentre M20i User Guide Downloaded From ManualsPrinter.com Manuals...
- Page 65 [Enter]. 4 Up Use to print the images Select the required N Up option and press [Enter]. from 4 originals on to one page. Xerox CopyCentre C20, WorkCentre M20 and WorkCentre M20i User Guide Page 3-13 Downloaded From ManualsPrinter.com Manuals...
-
Page 66: Using Interrupt
The job pauses after the current Interrupt sheet has been printed or the current original has been scanned. If the current job cannot be interrupted, a message displays. Page 3-14 Xerox CopyCentre C20, WorkCentre M20 and WorkCentre M20i User Guide Downloaded From ManualsPrinter.com Manuals... - Page 67 Features” on page 3-10. Color Original Press the feature key required and using the Navigation Keys, select the setting required for the feature. Press [Enter]. Xerox CopyCentre C20, WorkCentre M20 and WorkCentre M20i User Guide Page 3-15 Downloaded From ManualsPrinter.com Manuals...
- Page 68 [Interrupt] button. The Interrupt feature is deactivated. If required, reorder and reload the originals as instructed and press [Start]. The interrupted job resumes. Start Page 3-16 Xerox CopyCentre C20, WorkCentre M20 and WorkCentre M20i User Guide Downloaded From ManualsPrinter.com Manuals...
-
Page 69: Compatible Features
Surround Only AutoFit Glass Small Orig Only Clone Glass Small Orig Only Collate Glass / Document Feeder Not Book Center & Edges Key: Compatible Incompatible Xerox CopyCentre C20, WorkCentre M20 and WorkCentre M20i User Guide Page 3-17 Downloaded From ManualsPrinter.com Manuals... - Page 70 Page 3-18 Xerox CopyCentre C20, WorkCentre M20 and WorkCentre M20i User Guide Downloaded From ManualsPrinter.com Manuals...
-
Page 71: Paper And Other Media
Setting the Paper Size..... . 4-8 Media Specifications ..... . . 4-9 Xerox CopyCentre C20, WorkCentre M20 and WorkCentre M20i User Guide Page 4-1... -
Page 72: Loading Paper
550 sheets of 80 g/m (20 lb) plain paper. To load paper, pull open the Paper Tray. Push down on the pressure plate until it locks into position. Page 4-2 Xerox CopyCentre C20, WorkCentre M20 and WorkCentre M20i User Guide Downloaded From ManualsPrinter.com Manuals... - Page 73 Bypass Tray. edge of the sheet is placed at the right side. Xerox CopyCentre C20, WorkCentre M20 and WorkCentre M20i User Guide Page 4-3 Downloaded From ManualsPrinter.com Manuals...
- Page 74 Close the Paper Tray. Use the instructions “Setting the Paper Size” on page 4-8 to set the correct size for the Paper Tray. Page 4-4 Xerox CopyCentre C20, WorkCentre M20 and WorkCentre M20i User Guide Downloaded From ManualsPrinter.com Manuals...
-
Page 75: Using The Bypass Tray
10 sheets or 9 mm (0.35 inch) Cardstock 10 sheets or 9 mm (0.35 inch) The height is measured with the stack of sheets laid on a flat surface. Xerox CopyCentre C20, WorkCentre M20 and WorkCentre M20i User Guide Page 4-5 Downloaded From ManualsPrinter.com Manuals... -
Page 76: Loading The Bypass Tray
Ensure you have not loaded too much print media. The stack should be under the Max. Fill Line. Page 4-6 Xerox CopyCentre C20, WorkCentre M20 and WorkCentre M20i User Guide Downloaded From ManualsPrinter.com Manuals... - Page 77 [Enter]. Paper Supply Use the instructions “Setting the Paper Size” on page 4-8 to set the correct size for the Bypass Tray. Xerox CopyCentre C20, WorkCentre M20 and WorkCentre M20i User Guide Page 4-7 Downloaded From ManualsPrinter.com Manuals...
-
Page 78: Setting The Paper Size
Repeat the procedure for [Tray 2 Size] if available, and [Bypass Size]. Press [Menu/Exit] to exit each menu level and return to Standby mode. Page 4-8 Xerox CopyCentre C20, WorkCentre M20 and WorkCentre M20i User Guide Downloaded From ManualsPrinter.com Manuals... -
Page 79: Media Specifications
Hagaki (5.83 x 8.27 inch) Depending on paper thickness, maximum capacity may be reduced. Feed one sheet at a time through the Bypass Tray if jams occur. Xerox CopyCentre C20, WorkCentre M20 and WorkCentre M20i User Guide Page 4-9 Downloaded From ManualsPrinter.com Manuals... -
Page 80: Media Guidelines
10% and 70%. Do not load more than 10 sheets of special media into the Bypass Tray at a time. Page 4-10 Xerox CopyCentre C20, WorkCentre M20 and WorkCentre M20i User Guide Downloaded From ManualsPrinter.com Manuals... - Page 81 Do not use labels that are separating from the backing sheet or are wrinkled, bubbled, or otherwise damaged. Xerox CopyCentre C20, WorkCentre M20 and WorkCentre M20i User Guide Page 4-11 Downloaded From ManualsPrinter.com Manuals...
- Page 82 Page 4-12 Xerox CopyCentre C20, WorkCentre M20 and WorkCentre M20i User Guide Downloaded From ManualsPrinter.com Manuals...
-
Page 83: 5 E-Mail
Special E-mail Features..... 5-9 Using the Global Address Book....5-13 Xerox CopyCentre C20, WorkCentre M20 and WorkCentre M20i User Guide Page 5-1... -
Page 84: Sending An E-Mail
(12.5 - 28lb). Sizes range from B5 to Legal (7” x 10” to 8.5” x 14” ). Refer to “Scanner and Copier Specifications” on page 12-5 for full Document Feeder specifications. Page 5-2 Xerox CopyCentre C20, WorkCentre M20 and WorkCentre M20i User Guide Downloaded From ManualsPrinter.com Manuals... - Page 85 “Basic E-mail Features” on page 5-7, and “Special E-mail Features” on page 5-9. Using the Navigation Keys, select the setting required for the feature and press [Enter]. Xerox CopyCentre C20, WorkCentre M20 and WorkCentre M20i User Guide Page 5-3 Downloaded From ManualsPrinter.com Manuals...
- Page 86 The closest matching addresses [Local] and press [Enter]. stored in the Address Book display. Use the Navigation Keys to select the required address and press [Enter]. Page 5-4 Xerox CopyCentre C20, WorkCentre M20 and WorkCentre M20i User Guide Downloaded From ManualsPrinter.com Manuals...
- Page 87 Select [Yes] to review the addresses you have entered, and Review Addresses? if necessary make changes. [No] If a review is not required, select [No]. Press [Enter]. Xerox CopyCentre C20, WorkCentre M20 and WorkCentre M20i User Guide Page 5-5 Downloaded From ManualsPrinter.com Manuals...
- Page 88 Continue the procedure until all the originals have been scanned. Select [No] when all the originals have been scanned, and press [Enter]. The E-mail is sent. Page 5-6 Xerox CopyCentre C20, WorkCentre M20 and WorkCentre M20i User Guide Downloaded From ManualsPrinter.com Manuals...
-
Page 89: Basic E-Mail Features
Use the Navigation Keys to select [On] and press original. The remote recipient must [Enter]. have the capability to receive a color e-mail. Xerox CopyCentre C20, WorkCentre M20 and WorkCentre M20i User Guide Page 5-7 Downloaded From ManualsPrinter.com Manuals... - Page 90 Scans using a resolution of 400 x 400 dots per inch (dpi). Produces high quality output ideal for graphics and photos. May take longer to process. Page 5-8 Xerox CopyCentre C20, WorkCentre M20 and WorkCentre M20i User Guide Downloaded From ManualsPrinter.com Manuals...
-
Page 91: Special E-Mail Features
[Add] and press [Enter]. Continue to add addresses until all the recipients have been added to the Group, and select [Done] and press [Enter]. Xerox CopyCentre C20, WorkCentre M20 and WorkCentre M20i User Guide Page 5-9 Downloaded From ManualsPrinter.com Manuals... - Page 92 Select [Send] and press [Enter]. Enter the Group Number and press [Enter]. Enter the Sender’s name and select other features as required. Press [Start] to activate the job. Page 5-10 Xerox CopyCentre C20, WorkCentre M20 and WorkCentre M20i User Guide Downloaded From ManualsPrinter.com Manuals...
- Page 93 Navigation Keys and press [Enter]. Select another address if required. [Press Enter]. Enter the Sender’s name and select other features as required. Press [Start] to activate the job. Xerox CopyCentre C20, WorkCentre M20 and WorkCentre M20i User Guide Page 5-11 Downloaded From ManualsPrinter.com Manuals...
- Page 94 Select the required option and press [Enter]. stored in the Use to print both the Local Address The selected list prints. Individual and Group E- book. mail address lists. Page 5-12 Xerox CopyCentre C20, WorkCentre M20 and WorkCentre M20i User Guide Downloaded From ManualsPrinter.com Manuals...
-
Page 95: Using The Global Address Book
After entering all the addresses, select [Done] and press [Enter]. Enter the Sender’s name and select other features as required. Press [Start] to activate the job. Xerox CopyCentre C20, WorkCentre M20 and WorkCentre M20i User Guide Page 5-13 Downloaded From ManualsPrinter.com Manuals... - Page 96 Page 5-14 Xerox CopyCentre C20, WorkCentre M20 and WorkCentre M20i User Guide Downloaded From ManualsPrinter.com Manuals...
-
Page 97: Fax
Mailbox ....... . 6-14 Fax Setup Options......6-19 Xerox CopyCentre C20, WorkCentre M20 and WorkCentre M20i User Guide Page 6-1... -
Page 98: Faxing Procedure
(12.5 - 28lb). Sizes range from B5 to Legal (7” x 10” to 8.5” x 14” ). Refer to “Scanner and Copier Specifications” on page 12-5 for full Document Feeder specifications. Page 6-2 Xerox CopyCentre C20, WorkCentre M20 and WorkCentre M20i User Guide Downloaded From ManualsPrinter.com Manuals... - Page 99 Feeder is closed. Select the Fax key Fax Key Press the [Fax] key to activate Fax mode. The Fax key remains illuminated when selected. Xerox CopyCentre C20, WorkCentre M20 and WorkCentre M20i User Guide Page 6-3 Downloaded From ManualsPrinter.com Manuals...
-
Page 100: Select The Fax Features
Methods” on Numeric Keypad page 6-6. press the correct number. Clear/Clear All Pressing the [Clear/Clear All] key will delete the entire fax number entered. Page 6-4 Xerox CopyCentre C20, WorkCentre M20 and WorkCentre M20i User Guide Downloaded From ManualsPrinter.com Manuals... -
Page 101: Job Status
[Enter]. Select [Cancel Job?] and press [Enter]. A confirmation message displays, select [1:Yes] and press [Enter]. Press [Menu/Exit] to exit Job Status. Xerox CopyCentre C20, WorkCentre M20 and WorkCentre M20i User Guide Page 6-5 Downloaded From ManualsPrinter.com Manuals... -
Page 102: Dialing Methods
Select [Yes] to add more originals, or [No] to begin transmission. Press [Enter]. The machine automatically sends the fax to each of the numbers in the Group. Page 6-6 Xerox CopyCentre C20, WorkCentre M20 and WorkCentre M20i User Guide Downloaded From ManualsPrinter.com Manuals... - Page 103 Using the Navigation Keys, select the number required and press [Enter]. Press [Start] to dial the number. The fax is automatically scanned and sent. Xerox CopyCentre C20, WorkCentre M20 and WorkCentre M20i User Guide Page 6-7 Downloaded From ManualsPrinter.com Manuals...
-
Page 104: Basic Fax Features
Select if your originals are2 Select if your original is 1- Using the Navigation Keys, select the option Sided. Sided. required and press [Enter]. Page 6-8 Xerox CopyCentre C20, WorkCentre M20 and WorkCentre M20i User Guide Downloaded From ManualsPrinter.com Manuals... - Page 105 Super Fine Use for documents containing extremely fine detail. This is available only if the remote machine also supports Super Fine resolution. Xerox CopyCentre C20, WorkCentre M20 and WorkCentre M20i User Guide Page 6-9 Downloaded From ManualsPrinter.com Manuals...
-
Page 106: Special Fax Features
Toll Save period. Press [Enter]. Select [End Time] and enter a date and time to end the Toll Save period. Press [Enter]. Page 6-10 Xerox CopyCentre C20, WorkCentre M20 and WorkCentre M20i User Guide Downloaded From ManualsPrinter.com Manuals... - Page 107 If you set a time earlier than the current time, the job will be sent at that time the following day. The originals are scanned into memory ready for sending. Xerox CopyCentre C20, WorkCentre M20 and WorkCentre M20i User Guide Page 6-11 Downloaded From ManualsPrinter.com Manuals...
- Page 108 To store the originals in the Bulletin Board select [On]. If the Bulletin Board is not required, select [Off]. Press [Start]. The originals are scanned into memory ready to be polled. Page 6-12 Xerox CopyCentre C20, WorkCentre M20 and WorkCentre M20i User Guide Downloaded From ManualsPrinter.com Manuals...
- Page 109 Use the Navigation Keys to select [Batch TX] and same location, in one batch. press [Enter]. Select [On] and press [Enter]. Enter a Batch Interval between 0 - 99 and press [Enter]. Xerox CopyCentre C20, WorkCentre M20 and WorkCentre M20i User Guide Page 6-13 Downloaded From ManualsPrinter.com Manuals...
-
Page 110: Mailbox
Enter the box number for the mailbox and press [Enter]. Mailbox No: The originals are scanned and stored in the mailbox. The display shows the number of pages stored. Page 6-14 Xerox CopyCentre C20, WorkCentre M20 and WorkCentre M20i User Guide Downloaded From ManualsPrinter.com Manuals... -
Page 111: Printing Mailbox Contents
[Enter]. Mailbox No: Enter the passcode for the mailbox and press [Enter]. The contents of the mailbox are printed and deleted. Xerox CopyCentre C20, WorkCentre M20 and WorkCentre M20i User Guide Page 6-15 Downloaded From ManualsPrinter.com Manuals... -
Page 112: Deleting Mailbox Contents
Enter the box number for the mailbox and press [Enter]. Mailbox No: Enter the passcode for the mailbox and press [Enter]. The contents of the mailbox are deleted. Page 6-16 Xerox CopyCentre C20, WorkCentre M20 and WorkCentre M20i User Guide Downloaded From ManualsPrinter.com Manuals... -
Page 113: Polling From A Mailbox
If you set a time earlier than the current time, the originals will be retrieved at that time the following day. The mailbox will be polled at the specified time. Xerox CopyCentre C20, WorkCentre M20 and WorkCentre M20i User Guide Page 6-17 Downloaded From ManualsPrinter.com Manuals... -
Page 114: Sending To A Mailbox
If you set a time earlier than the current time, the job will be sent at that time the following day. The originals will be sent to the mailbox at the specified time. Page 6-18 Xerox CopyCentre C20, WorkCentre M20 and WorkCentre M20i User Guide Downloaded From ManualsPrinter.com Manuals... -
Page 115: Fax Setup Options
Press [Enter] to save your selections. Press [Menu/Exit] to exit each menu level and return to standby mode. Xerox CopyCentre C20, WorkCentre M20 and WorkCentre M20i User Guide Page 6-19 Downloaded From ManualsPrinter.com Manuals... - Page 116 Short Edge Use to set fax jobs to print 2 sided, with the binding edge on the short edge. Page 6-20 Xerox CopyCentre C20, WorkCentre M20 and WorkCentre M20i User Guide Downloaded From ManualsPrinter.com Manuals...
- Page 117 Press the [Menu/Exit] key when you have finished editing. The name appears in the upper line of the display. Change the name if required and press [Enter]. Xerox CopyCentre C20, WorkCentre M20 and WorkCentre M20i User Guide Page 6-21 Downloaded From ManualsPrinter.com Manuals...
- Page 118 De-activates printing a transmission report. On-Err Sets the machine to print a transmission report only if an error has occurred. Page 6-22 Xerox CopyCentre C20, WorkCentre M20 and WorkCentre M20i User Guide Downloaded From ManualsPrinter.com Manuals...
- Page 119 Use to set the default option for receiving secure faxes. Print Fax Auto Tray Tray 1 Selects the default paper tray for fax jobs. Tray 1 & Tray 2 Xerox CopyCentre C20, WorkCentre M20 and WorkCentre M20i User Guide Page 6-23 Downloaded From ManualsPrinter.com Manuals...
- Page 120 Dial Mode Tone Selects the default dial mode. Pulse Page 6-24 Xerox CopyCentre C20, WorkCentre M20 and WorkCentre M20i User Guide Downloaded From ManualsPrinter.com Manuals...
-
Page 121: Print
7 Print Direct Printing using a USB or Parallel Port connection is available as standard on the Xerox WorkCentre M20 and as an option on the Xerox WorkCentre M20i. Networked Printing is available as standard on the Xerox WorkCentre M20i and is optional on the Xerox WorkCentre M20. -
Page 122: Printing A Document
Windows 2000 Windows NT V4.0 Windows 98/Millennium Edition Your Workstation and the Xerox WorkCentre M20 or M20i must be connected and configured for printing from these environments. There are two printer drivers supplied, a PostScript driver and a PCL driver. -
Page 123: Printer Settings
Select File > Print > Properties or File > Print Setup from within any Windows application. Select Xerox WC M20 Series printer from the Printers folder, then select File > Properties (or select the printer icon in the Printers folder, and click the right mouse button). - Page 124 Windows XP Select File > Print > Properties from within any Windows application. Select Xerox WC M20 Series printer from the Printers and Faxes folder, click the right mouse button, then select Printing Preferences from the drop-down list. Page 7-4 Xerox CopyCentre C20, WorkCentre M20 and WorkCentre M20i User Guide Downloaded From ManualsPrinter.com Manuals...
-
Page 125: Pcl Driver
Settings made when Printer Properties are accessed through an application File menu and Print or Print Setup will remain active until the application you are printing from is closed. Xerox CopyCentre C20, WorkCentre M20 and WorkCentre M20i User Guide Page 7-5 Downloaded From ManualsPrinter.com Manuals... - Page 126 Page 7-6 Xerox CopyCentre C20, WorkCentre M20 and WorkCentre M20i User Guide Downloaded From ManualsPrinter.com Manuals...
-
Page 127: Paper Tab
Use to select the required paper source for a cover paper source for the job. page. Banner Page Use to select whether a banner page is required. Xerox CopyCentre C20, WorkCentre M20 and WorkCentre M20i User Guide Page 7-7 Downloaded From ManualsPrinter.com Manuals... -
Page 128: Image Options Tab
Provides access to additional options which allow you to select to print your output as graphics or bitmaps. You can also select to print all text in black. Page 7-8 Xerox CopyCentre C20, WorkCentre M20 and WorkCentre M20i User Guide Downloaded From ManualsPrinter.com Manuals... -
Page 129: Output Options Tab
If this option is selected the fonts which are resident on the printer will be used for the job. Collate Select to produce collated output Xerox CopyCentre C20, WorkCentre M20 and WorkCentre M20i User Guide Page 7-9 Downloaded From ManualsPrinter.com Manuals... -
Page 130: Watermark Tab
Message Angle document. Select to print the Watermark horizontally, vertically or a specified angle. Page 7-10 Xerox CopyCentre C20, WorkCentre M20 and WorkCentre M20i User Guide Downloaded From ManualsPrinter.com Manuals... -
Page 131: About Tab
The About Tab provides information about the printer driver. It provides the program version number and copyright information relating to the printer driver. Clicking on this page will connect you to the Xerox website, provided you have access to the Internet Xerox CopyCentre C20, WorkCentre M20 and WorkCentre M20i User Guide Page 7-11 Downloaded From ManualsPrinter.com Manuals... -
Page 132: Postscript Driver
Settings made when Printer Properties are accessed through an application File menu and Print or Print Setup will remain active until the application you are printing from is closed. Page 7-12 Xerox CopyCentre C20, WorkCentre M20 and WorkCentre M20i User Guide Downloaded From ManualsPrinter.com Manuals... - Page 133 Xerox CopyCentre C20, WorkCentre M20 and WorkCentre M20i User Guide Page 7-13 Downloaded From ManualsPrinter.com Manuals...
- Page 134 Paper / Quality Tab Paper Source Use to select the paper source for the print job from the drop down menu. Page 7-14 Xerox CopyCentre C20, WorkCentre M20 and WorkCentre M20i User Guide Downloaded From ManualsPrinter.com Manuals...
-
Page 135: Scan
TWAIN Scanner Program ....8-2 Scanning Procedure ..... . . 8-3 Xerox CopyCentre C20, WorkCentre M20 and WorkCentre M20i User Guide Page 8-1... -
Page 136: Twain Scanner Program
TWAIN Scanner Program The Xerox WorkCentre M20 and M20i TWAIN Scanner program is used to scan images, graphics, photographs, and printed text. Documents can be fed from the Document Feeder or placed on the Document Glass. The TWAIN driver is a program for PC printing that supports Windows 98, Windows NT4.0, Windows 2000, Windows ME and Windows XP environments. -
Page 137: Scanning Procedure
Align the stack with the left and rear edges of the tray. Adjust the guides to just touch the edges of the originals. Xerox CopyCentre C20, WorkCentre M20 and WorkCentre M20i User Guide Page 8-3 Downloaded From ManualsPrinter.com Manuals... -
Page 138: Select The Scan Features
Specifications” on page 12-5. Customize the settings available on the TWAIN driver for the job, for example Image Input, Resolution, and Reduce/Enlarge. Page 8-4 Xerox CopyCentre C20, WorkCentre M20 and WorkCentre M20i User Guide Downloaded From ManualsPrinter.com Manuals... - Page 139 The image is saved and can now be used in another document if required. Remove your original from the Document Glass or Document Feeder. Xerox CopyCentre C20, WorkCentre M20 and WorkCentre M20i User Guide Page 8-5 Downloaded From ManualsPrinter.com Manuals...
- Page 140 Page 8-6 Xerox CopyCentre C20, WorkCentre M20 and WorkCentre M20i User Guide Downloaded From ManualsPrinter.com Manuals...
-
Page 141: Machine Administration
Maintenance Tools......9-25 Enabling or Disabling Auxiliary Access ..9-31 Xerox CopyCentre C20, WorkCentre M20 and WorkCentre M20i User Guide Page 9-1... -
Page 142: Machine Setup
Press [Enter] to save your selections. Press [Menu/Exit] to exit each menu level and return to standby mode. Page 9-2 Xerox CopyCentre C20, WorkCentre M20 and WorkCentre M20i User Guide Downloaded From ManualsPrinter.com Manuals... - Page 143 Alarm Sound Set to On to enable an alarm sound when an error occurs or a fax communication ends. Xerox CopyCentre C20, WorkCentre M20 and WorkCentre M20i User Guide Page 9-3 Downloaded From ManualsPrinter.com Manuals...
- Page 144 Enter the current date and time using the Numeric Keypad. Use Clock Mode to set whether the machine uses a 12 or 24 hour clock. Page 9-4 Xerox CopyCentre C20, WorkCentre M20 and WorkCentre M20i User Guide Downloaded From ManualsPrinter.com Manuals...
- Page 145 If the received page is outside the discard margin set, it will print on two sheets of paper at the actual size. Margins can be set between 0 - 30mm (1.2"). Xerox CopyCentre C20, WorkCentre M20 and WorkCentre M20i User Guide Page 9-5 Downloaded From ManualsPrinter.com Manuals...
-
Page 146: Reports
Provides connection information for the E-mail function. User Auth List Provides User Authentication information for the E-mail function. Print All Reports Use this option to print all the available reports. Page 9-6 Xerox CopyCentre C20, WorkCentre M20 and WorkCentre M20i User Guide Downloaded From ManualsPrinter.com Manuals... -
Page 147: Printing Reports
System Admin Tools Reports Using the Navigation Keys select the required report and press [Enter]. Reports [Fax Phonebook] The report is processed and printed. Xerox CopyCentre C20, WorkCentre M20 and WorkCentre M20i User Guide Page 9-7 Downloaded From ManualsPrinter.com Manuals... -
Page 148: Controlcentre
After setting up Fax options or creating phonebooks, simply click [Apply] on the ControlCentre screen to download the new settings to the machine. Installing ControlCentre When Xerox WorkCentre M20i software is installed the ControlCentre utility is installed automatically. For information on installing refer to “Maintenance Tools” on page 9-25. -
Page 149: Using Controlcentre
When the settings on ControlCentre are changed, or when ControlCentre is run, the settings on the machine and on ControlCentre will be automatically updated to the latest settings made either on the machine or on ControlCentre. Xerox CopyCentre C20, WorkCentre M20 and WorkCentre M20i User Guide Page 9-9 Downloaded From ManualsPrinter.com Manuals... -
Page 150: Settings Tab
ControlCentre to the machine’s current WorkCentre M20i. settings. Advanced Tab Click on the [Advanced] tab to change the Machine Setup options applicable to Fax. Page 9-10 Xerox CopyCentre C20, WorkCentre M20 and WorkCentre M20i User Guide Downloaded From ManualsPrinter.com Manuals... -
Page 151: Phonebook Tab
ControlCentre to be edited in a the Xerox separate Edit dialog WorkCentre M20i Deletes a selected Deletes all phonebook phonebook entry entries Xerox CopyCentre C20, WorkCentre M20 and WorkCentre M20i User Guide Page 9-11 Downloaded From ManualsPrinter.com Manuals... -
Page 152: Information Tab
Click on the [Firmware Update] tab to update the firmware of the machine. This feature should be used by System Administrator only. For further information, please refer to the System Administration Guide. Page 9-12 Xerox CopyCentre C20, WorkCentre M20 and WorkCentre M20i User Guide Downloaded From ManualsPrinter.com Manuals... -
Page 153: Printer Tab
Printer Tab Click on the [Printer] tab to set default print options. PCL Tab Click on the [PCL] tab to set options for PCL printing. Xerox CopyCentre C20, WorkCentre M20 and WorkCentre M20i User Guide Page 9-13 Downloaded From ManualsPrinter.com Manuals... -
Page 154: Postscript Tab
Flash PCL fonts and macros may be supplied on a CD or downloaded from the internet. Use this tab to install flash PCL fonts and macros on the Xerox WorkCentre M20 or M20i. You can also delete individual fonts and macros, delete all of the fonts and macros and print a font listing. -
Page 155: Department Codes
Enter the Master Access Code. The first time you access Department, you will be prompted to enter a master access code then re-enter it to confirm the code. Xerox CopyCentre C20, WorkCentre M20 and WorkCentre M20i User Guide Page 9-15 Downloaded From ManualsPrinter.com Manuals... -
Page 156: Printing Department Data
[System Admin Tools] and press [Enter]. System Admin Tools [Passcode Protect] If the System Admin Tools have already been passcode protected, type in the password and press [Enter]. Page 9-16 Xerox CopyCentre C20, WorkCentre M20 and WorkCentre M20i User Guide Downloaded From ManualsPrinter.com Manuals... - Page 157 Select [Print] using the Navigation Keys and press [Enter]. Department Select the required report and [Print] press [Enter]. Xerox CopyCentre C20, WorkCentre M20 and WorkCentre M20i User Guide Page 9-17 Downloaded From ManualsPrinter.com Manuals...
-
Page 158: Managing Departments
Select [Management] using the Navigation Keys and press [Enter]. Department [Management] Page 9-18 Xerox CopyCentre C20, WorkCentre M20 and WorkCentre M20i User Guide Downloaded From ManualsPrinter.com Manuals... - Page 159 To remove all Department Codes select [All] and press [Enter]. To remove individual Department Codes, select [Each], press [Enter], enter the Department Number and confirm the removal. Xerox CopyCentre C20, WorkCentre M20 and WorkCentre M20i User Guide Page 9-19 Downloaded From ManualsPrinter.com Manuals...
-
Page 160: Changing The Master Code
Select [Change M. Code] and press [Enter]. Department [Change M Code] Page 9-20 Xerox CopyCentre C20, WorkCentre M20 and WorkCentre M20i User Guide Downloaded From ManualsPrinter.com Manuals... - Page 161 [Change] and press [Enter]. Change M Code [Change] Enter the new Master Code. To remove the Master Code, select [Delete] and press [Enter]. Xerox CopyCentre C20, WorkCentre M20 and WorkCentre M20i User Guide Page 9-21 Downloaded From ManualsPrinter.com Manuals...
-
Page 162: Passcode Protection
Simply press [Enter] when requested to enter the passcode. If you enabled Passcode Protection, refer to “Change the Passcode” starting on page 9-23 to enter the new passcode. Page 9-22 Xerox CopyCentre C20, WorkCentre M20 and WorkCentre M20i User Guide Downloaded From ManualsPrinter.com Manuals... -
Page 163: Change The Passcode
Enter the existing passcode and press [Enter]. This will be blank if you have just enabled Passcode Protection Enter the new passcode and press [Enter]. Enter Passcode: Xerox CopyCentre C20, WorkCentre M20 and WorkCentre M20i User Guide Page 9-23 Downloaded From ManualsPrinter.com Manuals... -
Page 164: Clear Memory
Select the option required and press [Enter]. The choices are: Fax Phone Book Fax RX History Fax TX History System Data Email TX History Email Address Book Page 9-24 Xerox CopyCentre C20, WorkCentre M20 and WorkCentre M20i User Guide Downloaded From ManualsPrinter.com Manuals... -
Page 165: Maintenance Tools
Notify Toner Low New Drum Clean Drum Billing Counters These tools can also be accessed using Xerox CentreWare, refer to the System Administration Guide for more information. Check the Serial Number Press the [Machine Status] key. Using the Navigation Keys select [System Admin Tools] and press [Enter]. - Page 166 Select [Serial Number] and press [Serial Number] [Enter]. The serial number of the Xerox WorkCentre M20 or M20i is displayed. Press [Menu/Exit] to exit this function. Page 9-26 Xerox CopyCentre C20, WorkCentre M20 and WorkCentre M20i User Guide Downloaded From ManualsPrinter.com Manuals...
- Page 167 Select [On] and press [Enter]. When prompted, enter: Notify Toner Low Your Customer Number [On] Your Customer Name The Supplier’s Fax Number The Suppliers Name Xerox CopyCentre C20, WorkCentre M20 and WorkCentre M20i User Guide Page 9-27 Downloaded From ManualsPrinter.com Manuals...
-
Page 168: New Drum
New Drum To set the drum counter to zero, [On] select [On] and press [Enter]. Otherwise, select [Off] and press [Enter] to exit the selection. Page 9-28 Xerox CopyCentre C20, WorkCentre M20 and WorkCentre M20i User Guide Downloaded From ManualsPrinter.com Manuals... -
Page 169: Clean Drum
[Enter]. Select [Clean Drum] and press [Enter]. System Admin Tools The Xerox WorkCentre M20 or [Clean Drum] M20i will print a special cleaning page. Xerox CopyCentre C20, WorkCentre M20 and WorkCentre M20i User Guide Page 9-29 Downloaded From ManualsPrinter.com Manuals... -
Page 170: Billing Counters
[Enter]. Select [Billing] and press [Enter]. Select the required Counter and System Admin Tools press [Enter]. [Billing] Page 9-30 Xerox CopyCentre C20, WorkCentre M20 and WorkCentre M20i User Guide Downloaded From ManualsPrinter.com Manuals... -
Page 171: Enabling Or Disabling Auxiliary Access
[Enter]. System Admin Tools To enable Auxiliary Access, [Auxiliary Access] select [On] is displayed and press [Enter]. Otherwise, select [Off] and press [Enter]. Xerox CopyCentre C20, WorkCentre M20 and WorkCentre M20i User Guide Page 9-31 Downloaded From ManualsPrinter.com Manuals... - Page 172 Page 9-32 Xerox CopyCentre C20, WorkCentre M20 and WorkCentre M20i User Guide Downloaded From ManualsPrinter.com Manuals...
-
Page 173: 10 Maintenance
Ordering Supplies ......10-4 Customer Replaceable Units ....10-5 Xerox CopyCentre C20, WorkCentre M20 and WorkCentre M20i User Guide Page 10-1... -
Page 174: Cleaning
Document Glass and CVT Glass until they are clean and dry. Wipe the underside of the Document Feeder until it is clean and dry. Close the Document Feeder. Page 10-2 Xerox CopyCentre C20, WorkCentre M20 and WorkCentre M20i User Guide Downloaded From ManualsPrinter.com Manuals... -
Page 175: Control Panel And Lcd
Control Panel and LCD screen with a soft, lint-free cloth, lightly dampened with water. Outside Areas of the Machine Use a cloth moistened with water to clean the outside areas of the machine. Xerox CopyCentre C20, WorkCentre M20 and WorkCentre M20i User Guide Page 10-3 Downloaded From ManualsPrinter.com Manuals... -
Page 176: Ordering Supplies
106R01048 106R01047 Drum Cartridge 113R00671 To obtain supplies, contact your local Xerox representative, giving the company name, the product number and the machine serial number. Use the space below to keep a record of the telephone number. Supplies Telephone Number:... -
Page 177: Customer Replaceable Units
This procedure can only be performed once prior to changing the Toner Cartridge. Pull the release latch to open the side cover. CAUTION: Ensure the side cover is always open before opening the front cover. Xerox CopyCentre C20, WorkCentre M20 and WorkCentre M20i User Guide Page 10-5 Downloaded From ManualsPrinter.com Manuals... - Page 178 Close the front cover and the side cover. The display shows [New Toner?], select [No] and press [Enter]. The machine returns to standby. Page 10-6 Xerox CopyCentre C20, WorkCentre M20 and WorkCentre M20i User Guide Downloaded From ManualsPrinter.com Manuals...
-
Page 179: Replacing The Toner
For instructions on setting the Send Toner Low Information to On, refer to “Maintenance Tools” on page 9-25. Xerox CopyCentre C20, WorkCentre M20 and WorkCentre M20i User Guide Page 10-7 Downloaded From ManualsPrinter.com Manuals... -
Page 180: Drum Cartridge
Pull the release latch to open the side cover. CAUTION: Ensure the side cover is always open before opening the front cover. Open the front cover. Page 10-8 Xerox CopyCentre C20, WorkCentre M20 and WorkCentre M20i User Guide Downloaded From ManualsPrinter.com Manuals... - Page 181 Pull out the used drum cartridge. Unpack the new drum cartridge and slide it in place, making sure not to touch the surface of the drum. Xerox CopyCentre C20, WorkCentre M20 and WorkCentre M20i User Guide Page 10-9 Downloaded From ManualsPrinter.com Manuals...
- Page 182 If the counter is not reset, ‘Drum Warning’ may appear before the new drum reaches its maximum life. To reset the counter manually refer to the “Maintenance Tools” on page 9-25. Page 10-10 Xerox CopyCentre C20, WorkCentre M20 and WorkCentre M20i User Guide Downloaded From ManualsPrinter.com Manuals...
-
Page 183: 11 Troubleshooting
LCD Error Messages ..... 11-11 Problem and Solutions Charts ....11-14 Xerox CopyCentre C20, WorkCentre M20 and WorkCentre M20i User Guide Page 11-1... -
Page 184: General
Always set the guides in the Paper Trays to the size of the media in the tray. Ensure paper clips and paper debris do not contaminate the machine. Page 11-2 Xerox CopyCentre C20, WorkCentre M20 and WorkCentre M20i User Guide Downloaded From ManualsPrinter.com Manuals... -
Page 185: Fault Clearance
Document Jam LED on the Status Map will flash. Details for clearing the three areas of the Document Feeder are given below. Input Misfeed Open the Document Feeder top cover. Xerox CopyCentre C20, WorkCentre M20 and WorkCentre M20i User Guide Page 11-3 Downloaded From ManualsPrinter.com Manuals... -
Page 186: Exit Misfeed
If the jammed document cannot be easily removed, skip to Roller Misfeed. Close the Document Feeder and reload the documents. Page 11-4 Xerox CopyCentre C20, WorkCentre M20 and WorkCentre M20i User Guide Downloaded From ManualsPrinter.com Manuals... -
Page 187: Roller Misfeed
Carefully pull the document to the right using both hands. Close the Document Feeder and reload the documents. Xerox CopyCentre C20, WorkCentre M20 and WorkCentre M20i User Guide Page 11-5 Downloaded From ManualsPrinter.com Manuals... -
Page 188: Paper Jams
Carefully remove the misfed paper in the direction shown. Page 11-6 Xerox CopyCentre C20, WorkCentre M20 and WorkCentre M20i User Guide Downloaded From ManualsPrinter.com Manuals... -
Page 189: Paper Exit Area
Open the front cover. Pull down on the Fuser Lever. This will release pressure on the paper. Xerox CopyCentre C20, WorkCentre M20 and WorkCentre M20i User Guide Page 11-7 Downloaded From ManualsPrinter.com Manuals... - Page 190 Push the Fuser Lever up. Turn the Jam Remove Lever back to the original position. Close the front cover and side cover. Page 11-8 Xerox CopyCentre C20, WorkCentre M20 and WorkCentre M20i User Guide Downloaded From ManualsPrinter.com Manuals...
-
Page 191: Sided Jam
’Bypass Jam’ may also occur when the paper has not fed correctly in the machine. Open the Bypass Tray and pull the paper out of the machine. Xerox CopyCentre C20, WorkCentre M20 and WorkCentre M20i User Guide Page 11-9 Downloaded From ManualsPrinter.com Manuals... -
Page 192: Customer Support
If a fault cannot be resolved by following the LCD instructions, check the troubleshooting tables in the next section - they may help to solve the problem quickly. If you need further assistance or information, please visit the Xerox website for online solutions and support: http://www.xerox.com... -
Page 193: Lcd Error Messages
You have tried to select a Try again. Check location for a group. group. Incompatible Remote party did not have the requested feature such as polling. Xerox CopyCentre C20, WorkCentre M20 and WorkCentre M20i User Guide Page 11-11 Downloaded From ManualsPrinter.com Manuals... - Page 194 No Developer Cartridge The toner cartridge is not Install the toner cartridge. Refer to “Toner installed. Cartridge” on page 10-5. Page 11-12 Xerox CopyCentre C20, WorkCentre M20 and WorkCentre M20i User Guide Downloaded From ManualsPrinter.com Manuals...
- Page 195 The transmission can also be split into more than one operation if it is a large job. Xerox CopyCentre C20, WorkCentre M20 and WorkCentre M20i User Guide Page 11-13 Downloaded From ManualsPrinter.com Manuals...
-
Page 196: Problem And Solutions Charts
Replace the paper in the tray with paper from a new package. In high humidity areas do not leave paper in the product for extended periods of time. Page 11-14 Xerox CopyCentre C20, WorkCentre M20 and WorkCentre M20i User Guide Downloaded From ManualsPrinter.com Manuals... -
Page 197: Printing Problems
The printer driver may not Reinstall the software. be installed properly. The parallel port cable Use an IEEE-1284 compliant parallel port cable. specifications may not be correct. Xerox CopyCentre C20, WorkCentre M20 and WorkCentre M20i User Guide Page 11-15 Downloaded From ManualsPrinter.com Manuals... - Page 198 Print a few blank pages to clean the transfer dirty. roller. Incorrect fonts TrueType fonts may be Use the fonts dialog box in the Control Panel to disabled. enable TrueType fonts. Page 11-16 Xerox CopyCentre C20, WorkCentre M20 and WorkCentre M20i User Guide Downloaded From ManualsPrinter.com Manuals...
- Page 199 Invalid Server or Port Wrong SMTP server or port number. SMTP DNS CONN. DNS connection failure. Failure. SMTP DNS Domain Error in the SMTP DNS Error Domain. Xerox CopyCentre C20, WorkCentre M20 and WorkCentre M20i User Guide Page 11-17 Downloaded From ManualsPrinter.com Manuals...
- Page 200 + or @ and that the ID only contains one @ symbol. Enter Again Displayed when an attempt is made to enter an invalid Group number. Page 11-18 Xerox CopyCentre C20, WorkCentre M20 and WorkCentre M20i User Guide Downloaded From ManualsPrinter.com Manuals...
-
Page 201: Faxing Problems Solution Chart
Check with the party trying to send the original that there are no problems with the remote fax. Paper is not collated Ensure the machine has paper loaded. Check if a paper jam has occurred. Xerox CopyCentre C20, WorkCentre M20 and WorkCentre M20i User Guide Page 11-19 Downloaded From ManualsPrinter.com Manuals... - Page 202 Paper is collated but not printed. Ensure there enough toner. Check with the party sending the fax that the original was placed correctly when scanned at the remote Fax. Page 11-20 Xerox CopyCentre C20, WorkCentre M20 and WorkCentre M20i User Guide Downloaded From ManualsPrinter.com Manuals...
-
Page 203: 12 Specifications
General Specifications..... 12-6 Media Specifications ..... . 12-7 Xerox CopyCentre C20, WorkCentre M20 and WorkCentre M20i User Guide Page 12-1... -
Page 204: Introduction
Introduction The Xerox CopyCentre C20, WorkCentre M20 and WorkCentre M20i adhere to strict specifications, approvals and certifications. These specifications are designed to provide for the safety of users and to ensure that the machine operates in a fully functional state. Use the specifications listed in this chapter to quickly identify the capabilities of the machine. -
Page 205: Printer Specifications
Effective printing width 208 mm (8.2 inches) for letter / legal (216 x 356 mm / 8.5 x 14 inch) 202 mm (8 inches) for A4 Xerox CopyCentre C20, WorkCentre M20 and WorkCentre M20i User Guide Page 12-3 Downloaded From ManualsPrinter.com Manuals... -
Page 206: Fax Specifications
(20 lb) Bypass Tray: 100 sheets 80 g/m (20 lb) Document Feeder Document Feeder: Up to 50 pages 80 g/m (20 lb) Platen: 1 page Page 12-4 Xerox CopyCentre C20, WorkCentre M20 and WorkCentre M20i User Guide Downloaded From ManualsPrinter.com Manuals... -
Page 207: Scanner And Copier Specifications
Maximum print edge margin Top, Bottom, Each side 4 mm (0.16 inch) First Copy Out Time Under 8 seconds (Normal - Ready) 33 seconds (from Power Saver) Xerox CopyCentre C20, WorkCentre M20 and WorkCentre M20i User Guide Page 12-5 Downloaded From ManualsPrinter.com Manuals... -
Page 208: General Specifications
540 x 441 x 619 mm (21 x 17 x 24.4 inches) with Tray 2 Memory Size C20 = 32MB, M20 = 32MB, M20i = 80MB Page 12-6 Xerox CopyCentre C20, WorkCentre M20 and WorkCentre M20i User Guide Downloaded From ManualsPrinter.com Manuals... -
Page 209: Media Specifications
4.33 x 8.66 Envelope C5 162 x 229 6.38 x 9.02 Custom 98 x 148 ~ 3.86 x 5.83 ~ 215.9 x 355.6 8.5 x 14 Xerox CopyCentre C20, WorkCentre M20 and WorkCentre M20i User Guide Page 12-7 Downloaded From ManualsPrinter.com Manuals... - Page 210 A4, Letter, Folio, 80 ~ 90 g/m Legal (20lb ~ 24lb) B5 means JIS and ISO Transparency film thickness: 150 µm Paper Label thickness: 140 µm Page 12-8 Xerox CopyCentre C20, WorkCentre M20 and WorkCentre M20i User Guide Downloaded From ManualsPrinter.com Manuals...
-
Page 211: Index
1-2 Sided 3-7 Book Copy Auto Fit 3-7 copy 3-12 Auto Suppress 3-12 Bypass Tray 4-5 Book Copy 3-12 Clone 3-7 collated 3-8 Xerox CopyCentre C20, WorkCentre M20 and WorkCentre M20i User Guide Page Index - 1 Downloaded From ManualsPrinter.com Manuals... - Page 212 Document Feeder 3-3 Fax 6-8 Document Glass 3-4 File Type 5-6 Drum Cartridge 10-8 Firmware Update Tab 9-12 Replacing the Drum Cartridge 10-8 Page Index - 2 Xerox CopyCentre C20, WorkCentre M20 and WorkCentre M20i User Guide Downloaded From ManualsPrinter.com Manuals...
- Page 213 Stock Types 4-9 fax 6-9 Local Connection Overview Control Panel 2-7 Driver Installation 2-24 Test Print 2-28 Test Scan 2-28 Paper Specification 12-7 Xerox CopyCentre C20, WorkCentre M20 and WorkCentre M20i User Guide Page Index - 3 Downloaded From ManualsPrinter.com Manuals...
- Page 214 Solving Problems 11-14 Regulations 1-6 Specifications Regulations - Canada 1-17 Fax 12-4 Regulations - Europe 1-14 General 12-6 Regulations - USA 1-15 Paper 12-7 Page Index - 4 Xerox CopyCentre C20, WorkCentre M20 and WorkCentre M20i User Guide Downloaded From ManualsPrinter.com Manuals...
- Page 215 US 1-5 11-10 Toner Save Mode 10-5 Total Number of Prints 9-12 Transparencies Xerox Website 1-5 copy 3-13 Xerox Welcome Center 1-5 Troubleshooting Xerox CopyCentre C20, WorkCentre M20 and WorkCentre M20i User Guide Page Index - 5 Downloaded From ManualsPrinter.com Manuals...
Need help?
Do you have a question about the CopyCentre C20 and is the answer not in the manual?
Questions and answers