
Related Manuals for Kenton Control Freak STUDIO EDITION

Summary of Contents for Kenton Control Freak STUDIO EDITION
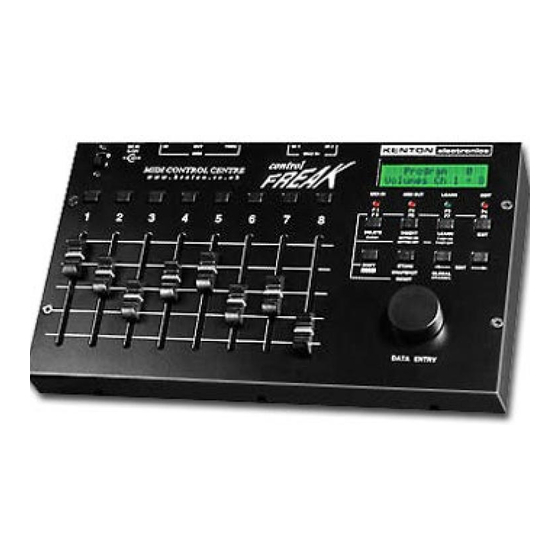
- Page 1 MIDI CONTROL CENTRES Control Freak STUDIO EDITION & Control Freak ORIGINAL...
-
Page 3: Table Of Contents
CONTROL FREAK CONTENTS Foreword ........1 Connecting Up . - Page 4 CONTROL FREAK...
-
Page 5: Foreword
CONTROL FREAK INTRODUCTION Foreword Congratulations on your purchase of a Kenton Control Freak. Please take the time to read this manual thoroughly as it explains everything you will need to know in order to get the most from your unit. -
Page 6: Connecting Up
In more advanced setups, there may be situations where Thru boxes, merge boxes and switch boxes will be useful. Kenton maintain a stock of these items, together with a full range of MIDI leads. -
Page 7: Getting Started
CONTROL FREAK GETTING STARTED Getting Started In order to get you started, many of the programs on the Freak have been pre-loaded at the factory with useful features. For example program 0 contains a profile which is set up so the sliders control MIDI volumes on channels 1 –16 (1 –... -
Page 8: Switching On
PLAY MODE CONTROL FREAK Switching on On power up, the LCD illuminates and displays the product name and current software version* . After a couple of seconds the LCD changes to show: `Program````0` `Program````0` Volumes Ch`1`-16 Volumes Ch`1`-`8 on the Freak , or... -
Page 9: The Edit Buttons In Play Mode
CONTROL FREAK THE EDIT BUTTONS IN PLAY MODE What the edit buttons will do for you in PLAY MODE What to expect from the [SHIFT] button in PLAY MODE 1 Pressing [SHIFT] will stop the sliders and buttons sending any MIDI until it has been released. This is useful if you want to know which slider or button does what. -
Page 10: The Data Wheel In Play Mode
THE DATA WHEEL IN PLAY MODE CONTROL FREAK What to expect from the Data Wheel in PLAY MODE In the home position, the Data Wheel is used to scroll through the available programs.The display will show the names of the profiles they contain. For example: DATA ENTRY ```Program```0``... -
Page 11: How The Freak Uses Midi Channels
CONTROL FREAK HOW THE FREAK USES MIDI CHANNELS Understanding how the Freak uses MIDI channels In the simplest case you don’t need to set any MIDI channel at all, in which case the Freak will use the Global MIDI channel (factory default #1) – You can change this at any time whilst you are in play mode by going to the Real-Time Edit section and using the Data Wheel to change the Global MIDI channel. -
Page 12: Editing Overview
EDITING THE CONTROL FREAK CONTROL FREAK Editing Overview The main editing commands are grouped together here for easy reference. Defining objects to edit Moving a slider before entering edit mode will define it as the Slider to Edit.This also works with Push buttons but not the F keys. The [<... - Page 13 CONTROL FREAK EDITING OVERVIEW When you have pressed the [–– >] key to take you into EDIT MODE, the Data Wheel can be used to scroll through the various edit menus.At present there are 21 edit menu options: DATA ENTRY Menu What you see on the top line Description...
-
Page 14: Overall Map Of Editing System
OVERALL MAP OF EDITING SYSTEM CONTROL FREAK PLAY MODE EDIT MODE EDIT EDIT EDIT EDIT EDIT EDIT EDIT EDIT EDIT EDIT EDIT EDIT [HOME] [< ––] [< ––] [< ––] [< ––] [–– >] [–– >] [–– >] [–– >] [––... -
Page 15: Edit Mode
CONTROL FREAK OVERALL MAP OF EDITING SYSTEM EDIT MODE EDIT EDIT EDIT EDIT EDIT EDIT EDIT EDIT EDIT EDIT EDIT EDIT EDIT [–– >] [–– >] [–– >] [–– >] [–– >] [–– >] [–– >] [–– >] [–– >] [––... -
Page 16: Edit Slider Name
EDIT MENUS CONTROL FREAK Slider operations Slider name EDIT MENU 1 This allows you to enter a name of up to 16 characters for each individual EDIT`SLIDER`NAME slider. Push`>`to`Select Pressing the [–– >] button will move to the next screen. This allows you to choose the slider to edit by turning the Data Wheel. -
Page 17: Edit Button Name
CONTROL FREAK EDIT MENUS Button operations Button On name EDIT MENU 3 This allows you to enter a name of up to 16 characters for each Button On. EDIT`PB``ON`NAME Button On names are edited in the same way as slider names. Push`>`to`Select Press [STORE] then [EXIT] or use [SHIFT]/[STORE] to jump to Button On data... -
Page 18: Edit F Key Name
EDIT MENUS CONTROL FREAK F key operations F key On name EDIT MENU 7 This allows you to enter a name of up to 16 characters for each F key On. EDIT`FK``ON`NAME F key On names are edited in the same way as slider names. Push`>`to`Select Press [STORE] then [EXIT] or use [SHIFT]/[STORE] to jump to F key On data... -
Page 19: Edit Program Name
CONTROL FREAK EDIT MENUS Program operations Program name EDIT MENU 11 This allows you to enter a name of up to 16 characters for each individual EDIT`PROGRM`NAME program. Program names are edited in the same way as slider names. Push`>`to`Select Press [STORE] then [EXIT] or use [SHIFT]/[STORE] to jump to Program data EDIT MENU 12... - Page 20 EDIT MENUS CONTROL FREAK These three screens are identical in function to those above but apply to real- ``R/T`Value`#2`` time byte #2. Minimum`Val=```0 Pressing the [–– >] button will move to the next screen: ``R/T`Value`#2`` Maximum`Val=`127 Pressing the [–– >] button will move to the next screen: ``R/T`Value`#2` Default`Val=`Off Pressing the [––...
-
Page 21: Edit Global Name
CONTROL FREAK EDIT MENUS Global operations Global name EDIT MENU 13 This allows you to enter a startup name.This name will be seen on power up, EDIT`GLOBAL`NAME and is edited in the same way as slider names. Push`>`to`Select Press [STORE] then [EXIT] or use [SHIFT]/[STORE] to jump to Global data EDIT MENU 14 EDIT`GLOBAL`DATA... -
Page 22: Sysex Rx Prog Map
EDIT MENUS CONTROL FREAK RX/TX Dump operations SysEx RX prog map EDIT MENU 15 SYSX`RX`PROG`MAP This allows you to redirect incoming profile dumps to any internal program. Push`>`to`Select Pressing the [–– >] button will move to the next screen: The Data Wheel can be used to select a destination program for the incoming ReMap`to`Prog``0 profile.Then just send the data to the Freak from your computer. -
Page 23: Sysex Dump Block
CONTROL FREAK EDIT MENUS SysEx dump block EDIT MENU 18 This allows you to dump various different data blocks to an external storage SYSEX`DUMP`BLOCK device. Pressing the [–– >] button will move to the next screen: Push`>`to`Select The Data Wheel can be used to select from the available blocks. ``Block`Select`` For example Slider block dumps every slider in every program. -
Page 24: ``Copy`program
EDIT MENUS USER MANUAL Copy program EDIT MENU 21 This allows you to copy any program to any other program location. Pressing ``COPY`PROGRAM`` the [–– >] button will move to the next screen: Push`>`to`Select The Data Wheel can be used to select the source program. From`Program```x The bottom line of the display will show the name of the selected program. -
Page 25: Commands
CONTROL FREAK COMMANDS Commands When you see the ````COMMAND````` ``End`of`DATA``` prompt you have the option of the following commands.The table below lists all currently available commands and their associated data bytes.As may be seen, the majority of MIDI and Internal Commands use a command followed by one or two variables. MIDI Command Data Byte # 1 Data Byte # 2... -
Page 26: Data Variables
DATA VARIABLES CONTROL FREAK Data variables Most commands require some data to be entered at the subsequent screens. The following data variables can be used at any of these screens. The table lists the data types in the order you see them as you turn the Data Wheel to the left (anti-clockwise). -
Page 27: Editing Examples
CONTROL FREAK EDITING EXAMPLES Editing examples – a step by step guide In all the following examples the naming of the slider/button has been omitted as it is common to all examples and is described fully on page 12. Further editing examples will be made available on our website. Example of making a slider control filter cutoff on the Global MIDI channel In this case we are assuming that filter cutoff can be controlled with controller #74.This is by no means always the case, but the method holds good for any other controller message such as MIDI... - Page 28 EDITING EXAMPLES CONTROL FREAK Example of making a button send note on & off on the Global MIDI channel – taking the note number from the local slider (the one directly beneath the button) at a fixed velocity of 64 Press the [––...
- Page 29 CONTROL FREAK EDITING EXAMPLES At this point you have set the button so that it turns a note on when you press it, but now you also need to make it send a note off when you release it, so continue as follows: Press the [––...
- Page 30 EDITING EXAMPLES CONTROL FREAK Example of making a button send a chord on the Global MIDI channel – taking the velocity from the local silder (the one directly beneath the button) For this example we will send middle C and the major third and fifth above it.These correspond to MIDI note numbers 60, 64 and 67 Press the [––...
- Page 31 CONTROL FREAK EDITING EXAMPLES Press the [–– >] key – the display will show: ```Note`Number Data`Val`00h```0 Turn the Data Wheel to the right (clockwise) until the display shows: Data`Val`43h``67 Press the [–– >] key – the display will show: ````Velocity```` Data`Val`00h```0 Turn the Data Wheel one click to to the left –...
- Page 32 EDITING EXAMPLES CONTROL FREAK Turn the Data Wheel to the right (clockwise) until the display shows: Data`Val`40h``64 Press the [–– >] key – the display will show: ````Velocity```` Data`Val`00h```0 Turn the Data Wheel one click to to the left - the display will show: Data`from`Slider Press the [––...
- Page 33 CONTROL FREAK EDITING EXAMPLES Example of sending on multiple MIDI channels from one slider How to make a slider send MIDI volume on two MIDI channels at the same time In the example below, we’re using MIDI Channels 1 & 2. from home position to start edit and display the edit menu options.
- Page 34 EDITING EXAMPLES CONTROL FREAK Press the [–– >] key – the display will show ````COMMAND ``End`of`DATA Press the [STORE] key to save your data UPDATING`MEMORY Press the [EXIT] key to go back to PLAY MODE As you can see from the above, you have to send the message twice. Setting the channel then sending the message, then setting a new channel and sending the message again.
- Page 35 CONTROL FREAK EDITING EXAMPLES At this point you have already set the slider to send MIDI volume (controller #7) on MIDI Channel #1. Continue as follows to make it also send inverted data on Channel #2. Press the [–– >] key – the display will show: ````COMMAND ``End`of`DATA Turn the Data Wheel one click to the left - the display will show:...
- Page 36 EDITING EXAMPLES CONTROL FREAK Example of programming a button to send a System Exclusive Message (SysEx) For this example we are going to send a General MIDI System On message which comprises six bytes as follows: (in hexadecimal) F0h, 7Eh, 7Fh, 09h, 01h, F7h. Press the [––...
- Page 37 CONTROL FREAK EDITING EXAMPLES Example of programming a button to learn Note On/Off messages Press the [–– >] edit button to enter EDIT MODE Use the Data Wheel to select… EDIT`PB``ON`NAME Enter a suitable name as previously described Note`On`36`C1 Press [SHIFT] + [STORE] to jump directly to PB on data. Minimum`Levl```0 Press the [LEARN] button Learning...
-
Page 38: Using The External Inputs
EXTERNAL INPUTS 1 & 2 CONTROL FREAK Using the Each external input can be used to connect either a variable or switch type foot pedal external to replace the operation of a slider, button or F key. The external input settings are selected inputs in ‘Edit program data’... - Page 39 CONTROL FREAK EXTERNAL INPUTS 1 & 2 Using a variable pedal to control MIDI volume (using In #1) Although this example uses MIDI volume (controller #7) , you could substitute another continuous controller (eg: controller #1 – modulation) or a different type of MIDI message entirely. Remember, all you are actually doing is replacing the operation of a slider with a foot pedal, therefore anything you can do with a slider you can also do with a pedal.
- Page 40 EXTERNAL INPUTS 1 & 2 CONTROL FREAK Setting a button to act as a sustain pedal This is most useful if this button is then assigned to an external switch pedal. Select ‘Edit PB On Name’– screen reads EDIT`PB`ON`NAME Use the Data Wheel to select a button and give the button a name in the usual way (eg:‘Sustain On’) [SHIFT] [STORE] Hold...
-
Page 41: Cv To Midi Conversion
CONTROL FREAK EXTERNAL INPUTS 1 & 2 CV-to-MIDI The external inputs may also be used as CV/Gate inputs in order to perform CV-to-MIDI conversion conversion. As the set up procedure is rather extensive, Program 60 (125 for Control Freak ) has been pre-loaded with a CV-to-MIDI demo patch. ORIGINAL An example of how to program this will be made available on our website. -
Page 42: Nrpns Explained
NRPNs & RPNs EXPLAINED CONTROL FREAK Non-Registered Parameter Numbers (NRPNs) explained It is worth mentioning that you really don’t need to know how NRPNs actually work in order to program the Freak to send them. Because of the Freak’s friendly editing system, all you need is the Non Registered Parameter Numbers given in the manufacturer’s product literature, just enter these numbers when prompted and the Freak will do the rest.You might have the information printed in your manual or you may need to get it from the manufacturer’s website. -
Page 43: Rpns Explained
CONTROL FREAK NRPNs & RPNs EXPLAINED Non-Registered Parameter Numbers, or NRPNs, are actually made up of multiple continuous controller messages. There are only 128 continuous controllers (0-127) of which the last few are reserved for system messages (eg #121 = reset all controllers). However by combining several controllers into an NRPN the potential number of parameters available for control is greatly increased. -
Page 44: Sysex Explained
A typical example of a SysEx string is that which the Kenton Pro-2000 MIDI-CV converter uses to change the speed of LFO1:... -
Page 45: Dealing With Sysex Variable Data Bytes
CONTROL FREAK SYSEX EXPLAINED Dealing with SysEx variable data bytes There are several ways in which different manufacturers want their variable data sent.The Freak has got several data options available for dealing with these.When you are in edit mode entering SysEx data, you are offered several new choices for variable data bytes in addition to the options available for controller messages and the like.These are mentioned in the reference section but the following explains what these are, and where you would use them. -
Page 46: Profiles And Programs
How do I download profiles from the web and load them in? Profiles Kenton are continually adding to the hundreds of profiles already on our website. These profiles are available for download free from our website at www.kenton.co.uk.We also welcome profiles submitted by our customers for the benefit of other users.You can email these to us at... -
Page 47: Cubase Vst Users
VST audio mixer. Control Freak owners with an earlier software revision than 4501.289 (4501.422 for Original Freak) will not have these profiles but can download them from our website www.kenton.co.uk, where there is also a profile for controlling transport. -
Page 48: Cakewalk Pro Audio Users
CAKEWALK PRO AUDIO USERS CONTROL FREAK Cakewalk Pro Audio users Cakewalk users can control the mixing desk from the Freak. Just follow the simple procedure that follows: Open up the mixing desk inside cakewalk and right click on slider 1; this will bring up a sub-menu. -
Page 49: Logic Audio Users
CONTROL FREAK LOGIC AUDIO USERS Logic Audio users Logic Audio users can control the midi desk from the Kenton Control Freak. Bring up the GM mixing desk inside Logic and the mixer is ready to go. This is done by using the Freak’s factory default profile Program 0 volumes ch 1-16 for volume control and the Freak’s factory default profile Program 1 pans... -
Page 50: Saving A Sysex File
SAVING A SYSEX FILE CONTROL FREAK Saving a SysEx File How to save a SysEx file without a sequencer It is possible to save your profiles without using a sequencer. Instead you can use a dedicated SysEx editor. Set the Freak to the type of SysEx dump you would like to do (single, program or block) before you press store. -
Page 51: The Virtual Control Freak
CONTROL FREAK THE VIRTUAL CONTROL FREAK The Virtual Control Freak The virtual Control Freak is a freeware program that allows the user to set up or edit a profile without using the Freak. This is useful as you can then save and edit till you are happy with it before you send it to your Freak. -
Page 52: Studio Edition
SYSTEM EXCLUSIVE CONTROL FREAK Details of the Control Freak System Exclusive Specification STUDIO EDITION The first five bytes of the Freak’s own SysEx messages are common to all data types. N.B. the h suffix means hexadecimal [ 1 ] 0F0h – Begin SysEx command [ 2 ] 00h –... - Page 53 CONTROL FREAK SYSTEM EXCLUSIVE Request for 64 byte single data dump (also Button/Fkey etc.) F0h, 00h, 20h, 13h, 09h, 10h , 40h, prog_num , slider_num , F7h where prog_num is a (decimal) number between 0 and 127 where slider_num is as follows (decimal) : 0 –...
-
Page 54: Original
SYSTEM EXCLUSIVE CONTROL FREAK Details of the Control Freak System Exclusive Specification ORIGINAL The first five bytes of the Freak’s own SysEx messages are common to all data types. N.B. the h suffix means hexadecimal [ 1 ] 0F0h – Begin SysEx command [ 2 ] 00h –... - Page 55 CONTROL FREAK SYSTEM EXCLUSIVE Request for 64 byte single data dump (also Button/F key etc.) F0h, 00h, 20h, 13h, 08h, 10h , 40h, prog_num , slider_num , F7h where prog_num is a (decimal) number between 0 and 127 where slider_num is as follows (decimal) : 0 –...
-
Page 56: Midi Analyser Mode
MIDI ANALYSER MODE CONTROL FREAK MIDI Analyser Mode The Control Freak also has a MIDI analyser function.This feature allows you to see what types of MIDI messages are being transmitted by your master keyboard, or sequencer. In this way, the Control Freak may be used as a powerful diagnostic tool if you have a problem with your MIDI set-up. -
Page 57: Overview Of The Midi Message Format
CONTROL FREAK OVERVIEW OF THE MIDI MESSAGE FORMAT Overview of the MIDI message format To make it easier to understand, MIDI data is usually represented in either decimal (base 10) or hexadecimal (base 16) numbers. On the Freaks, decimal is suffixed with [d]. Hex is suffixed with [h]. The MIDI standard uses 0-255 in the following way: 00 - 7F = 0-127 variable for data Channel Commands... -
Page 58: Specifications
Warranty The Control Freak comes with a 12 month back to base warranty (from purchase date). Customer must arrange and pay for carriage to and from Kenton Electronics. Support Control Freak profile updates for a wide range of devices are available from our website: www.kenton.co.uk. -
Page 59: Features And Contact Details
Snapshot function – sends all current slider positions to MIDI Out • Reset all controllers function • Hundreds of presets are already available from www.kenton.co.uk Further Further information and additional examples will be made available on our website. Information Contact Kenton Electronics...
Need help?
Do you have a question about the Control Freak STUDIO EDITION and is the answer not in the manual?
Questions and answers