Table of Contents
Advertisement
Advertisement
Table of Contents

Related Manuals for Sony nxcam HXR-NX3D1E


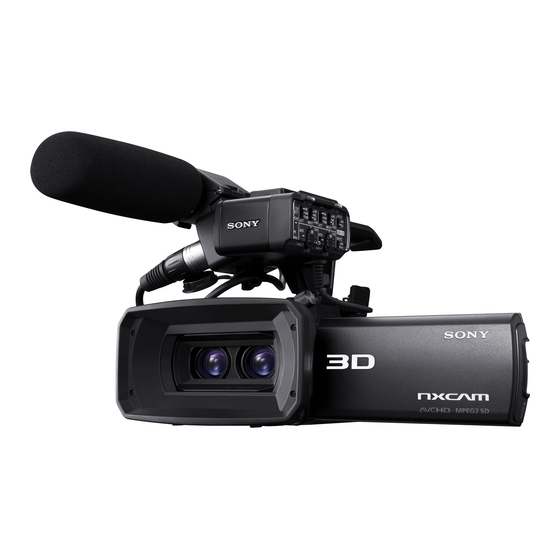
Summary of Contents for Sony nxcam HXR-NX3D1E
- Page 1 4-278-517-11(1) 3D Digital HD Video Table of contents Camera Recorder Getting started Recording/Playback Operating Guide Advanced operations Saving images with an external device Customizing your camcorder Additional information Quick reference HXR-NX3D1E/ NX3D1P...
-
Page 2: Read This First
Read this first Supplied items The numbers in ( ) are the supplied quantity. Camcorder (1) AC Adaptor (1) Power cord (Mains lead) (1) HDMI cable (1) Component A/V cable (1) A/V connecting cable (1) ... -
Page 3: About Language Setting
Menu items, LCD panel, and lens Microphone XLR Adaptor when a tripod Avoid operating the touch panel under is attached to the camcorder following conditions, as doing so may cause a malfunction of the camcorder. When there are droplets of water on the touch ... - Page 4 On recording Standard (STD) image quality movies recorded on SD memory cards cannot be played on AV To ensure stable operation of the memory equipment of other manufacturers. card, it is recommended to format the memory card with your camcorder before the first use DVD media recorded with HD image (p.
-
Page 5: Notes On Use
Media Settings)] not crash the camcorder against an object. [Format] the desired medium Notes on optional accessories We recommend using genuine Sony accessories. Genuine Sony accessories may not be available in some countries/regions. -
Page 6: Table Of Contents
Table of contents indicate the 3D and 2D sides of the 2D/3D switch (p. 24), respectively. The items you can set differ depending on the position of the switch. Read this first..................2 Notes on use. - Page 7 Selecting the recording mode............38 Using the Tracking focus function.
- Page 8 Customizing your camcorder Using menus..................62 Operating menus..
-
Page 9: Getting Started
Getting started Step 1: Attaching the supplied microphone and lens hood You do not need to attach the XLR Adaptor or microphone when you use the internal microphone. Attaching the XLR Adaptor XLR Adaptor Active Interface Shoe Attach the XLR Adaptor to the accessory shoe on the camcorder and tighten the screw of the XLR Adaptor. -
Page 10: Attaching The Microphone
Attaching the microphone Microphone holder INPUT1 jack Release lever Attach the wind screen to the microphone . Unlock the stopper of the microphone holder and open the cover. Align the convex part of the microphone with the concave part of the holder, and then place the microphone into the holder. -
Page 11: Attaching The Lens Hood
Put the microphone cable into the cable holder. Hook the cable in the outer cable holder. See page 43 on the settings for the audio recording. When detaching the microphone cable Detach the microphone from the microphone holder. ... - Page 12 Tighten the screw of the lens hood firmly. To remove the lens hood Loosen the screw of the lens hood and remove the lens hood while moving the lens hood lock lever to RELEASE.
-
Page 13: Step 2: Charging The Battery Pack
Step 2: Charging the battery pack CHG (charge) lamp Battery pack Power cord (Mains lead) DC plug DC IN jack To the wall outlet (wall AC Adaptor socket) Align the mark on the DC plug with that on the DC IN jack. You can charge the “InfoLITHIUM”... -
Page 14: Charging Time
Connect the AC Adaptor and the power cord (mains lead) to your camcorder and the wall outlet (wall socket). The CHG (charge) lamp lights up and charging starts. The CHG (charge) lamp turns off when the battery pack is fully charged. When the battery is charged, disconnect the AC Adaptor from the DC IN jack of your camcorder. -
Page 15: Charging The Battery Pack Abroad
To use a wall outlet (wall socket) as a power source Make the same connections as “Step 2: Charging the battery pack” (p. 13). Even if the battery pack is attached, the battery pack is not discharged. Charging the battery pack abroad You can charge the battery pack in any countries/regions using the AC Adaptor supplied with your camcorder within the AC 100 V - 240 V, 50 Hz/60 Hz range. -
Page 16: Step 3: Turning The Power On, And Setting The Date And Time
Step 3: Turning the power on, and setting the date and time Open the LCD screen of your camcorder. Your camcorder is turned on. To turn on your camcorder when the LCD screen is open, press POWER. MODE lamp POWER button Select the desired language, then touch [Next]. - Page 17 Set [Summer Time], then touch [Next]. If you set [Summer Time] to [On], the clock advances 1 hour. Select the date format, then touch [Next]. Select the date and time, touch to set the value, then touch [Next] The clock starts.
- Page 18 Aim the camcorder at a subject to display it on the LCD screen. Be sure that the subject produces a scale higher than the mark. The subject will appear doubled. If you feel uncomfortable viewing the image in 3D, press 2D/3D DISP and check the image in 2D (p.
-
Page 19: Changing The Language Setting
Notes The date and time does not appear during recording, but they are automatically recorded on the recording media, and can be displayed during playback. To display the date and time, touch (MENU) [Setup] [ Playback Settings)] [Data Code] [Date/Time] To turn off the power Close the LCD screen. -
Page 20: Step 4: Preparing The Recording Media
Step 4: Preparing the recording media The recording media that can be used are displayed on the screen of your camcorder as following icons. Internal memory Memory card In the default setting, both movies and photos are recorded on this recording media. You can perform recording, playback and editing operations on the selected medium. -
Page 21: Inserting A Memory Card
Inserting a memory card Notes Set the recording medium to [Memory Card] to record movies and/or photos on a memory card. Types of memory card you can use with your camcorder SD Speed Class Described in this manual “Memory Stick PRO Duo”... - Page 22 Open the cover, and insert the memory card with the nothched edge in the direction as illustrated until it clicks. Close the cover after inserting the memory card. Access lamp Note the direction of notched corner. The [Preparing image database file. Please wait.] screen appears if you insert a new memory card.
-
Page 23: Recording/Playback
Recording/Playback Recording In the default setting, movies and photos are recorded on the internal recording media. Movies are recorded in 3D with high definition image quality (HD). Tips To change the recording media, see page 20. Fasten the grip belt. Open the LCD screen of your camcorder. -
Page 24: Recording Movies
Recording movies (Movie): When recording a movie MODE button (Photo): When recording a photo START/STOP [STBY] [REC] button 2D/3D switch Press MODE to turn on the (Movie) lamp. Press START/STOP to start recording. To stop recording, press START/STOP again. Tips ... - Page 25 To display items on the LCD screen again Touch anywhere on the screen except the buttons on the LCD screen so that you can use items. You can change the settings using the [Display Setting] menu (p. 76). about 4sec after To record movies in 3D while viewing them in 2D on the LCD screen of the camcorder If you record 3D movie for a long time, you may feel uncomfortable.
- Page 26 Tips See page 98 on the recordable time of 2D movies. You can record photos during movie recording by pressing PHOTO fully (Dual Rec, p. 40). SteadyShot] is set to [Active] in the default setting. You can specify the priority face by touching it (p. 39). ...
-
Page 27: Shooting Photos
Shooting photos (Movie): When recording a movie MODE button (Photo): When recording a photo [STBY] [REC] 2D/3D switch PHOTO button When disappears, the photo is recorded. Set the 2D/3D switch to 2D. Press MODE to turn on the (Photo) lamp. -
Page 28: Playback On The Camcorder
Playback. on.the.camcorder You can enjoy the playback of images with powerful sound through the stereo speakers built into the camcorder. In the default setting, movies and photos that are recorded on the internal recording media are played. Tips To change the recording media, see page 20. ... - Page 29 Change to the movie/photo recording mode Time-line bar Change Event Scale button The Event Index screen appears when you touch the event that is displayed on the center. You can also choose an event by touching on the time-line bar.
-
Page 30: Operating The Camcorder While Playing A Movie
Operating the camcorder while playing a movie You can use the functions shown in the figure below while the camcorder is playing a movie. Volume adjustment Delete Context To stop * Next Previous To fast-forward * To fast-reverse * To pause * /play These buttons can be used only when the camcorder is playing a movie. -
Page 31: Viewing Photos
to adjust the vertical direction [Next]. Touch The screen used to adjust horizontal direction appears. to adjust the horizontal direction Touch Viewing photos You can use the functions shown in the figure below while you are viewing photos. The figure below will be displayed when you select [ PHOTO] by touching the Switch Image Type button on the Event Index screen. -
Page 32: Playing Images On A Tv
Playing images on a TV Connection methods, the image type List of connection (3D or 2D) and the image quality (high definition (HD) or standard definition Connecting to a 3D TV (STD)) viewed on the TV screen differ Make sure that the 2D/3D switch of the depending on what type of TV is camcorder is set to 3D. - Page 33 A/V connecting cable (supplied) (Yellow) HDMI Cable (supplied) (White) (Red) Component A/V Cable (supplied) Component A/V Cable (Green) Y (supplied) (Blue)P (Green) Y (Red)P (Blue)P (Red)P (White) (Red) (White) (Red) A/V connecting cable with S VIDEO (sold separately) Connecting to a non-high-definition (White) 16:9 (wide) or 4:3 TV (Red)
-
Page 34: Using "Bravia" Sync
When the A/V connecting cable is used to When you connect with component output movies, movies are output with standard A/V cable definition image quality (STD). If you connect only component video plugs, audio signals are not output. Connect the white If your TV/VCR has a 21-pin adaptor and red plugs to output audio signals. - Page 35 This camcorder is compatible with the “Photo TV HD” standard. “Photo TV HD” allows for highly-detailed, photo- like depiction of subtle textures and colors. By connecting Sony’s Photo TV HD-compatible devices using the HDMI cable or a component AV cable...
-
Page 36: Advanced Operations
Advanced operations Useful functions for recording movies and Optimum distance from the subject photos and zooming level The distance at which you can obtain icons indicate the 3D and good 3D movies varies depending on the 2D positions of the 2D/3D switch (p. 24), zooming level. -
Page 37: Recording Better Images Automatically (Intelligent Auto)
Camera-shake detection Recording better images (Walk), (Tripod) automatically (Intelligent The camcorder detects whether camera- Auto) shake occurs or not, and makes the optimum compensation. When you turn the camcorder toward the subject, the camcorder records using Notes the optimum combination of the 3 The camcorder may not detect the expected ... -
Page 38: Selecting The Frame Rate
Tips Notes You can record, play, or edit movies in the When 3D recording and [60i/50i Sel] is set to selected image quality only. To record, play, or [50i], you cannot select the frame rate. edit movies in another image quality, change this setting. -
Page 39: Using The Tracking Focus Function
Recording modes and the media [High Quality ] (AVC HD 17M (FH)) [Standard ] (AVC HD 9M (HQ)) (the Types of media that images can be saved default setting) on will depend on the recording mode [Long Time ] (AVC HD 5M (LP)) ... -
Page 40: Recording High Quality Photos During Movie Recording (Dual Rec)
Notes Recording in mirror The subject you touched may not be detected, mode depending on the surrounding brightness or hairstyle of the subject. In this case, touch the subject again when you record. If you want to track a face, set the [Face ... - Page 41 MANUAL To assign the menu item to the button MANUAL dial Press and hold MANUAL down for a few seconds. The [Dial Setting] screen appears. MANUAL dial Press MANUAL to make the Rotate the MANUAL dial and select the camcorder adjust the depth of item to be assigned.
-
Page 42: Setting Time Data
If you adjust the IRIS, the in-focus range in To reset the time code front of and behind the focused subject is You can reset the time code (00:00:00:00) changed. When you open the IRIS wider (a (MENU) [TC/UB] by touching smaller F-stop), the in-focus range becomes ... -
Page 43: Audio Setup
Audio setup Using the internal microphone Detach the XLR Adaptor when you use the internal microphone. You can record stereo sound. Tips To reduce wind noise, set [Wind Noise Reduct.] to [On] (p. 75). Using an external microphone (sold separately) When an external microphone is connected to the MIC input jack, sound is switched to... -
Page 44: Adjusting The Recording Level
Selecting the recording level AUTO/MAN (CH1) switch AUDIO LEVEL (CH1) dial AUTO/MAN (CH2) switch AUDIO LEVEL (CH2) dial Switching wind noise reduction to ON/OFF LOW CUT (INPUT1) switch LOW CUT (INPUT2) switch Attach the XLR Adaptor (p. 9), and connect the supplied microphone to INPUT1 jack . -
Page 45: Reducing Wind Noise
Turn the AUDIO LEVEL dial or Select the sound source to be to adjust the volume to the input. proper level. Set the INPUT1/INPUT2 (LINE/MIC/ MIC+48V) switch or according Confirm that the volume is at the to the device to be connected to the proper level with headphones or audio INPUT1/INPUT2 jacks ... -
Page 46: Making Good Use Of Your Camcorder
Making good use of your camcorder icons indicate the 3D and Notes When the INPUT1/INPUT2 (LINE/MIC/ 2D positions of the 2D/3D switch (p. 24), MIC+48V) switch or is set to LINE, the respectively. input level is fixed to +4dBu. Even if you reset the ATT switch, the input level does not change. -
Page 47: Protecting Recorded Movies And Photos (Protect)
Touch to select the desired To select and delete movies, event, then touch touch [Multiple Images]. Touch and hold the desired thumbnail so that you can confirm the image. Touch In the case of 2D, after touching [Multiple ... -
Page 48: Copying Images
Notes When you record an image on the memory card Touch for the first time, create the image database file (MENU) [Setup] [ by touching Media Settings)] [Repair Img. DB F.] [Memory Card]. To undo the protection of movies and Connect your camcorder to the wall outlet ... -
Page 49: Dividing A Movie
Dividing a movie Touch the type of copy operation. You can divide a movie to delete [Multiple Images]: To select multiple unnecessary parts. images and copy them [All In Event]: To copy all images of a specified event [ ... -
Page 50: Capturing A Photo From A Movie
Do not eject the memory card while dividing movies on the memory card. Touch A slight difference may occur from the point When capturing is finished, the screen where you touch and the actual dividing returns to pause. point, as your camcorder selects the dividing point based on about 0.5 second increments. -
Page 51: Saving Images With An External Device
Saving images with an external device Selecting a method for saving images with an external device You can save 3D movies and 2D high definition image quality (HD) movies using an external device. Select the method to be used according to the device. Movies External devices Connecting cable... -
Page 52: The Devices On Which The Created Disc Can Be Played Back
The devices on which the created disc can be played back DVD disc with high definition image quality (HD) AVCHD format playback devices, such as a Sony Blu-ray disc player or a PlayStation DVD disc with standard definition image quality (STD) Ordinary DVD playback devices, such as a DVD player. -
Page 53: Saving Images On An External Media Device
(USB storage For details on available external media devices, devices), such as an external hard disk go to the Sony support website in your drive. You can also play back images on the country/region. camcorder or another playback device. - Page 54 When connecting an external media device The images saved in the external media device are displayed on the LCD screen. When an external media device is USB Adaptor Cable connected, the USB icon will appear on the (supplied) Event View screen, etc. You can make menu settings of the external media device such as deleting images.
-
Page 55: Saving Desired Movies And Photos
Saving desired movies and photos Touch You can save desired images in the on the camcorder screen. camcorder to the external media device. Connect the camcorder to the Playing back images in the external external media device and touch media device on the camcorder [Play without copying.]. -
Page 56: Other Than Dvdirect Express
Notes You cannot save 3D movies. Sony DVD writer may not be available in some countries/regions. Connect the AC Adaptor and the power cord (mains lead) to the DC IN jack of your camcorder and the wall outlet (wall socket) (p. -
Page 57: Creating A Standard Definition Image Quality (Std) Disc With A Recorder, Etc
(STD). Connect your camcorder to the wall outlet (wall socket) using the supplied AC Adaptor for this operation (p. 15). Sony DVD writer may not be available in some countries/regions. High definition image quality (HD) movies ... -
Page 58: Your Camcorder
A/V Remote Connector Connect your camcorder to the recording device (a disc recorder, etc.) with the A/V connecting cable (supplied) or an A/V connecting cable with S VIDEO (sold separately). Connect your camcorder to the input jacks of the recording device. -
Page 59: Saving Images With A Computer
Saving images with a computer Preparing a computer (Windows) Hard disk You can perform following operations using Disk volume required for installation: Approximately 100 MB “Content Management Utility. ” Only the NTFS or exFAT file system can be Importing images to a computer ... - Page 60 Place the supplied CD-ROM Turn on your camcorder, then “Content Management Utility” in connect the camcorder to the the disc drive of your computer. computer using the supplied USB cable. The installation screen appears. If the screen does not appear, click ...
- Page 61 To disconnect your camcorder from the computer Click the icon at the bottom right of the desktop of the computer [Safely remove USB Mass Storage Device- Drive]. Touch [Yes] on the camcorder screen. Disconnect the USB cable. To play images recorded on the camcorder, using a computer See Help of the supplied CD-ROM...
-
Page 62: Customizing Your Camcorder
Customizing your camcorder Using menus You can enjoy using your camcorder more by making good use of menu operations. The camcorder has various menu items under each of 6 menu categories. Shooting Mode (Items for selecting a shooting mode) p. 67 Camera/Mic (Items for customized shooting) p. -
Page 63: Menu Lists
Menu lists icons indicate the 3D and 2D positions of the 2D/3D switch (p. 24), respectively. Shooting Mode Records movies. Movie Shoots photos. Photo Records fast moving subjects in slow-motion. Smth Slw REC Divides two seconds of fast movement into frames Golf Shot which are then recorded as a movie and photos. - Page 64 Face) Adjusts the image quality of the face(s) Face Detection automatically. Automatically takes a shot whenever a smile is Smile Shutter detected. Sets the smile detection sensitivity using the smile Smile Sensitivity shutter function. Microphone) Records movies with vivid sound appropriate to Blt-in Zoom Mic the zoom position.
- Page 65 Edit/Copy Deletes movies or photos. Delete Protects movies or photos to avoid deleting. Protect Copies movies or photos. Copy Copies images stored on the internal recording Direct Copy medium or on a memory card to some type of external media. Setup Media Settings) Sets the type of media to be used for recording...
- Page 66 General Settings) Switch 1080/60i (NTSC-system) and 1080/50i 60i/50i Sel (PAL-system). Sets whether the camcorder sounds operation Beep beeps or not. Adjusts the brightness of the LCD screen. LCD Brightness Sets the recording lamp to light up or not. REC Lamp Sets whether the Wireless Remote Commander is Remote Ctrl to be used or not.
-
Page 67: Shooting Mode (Items For Selecting A Shooting Mode)
Shooting Mode (Items for selecting a shooting The point when START/STOP is pressed. mode) See “Using menus” (p. 62) on the operation. The default settings are marked with . [3sec After] Movie You can record movies. [3sec Before] Photo Notes You cannot record sound. -
Page 68: Camera/Mic (Items For Customized Shooting)
Camera/Mic (Items for customized The point when you press shooting) START/STOP The sound of a club hitting the ball See “Using menus” (p. 62) on the operation. The default settings are marked with . White Balance The camcorder records images You can adjust the color balance to the in this 2 seconds period. - Page 69 Notes Spot Meter (Flexible spot Set [White Balance] to [Auto] or adjust the meter) color in [One Push] under white or cool white fluorescent lamps. You can adjust and fix the exposure When you select [One Push], keep framing ...
- Page 70 It is easier to focus on the subject by moving Exposure the power zoom lever towards T (telephoto) to adjust the focus, then towards W (wide angle) You can fix the brightness of a picture to adjust the zoom for recording. When you manually.
- Page 71 Low Lux Auto Adjusts the shutter speed automatically. You can record bright color images, even in Manual dim light. Adjusts the shutter speed manually. Off The Low Lux function is not used. Tips You can also adjust manually by using the ...
- Page 72 Scene Selection Snow** ( ) Takes bright pictures of a You can record images effectively in various white landscape. situations. Adjusted to focus on subjects farther away Auto only. Records images in average image quality Adjusted not to focus on subjects a short without the [Scene Selection] function.
- Page 73 Tips Off When you press START/STOP the setting is Cancels Tele Macro. (Tele Macro is also cleared. canceled when you move the zoom lever to The thumbnails of movie recorded using [Black the W side.) Fader] may be difficult to see on Event View or On ( ) other screens.
- Page 74 You can magnify images up to 12 times the Auto Back Light original size using optical zooming, unless SteadyShot] is set to [Active]. (2D only) Your camcorder adjusts the exposure for backlit subjects automatically. SteadyShot On Adjusts the exposure for backlit subjects You can compensate for camera shake.
- Page 75 Faces may not be detected depending on Tips recording conditions, subject conditions, and You can detect a face or a smile on a the setting of your camcorder. subject with [Face Detection] (p. 74). If [Face Detection] may not function properly ...
- Page 76 Guide Frame Off Disables wind noise reduction. You can display the frame and check that On ( the subject is horizontal or vertical. Enables wind noise reduction. The frame is not recorded. Off Notes Does not display the guide frame. If you turn the [Wind Noise Reduct.] function ...
-
Page 77: Image Quality/Size (Items For Setting Up Image Quality Or Size)
Image Quality/Size (Items for setting up image quality or size) Audio Level Display See “Using menus” (p. 62) on the operation. You can select whether or not to display the The default settings are marked with . audio level meter. ... - Page 78 Notes x.v.Color The selected image size is effective when the (Photo) lamp is lit. You can capture wider range of colors. Various colors such as the brilliant color of flowers and turquoise blue of the sea can be more faithfully reproduced. Refer to the instruction manuals of the TV.
-
Page 79: Tc/Ub (Items For Setting Up The Time Code Or User Bit)
TC/UB (Items for setting up the time code or user bit) TC Make Preset TC/UB Disp Records the newly set time code on the recording media. See page 42. Regenerate TC Preset Reads the last time code of the previous recording from the recording media and See page 42. -
Page 80: Edit/Copy (Items For Editing)
Setup Edit/Copy (Other setup items) (Items for editing) See “Using menus” (p. 62) on the operation. See “Using menus” (p. 62) on the operation. The default settings are marked with . Delete Media Select See page 46. See page 20. Protect Media Info See page 47. - Page 81 While [Executing...] is displayed, do not close Repair Img. DB F. the LCD screen, operate the buttons on the camcorder, disconnect the AC Adaptor, or eject See page 92, 94, 96. the memory card from your camcorder. (The access lamp is lit or flashing while formatting File Number memory card.) You can select the way to assign file number...
- Page 82 Date/Time Volume You can adjust the volume of playback sound by touching TV Type You need to convert the signal depending on the TV connected when playing back Date movies and photos. The recorded movies Time and photos are played back as following Camera Data illustrations.
- Page 83 Component Auto Normal setting (outputs the signal according Select [Component] when connecting your to the TV automatically). camcorder to a TV with the component 1080p/576p input jack. Outputs high definition image quality (HD) movies with a 1080p signal and standard 576i image quality (STD) movies with a 576p ...
- Page 84 60i/50i Sel Fixed to 3D The image on the TV screen is fixed to 3D Select the settings depending on the TV if you press 2D/3D DISP (p. 25) and set the color systems of the countries/regions image on the LCD screen to 2D. where you use the camcorder.
- Page 85 REC Lamp (Recording Power On By LCD lamp) You can set the power of the camcorder to turn on or off by opening or closing the You can make the camera recording lamp LCD screen panel. on the front of your camcorder not to turn Does not turn the power on or off by opening ...
- Page 86 Summer Time You can change this setting without stopping the clock. Set to [On] to move the time forward 1 hour. Sets the summertime. Off Does not set the summertime. Date & Time See page 16. Area Setting You can adjust a time difference without stopping the clock.
-
Page 87: Additional Information
Leave your camcorder with in order to investigate the problem. However, the power of your camcorder on. If you still your Sony dealer will neither copy nor retain cannot operate your camcorder, turn off your your data. camcorder and take it to a warm place. Leave Overall operations/Wireless Remote ... - Page 88 The following menu items return to the [Tele Macro] default settings when you switch among movie SteadyShot] SteadyShot] recording and photo recording and playback [Auto Back Light] modes. [Face Detection] Fader] Self-Timer] The supplied Wireless Remote [Tele Macro] ...
- Page 89 disconnect the AC Adaptor from the wall point you should touch, the panel may not outlet (wall socket) and contact your Sony operate properly. Touch only the point where the feature you want to operate is located. dealer. The battery pack may be damaged.
- Page 90 You cannot delete the protected images. The access lamp remains lit or flashing even if recording was stopped. The data file name is not indicated Your camcorder is recording the scene you correctly or flashes. have just shot on the memory card. The file is damaged.
- Page 91 The horizontal to vertical ratio of the Black bands appear when you record a TV movie (16:9 (wide)/4:3) cannot be screen or computer screen. changed. Set [ SteadyShot] to an option except for The horizontal to vertical ratio of high [Active] (p.
- Page 92 Playing back images stored on Photos cannot be played back. memory card on other devices Photos cannot be played back if you have modified files or folders, or have edited the data on a computer. (The file name flashes in Images cannot be played back or the that case.) This is not a malfunction.
- Page 93 When you are using the S VIDEO plug, Connecting to a computer make sure the red and white plugs of the A/V connecting cable are connected (p. 34). The computer does not recognize the The top, bottom, right, and left edges camcorder.
-
Page 94: Self-Diagnosis Display/Warning Indicators
HDMI output persists even after you have tried a couple has stopped, no image is displayed on the of times, contact your Sony dealer or local connected monitor, etc. Leave the camcorder authorized Sony service facility. -
Page 95: Recording Media
Description of warning messages (Warning indicator pertaining to the external media device) If messages appear on the screen, follow the The image database file may be damaged. instructions. Check the database file by touching Recording media (MENU) [Setup] [ Media Settings)] ... - Page 96 (p. 80). camcorder (p. 21). The size of the inserted memory card is not Contact your Sony dealer. The battery pack sufficient for copying the movie(s). Use the may be damaged. recommended memory card (p. 21).
-
Page 97: Recording Time Of Movies/Number Of Recordable Photos
Recording time of movies/number of recordable photos Unable to access external media. “HD” stands for high definition image Use the external media device in stable quality, and “STD” stands for standard condition (the environment such as no image quality. vibration and room temperature, etc.). -
Page 98: Expected Recording Time Of Movies
The recording and playback time will be Expected recording time of movies shorter when you use your camcorder in low temperatures. Internal recording media The recording and playback time will be shorter depending on the conditions under which you High definition image quality (HD) in h (hour) and min use your camcorder. -
Page 99: Expected Number Of Recordable Photos
Depending on the settings of the camcorder, the Standard definition image quality (STD) recording time will be shorter. (unit: minute) Your camcorder uses the VBR (Variable Bit 2 GB 4 GB 8 GB 16 GB 32 GB Rate) format to automatically adjust image Standard quality to suit the recording scene. - Page 100 Notes The unique pixel array of Sony’s ClearVid and the image processing system allow still image resolution equivalent to the sizes described. Tips The following list shows the bit-rate, pixels and aspect ratio of each recording mode (movie + audio, etc.).
-
Page 101: Using Your Camcorder Abroad
Using your camcorder abroad Power supply On TV color systems You can use your camcorder in any Your camcorder is a PAL-system-based countries/regions using the AC Adaptor camcorder. If you want to view the playback supplied with your camcorder within the image on a TV, it must be a PAL-system- AC 100 V to 240 V, 50 Hz/60 Hz range. - Page 102 Setting to the local time You can easily set the clock to the local time by setting a time difference when using your (MENU) [Setup] [ Clock Settings)] [Date & camcorder abroad. Touch Time Setting] [Summer Time] and (MENU) ...
-
Page 103: File/Folder Structure On The Recording Media
File/folder structure on the recording media The file/folder structure is shown below. You do not usually need to acknowledge the file/ folder structure, when recording/playing back movies and still images on the camcorder. “Memory Stick PRO Duo” media Still image files (JPEG files) SD memory card, SDHC memory card, SDXC The extension of the files is “.JPG”. -
Page 104: Maintenance And Precautions
Maintenance and precautions About the memory card About the AVCHD format A memory card formatted by a computer What is the AVCHD format? (Windows OS/Mac OS) does not have guaranteed compatibility with your camcorder. The AVCHD format is a high definition Data read/write speed may vary depending ... -
Page 105: About The "Infolithium" Battery Pack
On the memory card adaptor This product cannot record or play data that uses “MagicGate” technology. “MagicGate” is When using memory card with memory card a copyright protection technology that records compliant device inserting memory card and transfers the contents in an encrypted into memory card adaptor, make sure the format. -
Page 106: About X.v.color
Do not expose the battery pack to water. The standard proposed by Sony, and is a trademark battery pack is not water resistant. of Sony. -
Page 107: Moisture Condensation
Moisture may condense when you bring your casing, unplug your camcorder and have it camcorder from a cold place into a warm place checked by a Sony dealer before operating it (or vice versa) or when you use your camcorder any further. -
Page 108: Rechargeable Battery
To clean the LCD screen On charging the pre-installed rechargeable battery The surface of the LCD screen is coated. If you scratch the surface, the coating may be come Your camcorder has a pre-installed rechargeable off. Mind the following points when cleaning battery to retain the date, time, and other settings and handling it. -
Page 109: Specifications
Specifications System Note on disposal/transfer of the Signal format: memory card NTSC color, EIA standards Even if you delete data in the memory card or HDTV 1080/60i, 1080/60p specification format the memory card on your camcorder or PAL color, CCIR standards a computer, you may not delete data from the HDTV 1080/50i, 1080/50p specification memory card completely. - Page 110 1 150 g (2 lb 8.6 oz) including the supplied speed 1/30 , 1/25 second) lens hood, battery (NP-FV70), XLR Adaptor, The unique pixel array of Sony’s ClearVid and the microphone (ECM-XM1) and the image processing system allow still image resolution equivalent to the AC Adaptor AC-L200C/AC-L200D sizes described.
- Page 111 On trademarks MultiMediaCard is a trademark of MultiMediaCard Association. “NXCAM” logo is a trademark of Sony All other product names mentioned herein may Corporation. be the trademarks or registered trademarks of “AVCHD” and “AVCHD” logotype are trademarks of Panasonic Corporation and Sony their respective companies.
- Page 112 URL to download it. When downloading the source code, select NEX-FS100 as the model for your camcorder. http://www.sony.net/Products/Linux/ We would prefer you do not contact us about the contents of source code. Read “license2.pdf ” in the “License” folder on the CD-ROM.
-
Page 113: Quick Reference
Quick reference Screen indicators Center Center Indicator Meaning Left Right [STBY]/[REC] Recording status (24) Slide show set Warning (94) Playback mode (30) Bottom Right Indicator Meaning Left Recording image quality (HD/STD), frame rate Indicator Meaning (50p/50i/25p) and MENU button (62) recording mode (PS/FX/ Self-timer recording (73) FH/HQ/LP) (38) -
Page 114: Parts And Controls
Parts and controls Figures in ( ) are reference pages. Bottom Indicator Meaning View Images button (28) Micref Level low (76) Blt-in Zoom Mic (75) Audio Level Display (77) Low Lux (71) Spot Meter/Fcs (69)/ Spot Meter (69)/ Exposure (70) AE Shift (71) Shutter Speed (70) IRIS (70) - Page 115 LCD screen/Touch panel (16, 40) Memory card access lamp (22) If you rotate the LCD panel 180 degrees, you While the lamp is lit or flashing, the can close the LCD panel with the LCD screen camcorder is reading or writing data. facing out.
- Page 116 (USB) jack (53) DC IN jack (13) Grip belt (23) Hook for a shoulder belt Tripod receptacle Attach a tripod (sold separately) to the tripod receptacle using a tripod screw (sold separately: the length of the screw must be less than 5.5 mm (7/32 in.)).
- Page 117 AUTO/MAN (CH1) switch (44) AUDIO LEVEL (CH1) dial (44) AUTO/MAN (CH2) switch (44) AUDIO LEVEL (CH2) dial (44) LOW CUT (INPUT2) switch (44) INPUT2 jack (44) INPUT1 jack (44) Cable holder (11) ...
-
Page 118: Wireless Remote Commander
Remote Commander may not function MODE button (28) properly. In this case, replace the battery with a Sony CR2025 lithium battery. Use of another Displays an Index screen during playback. battery may present a risk of fire or explosion. -
Page 119: Index
Index Content Management Utility ..59 HDMI Output Link ....83 Symbols Copy ..........48 HDMI Resolution .......83 1080i/576i ........83 HDMI TC Output ......84 1080p/576i ........83 HQ ..........38 2D Frame Rate ......77 Data Code ......19, 81 3D Depth Adjustment....30 Date/Time ........19 3D Frame Rate ......77 Date &... - Page 120 Smile Shutter .......75 Smth Slw REC ......67 One Push ........68 Wall outlet (wall socket) ....13 Snow ..........72 Original ........48 Warning messages ......95 Specifications ......109 Outdoor ........68 White Balance ......68 Spot Focus ........69 White Balance Shift ....71 Spotlight ........72 White Fader .........72 PAL ..........101 Spot Meter ........69 Wide angle ........36...
- Page 124 2011 Sony Corporation Printed in Japan ...
Need help?
Do you have a question about the nxcam HXR-NX3D1E and is the answer not in the manual?
Questions and answers