
Related Manuals for SEWOO LK-P20B


Summary of Contents for SEWOO LK-P20B
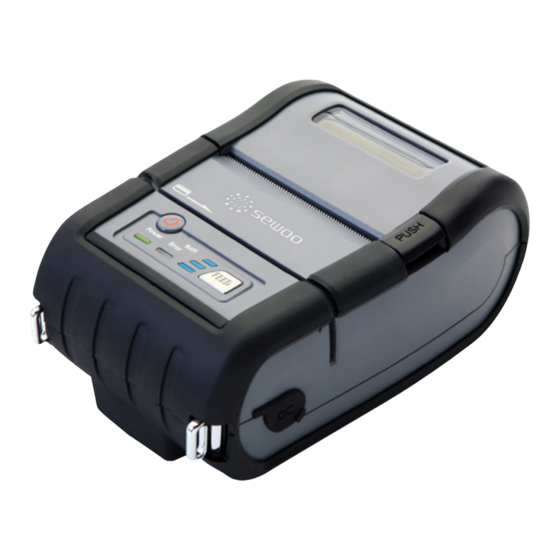
- Page 1 MODEL : LK-P20B MOBILE PRINTER All specifications are subject to change without notice...
- Page 2 RISK OF EXPLOSION IF BATTERY IS REPLACED BY AN INCORRECT TYPE. DISPOSE OF USED BATTERIES ACCORDING TO THE INSTRUCTION...
-
Page 3: Table Of Contents
Table of Contents 1. Unpacking 2. Product overview 3. Usage and Installation 3-1. Control panel usage 3-2. Battery Installation 3-3. Charging battery 3-4. Battery charger usage (Optional) 3-5. Usage of Cigar Jack for charging (Optional) 3-6. Battery removal 3-7. Belt Clip usage 3-8. -
Page 4: Unpacking
1. Unpacking Standard Printer Battery Belt Buckle Charger Serial Cable USB Shelded Cable Roll paper Quick Manual Option Battery recharger Cigar jack charger Strap Printer case... -
Page 5: Product Overview
2. Product overview MSR Slot (Optional) Power switch Open Button Paper feed button IC Card Slot (Optional) DC Power Belt clip hole Battery SERIAL... -
Page 6: Usage And Installation
3. Usage and Installation 3-1 Control panel usage Button Name function This button is used to turn the printer on and off. Power When the printer is off, press this button for approximately 3 seconds button and it will turn on the power. When you press this button in a state that the printer is on, the printer will turn off. -
Page 7: Battery Installation
3-2 Battery Installation Hook 1. Align battery hook as shown in the picture 2. Push the battery into the printer until it locks in place. NOTE As the battery is not charged at the time of your purchase, charge the battery prior to using the printer (Battery charger or Cradle can be used to charge) -
Page 8: Charging Battery
3-3 Charging battery 1. Be sure that the printer is turned off 2. After open the DC JACK cover, insert DC JACK into the printer. 3. Plug the power code to electrical outlet. NOTE 1. Unless the exclusive charger is used provided by the manufacturer, the printer can be damaged, and the manufacturer is not liable for the consequential damage. -
Page 9: Battery Charger Usage Optional
3-4 Battery charger usage Optional lamp 1. Insert the battery into the battery holder as shown above 2. Connect the DC JACK to the power electrical outlet. 3. Once the charging is completed, remove the battery from the holder. 3-5-1 The status of lamp in charging Status charging charging complete... -
Page 10: Usage Of Cigar Jack For Charging Optional
3-5 Usage of Cigar Jack for charging Optional Printer Battery holder Connect the car cigar JACK charger into the printer or battery holder. -
Page 11: Battery Removal
3-6 Battery removal Rotate the belt clip as shown Remove the battery as shown... -
Page 12: Belt Clip Usage
3-7 Belt Clip usage Insert screw into belt clip. Tighten the screw with driver as shown... -
Page 13: Loading The Media
3-8 Loading the media. Place the paper roll as shown. Make sure the paper is placed in Press the cover open button and open right direction. Pull a short length of paper out of the printer and close the cover. -
Page 14: Optional
3-9 Shoulder Strap Usage Optional Place the end of strap into the hook of Insert the strap into the hook on shoulder strap. the printer. After pulling out the end of strap Fasten the strap in the opposite side tightly, put it into the clip to be with the sample way. -
Page 15: Leather Case Usage Optional
3-10 Leather case usage Optional Open the leather case Place the printer into the leather case Close the Velcro and stick the cover. Fasten to the belt by using the clip at the rear of the leather case... -
Page 16: Self Test
3-11 Self Test Turn off the power pressing the While you are pressing the FEED power button for approximately button, press the power button 3 minutes. NOTE 1. To print ASCII pattern additionally, press the Feed button once more 2. After printing ASCII pattern, the self test will be finished automatically. - Page 17 When the printer is installed initially or when you face a problem, you can run the self test and check the information about -Control Circuit, Mechanism, Print Quality, ROM Version After checking with self-test and no issues are found, you can examine other devices and software.
-
Page 18: Msr Usage Optional
3-12 MSR usage Optional Insert and swipe the card in the direction of the arrow as shown in the picture. -
Page 19: Ic Card Usage Optional
3-13 IC CARD usage Optional Insert the card in the direction of the arrow as shown in the picture. -
Page 20: Peripherals Connection
4. Peripherals Connection This product can communicate with other devices via Bluetooth communication and cable. 4-1. Bluetooth Connection 1. The Printer can be connected to devices equipped with Bluetooth communication capacity (PDAs, PCs, etc.) 2. Use the Bluetooth connection function supported by the device to connect to the printer. -
Page 21: Interface Cable Connection
4-2 Interface Cable Connection Serial 1. Connect USB or Serial cable into the cable connector on the printer. NOTE Use the cable offered by the manufacturer (USB, Serial) 2. Connect the interface cable into the USB or Serial port of the device (PDA, PC, etc.) -
Page 22: Specification
5. Pritner Specification 5-1. Specification Printing Method Direct Thermal Printing Speed 80mm/sec 203 DPI X 203 DPI Resolution ALPHA NUMERIC Character, Extension Character Character EAN-8, EAN-13, Code39, ITF, UPC-A, Barcode Codabar, Code93, Code128, PDF417(2D) Emulation ESC/POS Driver Window CE 4.2&5.0, Window Mobile 5.0 Sensor Paper End Sensor Paper... - Page 23 5~40℃ Temperature operation storage -10~50℃ Humidity operation 35 ~ 95% storage 10 ~ 95% Preventing Overheating ● To prevent the motor from overheating, continuous driving of the printer should be 1.5 m or less in print length. Set the pause time for 30 seconds or more after driving the printer.
-
Page 24: Setting Up The Software
6. Setting up the software Please refer to the programming manual included in CD. ♣Certification FCC Information This device complies with part 15 of the FCC Results. Operation is subject to the following two conditions: (1) This Device may not cause harmful interface, and (2) This device must accept any interference received, including interference that may cause undesired operation. - Page 25 CAUTION Antenna shall be mounted in such a manner to minimize the potential for human contact during normal operation. The antenna should not be contacted during operation to avoid the possibility of exceeding the FCC radio frequency exposure limit.
- Page 27 SEWOO TECH CO.,LTD. Doosung BD, 689-20, Geumjung-dong, Gunpo-si, Gyeonggi-do, 435-862 South Korea TEL : +82-31-459-8200 FAX : +82-31-459-8880 www.miniprinter.com Rev. 1.0...
Need help?
Do you have a question about the LK-P20B and is the answer not in the manual?
Questions and answers