Table of Contents
Advertisement
Quick Links
Advertisement
Table of Contents

Summary of Contents for Bodyworx Premier A807
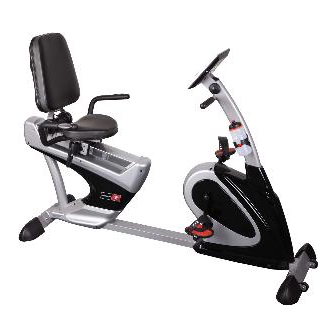
- Page 1 A807 BodyworX Deluxe Recumbent Bike...
-
Page 2: Safety Instructions
Safety Instructions • To ensure the best safety of the exerciser, regularly check it on Be sure to consult a physician before you start any exercise damages and worn parts. program. He may give you proper hints and advice with respect to the individual intensity of stress for you •your work-out and sensible eating habits. - Page 3 • Be sure to set up the exerciser in a dry and even place and always protect it from humidity. If you wish to protect the place particularly against pressure points, contamination, etc., it is recommended to put a suitable, non-slip mat under the exercise •...
-
Page 4: Exploded Drawing
Exploded drawing:... - Page 5 Part list: Part No. Description Q’ty Part No. Description Q’ty Main frame Bushing 125*75*53 Rear stabilizer Upper computer cable 750L Front stabilizer Lower computer cable 650L Triangle foot cap Sensor cable 2020L Handlebar post Handle pulse cable 800L Sliding beam Belt wheel Spring washer D15.4*D8.2*2T Handle pulse...
-
Page 6: Main Frame (
Assembly drawing: Step 1 FIG.1 (x4) M8*20L D16*D8.5*1.2T D15.4*D8.2*2T 1) Assemble the Front stabilizer (3) and Rear stabilizer (2) onto the main frame (1) by the spring washer (7), the Allen bolt (9) and the flat washer (13). 2) The backrest could be folded by turning the club knob (75) shown as fig. A. - Page 7 Step 2 (x1) D22*D8.5*1.5T M8*15L FIG.2 (x2) M8*15L D16*D8.5*1.2T 1) Assemble the upper cover (64) to the handlebar post (5) shown as fig. A. 2) Connect the upper handle pulse cable (46) with the middle handle pulse cable (50A) shown as fig.
-
Page 8: Adaptor 1
Step 3 FIG.3 (x4) M5*0.8*10L 1) Assemble the upper handlebar pulse cable (46) and the upper computer cable (52) to the computer (60) shown as fig. A. 2) Assemble the computer (60) to the handlebar post (5) by the bolt (66). 3) Assemble the left pedal (16L) to the left crank (15L), and assemble the right pedal (16R) to the right crank (15R). - Page 9 Step 4 FIG.4 (x4) M8*70L D22*D8.5*1.5T D16*D8.5*1.2T M8*8T 1) Assemble the handlebar (48L & 48R) to the main frame (1) by the nylon nut (10), the curved washer (11), the flat washer (13) and the Allen bolt (17). 2) Connect the plug of the handle pulse cable (54) with the socket of the lower handle pulse cable (47).
-
Page 10: Bottle
Step 5 (x4) M8*20L D16*D8.5*1.2T FIG.5 (x4) M8*40L D16*D8.5*1.2T 1) Assemble the seat (42) on the seat post by the flat washer (13) and the Allen bolt (8). 2) Assemble the backrest (38) to the backrest support tube by the Allen bolt (9) and the flat washer (13). - Page 11 Step 6 FIG.6 Assemble the backrest cover (100) to the backrest (38) by the screw (101) and the round cap (103).
-
Page 12: Adjustable Pole 1
Note (I): 1) The backrest can be adjusted to the proper angle you prefer with the club knob (75). 2) The seat can be adjusted forward and backward according to your height with the adjustable pole (41). - Page 13 Note (II): If you would like to transfer the product, please uplift the back, then you can move it by the two transportable wheels.
- Page 14 Computer B31232: The things you should know before exercise A. Input Power Plug in the adaptor to the equipment then the computer will produce a beep sound and turn on the computer at the Manual mode. Program select and setting value 1.
- Page 15 Program Introduction & Operation: Manual Program: Manual P1 is a manual program. User can start exercise by pressing START/STOP key. The default resistance level is 5. Users may exercise in any desirous of resistance level (Adjusting by UP/DOWN keys during the workout) with a period of time or a number of calories or a certain distance.
- Page 16 Program 20 is the 75% Max H.R.C. - - Target H.R. = (220 – AGE) x 75% Program 21 is the 85% Max H.R.C. - - Target H.R. = (220 – AGE) x 85% Program 22 is the Target H.R.C. - - Workout by your target heart rate value. Users can exercise according to your desired Heart Rate program by setting your AGE, TIME, DISTANCE, CALORIES or TARGET PULSE.
-
Page 17: Motor
6. The AGE will flash and you can press UP or DOWN keys to set your AGE. Press ENTER key to confirm your AGE. The default AGE is 35. 7. Press the START/STOP key to begin body fat measurement. If the window show E on the window, please make sure your hands are attached well on the grips or the chest belt is touch well on your body. - Page 18 PROGRAM 7 (RAMP): PROGRAM 8 (MOUNTAIN): PROGRAM 9 (INTERVALS): PROGRAM 10 (RANDOM): PROGRAM 11 (PLATEAU): PROGRAM 12 (FARTLEK): PROGRAM 13 (PRECIPICE): PROGRAM 14 (USER-1 PROFILE) PROGRAM 15 (USER-2 PROFILE) PROGRAM 16 (USER-3 PROFILE) PROGRAM 17 (USER-4 PROFILE) PROGRAM 18 (55% H.R.C): PROGRAM 19 (65% H.R.C):...
- Page 19 PROGRAM 20 (75% H.R.C): PROGRAM 21 (85% H.R.C): PROGRAM 22 (target H.R.C): PROGRAM 23 (WATT): PROGRAM 24 (BODY FAT ): Remark : USER 1 – 4, HRC 55% - 85% , THRC , WATT CONTROL --- AFTER START TO CHANGE PROFILE AS BELOW.


Need help?
Do you have a question about the Premier A807 and is the answer not in the manual?
Questions and answers