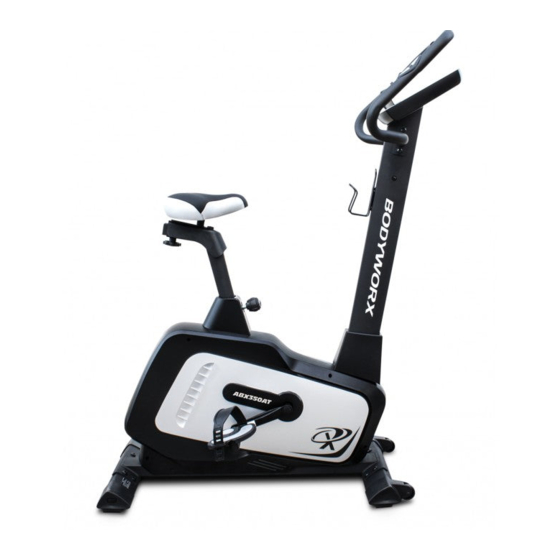
Summary of Contents for Bodyworx ABX350AT
- Page 1 MAGNETIC PROGRAMMABLE BIKE Model No: ABX350AT Retain this owner’s manual for future reference. Read and follow all instructions in this owner’s manual. Version A...
- Page 2 GPI Sports & Fitness Warranty Registration Form Congratulations on purchasing your product, we at GPI believe that our product range is of the highest quality and represents great value for money. We back our product range up with our industry leading warranty. Please see below for the step by step instructions on how to register your product warranty online.
-
Page 3: Important Safety
IMPORTANT SAFETY NOTICE EXPLODED-VIEW & PARTS LIST ASSEMBLY INSTRUCTION EXERCISE INSTRUCTIONS MONITOR INSTRUCTIONS 10-15 IMPORTANT SAFETY NOTICE:: Dear Customer, Please read this instruction very carefully before using the item. Note the following precaution before assembling or operating the machine 1、 Assemble the machine exactly as the descriptions in the instruction manual. - Page 4 This machine can be used for only one person’s training at a time. 9、 10、 Wear training clothes and shoes, which are suitable for fitness training with the machine. Your training shoes should be appropriate for the trainer. 11、 If you have any feeling of dizziness, sickness or other abnormal symptoms, please stop training and consult a doctor immediately.
-
Page 5: Exploded View And Parts List
EXPLODED-VIEW & PARTS LIST:... - Page 6 NAME QUA. NAME QUA. Computer Seat post plastic cover Bolt M5*10 D bushing End cap Φ25 Spring knob M16 各 1 Handlebar (L) 40L/R Pedal 各 1 Handlebar (R) 41L/R Crank 170 Foam Crank cover Screw ST4.2*19 Nut M10*1.25 Pulse Φ25 Chain cover molding 各...
- Page 7 HARDWARE PACKS 9# M8*16 20PCS 10# d8*Φ20*1.5 23PCS 35# d10* 20*2 1PC 33# M8 3PCS 2# M5*10 5PCS 39# M16 1PC 36# M10 1PC S13-S14-S15...
-
Page 8: Assembly Instruction
ASSEMBLY INSTRUCTION STEP 1:Attach the front stabiliser (17) and the rear stabiliser (20) to the main frame (26) with bolt (9) and washer (10); Attach the pedal (40L/R) to the crank arms as shown in FIG.1. CAUTION: be sure the right pedal (40R) marked (R) is attached to the right crank arm and tightened in the clockwise direction. - Page 9 STEP 3: Attach the seat (27) to the seat tube (28) with washer (10) and nylon nut (33), then tighten seat (27). Slide the seat tube (28) into the vertical seat post (32) and at the desired position, align holes and fix in place with the locking knob (36) and washer (35).
-
Page 10: Exercise Instructions
EXERCISE INSTRUCTIONS Using your Upright Bike provides you with several benefits, it will improve your physical fitness, tone muscles and in conjunction with calorie controlled diet help you lose weight. 1.The Warm Up Phase This stage helps get the blood flowing around the body and the muscles working properly. It will also reduce the risk of cramp and muscle injury. - Page 11 3. The Cool Down Phase This stage is to let your Cardio-vascular System and muscles to wind down. This is a repeat of the warm up exercise e.g. reduce your tempo, continue for approximately 5 minutes. The stretching exercises should now be repeated, again remembering not to force or jerk your muscles into the stretch.
-
Page 12: Button Functions
SM1900 SERIES INSTRUCTION MANUAL 【BUTTON FUNCTIONS】 UP (Encoder) To make upward adjustment to each function data or increase training resistance. DOWN To make downward adjustment to each function data or decrease training resistance. (Encoder) MODE/ ENTER To confirm all settings. START/STOP To start or stop workout. - Page 13 2. Console will show “SELECT USER” (Drawing 2 & 3), user may press ENTER into user selection mode. Use UP/DOWN button to select U1 to U4 (Drawing 4) and press MODE/ENTER for confirmation. And then preset user information for SEX, AGE, HEIGHT and WEIGHT.
- Page 14 Drawing 7 Drawing 8 Workout in PROGRAM mode: In standby mode, select a PROGRAM (Drawing 9) and press the MODE/ENTER button to enter. User may use UP/DOWN button to select a preferred program from 1 to 12, and press the MODE/ ENTER button for confirmation.
- Page 15 Workout in User program mode: In standby mode, select USER PROGRAM and press the MODE/ENTER button to enter. User may create his/her own preferred profile by use UP and DOWN button to set up resistance level of each row (Drawing 12), and press the MODE/ENTER button to confirm. Press the MODE/ ENTER button when settings are completed.
- Page 16 Drawing 15 Drawing 16 Drawing 17 Drawing 18 Workout in WATT constant mode: In standby mode, select WATT and press MODE/ENTER button to enter. The preset watt value 120 will be in flashing form showing in the WATT setting mode (Drawing 19), select UP/DOWN/MODE/ENTER button to set target value from 10 to 350.
- Page 17 RECOVERY: After exercising for a period of time, keep holding on the hand grips or wearing chest strap and press the “RECOVERY” button. All functions displaying on LCD will stop, except “TIME” will start counting down from 00:60 to 00:00 (Drawing 22). LCD will display user’s heart rate recovery status with F1, F2….to F6 (Drawing 23).
- Page 18 Drawing 28 Drawing 29 Noted: 1. After 4 minutes without pedaling or pulse input, console will enter into power saving mode. Press any key may wake the console up. 2. When the computer acts abnormally please unplug the adaptor and plug it in again.
- Page 19 MAGNETIC PROGRAMMABLE BIKE Model No: ABX350AT To register your warranty, please go to www.gpisports.com.au...


Need help?
Do you have a question about the ABX350AT and is the answer not in the manual?
Questions and answers
Bike resistance not working. Mode button not working