Table of Contents
Advertisement
Quick Links
Advertisement
Table of Contents

Subscribe to Our Youtube Channel
Related Manuals for Insportline IN 8252


Summary of Contents for Insportline IN 8252
- Page 1 USER MANUAL – EN IN 8252 Motorized Treadmill inSPORTline T400i...
-
Page 2: Table Of Contents
CONTENTS TIPS FOR SAFETY ..............................3 PACKING DETAILS ............................. 4 EXPLODED VIEW ..............................5 LIST OF COMPONENTS ............................5 TREADMILL STRUCTURE ..........................7 INSTALLATION SKETCH ........................... 7 USE ..................................8 INSTRUCTION FOR CONSOLE ........................10 MAINTENANCE ..............................15 CLEANING ................................16 CAUTIONS, DEPOSITING .......................... -
Page 3: Tips For Safety
Special tips: Before installation and operation, please read this operation manual carefully and save this manual for future reference. TIPS FOR SAFETY We have considered more for safety when we design and produce this item. However, in case of any unhappiness, please pay attention to these tips. -
Page 4: Packing Details
Before cleaning, moving and maintaining the machine, please pull off the plug for the socket. Warning: If don’t pull off, it will cause injury or damage for the machine. PACKING DETAILS Warning: Carefully install the product, avoid to make any damage. Notice: 1) Carefully read the instructions before installation. -
Page 5: Exploded View
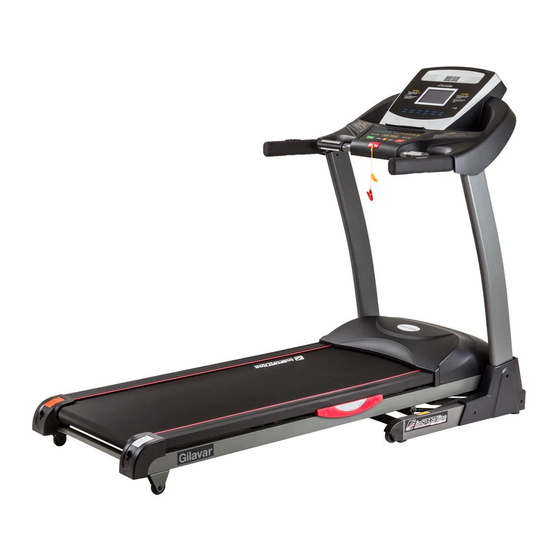
EXPLODED VIEW These are all the components used in installation. All components are listed in the following form. LIST OF COMPONENTS Component Quantity Component Quantity Base frame Bumper Frame Rubber wheel Left pillar accessory Square tube plug Right pillar accessory Upper cover of meter Dashboard frame Meter panel... - Page 6 Incline motor Button paster Motor Speaker PCB for console Front roller Back roller Upper communication line Pressure stick Lower communication line Multislot belt Green connecting line Power switch Red connecting line Overload protector Power wire Running belt Red connecting line Running board Sensor wire Motor cover...
-
Page 7: Treadmill Structure
TREADMILL STRUCTURE INSTALLATION SKETCH Step 1: Put meter on the meter tube. a) Use 2 pcs of Screw M8*20 with 2 pcs of washer to solid the meter tube. (Don’t fasten screw at first). b) Use 2 pcs of Screw M8*60 with 2 pcs of washer, 2 pcs of nut to solid the meter tube. (Don’t fasten screw at first). -
Page 8: Use
d) After the machine is power on, push “Start”, if everything goes well, then fasten screws mentioned in front steps. Step 2:Disassemble connecting screw for base frame Step 3: Install decorating cover at base Use 6 pcs of Screw ST4.2*15 to solid left and right decorating cover at base. Insert the power plug into the socket and switch on the machine. - Page 9 FOLDING & UNFOLDING Folding: Folding will help to save space. Before folding, please switch off and pull off the plug. Use your hand to lift the running board until it has been locked. Unfolding: Step on the supporting tube and pull running board with your hands. The running board will fall to the ground slowly.
-
Page 10: Instruction For Console
INSTRUCTION FOR CONSOLE Tech info Time 00:00-99:59 min Speed 1.0-22.0 km/h Incline 0-22% Distance 0.00-99.9 km Calorie 0-999 KCAL Heart rate 40-250 / Min Preset program P1-P99 User-defined program U1.U2.U3 Program... - Page 11 Panel Keys and Function: START Key: Press "Start" key, there will be 3 seconds countdown displayed on the window! After countdown, the machine will run at the speed of 1.0km/h. STOP Key: Under running condition, press “Stop” key, it will slow down then stop.
- Page 12 INCLINE direct key Use these keys, you could set incline for 3%,6%,9%,12%, 15% directly. Use this key to turn on or turn off the fan. DISPLAYED WINDOW PACE: Display the time rate; CALORIES: Display running calories TIME: Display running time DISTANCE: Display running distance PULSE: Display running heart rates;...
- Page 13 DETAILED INSTRUCTIONS Quick start (for manual mode) Turn on power switch, Put safe key in the right position. Press “START” key, there will be 3 seconds countdown displayed on the window! After countdown, the machine will run at the speed of 1.0km/h. ...
- Page 14 Every mode has 18 parts. You can only press “START” key to start the machine after finishing all parts’ setting and total exercise time setting. Data range: Parameter Setting range Displayed range Time(minute:second) 5:00-99:00 0:00-99:59 0-22 0-22 Incline (%) 1.0-22 1.0-22 Speed (KM/H) Distance (KM)
-
Page 15: Maintenance
MAINTENANCE Identification ways for the degree of tightness of running belt and poly V-belt. When the running belt skips, please follow the steps as follows to make sure which belt needs to be adjusted, running belt or poly V-belt. a) Unplug all power supply, screw and remove the Base cover. b) Turn the speed to be around 3km/h, step on the running belt by pressure and try your best to make the running belt stop. -
Page 16: Cleaning
The treadmill is brand-new and has been pre-factory lubricated. Lubrication is not necessary directly after purchase. Lubrication needs constant maintenance termly after purchase. The friction between the running board and running belt has a great effect on the treadmills’ life. So please lubricate your machine termly (every one month). The steps are as follows: Step 1. - Page 17 Item. Malfunction Reasons Solution The safe key isn’t in the right Put the safe key in the right position position can’t Treadmill started The electrical switch is placed to Turn the electrical switch to “1” “0” Check the machine whether it is in Check the power cord are connected well power and switch on...
-
Page 18: Instruction Manual For Irunning
Displayed E0E on the Upper or lower communication line Eeprom error screen broken or PCB broken If you still can’t solve the problems after taking the solutions above, we hope that you can contact our dealer or company as soon as possible. INSTRUCTION MANUAL FOR IRUNNING+ 1. - Page 19 Start exercise directly. During exercise, user can adjust Speed\Incline by pressing console buttons (Speed/Incline adjustment as following). After exercise, user can share workout information via Facebook or Twitter or else go back to Homepage. 3.1.1 Incline adjustment drawing: User may adjust the treadmill incline by pressing UP/DOWN key or hot keys. Adjust range: 0~15 3.1.2 Speed adjustment drawing:...
- Page 20 3.2 Program Program selection Time setting User can select from P1 to P20 for training. After selection, set training time and press start. During exercise, user can adjust Speed\Incline by p pressing console buttons. After exercise, user can share workout information via Facebook or Twitter or else go back to Homepage. 3.3 Manual Setting page: User can set target Time/Distance/Calories by manual.
- Page 21 HR selecting Custom HR Setting Exercise page In this mode, user can choose: 55%, 65%, 75%, custom for different heart rate training. For example, user chooses 55%, system will self-calculate Heart Rate: (220-Age)*55%=103.4 BPM. After selection, double click the icon to enter to enter the program. Then set time and press to start.
- Page 22 From the Information center, user can review history workout record. 6. GYM Center – i-Route Select to plan training route. Set Start location by first long press and End location by second long press. After planning the route, press to start training. Start location End location Training page...
- Page 23 Method: Firstly set Start and End location. Then get the first turning point by one click. You can totally set 8 turning points. System will plan the route again after your setting. 7. APP Supported Devices 7.1 Supported mobile devices: ...
Need help?
Do you have a question about the IN 8252 and is the answer not in the manual?
Questions and answers