
Related Manuals for Insportline IN 2678


Summary of Contents for Insportline IN 2678
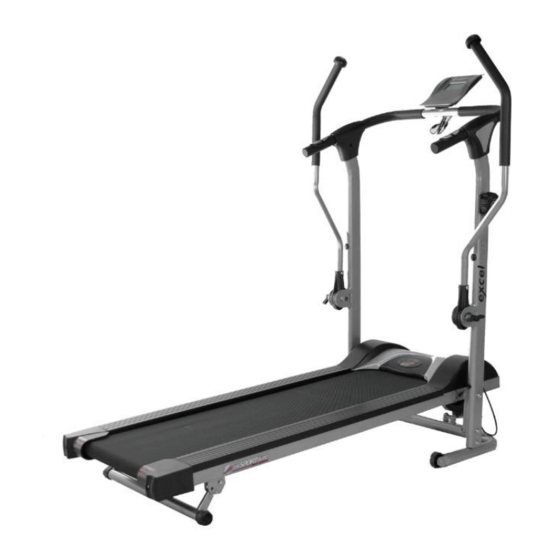
- Page 1 USER MANUAL – EN IN 2678 Magnetic Treadmill with Ski Function inSPORTline Excel Run...
-
Page 2: Table Of Contents
CONTENTS IMPORTANT SAFETY INFORMATION ......................3 EXPLODED VIEW ..............................4 PARTS LIST OF EXPLODED VIEW ........................5 ASSEMBLING INFORMATION ........................... 7 ASSEMBLY ................................8 NOTICE ................................8 HARDWARE ..............................9 STEP 1 ................................11 STEP 2 ................................12 STEP 3 ................................13 STEP 4 ................................ -
Page 3: Important Safety Information
IMPORTANT SAFETY INFORMATION WARNING: TO REDUCE THE RISK OF SERIOUS INJURY, READ THE FOLLOWING IMPORTANT PRECAUTIONS BEFORE USING MAGNETIC TREADMILL WITH SKI. 1. Before starting to exercise, read the manual carefully and also always keep this manual with you. 2. Before beginning any exercise program you should consult your doctor first to determine if you have any medical or physical conditions that could put your health and safety at risk or prevent any damage. -
Page 4: Exploded View
EXPLODED VIEW... -
Page 5: Parts List Of Exploded View
PARTS LIST OF EXPLODED VIEW DESCRIPTION Bolt M8X15 Washer Arc Washer Plastic Washer Washer ID6.2 Bolt M8X50 Big Washer Bolt M8X45 Bolt M8*70 Bolt M8*40 Nut M8 Sleeve Screw M4*15 Knob M8 Pin φ8 Wrench S13 Wrench S5 Main Frame Rear Roller Plastic Washer Steel End... - Page 6 Nut M6 Base of the Magnet Nut M8 Bolt M8x40 Plastic Wheel Base Frame Cushion Bottom Frame Right Side Handle Post Tension Bolt M5X20 27R-R&L Cover Of Handle 28L- L&R Cover Of Handle Handle Bar Bolt M8x35 Sensor Wire Connector Screw M5*25L Left Side Handle Post Washer...
-
Page 7: Assembling Information
End Cap Washer M4 ASSEMBLING INFORMATION DESCRIPTION DESCRIPTION Main Frame Handle Bar Left Side Handle Computer Post 14L&14R Handle bar Extension tube Bottom Frame Plastic Cover Right Side Handle Post 27R-R&L Cover of handle... -
Page 8: Assembly
28L-L&R Cover of handle ASSEMBLY 30 MIN NOTICE • Read this manual before assembly. • Recognize the spare parts first. • Check the hardware. • Ensure that you have the right tool. • Prepare an area to assemble. • Follow the instruction accordingly. •... -
Page 9: Hardware
• Keep this manual with you. HARDWARE SPECIFICATION M8*70 M8*50 M8*45 M8*40 M8*15 M4*15 OD16.8*ID8.2 OD16.8*ID8.2 OD22*ID8.2 OD13*ID6.2 OD59*ID38 OD12.7*ID8.2*11L... - Page 10 ø8...
-
Page 11: Step 1
STEP 1 M8*15 OD16.8*ID8.2 OD16.8*ID8.2... -
Page 12: Step 2
STEP 2 M8*50 OD22*ID8.2 ø8... -
Page 13: Step 3
STEP 3 Before you assemble the tension cable, please make sure that it is at the level 8. HIGH THE ASSEMBLY OF MAGNETIC TENSION ADJUSTING SET IS AS THE FOLLOWING STEPS: 1. Insert C through A. (Note: G through under the Main Frame) 2. - Page 14 3. Revolve D as the drawing direction in order to tighten these two parts well.
-
Page 15: Step 4
STEP 4 M6*10 OD13*ID6.2... -
Page 16: Step 5
STEP 5 M8*50 M8*40 OD16.8*ID8.2... -
Page 17: Step 6
STEP 6 M8*45 OD16.8*ID8.2... -
Page 18: Step 7
STEP 7 M4*12 OD12*ID4... -
Page 19: Step 8
STEP 8... -
Page 20: Step 9
STEP 9 M4*15... -
Page 21: Step 10
STEP 10 OD12.7*ID8.2*11L OD16.8*ID8.2 OD59*ID38 M8*70 You’d better check if all the parts are well fastened or not before using. -
Page 22: Storage
STORAGE Please loosen knob (49) completely before folding the treadmill. Then lift the NO.1 Main frame to the upright position and use knob (49) to fasten it tightly to prevent any accident in advance. -
Page 23: Belt Adjustment
BELT ADJUSTMENT If the following situation is happened on the tread belt, it will make some noise on the machine. So if the tread belt is not in the center position, too tight or too loose, please use the tool to adjust it. 1. -
Page 24: Gradient Adjustment
GRADIENT ADJUSTMENT TO HIGH UP ITS ANGEL: Use your left hand to lift off the machine, and then use your right hand to adjust up- down plinth in the clockwise direction to collimate down its angle, then insert the pin (NO. O). If you want to downward, just do it in the anticlockwise. -
Page 25: How To Use The Ski Function
HOW TO USE THE SKI FUNCTION 1. To use the SKI FUNCTION ONLY: First put your feet on each side rail and put your hand on the Ski handle then do the Ski exercise. 2. If you want to do the Ski while running, first please adjust the tension on the treadmill to the level you want and also adjust the handle bar tension knob to the level you want. -
Page 26: Tension Adjustment
TENSION ADJUSTMENT The tension power has a great influence on the effect of the exercise, such as the consumption of the calories. The exerciser can set the desired tension power according to the photo as below: (1) When revolving the bolt No.16 in the a-direction, the tension power will be less. (2) When revolving the bolt No.16 in the b-direction, the tension power will be more. -
Page 27: Handlebar Tension Adjustment
HANDLEBAR TENSION ADJUSTMENT The tension of the ski function can be adjusted by the knob. Turn the knob clockwise to increase the tension. After all the above, you can do the Ski exercise or Ski with walk exercise. You also can exercise with the Tempo function in the meter. -
Page 28: Exercise Computer With Pulse Instruction Manual
EXERCISE COMPUTER WITH PULSE INSTRUCTION MANUAL FUNCTIONAL BUTTONS MODE – Press to select functions. SET – To set the values of time, distance and calories when not in scan mode. RESET – Press to reset time, distance and calories. FUNCTIONS AND OPERATION 1. -
Page 29: Specification
SPECIFICATION Auto Scan Every 4 seconds Time 00:00 – 99M59S The maximum pickup signal is Current Speed 99.9KM/H/99.9Mile/H (or 1500RPM) FUNCTION Distance 0.00-99.99 Km Or Miles Calories 0.0-999.9-9999 Kcal Total Distance 0-9999 Km or Miles Pulse Rate 40-240 BPM Battery Type 2 pcs of size-AA or UM3 Operating Temperature 0°C-+40°C (32°F-104°F) -
Page 30: Warm Up And Cool Down
WARM UP AND COOL DOWN A successful exercise program consists of a warm-up, aerobic exercise. And a cool-down. Do the entire program at least two and preferably three times a week, resting for a day between workouts, after several months, you can increase your workouts to four or five times per week. - Page 31 Calf-Achilles Stretch Lean against a wall with your left leg in front of the right and your arms forward, Keep your right leg straight and the left foot on the floor, then bend the left leg and lean forward by moving your hips toward the wall, Hold, then repeat on the other side for 15 counts.
-
Page 32: Terms And Conditions Of Warranty, Warranty Claims
TERMS AND CONDITIONS OF WARRANTY, WARRANTY CLAIMS General Conditions of Warranty and Definition of Terms All Warranty Conditions stated hereunder determine Warranty Coverage and Warranty Claim Procedure. Conditions of Warranty and Warranty Claims are governed by Act No. 40/1964 Coll. Civil Code, Act No. 513/1991 Coll., Commercial Code, and Act No. - Page 33 If the Buyer gives notice of a defect that is not covered by the Warranty (e.g. in the case that the Warranty Conditions were not fulfilled or in the case of reporting the defect by mistake etc.), the Seller is eligible to require a compensation for all the costs arising from the repair.
Need help?
Do you have a question about the IN 2678 and is the answer not in the manual?
Questions and answers