Table of Contents
Advertisement
Quick Links
Advertisement
Table of Contents

Subscribe to Our Youtube Channel
Related Manuals for Insportline Trodos IN 7564


Summary of Contents for Insportline Trodos IN 7564
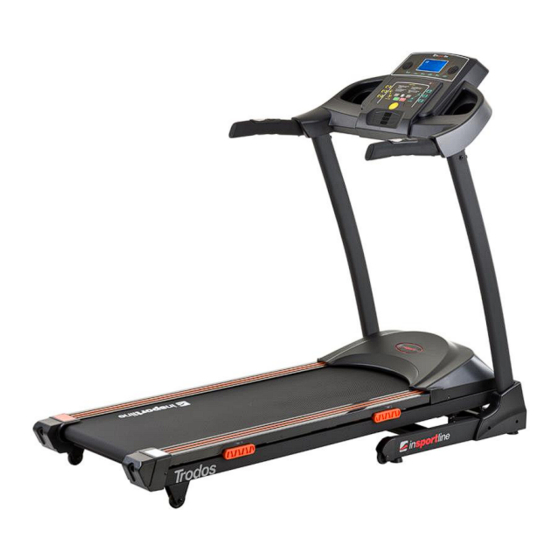
- Page 1 USER MANUAL – EN IN 7564 Motorized Treadmill inSPORTline Trodos (QST8436)
-
Page 2: Table Of Contents
CONTENTS TIPS FOR SAFETY ..........................3 PACKING DETAILS ..........................4 EXPLODED VIEW ........................... 5 PARTS LIST ............................5 TREADMILL STRUCTURE ........................7 ASSEMBLY ............................. 8 USE INSTRUCTIONS ..........................9 POWER KEY ............................9 SAFETY KEY ............................. 10 FOLDING / UNFOLDING ........................10 INSTRUCTION FOR CONSOLE ...................... -
Page 3: Tips For Safety
Special tips: Before installation and operation, please read this operation manual carefully and save this manual for future reference. WARRANTY We make sure that this item is made of high-quality materials. In normal use, we will take charge of maintenance if any problem occurs. If the item you purchased meets problems as follows, the manufacturer’s warranty is not effective: ... -
Page 4: Packing Details
Category: HA (EN957 standard) suitable for home use WARNING! The hart rate monitor may not be accurate. Overloading during training may cause serious injury or death. If you feel any discomfort, immediately stop the exercise! PACKING DETAILS Warning: Carefully install the product, avoid making any damage. Notice: 1) Carefully read instructions before installation, operate in accordance with procedures. -
Page 5: Exploded View
EXPLODED VIEW These are all the components used in installation. All components are listed in the following form. PARTS LIST Component Quantity Base frame Main frame Left meter pillar Right meter pillar Meter frame Incline frame Pressure stick Motor stator... - Page 6 Front roller Back roller Motor Incline motor Running belt Running board Multislot belt Motor cover Footplate Left back cover Right back cover Connecting part of base frame Adjustable foot pad Left decorative cover Right decorative cover Cover of transporting wheel Cover under motor Shock gasket Shock absorber...
-
Page 7: Treadmill Structure
Red connecting line Green connecting line Power wire Speaker MP3 module TREADMILL STRUCTURE... -
Page 8: Assembly
ASSEMBLY STEP 1: Install meter pillars a) Let the communication line pass through the right meter pillar. b) Put meter pillars on the base frame. First, use 2 Screw M8*15 and 2 washers; second, use 4 Screw M8*50, 4 washers and 4 nuts to fasten meter pillars. (Don’t tighten screws at first) STEP 2: Install the meter a) Make sure that communication lines are connected correctly. -
Page 9: Use Instructions
b) Put the meter on the meter pillars. Use 6 Screw M8*15 and 6 washers to fasten the meter. (Don’t tighten screws at first) c) Turn power on and start the machine. If all functions work well, tighten all screws in Step 1 and 2. -
Page 10: Safety Key
SAFETY KEY The machine can work only when safety key is put at the appointed position. Nip the other end of safety key to clothes. In this way, you can pull up safe key to stop the machine immediately in case of accidents. -
Page 11: Instruction For Console
INSTRUCTION FOR CONSOLE Tech info: Time 00:00-99:59 min Speed 1.0-16.0 km/h Incline 0-15% Distance 0.00-99.9 km Calories 0-999 kcal Heart rate 50-200 / min Built-in program P1-P99 Count-down mode Time/Distance/Calories Program User-defined program U1—U3 Body fat measurement Fat Gender 1/0 (Man/Woman) -
Page 12: Panel Buttons And Functions
PANEL BUTTONS AND FUNCTIONS START button: Press “Start” button, the system will count down in 3 seconds, which displays on the screen! The machine will run at the speed of 1.0km/h. STOP button: Press this button to stop the running machine. Reset: Press “Stop”... - Page 13 SPEED △ ▽ button: In ready condition, buttons are used to adjust preset-data. In running condition, buttons are used to adjust speed, and the adjusting range is 0.1km/h each time. Keep pressing buttons for over 0.5 second, the speed will continuously increase or decrease. INCLINE button: In ready condition, buttons are used to adjust...
-
Page 14: Displayed Window
DISPLAYED WINDOW Display height and time Display weight and calories Display incline and pulse Display distance and fat Display speed and gender PROGRAMS QUICK START (FOR MANUAL MODE) 1. Switch power on and put the safety key at the appointed position. 2. -
Page 15: Maintenance
BUILT-IN PROGRAM There are 99 built-in programs, from P1 to P99. In ready condition, press “PROG.” button to select one program from P1-P99. After that, press “MODE” button to set time from 5:00—99:00. Then press “START” button to start the machine. Every built-in program is divided into 10 periods, each period lasts 1/10 of set time. -
Page 16: Adjust The Running Belt
3. Check and tighten all parts regularly. Replace broken parts immediately. ADJUST THE RUNNING BELT The running belt is well adjusted before being packed. After a period of use, the running belt may loosen or deflect, which is normal. Then it is necessary to adjust the running belt, otherwise there will be friction damage to the running belt. -
Page 17: Cleaning
CLEANING Clean the machine regularly to extend service life. Here are some tips for cleaning: a) Please power off and pull the plug before cleaning. b) Do not use corrosive or liquid material to clean the machine, which shall cause damage to electronic parts. -
Page 18: Terms And Conditions Of Warranty, Warranty Claims
If this problem happened when speed is higher than 8km/h, the machine is overload, running belt is broken or lack of lubricant. Big speed fluctuation on the screen If the motor has been used for a long time, replace the motor or replace the PCB. Check connections of the meter and under Error of the communication control and make sure they are all well... - Page 19 Code, Act No. 513/1991 Coll., Commercial Code, and Act No. 634/1992 Coll., Consumer Protection Act, as amended, also in cases that are not specified by these Warranty rules. The seller is SEVEN SPORT s.r.o. with its registered office in Borivojova Street 35/878, Prague 13000, Company Registration Number: 26847264, registered in the Trade Register at Regional Court in Prague, Section C, Insert No.
- Page 20 VAT ID: CZ26847264 Phone: +420 556 300 970 E-mail: eshop@insportline.cz reklamace@insportline.cz servis@insportline.cz Web: www.insportline.cz INSPORTLINE s.r.o. Headquarters, Warranty & Service centre: Elektricna 6471, 911 01 Trencin, Slovakia CRN: 36311723 VAT ID: SK2020177082 Phone: +421(0)326 526 701 E-mail: objednavky@insportline.sk reklamacie@insportline.sk servis@insportline.sk Web: www.insportline.sk...
Need help?
Do you have a question about the Trodos IN 7564 and is the answer not in the manual?
Questions and answers