Table of Contents
Advertisement
Quick Links
Advertisement
Table of Contents

Related Manuals for Insportline Mystral IN 6935


Summary of Contents for Insportline Mystral IN 6935
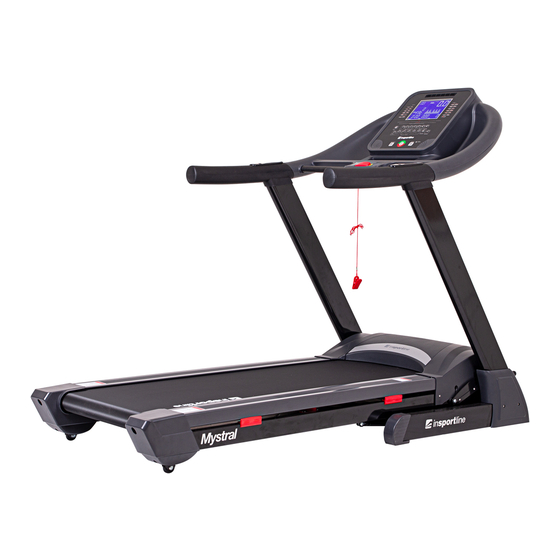
- Page 1 USER MANUAL – EN IN 6935 Motorized Treadmill inSPORTline Mystral...
-
Page 2: Table Of Contents
CONTENTS GENERAL SAFETY INSTRUCTIONS ......................3 ASSEMBLY ................................4 SETTING UP YOUR TREADMILL ........................9 SPECIAL SAFETY PRECAUTIONS ....................... 10 GENERAL FUNCTIONALITIES ........................11 CONSOLE ................................12 ERROR MESSAGE AND SOLUTIONS ......................18 TREADMILL MAINTENANCE .......................... 19 EXPLODED DRAWING............................. 22 PARTS LIST ................................ -
Page 3: General Safety Instructions
Thank you Thanks for purchasing this product. The product will help you exercise your muscles in the correct way and to improve your fitness – and all this in a familiar environment. GENERAL SAFETY INSTRUCTIONS A great deal of emphasis was placed on safety in the design and manufacture of this fitness device. Still, it is very important that you strictly adhere to the following safety instructions. -
Page 4: Assembly
ASSEMBLY Before starting with the assembly of this fitness device, carefully read through the set up steps as of page 7 We also recommend that you view the assembly drawing prior to assembly. Remove all packaging material and place the individual parts on a free surface. This will provide you with an overview and will simplify assembly. - Page 5 UNPACK AND VERIFY THE CONTENTS OF THE BOX: Lift up and remove the box that surrounds the Treadmill. Check the following items are present. If any of the parts are missing, contact with the dealer. Console Main frame and base Stand post Base cover Silicone oil...
- Page 6 MAIN PARTS OF THE TREADMILL: Rear roller Front roller Decorate rail Motor cover Console Side rail Motor Base cover Handle bar Running belt Incline motor Running board End cover (right) Feet End cover (left) Soft drop...
- Page 7 ASSEMBLY DIAGRAM:...
- Page 8 ASSEMBLY INSTRUCTIONS: Step 1: Take the machine out of package, put on a flat surface; Use 4pcs M8*15 and 6pcs M8*55*20 screws separately to fit the stand post (left and right) onto the base frame. Step 2: Put the stand post cover on left and right stand post, and then use 4 pcs M4*20 screw to tight the stand post cover.
-
Page 9: Setting Up Your Treadmill
Step 3: Use 4 pcs M8*50*20 screws fit the console to the stand post and tight the screw. Step 4: Use 4pcs M3*28 screws fit the handle bar cover to the PU handle bar and tight the screw. SETTING UP YOUR TREADMILL FOLDING &UNFOLDING THE TREADMILL 1. -
Page 10: Special Safety Precautions
MOVING THE TREADMILL 1. Before moving, make sure the power is off. 2. Make sure the plug has pulled off. 3. Make sure the running base has been folded 4. The treadmill can be moved around in house safely in its fold-up position by using the transport wheels. -
Page 11: General Functionalities
GENERAL FUNCTIONALITIES To start any workout phase after the setup, the user has to press the Start key. If the user presses the Stop key during the workout phase, the workout pauses. If the user presses the Stop key twice, the workout terminates and the system will return to the initial state. -
Page 12: Console
CONSOLE START THE TREADMILL: When the treadmill connects to power, the LCD show like the below picture 1:... - Page 13 If the treadmill without the safety key, the LCD will show like the below picture 2: With the safety key, will show like below picture 3: LCD WINDOW DISPLAY: 10” LCD window displays the item and number. Program and Pulse use the same window; if no pulse signal neither in Program, this window shows “P”, in Program, it shows program number, if has pulse, it shows the pulse number.
- Page 14 KEY INFORMATION: 1. Safety Key A) Emergency STOP B) Safety key RESET 2. PROGRAM key: Press the P key, program key: it will show:...
- Page 15 P0 is user’s program, in this program, press ”MODE” key, you can set three count-down program: TIME COUNT DOWN mode; DISTANCE COUNT DOWN mode; CALORIES COUNT DOWN mode. 3. SPEED +/- key: In the P1-P24 program, press Speed +/- key can adjust the time 4.
- Page 16 6. INCLINE +/- key: Press Incline+/- key can increase and decrease the incline number. In FAT function, press Incline+/- key, can adjust the item number. 7. SPEED +/- key: Increase and decrease the speed, 0.1KM once. In P0-P24, choose time, press Speed+/- key, can adjust the number. In FAT, after choosing the item, press Speed+/- key can adjust the number.
- Page 17 Program speed diagram: Time Interval Program SPEED INCLINE SPEED INCLINE SPEED INCLINE SPEED INCLINE SPEED INCLINE SPEED INCLINE SPEED INCLINE SPEED INCLINE SPEED INCLINE SPEED INCLINE SPEED INCLINE SPEED INCLINE SPEED INCLINE SPEED INCLINE SPEED INCLINE SPEED INCLINE SPEED INCLINE...
-
Page 18: Error Message And Solutions
SPEED INCLINE SPEED INCLINE SPEED INCLINE SPEED INCLINE SPEED INCLINE SPEED INCLINE SPEED INCLINE ERROR MESSAGE AND SOLUTIONS SYMPTOM DESCRIPTION SOLUTION Console is bad Control board is bad, cannot start the treadmill. Console show the E01, warning sound 3times. Solution: console and control board connect not well, check the connection wire set between the console and control board. -
Page 19: Treadmill Maintenance
Over current protection: Treadmill cannot start, warning sound 9times. treadmill running, control Console show the E05. If treadmill can restart in 10 board check the current is over seconds, it will be ok. standard current +6A for 3 Solution: current is over the standard current, so seconds system take protection. - Page 20 Weekly: To make the cleaning easier it is recommended to use a mat for the treadmill. Shoes can leave dirt on the striding belt that can fall beneath the treadmill. Clean the mat under the treadmill once a week. 4.
- Page 21 If the above procedure is unsuccessful in resolving the off-centre, you may need to increase the belt tension. 5. Storage Store your treadmill in a clean and dry environment. Ensure the master power switch is off and is un-plugged from the electrical wall outlet. 6.
-
Page 22: Exploded Drawing
EXPLODED DRAWING... -
Page 23: Parts List
PARTS LIST DESCRIPTION QUANTITY Base fame Platform frame Incline frame Motor base frame Left Upright frame Right Upright frame Computer frame Ezfit linking parts Connecting sheet left Connecting sheet right Wheel cover frame Limited tube Inner hex half thread screw M10*50 Inner hex half thread screw M10*35 Inner hex full thread screw M10*60 Inner hex half thread screwM8*80... - Page 24 Philip full thread screw M8*25 Washer Φ25*Φ 8.2*2 Washer Φ10 Washer Φ8 Washer Φ6*Φ 20 Washer Φ5 Washer M10 Washer M8 Metal plug Φ 17*Φ 10Φ 31 Fan washer Running belt Computer up cover Computer down cover Safety key Hand bar cover Motor cover - left Motor cover - center Motor cover - right...
- Page 25 Wire clip Foam Wire Switch Fuse Controller Power wire Filter Speed sensor Transformer Motor Incline motor Magnet ring Φ33*Φ14*33 Magnet ring Φ20*Φ9*32 Cylinder Running board Front roller Rear roller Wire in stand post Wire to controller Inner hex full thread screw M8*15 Screw M8*65 Tube plugΦ19.5*Φ14.2*8.5 Decorate rail...
-
Page 26: General Fitness Tips
GENERAL FITNESS TIPS Start your exercise program slowly, i.e. one exercise unit every 2 days. Increase your exercise session week by week. Begin with short periods per exercise and then increase these continually. Start slowly with the exercise sessions and don’t set yourself impossible targets. In addition to these exercises, do other forms of exercise such as jogging, swimming, dancing and/or cycling. - Page 27 TOUCH TOES Bend your trunk slowly forwards and try to touch your feet with your hands. Reach down as far as possible to your toes. Maintain this position for 20-30 seconds if possible EXERCISES FOR THE KNEES Sit on the floor and stretch out your right leg. Bend your left leg and place your foot on your right upper thigh.
-
Page 28: Terms And Conditions Of Warranty, Warranty Claims
EXERCISES FOR THE UPPER THIGH Support yourself by placing your hand on the wall, then reach down behind you and lift up your right or left foot as close to your buttocks as possible. Feel a comfortable tension in your front upper thigh. Maintain this position for 30 seconds if possible and repeat this exercise 2 times for each leg INSIDE UPPER THIGH Sit on the floor and place your feet in such a way that your knees are facing outwards. - Page 29 Warranty Conditions Warranty Period The Seller provides the Buyer a 24 months Warranty for Goods Quality, unless otherwise specified in the Certificate of Warranty, Invoice, Bill of Delivery or other documents related to the Goods. The legal warranty period provided to the Consumer is not affected. By the Warranty for Goods Quality, the Seller guarantees that the delivered Goods shall be, for a certain period of time, suitable for regular or contracted use, and that the Goods shall maintain its regular or contracted features.
- Page 30 VAT ID: CZ26847264 Phone: +420 556 300 970 E-mail: eshop@insportline.cz reklamace@insportline.cz servis@insportline.cz Web: www.insportline.cz INSPORTLINE s.r.o. Headquarters, Warranty & Service centre: Elektricna 6471, 911 01 Trencin, Slovakia CRN: 36311723 VAT ID: SK2020177082 Phone: +421(0)326 526 701 E-mail: objednavky@insportline.sk reklamacie@insportline.sk servis@insportline.sk Web: www.insportline.sk...
Need help?
Do you have a question about the Mystral IN 6935 and is the answer not in the manual?
Questions and answers