Table of Contents
Advertisement
Quick Links
Advertisement
Table of Contents

Related Manuals for Insportline ZenRun Fold 10


Summary of Contents for Insportline ZenRun Fold 10
- Page 1 USER MANUAL – EN IN 26632 Walking treadmill inSPORTline ZenRun Fold 10...
-
Page 2: Table Of Contents
CONTENTS SAFETY INSTRUCTIONS ........................3 SPECIFICATIONS ........................... 3 DIAGRAM ..............................4 PARTS LIST ............................4 PARTS LIST ............................5 PRODUCT DESCRIPTION ........................6 ASSEMBLY ............................. 6 CONTROL ............................... 7 ERROR CODES ............................8 GETTING START ............................ 9 WARM – UP EXERCISE ......................... 9 IMPORTANT NOTICE ........................... -
Page 3: Safety Instructions
SevenSport s.r.o. reserves the right to make any changes and improvements to its product without prior notice. Visit our website www.insportline.eu where you will find the latest version of the manual. SAFETY INSTRUCTIONS • Read the manual before assembly and first use and keep it for future reference. -
Page 4: Diagram
DIAGRAM PARTS LIST Name Qty. Name Qty. Front main frame Right front engine cover Rear main frame Left rear cover Middle frame Right rear cover Rear frame Left front sticker Front running board Right front sticker Rear running board Left rear sticker Front cylinder Right back sticker Rear cylinder... -
Page 5: Parts List
Power switch Phillips screw Cable bundle Phillips screw Display Flat pad Remote controller Flexible mat Cables 01 Allen screw Cable harness 02 Hexagonal screw Transport wheels Flexible mat Connecting frame Allen screw Running board spacer Allen screw Springs 01 Allen screw Springs 02 Flat screw Cushioning of the running surface... -
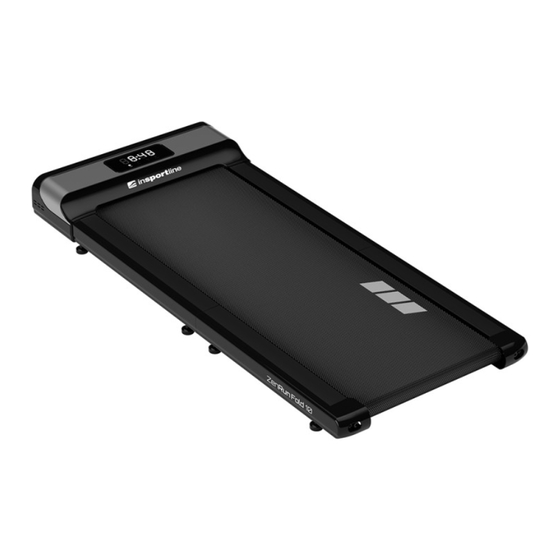
Page 6: Product Description
PRODUCT DESCRIPTION 1. Treadmill 4. Power switch 2. Digital display 5. Power supply 3. Transport wheels 6. Leveling feet ASSEMBLY Step 1 Take the product and the packaging material out of the box Step 2 Remove the packing material. Step 3 Unfold the product. -
Page 7: Control
CONTROL DISPLAY 1. Numeric display 2. Training time, range 00:00 – 99:59 min 3. Speed, range: 1 – 6 km/h 4. Distance, range 1.0 – 99.0 km 5. Burned calories, range 20.0 – 990 cal CONTROLLER 1. Power switch If the belt is stopped, press the button to start the belt, the display will show "1.0"... -
Page 8: Error Codes
ERROR CODES Turning off the bottom control goes into a fault state. Unable to start. The electronic meter displays error codes and beeps three times. Possible cause: Communication between the Communication Abnormality: electronic control and the electronic meter is Communication abnormality between blocked. -
Page 9: Getting Start
GETTING START PREPARATION If you are more than 45 years old or have health problems and this is your first time using a treadmill, please consult your doctor before exercising. Before you use the motorized treadmill, please stand aside and learn how to use it, e.g. how to start, stop and adjust the speed. - Page 10 Touch toes Bend your knees slightly and slowly stretch your body downwards. Relax your back and shoulders. Try to touch the toes. Keep the position for 10 - 15 seconds. Repeat approx. 3 times. Hamstring stretches Sitting on a cushion, stretch one leg straight and fold the other inward.
-
Page 11: Important Notice
IMPORTANT NOTICE • This treadmill comes with standard safety regulations and is only suitable for home use. Any other use is prohibited and may be dangerous to users. We are not responsible for any injury caused by improper and forbidden use of the machine. •... -
Page 12: Environment Protection
• Picture A If the running belt drifts to the left, unplug the treadmill from power. Turn the left adjusting bolt clockwise by 1/4 turn, then plug in the power cord. The belt starts running. Watch if the belt still drifts to the side. - Page 13 By the Warranty for Goods Quality, the Seller guarantees that the delivered Goods shall be, for a certain period of time, suitable for regular or contracted use, and that the Goods shall maintain its regular or contracted features. The Warranty does not cover defects resulting from (if applicable): •...
- Page 14 SEVEN SPORT s.r.o. inSPORTline s.r.o. Strakonická 1151/2c, Praha 5, 150 00, ČR Headquaters, warranty & service center: Električná 6471, Registered Office: Dělnická 957, Vítkov, 749 01 Trenčín 911 01, SK Headquaters: Warranty & Service: Čermenská 486, Vítkov 749 01 CRN:...
Need help?
Do you have a question about the ZenRun Fold 10 and is the answer not in the manual?
Questions and answers