Barco ClickShare Installation Manual
Wireless presentation system
Hide thumbs
Also See for ClickShare:
- Quick start manual ,
- Service manual (124 pages) ,
- Installation manual (114 pages)
Table of Contents
Advertisement
Quick Links
Advertisement
Table of Contents

Related Manuals for Barco ClickShare


Summary of Contents for Barco ClickShare
- Page 1 ClickShare Installation manual R5900014/00 16/09/2013...
- Page 2 Barco nv President Kennedypark 35, 8500 Kortrijk, Belgium Phone: +32 56.23.32.11 Fax: +32 56.26.22.62 Support: www.barco.com/esupport Visit us at the web: www.barco.com Printed in China...
- Page 3 BARCO reserve all rights not expressly granted to you. You may own the carrier on which the Software is provided, but the Software is owned and copyrighted by BARCO or by third party suppliers. Your license confers no title or ownership and is not a sale of any rights in the Software or its documentation.
- Page 4 Software, or any portion thereof, (i) that is based on specifications, drawings, models or other data furnished by you or, (ii) that is not provided by Barco or, (iii) that is modified, in spite of the prohibition for you to modify the software or, (iv) to the extent that you continue allegedly infringing activity after having been provided modifications that avoid the alleged infringement, or (v) where the use...
- Page 5 Software, including the U.S. Export Administration Regulations, as well as end-user, end-use, and destination restrictions issued by the U.S. or other governments. 11. Barco shall be entitled to sub-contract all or any of Barco’s obligations hereunder to a third party and/or any of Barco’s affiliated companies.
- Page 6 You acknowledge living up to the conditions of each separate Open Source Software license. In the development of the Software, the following Open Source Software components have been used (an updated list may be made available through the (customer section of the) Barco website or other (online) means): Open Source component...
- Page 7 Open Source component Open Source License gdbserver http://www.gnu.org/licenses/lgpl.html grub http://www.gnu.org/licenses/lgpl.html gstreamer http://www.gnu.org/licenses/lgpl.html hdparm http://opensource.org/licenses/BSD-3-Clause hostapd http://opensource.org/licenses/BSD-3-Clause i2c-tools http://www.gnu.org/licenses/old-licenses/gpl-2.0.html iftop http://www.gnu.org/licenses/old-licenses/gpl-2.0.html iperf http://opensource.org/licenses/BSD-3-Clause iptables http://www.gnu.org/licenses/old-licenses/gpl-2.0.html http://opensource.org/licenses/BSD-3-Clause http://www.gnu.org/licenses/old-licenses/gpl-2.0.html attr http://www.gnu.org/licenses/old-licenses/gpl-2.0.html libav http://www.gnu.org/licenses/old-licenses/lgpl-2.1.html libcap2 http://www.gnu.org/licenses/gpl.html libdaemon0 http://www.gnu.org/licenses/old-licenses/lgpl-2.1.html libdrm2 http://opensource.org/licenses/MIT libexpat1 http://opensource.org/licenses/MIT libfontconfig1 http://opensource.org/licenses/BSD-3-Clause libfontenc1 http://opensource.org/licenses/BSD-3-Clause freetype...
- Page 8 Open Source component Open Source License libstdc++6 http://www.gnu.org/licenses/gpl.html libtalloc2 http://www.gnu.org/licenses/lgpl.html libusb http://www.gnu.org/licenses/old-licenses/lgpl-2.1.html libxml2 http://opensource.org/licenses/MIT libz1 Free license lighttpd http://opensource.org/licenses/BSD-3-Clause lmsensors http://www.gnu.org/licenses/gpl.html logrotate http://www.gnu.org/licenses/gpl.html makedevs http://www.gnu.org/licenses/gpl.html memtest86plus http://www.gnu.org/licenses/gpl.html mesa http://opensource.org/licenses/MIT module-init-tools http://www.gnu.org/licenses/old-licenses/gpl-2.0.html modutils http://www.gnu.org/licenses/old-licenses/gpl-2.0.html monit http://www.gnu.org/licenses/gpl.html ncurses http://opensource.org/licenses/MIT netbase http://www.gnu.org/licenses/old-licenses/gpl-2.0.html openssh-sftp-server http://opensource.org/licenses/BSD-3-Clause openssl http://www.openssl.org/source/license.html...
- Page 9 The period of guarantee begins on the date of transfer of risks, in the case of special systems and software on the date of commissioning, at latest 30 days after the transfer of risks. In the event of justified notice of complaint, Barco can repair the fault or provide a replacement at its own discretion within an appropriate period.
- Page 10 Informations concernant l’exposition aux fréquences radio (RF) La puissance de sortie émise par l’appareil de sans fil Barco est inférieure à la limite d’exposition aux fréquences radio d’Industry Canada (IC). Utilisez l’appareil de sans fil Barco de façon à minimiser les contacts humains lors du fonctionnement normal.
-
Page 11: Table Of Contents
8. ClickShare Troubleshooting................ - Page 12 Table of contents R5900014 CLICKSHARE 16/09/2013...
-
Page 13: Introduction To The Installation Guide
R5900014 Installation Guide Installation engineer This installation guide explains how to install ClickShare in a meeting room, It explains also how to make everything operational. It provides detailed information on how to configure ClickShare. Available System documentation This guide is part of the documentation set describing the ClickShare product. - Page 14 Menu items are indicated in italic. • Step related notes, tips, warnings or cautions are printed in italic. • Procedure related notes, tips, warnings or cautions are printed in bold between 2 lines preceded by the corresponding icon. R5900014 CLICKSHARE 16/09/2013...
-
Page 15: Clickshare Specifications
Components ClickShare set A standard ClickShare set consists of a Base Unit and 2 Buttons. Depending on the location where you buy the product, the software of the Base Unit is different. If needed, you can buy additional Buttons. -
Page 16: Clickshare Specifications
External Power adaptor 5V DC input 2.6A (included in set) or power over ethernet (PoE) Band 2.4 GHZ and 5 GHz Reach Max. 30m (100 ft) between ClickShare Button and ClickShare M Base Unit, depending on environment Data rate wireless Up to 300Mbps Wireless transmission protocol IEEE 802.11 a/b/g/n... -
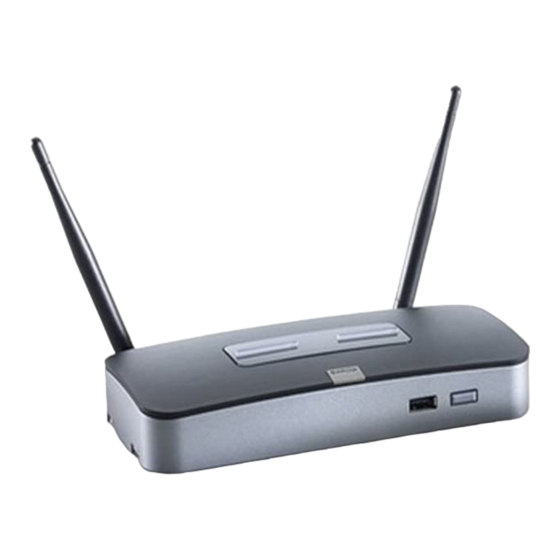
Page 17: About The Base Unit
2. ClickShare Specifications iPad, iPhone and Android Available via ClickShare app for static content. compatibility Audio Radio quality 16bits 22KHz (no synchronization) via audio jack or HDMI Number of simultaneous connections Number of sources simultaneous on screen Input Resolutions Up to 2048x1536 (QXGA) -
Page 18: Usb Port
firmware are up to date. If not, the Base Unit updates the software and/or firmware. To update the Base Unit software, download the latest version of the software from the Barco website. Copy the file on a USB stick and plug it into the USB port of the Base Unit. -
Page 19: About The Button
Usage of antennas other than the ones provided with the unit are allowed within the restrictions on usage of other antennas defined by local regulations. Barco does not take responsibility for damage or disturbance of other devices that may be caused by using a different antenna. -
Page 20: Clickshare App
ClickShare App Introduction The ClickShare App is freely available from the Apple store. It allows one to display static content such as PDF and JPG documents on iOS devices (mini. required iOS5). The App is like a virtual Button. Content from tablet devices running the App is treated by the Base Unit just like content coming from a physical Button. - Page 21 2. ClickShare Specifications Before you can use your iOS device with the ClickShare App, you have to connect the wifi with the ClickShare SSID. Follow the instructions as given in your iOS device user guide. Image 2-5 WiFi connection Spinning circle, means connected but no internet connection...
- Page 22 2. ClickShare Specifications Image 2-8 Image 2-9 Image 2-10 Image 2-11 Image 2-12 Image 2-13 R5900014 CLICKSHARE 16/09/2013...
- Page 23 2. ClickShare Specifications Image 2-14 Image 2-15 Image 2-16 R5900014 CLICKSHARE 16/09/2013...
- Page 24 2. ClickShare Specifications R5900014 CLICKSHARE 16/09/2013...
-
Page 25: Getting Started
7. If desired, configure ClickShare via the Web Interface. For more information on the different ways to configure ClickShare, For more information on using ClickShare, refer to the ClickShare User Guide (R5900014). This manual can be found on Barco’s website www.barco.com/clickshare... - Page 26 3. Getting started R5900014 CLICKSHARE 16/09/2013...
-
Page 27: Clickshare Installation
4. ClickShare installation 4. CLICKSHARE INSTALLATION About this chapter The installation chapter gives an overview of the different ways to install and connect ClickShare’s Base unit. Overview • Installation methods for the Base unit • Table mounting • Wall mounting •... -
Page 28: How To Install
2. Insert a plug in each hole (if needed, depends on the wall type) and drive in 4 screws. Note: Mounting screws and plugs are not included in the ClickShare box . The type of screws and plugs depend on the type of wall (stone, wood, plasterboard, ...) you are mounting the Base Unit to. -
Page 29: Video Signal Connections To The Base Unit
About audio The ClickShare Button captures the audio output of the user’s laptop and sends it to the Base Unit together with the video signal. The audio will be output at line levels from the mini jack socket (3.5mm) and via the HDMI connector. -
Page 30: Lan Connection
1. Plug the barrel connector of the power adapter into the power input of the Base unit. 2. Slide a power input adaptor piece (US, CN, EU or UK) on the power adapter of the ClickShare Link . Use the one which is applicable in your country. -
Page 31: Preparing The Buttons
To be able to use a Button it should be assigned to the Base Unit you are using. This process is called pairing. By default, the two Buttons delivered with the ClickShare set are already paired to the specific Base Unit. -
Page 32: Pre-Install Of The Launcher Service
Pre-install of the Launcher service Launcher service pre-install The ClickShare Launcher service can be pre-installed on your laptop or on company level. How this is done depends on your IT infrastructure. When the Launcher service is pre-installed, a launcher application runs in the background. When you plug the Button in your laptop, the ClickShare application will be run from the Button automatically. -
Page 33: Clickshare Web Interface
Note: Supported browsers are Internet Explorer, Firefox, Google Chrome and Safari. 2. Browse to the IP address you can find in the top left corner of the ClickShare welcome screen. Note: The Wired IP address is only visible when the Base Unit is connected to the LAN. -
Page 34: Language Setup Web Interface
To access the Web Interface via the Base Unit wireless network 1. On your laptop, connect to the Base Unit wireless network. The default SSID and password to connect to the Base Unit are respectively ’ClickShare-<serial base number>’ and ’clickshare’. 2. On your laptop, open a browser. -
Page 35: About Clickshare Tabs
Overview ClickShare has a main tab bar (red bar with white text) containing 3 tabs, Setup, Maintenance and Help. Each main tab contains sub tabs. The sub tabs are only displayed when a main tab is selected. These sub tabs are displayed in a gray bar. The functionality of these sub tabs is explained in the next topics. -
Page 36: Basic Settings
About Basic settings The basic settings contain the following information: • Meeting room name • Meeting room location • Welcome message To change the basic settings 1. Log in to the ClickShare web interface. 2. Click the Setup tab. R5900014 CLICKSHARE 16/09/2013... - Page 37 6. ClickShare Web Interface Image 6-4 Setup, basic settings The Basic tab is displayed by default. 3. In the Identification section click in an input field and enter the name of the meeting room the location of the meeting room a welcome message which will be displayed below the meeting room name and location.
-
Page 38: Wallpaper (Background) Selection
The new name, location and welcome message are displayed in the left top corner of the screen. Wallpaper (background) selection About wallpaper When ClickShare starts up, a background (wallpaper) is displayed. By default a general ClickShare and a quick start wallpaper are available. The possibility exists to upload personal backgrounds (wallpapers). Wallpaper selection 1. -
Page 39: Personalized Wallpapers
3. Select one of the available wallpapers (3) and click Apply (5).. Note: By default a general Barco ClickShare wallpaper and a ClickShare Quick Start Guide wallpapers are available. They are automatically resized to fit the aspect ratio of the screen. - Page 40 6. ClickShare Web Interface Image 6-8 Add wallpaper The Wallpaper tab page is displayed. 3. In the Background wallpapers pane, click on the “+” sign (3). A browser window opens. 4. Select the desired file (4) and click Open (5).
-
Page 41: Display Settings
About on-screen text The language of the on-screen messages and ClickShare Instructions wallpaper can be changed. Also the color, size and style of the messages can be updated. The background color and the transparency can be adapted so that they match with the text layout. -
Page 42: Language Selection
3. When changes are made, click Apply to activate the new settings. To cancel the changes, click Refresh Page. Language selection 1. Select the language of the on-screen text and ClickShare Instructions wallpaper. Click on the drop down box next to Language and select the desired language. Image 6-12... -
Page 43: Background Color
6. ClickShare Web Interface Text color 1. Click in the input field next to Text color or click on the color icon (1). Image 6-13 Text color selection A color selection window opens. 2. Drag the marker in the color bar up or down until the desired color is obtained (2). -
Page 44: Advanced Settings: Hostname
Hostname Hostnames are human-readable nicknames that correspond to the address of a device connected to a network. How to change 1. Log in to the ClickShare web interface. 2. Click the Setup tab (1) and click Advanced (2). Image 6-16 Hostname 3. - Page 45 IP address when a computer is plugged into a different place in the network. DHCP setup of the LAN network 1. Log in to the ClickShare web interface. 2. Click the Setup tab (1) and click Advanced (2). Image 6-17 DHCP setup The Advanced tab is displayed.
-
Page 46: Advanced Settings: Wifi Settings
A connection with the Base Unit can be made via a wireless connection. A fixed wireless IP address is used to establish the con- nection. How to set up 1. Log in to the ClickShare web interface. 2. Click the Setup tab (1) and click Advanced (2). Image 6-19 WiFi settings 3. -
Page 47: Maintenance, Status Check Clickshare
• Subsystem status • System management To check the system status 1. Log in to the ClickShare web interface. 2. Click the Maintenance tab and click Status. The Status tab page is displayed. Image 6-20 Status overview R5900014 CLICKSHARE 16/09/2013... -
Page 48: Maintenance, Buttons Information
To see the MAC address of the associated devices, click on the corresponding detail button to get an overview. Image 6-21 Detail associated devices System Management Use the Restart System button to restart ClickShare. Use the Shutdown System button to shutdown ClickShare. Image 6-22 System management 6.13 Maintenance, Buttons information... - Page 49 6. ClickShare Web Interface Image 6-23 Paired butons, overview The list gives an overview of the Buttons that have in the past been paired to this Base Unit. If a Button has in the meantime been paired to another Base Unit, it will still appear in this list. To remove it from the list, at the right of the tab page, click More and select Remove from list.
-
Page 50: Base Unit Software Update
6.15 Downloads from Base Unit About downloads The launcher service and the ClickShare client software for PC or MAC are stored on the Base Unit and can be downloaded for installation on the user’s PC. For more information, see "Pre-install of the Launcher service", page 22. -
Page 51: Manage System Configuration
3. To download the Launcher Service, for Windows, click on Download Windows Launcher or for Mac, click on Download Mac Launcher. 4. To download the ClickShare Client, for Windows, click on Download Windows Client or for Mac, click on Download Mac Client. 6.16 Manage System Configuration About Manage system configuration... -
Page 52: Load Default Settings
Base Unit has not changed from SSID or wireless password. 6.17 Load Default Settings About default settings The ClickShare Base Unit can return to the factory default settings. The following settings are the defaults: •... - Page 53 1. Start up the Base unit. 2. When Barco logo appears, press the reset button (bottom side of the Base unit) Press this button until the Barco logo disappears and the LEDs are blinking red/white for at least 10 seconds.
-
Page 54: Administrator Password
The administrator password to log in in the web interface can be changed at any time. To change the administrator password 1. Log in to the ClickShare web interface. 2. Click the Maintenance tab (1) and then click Password (2).. -
Page 55: Clickshare Help, Barco Contact Data
If the launcher service is running hold down the shift key while connecting the dongle to the PC, until logging is started. If the launcher service is not running : hold down the shift key while double clicking the ClickShare application. -
Page 56: Barco Clickshare Eula
6. ClickShare Web Interface Image 6-33 The content of the Contact tab is displayed. The Contact page contains a link to the ClickShare home page on Barco’s website (3). 3. Click on the link Visit the ClickShare product page. 4. Click Downloads All kind of manuals, brochures and software updates can be found on that page. - Page 57 4. In the File Download window, click Save. The Save as window opens. 5. Browse to the location where to store the EULA file and click Save. A copy of the Barco ClickShare EULA has been saved to your laptop. R5900014 CLICKSHARE 16/09/2013...
- Page 58 6. ClickShare Web Interface R5900014 CLICKSHARE 16/09/2013...
-
Page 59: Software Updates
USB stick To update the Base Unit software by copying the software on a USB stick 1. Download the latest version of the software from Barco’s website, , www.barco.com/clickshare. Click on Visit the ClickShare product page and go to tab Downloads 2. - Page 60 7. Software updates R5900014 CLICKSHARE 16/09/2013...
-
Page 61: Clickshare Troubleshooting
Refer to the corresponding chapter of the documentation. • Check the proxy settings Users do not get a ClickShare drive when • No automatic refresh of drives • Refresh your view on the laptop. inserting the Button in their laptop. - Page 62 Only one screen can to use the Show me full screen function. appear simultaneously The ClickShare software is not running. Go to the ClickShare drive and run the software. Your content is removed from the display Connection to the Base Unit is lost.
- Page 63 “WiFi Access Point Daemon” Web Interface and press “Load Default and/or “DHCP Server” Settings”. ClickShare Base Unit does not start up Configuration file is corrupted Browse to the Configuration tab of the correctly Web Interface and press “Load Default Settings”.
- Page 64 8. ClickShare Troubleshooting R5900014 CLICKSHARE 16/09/2013...
-
Page 65: Environmental Information
According to the “China Administration on Control of Pollution Caused by Electronic Information Products” (Also called RoHS of Chinese Mainland), the table below lists the names and contents of toxic and/or hazardous substances that Barco’s product may contain. The RoHS of Chinese Mainland is included in the MCV standard of the Ministry of Information Industry of China, in the section “Limit Requirements of toxic substances in Electronic Information Products”. -
Page 66: Production Address
Pollution Control Labeling Standard” of Chinese Mainland, marked with the Environmental Friendly Use Period (EFUP) logo. The number inside the EFUP logo that Barco uses (please refer to the photo) is based on the “Standard of Electronic Information Products Environmental Friendly Use Period” of Chinese Mainland. -
Page 67: Index
Documentation Software updates Specifications 5–6 ClickShare Symbols Environment condition check Environmental information Disposal information Rohs compliance Table mounting EULA Base unit Troubleshooting Troubleshooting list Getting started Update Software Help 45–46 Barco contact data EULA Hostname Wall mounting R5900014 CLICKSHARE 16/09/2013... - Page 68 On-screen text format Configuration 41–42 Password Default settings Change Manage system Tabs Display settings Wallpaper 28–29 Help 45–46 Personalized Barco contact data Selection EULA WiFi settings Hostname Web Interface LAN network Access Settings WiFi settings Language setup R5900014 CLICKSHARE 16/09/2013...
Need help?
Do you have a question about the ClickShare and is the answer not in the manual?
Questions and answers