Jandy CL Versa-Plumb Series Installation And Operation Manual
Cartridge pool filters
Hide thumbs
Also See for CL Versa-Plumb Series:
- Installation and operation manual (20 pages) ,
- Installation and operation manual (20 pages)
Table of Contents
Advertisement
Installation and Operation Data
Installation and
Op er a tion Man u al
Jandy Car tridge
Pool Filters
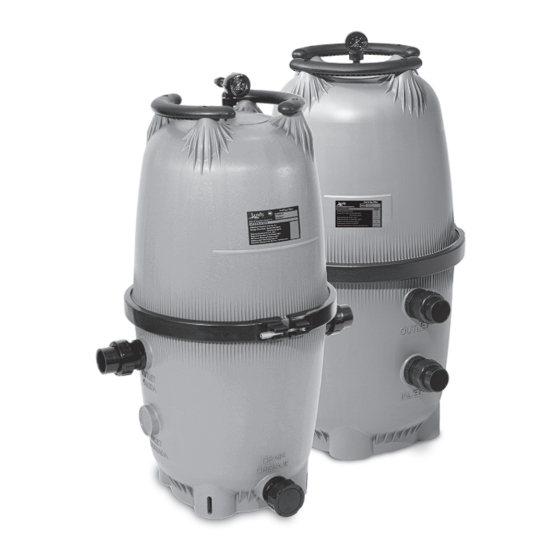
CL and CV Versa-Plumb
Series Fil ters
FOR YOUR SAFETY - This product must be installed and serviced by a contractor who is licensed
and qualifi ed in pool equipment by the jurisdiction in which the product will be installed where such
state or local requirements exists. In the event no such state or local requirement exists, the installer
or maintainer must be a professional with suffi cient experience in pool equipment installation and
maintenance so that all of the instructions in this manual can be followed exactly. Before installing
this product, read and follow all warning notices and instructions that accompany this product. Failure
to follow warning notices and instructions may result in property damage, personal injury, or death.
Improper installation and/or operation can create dangerous high pres sure which can cause product
failure or also cause the filter lid to be blown off, possibly causing death, serious injury or prop er ty
damage. Improper installation and/or operation will void the warranty.
®
WARNING
Advertisement
Table of Contents

Subscribe to Our Youtube Channel
Related Manuals for Jandy CL Versa-Plumb Series


Summary of Contents for Jandy CL Versa-Plumb Series
- Page 1 Installation and Operation Data Installation and Op er a tion Man u al Jandy Car tridge Pool Filters CL and CV Versa-Plumb ® Series Fil ters WARNING FOR YOUR SAFETY - This product must be installed and serviced by a contractor who is licensed and qualifi...
-
Page 3: Table Of Contents
Filter Plumbing ......7 Section 10. Head Loss Curves ......16 Clamp Installation ......10 10.1 Jandy CL and CV Cartridge Filter Design Head Loss Curves ..... 16 Section 4. Start-Up and Operation ...... 10 Section 5. Filter Disassembly and Assembly ..11... -
Page 4: Section 1. Safety Information
• Water temperature for test must NOT EXCEED 100°F (38°C). • Limit test to 24 hours. After test, visually check system to be sure it is ready for operation. Notice: These parameters apply to Jandy equipment only. For non-Jandy equipment, consult equipment manufacturer. 1.2 General Safety Instructions... -
Page 5: Section 2. General Information
This manual contains information for the proper instal- exceeding 50 psi. Operating pressures above 50 psi lation and operation of the Jandy CL and CV Series can cause product failure or also cause the lid to be Cartridge Filters. Procedures in this manual must be blown off, which can result in death, serious personal followed exactly. -
Page 6: Section 3. Installation Instructions
Cartridge Pool Filters - CL and CV Series Filters Page 6 Section 3. Installation Instructions If the fi lter needs to be located above the water level of the pool, it can be raised 2.5 ft. without WARNING affecting the pump effi ciency. A check valve is recommended on the suction line to the pump. -
Page 7: Filter Plumbing
fi ttings. This will prevent a restriction in the Tank Adapter water fl ow. Tank Adapter to Housing 5.1 The CV model fi lter comes with a Jandy Coupler Sweep Elbow for this purpose. The sweep O-Ring elbow also includes a threaded port and plug so that a ½"... - Page 8 From Pool Skimmer Figure 5A. CV Cartridge Filter Plumbing for Pool/Spa Combination CL/CV Filter Tank Bottom 2" Ball Valve 2" Pipe O-ring Alt Universal Union Bulkhead for Plumbing Figure 6. Jandy CL and CV Series Cartridge Filter Drain Confi gurations...
- Page 9 Assemble the unions dry and hand NOTE The SHP pump shown in Figure 8 is for reference only. The Jandy sweep elbow also works with the tighten. See Figure 6. MHP and PHP series pumps. 10. If desired, the CV fi lter drain can be plumbed using a Jandy universal union.
-
Page 10: Clamp Installation
Cartridge Pool Filters - CL and CV Series Filters Page 10 Check that the drain plug for CL fi lters or drain cap for CV fi lters is in place and tight. Check that the tank clamp is correctly seated and tight (See Figs. -
Page 11: Section 5. Filter Disassembly And Assembly
Cartridge Pool Filters - CL and CV Series Filters Page 11 IMPORTANT: Completely open air release valve "T" Nut Thread ed Tightening on top of the fi lter tank to release all pressure Nut w/ from inside the tank and system. Shoulder If the equipment is installed below water level, close the fi... -
Page 12: Pressure Gauge
Cartridge Pool Filters - CL and CV Series Filters Page 12 Section 7. Winterizing Product safety signs or labels should be periodically inspected and cleaned by the product Turn off the pump and circuit breakers. user as necessary to maintain good legibility for safe viewing distance. -
Page 13: Section 8. Troubleshooting
Cartridge Pool Filters - CL and CV Series Filters Page 13 Section 8. Troubleshooting For a list of common problems and solutions see the Troubleshooting Guide below. Zodiac recommends that you call a service technician to do any work on the fi lter/pump system. -
Page 14: Section 9. Parts List And Exploded View
Cartridge Pool Filters - CL and CV Series Filters Page 14 Section 9. Parts List and Exploded View 9.1 Jandy CL and CV Car tridge Filter Parts List Description Model No. Part No. Handle Assembly w/ hardware (set of 2) -
Page 15: Jandy Cl And Cv Filters Exploded View
Cartridge Pool Filters - CL and CV Series Filters Page 15 9.2 Jandy CL and CV Filters Exploded View CL Filter CV Filter 22,18 18,21 15,21 15,22 23,25 23,25... -
Page 16: Section 10. Head Loss Curves
Cartridge Pool Filters - CL and CV Series Filters Page 16 Section 10. Head Loss Curves 10.1 Jandy CL and CV Car tridge Filter Design Head Loss Curves CL340 CV340 CL460 CV460 CL580 CV580 Design Design Head Pressure Loss Drop... - Page 17 Cartridge Pool Filters - CL and CV Series Filters Page 17 Notes...
- Page 18 Cartridge Pool Filters - CL and CV Series Filters Page 18 Notes...
- Page 19 Cartridge Pool Filters - CL and CV Series Filters Page 19 Notes *Trademarks used herein are the property of their respective owners.
- Page 20 ZODIAC POOL SYSTEMS, INC. 6000 Condor Drive • Moorpark CA USA 93021 • 800-822-7933 • Fax: 877-327-1403 © 2010 Zodiac Pool Systems, Inc. All rights reserved. 1006...
Need help?
Do you have a question about the CL Versa-Plumb Series and is the answer not in the manual?
Questions and answers