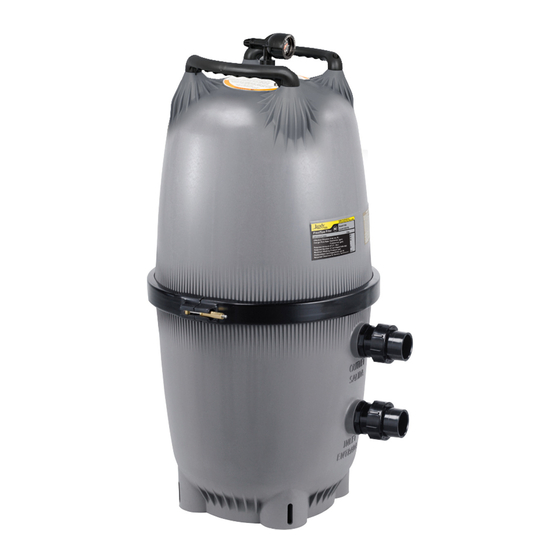
Jandy CL340 Installation And Operation Manual
Pool filters.
cl series
Hide thumbs
Also See for CL340:
- Installation and operation manual (32 pages) ,
- Installation and operation manual (20 pages) ,
- Installation and operation manual (20 pages)
Table of Contents
Advertisement
Jandy Cartridge
Pool Filters
CL Series Filters
Installation and Operation Manual
- This product must be installed and
FOR YOUR SAFETY
serviced by a professional pool/spa service technician. The
procedures in this manual must be followed exactly. Improper
installation and/or operation can create dangerous high
pressure which can cause the filter lid to be blown off,
possibly causing death, serious injury or property damage.
Improper installation and/or operation will void the warranty.
WARNING
- Before installing this product, read and
follow all warning notices and instructions that accompany
this filter. Failure to follow warning notices and instructions
may result in property damage, serious injury, or death.
H0238700C
6000 Condor Drive, Moorpark, CA, USA 93021 • 707.776.8200 FAX 707.763.7785
480 S. Service Road West, Oakville, Ontario, Canada L6K 2H4 • 905.844.8233 FAX 905.844.2635
Litho in U.S.A. © Water Pik Technologies, Inc. 2003
For Technical Support call 707-776-8200, ext. 260
Advertisement
Table of Contents

Summary of Contents for Jandy CL340
- Page 1 Jandy Cartridge Pool Filters CL Series Filters Installation and Operation Manual - This product must be installed and FOR YOUR SAFETY serviced by a professional pool/spa service technician. The procedures in this manual must be followed exactly. Improper installation and/or operation can create dangerous high pressure which can cause the filter lid to be blown off, possibly causing death, serious injury or property damage.
-
Page 2: Table Of Contents
Jandy® CL Series Exploded View..11 SECTION 4 SECTION 10 Start-up and Operation Design Head Loss Curves New Pool and Seasonal Start-up....7 10.1 Jandy® CL Series Head Loss Curves..12 SECTION 5 Filter Disassembly/Assembly Filter Disassembly/Assembly....7 Equipment Information Record Equipment Information Record Date of Installation... -
Page 3: Safety Information
SECTION 1. Safety Information 1.1 Important Safety Warning WARNING - NEVER OPERATE OR TEST THE FILTER SYSTEM AT MORE THAN 50 PSI THIS FILTER OPERATES UNDER HIGH PRESSURE. WHEN ANY PART OF THE CIRCULATING SYSTEM, i.e., FILTER, PUMP, VALVE(S), CLAMP, ETC. IS SERVICED, AIR CAN ENTER THE SYSTEM AND BECOME PRESSURIZED WHEN THE SYSTEM IS RESTARTED. -
Page 4: Introduction
This manual contains information for the proper psi, even when conducting hydrostatic pressure tests. installation and operation of the Jandy® CL Series Pressures above 50 psi can cause the lid to be blown Cartridge Filters. Procedures in this manual must be off. -
Page 5: Installation Instructions
SECTION 3. Installation Instructions 3.1 Filter Location 8. If the filter is to be installed below the water level of the pool, isolation valves should be installed on both 1. Select a well-drained area, one that does not flood the suction and return lines to prevent back flow of when it rains. -
Page 6: Filter Installation
SECTION 3. Installation Instructions Outlet Port Laars Heater Spa Make Up Inlet Port Jandy Pump Jandy Check Waterfall Jandy Valve Filter From Pool Drain (Optional) Spa Return Pool Return Spa Suction From Pool Skimmer Figure 4- Basic Pool/Spa Combination Plumbing Filter Installation 7. -
Page 7: Clamp Installation
SECTION 3. Installation Instructions WARNING Follow these instructions carefully. Improper clamp installation can cause the filter lid to be blown off which can result in death, serious personal injury or property damage. Clamp Ring 3.4 Clamp Installation, CL Series 1. Be certain the o-ring is in position in the lower tank half. -
Page 8: Start-Up And Operation
SECTION 4. Start-Up and Operation 4.1 New Pool and Seasonal Start-Up 8. Watch the pressure gauge to be sure that the pressure does not exceed 50 psi (with clean cartridges). If the pressure approaches 50 psi, immediately turn the pump off and clean the filter cartridges (see Section WARNING 6.3). -
Page 9: General Maintenance
Replace if necessary. Place the o-ring back onto the 2. Keep the pressure gauge in good working order. If filter bottom. you suspect a problem with the gauge, Jandy recommends you call a qualified service technician to 14. Place the filter lid onto the filter tank bottom. -
Page 10: Troubleshooting
SECTION 8. Troubleshooting Troubleshooting 1. For a list of common problems and solutions see the Troubleshooting Guide below. 2. Jandy recommends that you call a qualified Troubleshooting Guide Fault Symptom Possible Problems Solutions Water is not clear. Insufficient disinfectant level. -
Page 11: Exploded View And Parts List 9.1 Jandy® Cl Series Parts List
SECTION 9. Parts List and Exploded View 9.1 Jandy® CL Cartridge Filter Parts List ORDER Description PART NO: Handle Assembly w/ hardware (set of 2) R0357100 Handle Hardware (set of 4) R0359900 Gauge/Air Release Assembly R0357200 Pressure Gauge R0569600 Tank Adapter w/O-ring... -
Page 12: Jandy® Cl Series Exploded View
SECTION 9. Parts List and Exploded View Jandy® CL Exploded View... -
Page 13: Design Head Loss Curves 10.1 Jandy® Cl Series Head Loss Curves
SECTION 10. Head Loss Curves 10.1 Jandy® CL Cartridge Filter Design Head Loss Curves... -
Page 14: Limited Warranty
LIMITATION OF LIABILITY: This is the only warranty given by Laars and Jandy. No one is authorized to make any other warranties on Laars and Jandy behalf. THIS WAR RAN TY IS IN LIEU OF ALL OTHER WARRANTIES, EXPRESS OR IMPLIED, IN CLUD ING BUT NOT LIM IT ED TO ANY IMPLIED WAR RAN TIES OF FITNESS FOR A PARTICULAR PURPOSE AND MER CHANT ABIL I TY.


Need help?
Do you have a question about the CL340 and is the answer not in the manual?
Questions and answers