Jandy VersaPlumb CV Series Installation And Operation Manual
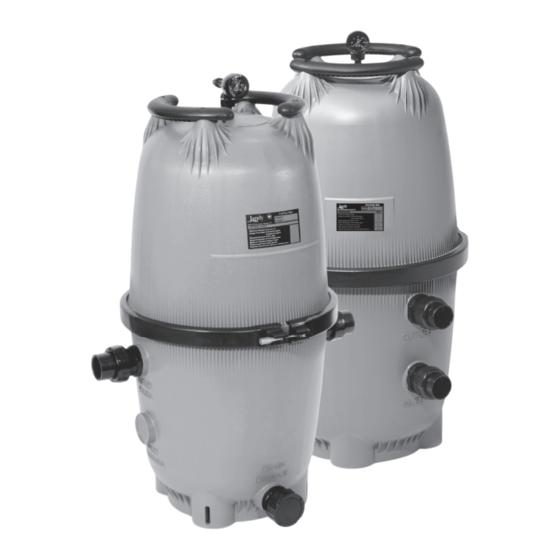
Cartridge pool filter
Hide thumbs
Also See for VersaPlumb CV Series:
- Installation and operation manual (20 pages) ,
- Installation and operation manual (20 pages) ,
- Installation and operation manual (20 pages)
Table of Contents
Advertisement
Available languages
Available languages
Quick Links
Cartridge Pool Filters
Models: CL
CV VersaPlumb
Essential installation and startup instructions are included in this manual.
Additional operation and troubleshooting information is available online by
scanning the QR code with your phone or visiting jandy.com
FOR YOUR SAFETY – This product must be installed and serviced by a contractor who is licensed and qualifi ed in pool
equipment by the jurisdiction in which the product will be installed where such state or local requirements exist. The
maintainer must be a professional with suffi cient experience in pool equipment installation and maintenance so that all of
the instructions in this manual can be followed exactly. Before installing this product, read and follow all warning notices and
instructions that accompany this product. Failure to follow warning notices and instructions may result in property damage,
personal injury, or death. Improper installation and/or operation may void the warranty.
Improper installation and/or operation can create unwanted electrical hazard which may cause serious injury, property
damage, or death.
ATTENTION INSTALLER – This manual contains important information about the in stal la tion, operation and
safe use of this product. This information should be given to the owner/operator of this equipment.
Installation and Operation Manual
Manuel d'installation et d'utilisation
Manual de instalación y operación
WARNING
Advertisement
Chapters
Table of Contents

Subscribe to Our Youtube Channel
Related Manuals for Jandy VersaPlumb CV Series


Summary of Contents for Jandy VersaPlumb CV Series
- Page 1 Essential installation and startup instructions are included in this manual. Additional operation and troubleshooting information is available online by scanning the QR code with your phone or visiting jandy.com WARNING FOR YOUR SAFETY – This product must be installed and serviced by a contractor who is licensed and qualifi ed in pool equipment by the jurisdiction in which the product will be installed where such state or local requirements exist.
-
Page 2: Table Of Contents
2.3 General Requirements ......4 Section 9. Parts List and Exploded View .. 13 2.4 Specifications and Dimensions ....4 9.1 Jandy Pro CL and CV Cartridge Section 3. Installation Instructions ....5 Filter Parts List ........13 3.1 Filter Location ........... 5 9.2 Jandy Pro CL and CV Filters... -
Page 3: Section 1. Important Safety Instructions
• Water temperature for test must NOT EXCEED 100°F (38°C). • Limit test to 24 hours. After test, visually check system to be sure it is ready for operation. Notice: These parameters apply to Jandy Pro Series equipment only. For non-Jandy equipment, consult equipment manufacturer. General Safety Instructions ATTENTION INSTALLER This manual contains important information about the installation, operation and safe use of this product. -
Page 4: Section 2. General Information
Only 18 ½ in. to ease in future servicing. Barrel unions are CL INLET provided with all Jandy filters. Port on CL Model 10 ½ in. Only Figure 1. Dimensions, Jandy Pro CL and CV Series Cartridge Filters Page 4... -
Page 5: Section 3. Installation Instructions
ENGLISH Jandy Cartridge Pool Filters | Installation & Operation Manual ® Section 3. Installation Instructions WARNING CAUTION Use equipment only in a pool or spa installation. Do not Maintain your pressure gauge in good working order. The connect system to an unregulated city water system or... -
Page 6: Filter Plumbing
Figure 4. Slide the tank flow. adapter through the coupling nut and into the 5.1 The CV model filter comes with a Jandy Pro filter tank. Use the flats on the tank adapter to Sweep Elbow for this purpose. The sweep tighten. - Page 7 From Pool Skimmer Figure 5A. CV Cartridge Filter Plumbing for Pool/Spa Combination CL/CV Filter Tank Bottom 2" Ball Valve 2" Pipe O-ring Alt Universal Union Bulkhead for Plumbing Figure 6. Jandy Pro CL and CV Series Cartridge Filter Drain Configurations Page 7...
- Page 8 NOTE: The SHP pump shown in Figure 8 is for reference only. line leaks may cause air to be entrapped in filter The Jandy Pro sweep elbow also works with the MHP tank or loss of prime at the pump. Pump discharge and PHP series pumps.
-
Page 9: Clamp Installation
3. Check that the tank clamp is correctly seated and 10. If desired, the CV filter drain can be plumbed using tight. See Figs. 9 and 10. a Jandy Pro universal union. The plumbing must contain a ball valve as shown in Figure 6. WARNING... -
Page 10: Section 5. Filter Disassembly And Assembly
ENGLISH Jandy Cartridge Pool Filters | Installation & Operation Manual ® Section 5. Filter Disassembly Tightening and Assembly Threaded "T" Nut Nut w/ Shoulder WARNING Never attempt to assemble, disassemble or adjust the filter when there is Tightening Clamp pressurized air in the system. Starting the... -
Page 11: Section 6. Maintenance
ENGLISH Jandy Cartridge Pool Filters | Installation & Operation Manual ® Section 6. Maintenance Cleaning the Filter Cartridge 1. Follow the procedures outlined in steps 1 through General Maintenance 8 of Section 5.1 to expose the cartridge elements 1. Wash outside of filter with a mild detergent and inside the filter. -
Page 12: Section 8. Troubleshooting
ENGLISH Jandy Cartridge Pool Filters | Installation & Operation Manual ® Section 8. Troubleshooting 1. For a list of common problems and solutions see the Troubleshooting Guide below. 2. Zodiac recommends that you call a service technician to do any work on the filter/pump system. For technical assistance, contact our Technical Support Department at 1.800.822.793. -
Page 13: Section 9. Parts List And Exploded View
ENGLISH Jandy Cartridge Pool Filters | Installation & Operation Manual ® Section 9. Parts List and Exploded View Jandy Pro CL and CV Cartridge Filter Parts List Description Model No. Part No. Handle Assembly w/ hardware (set of 2) R0357100... -
Page 14: Jandy Pro Cl And Cv Filters Exploded View
ENGLISH Jandy Cartridge Pool Filters | Installation & Operation Manual ® Jandy Pro CL and CV Filters Exploded View CL Filter CV Filter 11 12 11 12 13 21 13 21 11 12 11 12 22 18 18 21 15 21... -
Page 15: Section 10. Head Loss Curves
ENGLISH Jandy Cartridge Pool Filters | Installation & Operation Manual ® Section 10. Head Loss Curves 10.1 Jandy Pro CL and CV Cartridge Filter Design Head Loss Curves ® CL340 CV340 CL460 CV460 CL580 CV580 Design Design Head Pressure Loss... - Page 16 A Fluidra Brand | Jandy.com | Jandy.ca 2882 Whiptail Loop # 100, Carlsbad, CA 92010, USA | 1.800.822.7933 2-3365 Mainway, Burlington, ON L7M 1A6, Canada | 1.800.822.7933 ©2024 Fluidra. All rights reserved. The trademarks and trade names used herein are the property of their respective owners.
- Page 17 Les instructions essentielles d’installation et de démarrage sont incluses dans ce manuel. Des informations supplémentaires sur le fonctionnement et le dépannage sont disponibles en ligne en scannant le code QR avec votre téléphone ou en visitant jandy.com AVERTISSEMENT POUR VOTRE SÉCURITÉ – Ce produit doit être installé et entretenu par un entrepreneur agréé et compétent dans le matériel de piscine par la juridiction dans laquelle ce produit sera installé...
- Page 18 FRANÇAIS Jandy Filtres à cartouche pour piscine | Manuel d’installation et d’utilisation ® Table des matières Section 1. Consignes De Sécurité Section 5. Démontage et montage Importantes ....... 19 du filtre ........25 1.1 Avertissements de sécurité importants .. 19 Section 6. Entretien ........27 1.2 Consignes générales de sécurité...
-
Page 19: Section 1. Consignes De Sécurité Importantes
• Limiter le test à 24 heures. Après le test, vérifier visuellement le système pour s’assurer qu’il est prêt à fonctionner. Avis : Ces paramètres s’appliquent à l’équipement Série Jandy Pro uniquement. Pour l’équipement non fabriqué par Jandy, consulter le fabricant de l’équipement. -
Page 20: Section 2. Informations Générales
à cartouche des séries faciliter l’entretien futur. Les raccords à baril sont CL et CV Jandy. Les procédures de ce manuel doivent fournis avec tous les filtres Jandy. être scrupuleusement suivies. Pour toute assistance... -
Page 21: Section 3. Guide D'installation
Orifice sur 10,5 po le modèle CL uniquement Figure 2. Emplacement du filtre Figure 1. Dimensions, Jandy Pro CL and CV Series Cartridge ATTENTION Filters Maintenir le manomètre à la bonne pression de Section 3. Guide d’installation fonctionnement Le manomètre est le principal indicateur de la façon dont le filtre fonctionne. -
Page 22: Préparation Du Filtre
Ne pas trop serrer. 5.1 Le modèle de filtre CV est livré avec un coude élancé Jandy prévu à cet effet. Le coude b. Placer le joint torique plus grand et plus mince élancé comprend également un orifice fileté... - Page 23 Bouchon Soupape à réservoir des Conduite clapet 5 cm filtres CL/CV de 5 cm (2 po.) (2 po) Joint Raccord union universel torique Cloison pour plomberie Figure 6. Configurations du drain des filtres à cartouche séries CL/CV Jandy Page 23...
- Page 24 Filtres à cartouche pour piscine | Manuel d’installation et d’utilisation ® REMARQUE : La pompe SHP illustrée à la Figure 8 est à titre de référence seulement. Le coude élancé Jandy est compatible également avec les pompes des séries MHP et PHP.
-
Page 25: Installation Du Serre-Joint
10. Si cela est souhaité, le drain du filtre CV peut être branchée à l’aide d’un raccord union universel 1. Couper la pompe. Fermer le disjoncteur du moteur Jandy. La plomberie doit comporter une soupape de la pompe. à clapet, tel qu’ indiqué à la Figure 6. -
Page 26: Section 5. Démontage Et Montage Du Filtre
FRANÇAIS Jandy Filtres à cartouche pour piscine | Manuel d’installation et d’utilisation ® AVERTISSEMENT Écrou de Tige Écrou en Serrage avec filetée « T » Ne jamais essayer d’assembler, de épaulement démonter ou d’ajuster le filtre quand il y a de l’air sous pression dans le système. -
Page 27: Section 6. Entretien
FRANÇAIS Jandy Filtres à cartouche pour piscine | Manuel d’installation et d’utilisation ® Section 6. Entretien Nettoyage de la cartouche filtre 1. Suivre les procédures décrites aux étapes 1 à 8 Entretien général de la Section 5.1 pour exposer les éléments de la 1. -
Page 28: Section 8. Dépannage
FRANÇAIS Jandy Filtres à cartouche pour piscine | Manuel d’installation et d’utilisation ® Section 8. Dépannage 1. Pour la liste des problèmes communs et des solutions, voir le Guide de dépannage ci-dessous. 2. Zodiac recommande de faire appel à un technicien qualifié en entretien pour effectuer toute réparation sur le système de filtre/pompe. -
Page 29: Section 9. Liste Des Pièces Et Vue Éclatée
FRANÇAIS Jandy Filtres à cartouche pour piscine | Manuel d’installation et d’utilisation ® Section 9. Liste des pièces et vue éclatée Liste des pièces des filtres à cartouche CL et CV Clé Description Numéro de modèle Numéro de pièce nº... -
Page 30: Vue Éclatée Des Filtres Cl Et Cv
FRANÇAIS Jandy Filtres à cartouche pour piscine | Manuel d’installation et d’utilisation ® Vue éclatée des filtres CL et CV Filtre CL Filtre CV 11 12 11 12 13 21 13 21 11 12 11 12 22 18 18 21... -
Page 31: Section 10. Courbes De Perte De Charge
FRANÇAIS Jandy Filtres à cartouche pour piscine | Manuel d’installation et d’utilisation ® Section 10. Courbes de perte de charge 10.1 Courbes de perte de charge des filtres à cartouche CL et CV CL340 CV340 CL460 CV460 CL580 CV580 Conception... - Page 32 A Fluidra Brand | Jandy.com | Jandy.ca 2882 Whiptail Loop # 100, Carlsbad, CA 92010, USA | 1.800.822.7933 2-3365 Mainway, Burlington, ON L7M 1A6, Canada | 1.800.822.7933 ©2024 Zodiac Pool Systems LLC. Tous droits réservés. Toutes les autres marques de commerce mentionnées sont la propriété de leurs propriétaires respectifs.
Need help?
Do you have a question about the VersaPlumb CV Series and is the answer not in the manual?
Questions and answers