
Subscribe to Our Youtube Channel
Related Manuals for Danfoss FLX 17 Pro


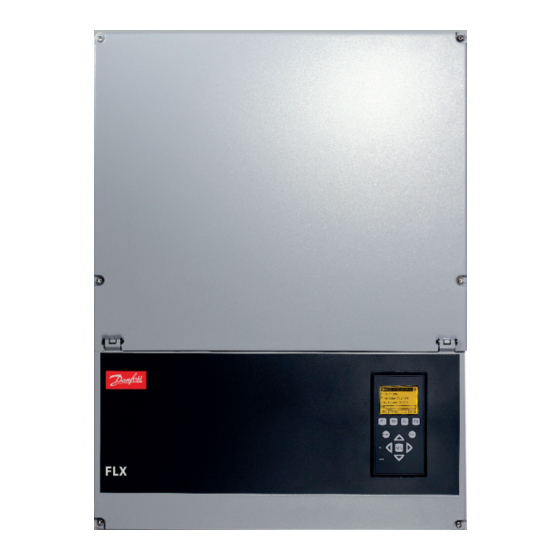
Summary of Contents for Danfoss FLX 17 Pro
-
Page 1: Installation Guide
MAKING MODERN LIVING POSSIBLE SOLAR INVERTERS Installation Guide FLX Series www.danfoss.com/solar... -
Page 2: Safety And Conformity
Safety and Conformity Safety and Conformity Safety Message Types General Safety The following symbols are used in this document: All persons installing and servicing inverters must be: • Trained and experienced in general safety rules DANGER for work on electrical equipment. •... - Page 3 Conformity Go to the download area at www.danfoss.com/solar, Approvals and Certifications, for information. See also 5 Technical Data. CE marking - This symbol certifies the conformity of...
-
Page 4: Table Of Contents
Contents Contents 1 Introduction 1.1 Purpose of the Manual 1.2 Software Version 1.3 Spare Parts 1.4 Unpacking 1.5 Identification of Inverter 1.6 Installation Sequence 1.7 Return and Disposal 1.7.1 Return 1.7.2 Disposal 1.8 Overview of Installation Area 2 Installation 2.1 Environment and Clearances 2.2 Mounting the Mounting Plate 2.3 Mounting the Inverter 2.4 Removing the Inverter... - Page 5 Contents 3.3.5 Plant, Group and Inverter Views 3.3.6 Autotest Procedure 4 Service 4.1 Troubleshooting 4.2 Maintenance 5 Technical Data 5.1 Specifications 5.1.1 Inverter Specifications 5.2 Derating Limits 5.3 Conformity 5.4 Installation Conditions 5.5 Cable Specifications 5.6 Torque Specifications 5.7 Mains Circuit Specifications 5.8 Auxiliary Interface Specifications 5.9 RS-485 and Ethernet Connections L00410568-02_02 / Rev.
-
Page 6: Introduction
• Manual access via the display, for configuration These documents are available from the download area at and monitoring of the inverter. www.danfoss.com/solar, or from the supplier of the solar inverter. • Ancillary service functionalities. Refer to the FLX Series Design Guide for details. -
Page 7: Spare Parts
Introduction 1.3 Spare Parts 1.6 Installation Sequence Contact Danfoss for information about spare parts, part Pay special attention to 1.1 Safety Message Types. numbers, and ordering. Install the inverter according to 2.1 Environment 1.4 Unpacking and Clearances, 2.2 Mounting the Mounting Plate and 2.3 Mounting the Inverter. -
Page 8: Return
Introduction 1.7.1 Return For return to Danfoss, the inverter should always be in its original packaging or equivalent packaging. If the product is returned as a result of inverter failure, contact your Danfoss inverter supplier. For return shipment and details, contact Danfoss hotline. -
Page 9: Overview Of Installation Area
Introduction 1.8 Overview of Installation Area PELV (Safe to touch) RS-485 interface Option slot A (can be used for GSM option, optional sensor interface, or PLA option) Ethernet interface Option slot A (can be used for GSM option, optional sensor interface, or PLA option) Live Part PV connection area Communication board... -
Page 10: Installation
Installation 2 Installation 2.1 Environment and Clearances Illustration 2.6 Mount Upright on Vertical Surface. Tilt of up to 10 degrees is permitted Illustration 2.1 Avoid Constant Stream of Water Illustration 2.7 Prevent Dust and Ammonia Gases Illustration 2.2 Avoid Direct Sunlight NOTICE When planning the installation site, ensure that inverter product and warning labels remain visible. -
Page 11: Mounting The Mounting Plate
Installation 2.2 Mounting the Mounting Plate Illustration 2.8 Safe Clearances NOTICE Ensure 620 mm base clearance for adequate airflow. L00410568-02_02 / Rev. date: 2013-12-10... -
Page 12: Mounting The Inverter
Installation Illustration 2.10 Mounting the Mounting Plate 2.3 Mounting the Inverter CAUTION Illustration 2.9 Mounting Plate For safe handling of the inverter, 2 people must carry the unit, or a suitable transport trolley must be used. Wear safety boots. NOTICE Use of the mounting plate delivered with the inverter is Procedure: mandatory. -
Page 13: Removing The Inverter
Installation On the inverter, position the side screws against Use 2 security screws, M5 x 8-12 (not supplied). the mounting plate slots. Insert screws through the pre-drilled anti-theft Push the inverter as shown so the side screws holes (see Illustration 1.3), through the mounting slide into the 2 lower slots, then the 2 upper plate to the wall. -
Page 14: Ac Grid Connection
Installation 2.6 AC Grid Connection Illustration 2.17 AC Connection Area L1, L2, L3 3 mains wires Neutral wire Illustration 2.15 Installation Area Primary protective earth Secondary protective earth Verify that the inverter rating matches the grid. Ensure that main circuit breaker is released, and take precautions to prevent reconnection. -
Page 15: Rs-485 Or Ethernet Connections
Installation NOTICE This product may generate DC current exceeding 6 mA, into the external grounded PE wire. Where a residual current-operated protective (RCD) or monitoring (RCM) device is used for protection in case of direct or indirect contact, only an RCD or RCM of Type B is allowed on the supply side of this product. -
Page 16: Pv Connection
Installation 2.10 PV Connection WARNING PV modules generate voltage when exposed to light. Do NOT connect PV to earth. Illustration 2.21 Correct Polarity: Mounting Sunclix Connector on Cable Measure the DC voltage between the positive terminal of the PV array and earth (or the green/ yellow PE cable). -
Page 17: Protection Rating For Pv Modules
Installation 2.10.1 Protection Rating for PV Modules CAUTION PV installation The inverter must only be operated with PV modules of Unused PV inputs may not be short-circuited. protection class II, compliant to IEC 61730, application class Module voltage rating must be more than 480 V (typical module voltage rating is 1000 V). -
Page 18: Initial Setup And Start
Initial Setup and Start 3 Initial Setup and Start 3.1 User Interface resistance between the PV arrays and earth. Meanwhile, it also monitors the grid parameters. When the grid The user interface comprises: parameters have been within the specifications for the required amount of time (depends on grid code), the •... -
Page 19: Preparation For Master Inverter
Set up the inverter for manual PV configuration: • Via the display, security level 1, at [Setup → Setup Obtain the service logon from Danfoss. • details → PV configuration]. • Enter the logon via the display, or the web interface logon dialog. -
Page 20: Initial Setup Via Display
Initial Setup and Start The menu structure is divided into 4 main sections: View - presents a short list of information, read only. Status - shows inverter parameter readings, read only. Log - shows logged data. Setup - shows configurable parameters, read/ write. - Page 21 Initial Setup and Start NOTICE NOTICE To use the default language (English) simply press the Set the time and date accurately. The inverter uses this [OK] button twice to select and accept. information for logging. If an incorrect time/date is accidentally set, correct it immediately in the set date and time menu [Setup →...
- Page 22 Initial Setup and Start parallel, enter average installed PV power for each PV input, as shown in the examples. Enter this value for PV String Configuration “Installed PV power” Example 1: PV1, PV2 and PV3 are each set to individual mode. Nominal PV power installed: PV 1: 6000 W PV 1: 6000 W...
-
Page 23: Turn Pv Load Switch On
24-hour password. Only Capital letters ABCDEFGHIJKLMNOPQRSTUVWXYZ authorised personnel is allowed to configure the Numbers 0123456789 inverter. Changes will be logged and Danfoss accepts no Special - _. liability for damage caused by changing the inverter characters configuration. -
Page 24: Setup Wizard
Initial Setup and Start • For Windows XP and older Windows Find the serial number marked on the product label on the versions: http://invertername, where side of the inverter enclosure. See Illustration 1.2. 'invertername' is the final 10 digits of the serial number. - Page 25 Initial Setup and Start Illustration 3.12 Step 2 of 8: Master Setting To change this setting later, go to [Inverter level: Setup → Inverter details]. Step 3 of 8: Time and date Enter: • Time in 24-hour format • Date •...
- Page 26 Initial Setup and Start CAUTION Incorrect setting can have serious consequences for production efficiency. Illustration 3.14 Step 4 of 8: Installed Power To change the installed power, go to [Inverter level: Setup → Calibration, PV Array]. Step 5 of 8: Country of Installation Select the setting to match the location of the installation.
- Page 27 Initial Setup and Start • The default setting is [undefined]. Select the grid code again, to confirm. • The setting is activated immediately. CAUTION Correct selection is essential to comply with local and national standards. Illustration 3.16 Step 6 of 8: Grid Code NOTICE If the initial and confirmation settings are different, •...
- Page 28 Initial Setup and Start NOTICE When the PV configuration, installed PV power and PV array area of follower inverters in the network differ from that of the master, do not replicate. Set up the follower inverters individually. Illustration 3.17 Step 7 of 8: Replication Step 8 of 8: Inverter start-up The wizard displays an overview of the setup configuration.
- Page 29 Initial Setup and Start Illustration 3.18 Step 8 of 8: Inverter start-up To change the setup later, access the inverter via the web interface or the display, at inverter level. To change the name of the inverter, go to [Inverter level: Setup → Inverter details]. •...
-
Page 30: Web Interface
The default inverter • Contact: Opens a pop-up window, name is based on the serial number. which displays Danfoss contact • Click on an inverter name to display the information. inverter view. -
Page 31: Plant, Group And Inverter Views
Initial Setup and Start NOTICE The content of the main menu changes depending on which view is currently selected: the plant, a group of inverters, or an individual inverter. 3.3.5 Plant, Group and Inverter Views The overview screens for plant view, group view, and inverter view display the same overall status information. -
Page 32: Autotest Procedure
Initial Setup and Start Item Unit View Description Plant and Inverter Group Overall plant status Red: Plant PR <50%, or: Any inverter in the network - in fail safe mode, or - missing from the scan list, no contact with the master Yellow: Any inverter in the network - with PR <70%, or - in Connecting or Off grid mode... -
Page 33: Service
Service 4 Service 4.1 Troubleshooting here. When the inverter enters the On grid mode, the most recent event is cleared and is shown as 0. This guide provides tables showing messages appearing in The event code is made up of 2 elements: the group the inverter display, known as events. - Page 34 Service Status Description Action DNO Hotline PV message 34–37 Residual Current Monitoring Unit Turn both DC and AC off and wait until the display turns (RCMU) has measured an off. Then turn on DC and AC and observe if the event excessive current.
- Page 35 Service Internal Events Status Description Action DNO Hotline PV message 201–208 The internal temperature of the Check the inverter is not covered and that the inverter is too high. ventilation duct is not blocked. If not, call the installer. 209, 210 Voltage on DC bus is too high.
-
Page 36: Maintenance
Service Events Caused by the Self-test Description Action DNO Hotline PV 264-271 Measurement circuit test failed. Restart the inverter. If event persists, call the installer. Installer: Call service. RCMU self-test failed. Call the installer. Installer: Call service. Current sensor test failed. 356-363 Transistor and relay test failed, or inverter relay has failed (contact assumed welded). -
Page 37: Technical Data
Technical Data 5 Technical Data 5.1 Specifications 5.1.1 Inverter Specifications Nomen- Parameter FLX series clature Rated apparent 5 kVA 6 kVA 7 kVA 8 kVA 9 kVA power 5 kW 6 kW 7 kW 8 kW 9 kW Rated active power ac,r Active power at 4.75 kW... - Page 38 Technical Data Nomen- Parameter FLX series clature Max. short-circuit current DC (at STC) 13.5 A per PV input Min. on grid power 20 W Efficiency Max. efficiency 97.8% 97.9% Euro efficiency, V at 96.5% 97.0% dc,r Other Dimensions (H, W, D), inverter / incl.
- Page 39 Technical Data Nomen- Parameter FLX series clature 12.5 Max. current AC 3 x 15.1 A 3 x 18.8 A 3 x 22.6 A 3 x 25.6 A acmax AC current distortion (THD at nominal <2 % output power, %) Inrush current 0.5 A / 10 ms cosphi Power factor at...
- Page 40 Technical Data Nomen- Parameter FLX series clature 12.5 Storage temperature -25..60 °C Overload operation Change of operating point Overvoltage Grid: OVC III categories PV: OVC II Table 5.2 Specifications At rated grid voltage (V ), Cos(phi)=1. At symmetric input configuration. ac,r To utilise the full range, asymmetrical layouts must be considered SPL (Sound Pressure Level) at 1 m under normal operating...
-
Page 41: Derating Limits
Technical Data 5.2 Derating Limits To ensure that the inverters can produce the rated power, measurement inaccuracies are taken into account when enforcing the derating limits stated in Table 5.5. (Limit = rated value + tolerance). FLX series 12.5 Grid current, per phase 7.5 A 9.0 A 10.6 A... -
Page 42: Installation Conditions
Technical Data 5.4 Installation Conditions Parameter Specification −25 °C - +60 °C (for temperature derating see the FLX Series Design Guide.) Temperature Relative humidity 95 % (non-condensing) Pollution degree Environmental class according to IEC IEC60721-3-3 3K6/3B3/3S3/3M2 Air quality - general ISA S71.04-1985 Level G2 (at 75% RH) Air quality - coastal, heavy industrial and agricultural zones... -
Page 43: Cable Specifications
Technical Data 5.5 Cable Specifications NOTICE NOTICE Avoid power loss in cables greater than 1% of the Table states only cable lengths less than 100 m. nominal inverter rating by following the values stated in the tables and illustrations. Specification FLX series AC cable maximum AC cable size... - Page 44 Technical Data Illustration 5.2 FLX Series 5, Cable Losses [%] versus Cable Illustration 5.5 FLX Series 8, Cable Losses [%] versus Cable Length [m] Length [m] Illustration 5.3 FLX Series 6, Cable Losses [%] versus Cable Illustration 5.6 FLX Series 9, Cable Losses [%] versus Cable Length [m] Length [m] Illustration 5.4 FLX Series 7, Cable Losses [%] versus Cable...
-
Page 45: Torque Specifications
Technical Data 5.6 Torque Specifications Illustration 5.8 FLX Series 12.5, Cable Losses [%] versus Cable Length [m] Illustration 5.11 Overview of Inverter with Torque Indications Parameter Tool Tightening Torque M16 cable gland Wrench 19 mm 3.75 Nm body M16 cable gland, Wrench 19 mm 2.5 Nm compression nut... -
Page 46: Mains Circuit Specifications
Technical Data Parameter Tool Tightening Torque M32 cable gland Wrench 42 mm 7.5 Nm body M32 cable gland, Wrench 42 mm 5.0 Nm compression nut Terminals on AC Pozidriv PZ2 or 2.0 - 4.0 Nm terminal block Straight slot 1.0 x 5.5 mm Torx TX 20 or 2.2 Nm... -
Page 47: Rs-485 And Ethernet Connections
Technical Data Illustration 5.13 Auxiliary Interfaces 5.9 RS-485 and Ethernet Connections RS-485 RX/TX A (-) BIAS L Terminate the RS-485 communication bus at both ends. BIAS H • RX/TX B (+) Termination is automatic when no RJ-45 plug is Not connected inserted into the socket. -
Page 48: Network Topology
Technical Data Illustration 5.15 RJ-45 Pinout Detail for Ethernet Colour Standard Pinout Cat 5 Cat 5 Ethernet T-568A T-568B 1. RX+ Green/white Orange/white Illustration 5.16 Network Topology 2. RX Green Orange 3. TX+ Orange/white Green/white Blue Blue Linear Daisy Chain Blue/white Blue/white Star Topology... - Page 49 Danfoss can accept no responsibility for possible errors in catalogues, brochures and other printed material. Danfoss reserves the right to alter its products without notice. This also applies to products already on order provided that such alterations can be made without subsequential changes being necessary in specifications already agreed.
Need help?
Do you have a question about the FLX 17 Pro and is the answer not in the manual?
Questions and answers