Table of Contents
Advertisement
Quick Links
Download this manual
See also:
User Manual
INTRODUCTION
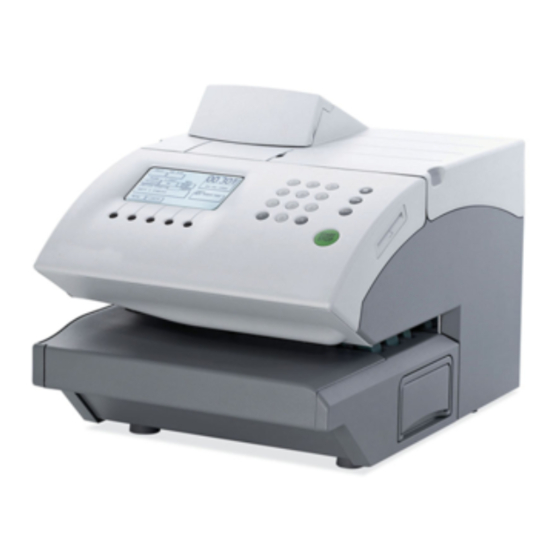
Congratulations for choosing the Neopost IJ-15K mailing ma-
chine. The IJ-15K is the result of the expertise and innovative
capabilities of the worldwide Neopost group and using ink jet
technology, it will integrate into your working environment to
enhance your mail processing operation.
The IJ15K mailing system is dedicated to the production inserter
environment connected either mechanicaly or electronically to
high speed inserter up to 15K envelopes/hour.
The IJ-15K is a unique communication tool for your company. Its
high quality printing combined with its integrated library of
advertisement messages, mail class texts and free format text will
give you extra tools to enhance your company's image and the
impact of your mail.
The IJ-15K has many capabilities that are important to your
business:
As well as being productive (up to 250 letters per minute), the IJ-
15K is designed to be a user friendly machine that can fit into the
production environment with its innovative and attractive design,
simple user settings and very low noise level. The high volume
capacity ink system makes it easy and safe to handle, and the
user interface is particularly clear with a touch graphic display and
pop up menus.
The IJ-15K is adaptable and as such can handle many different
types of mail. The machine can be used to process, in a continuous
cycle, items of different sizes (ranging from postcards to large
flats) and items of various thickness (up to 5/8 inch), with automatic
imprint shift. For thicker mail items or packages, adhesive labels
can be automatically dispensed.
It's automatic thickness adjustment and inkjet printing ensure
reliable processing and quality imprints including thick and uneven
material.
You will very soon discover by yourself that the IJ-15K is the
ultimate in quality and productivity for mail processing equipment.
1
4131934X/B
19/06/2007
ORIG0060-1
Advertisement
Table of Contents

Related Manuals for Neopost IJ-15K


Summary of Contents for Neopost IJ-15K
- Page 1 It’s automatic thickness adjustment and inkjet printing ensure reliable processing and quality imprints including thick and uneven material. You will very soon discover by yourself that the IJ-15K is the ultimate in quality and productivity for mail processing equipment. 4131934X/B...
- Page 2 WARNING! Do not remove any secured covers or attempt to repair the IJ-15K by yourself, there are no user serviceable parts contained and the IJ-15K product is licensed for use only under the conditions of the Post Office rules. This license is issued subject to the product being secure at all times.
-
Page 3: Table Of Contents
TABLE OF CONTENTS GETTING STARTED ..........7 SECTION A: BASIC FUNCTIONS ......9 1. OVERALL PRESENTATION ..........11 1.1 Overview ..............11 1.1.1 Overall view ........... 11 1.1.2 Overall inside view ......... 12 1.1.3 Touch screen and keyboard......13 1.2 Installing the machine ..........15 1.2.1 Prepare the mailing machine ...... - Page 4 4. MODIFYING OF THE IMPRINT .......... 34 5. CONNECTING TO DEPARTMENTS ........36 6. CONNECTING TO POSTAGE-ON-CALL® SERVER ..38 6.1 Adding Postage ............. 38 6.2 Clearing a PO lockout ..........39 6.3 Completing an interrupted add postage transaction 40 7.
- Page 5 2.8 Ink information ............72 2.9 Postal services ............73 2.10 Downloading an advertisement slogan ....75 2.11 Text modification ............. 77 2.12 Exiting the supervisor mode ........78 SECTION C: MACHINE CONFIGURATION ..79 1. MAILING MACHINE GENERAL CONFIGURATION ... 81 2.
- Page 6 SPECIFICATIONS ..........101 ORDERING SUPPLIES ........102 INDEX ..............104 4131934X/B 19/06/2007 ORIG0060-6...
-
Page 7: Getting Started
GETTING STARTED 1 Place envelopes in your inserter. 2 Configure in supervisor mode the rates on the mailing system by doing the following: - Log in using the Supervisor Pincode. - Press the «Batch Config» area to enter rates programming section. - Page 8 Special icons Signals an essential piece of information that cannot be missed. Signals an important issue. Indicates an interesting idea or trick Illustrates through an example 4131934X/B 19/06/2007 ORIG0060-8...
-
Page 9: Section A: Basic Functions
SECTION A: BASIC FUNCTIONS OVERALL PRESENTATION ..........11 Overview 1.1.1 Overall view 1.1.2 Overall inside view 1.1.3 Touch screen and keyboard Installing the machine 1.2.1 Prepare the mailing machine 1.2.2 Connections at the rear of the machine 1.2.3 Ink reservoir and printhead Connecting mailing machine to an inserter PROTECTING THE MACHINE BY AN ACCESS PIN CODE ................ - Page 10 4131934X/B 19/06/2007 ORIG0060-10...
-
Page 11: Overall Presentation
OVERALL PRESENTATION 1.1 Overview 1.1.1 Overall view pre-cut ON/OFF modem label ink reservoir switch connector dispenser cover (rear) (rear) cover touch paper keyboard memory screen path card control reader panel Overall presentation 4131934X/B 19/06/2007 ORIG0060-11... -
Page 12: Overall Inside View
1.1.2 Overall inside view postage reservoir printhead meter Overall presentation 4131934X/B 19/06/2007 ORIG0060-12... -
Page 13: Touch Screen And Keyboard
1.1.3 Touch screen and keyboard postage value user defined signal light list of batch working status when parameters configuration mode connected warning text advertisement date message TEXT AD DIE LOW POSTAGE LIGHT MODE XX/XX/XXXX LETTER PRESORT REPORT INFO BATCH CONFIG DEPT TOI XXXXXX DEPT... - Page 14 locking and standby mode return to main menu with default settings RESET label mode selection input value reset-clear switching on/off envelope or label feed when no START STOP electronic connection with the inserter. numeric entry keys validating a selection return to previous menu with no validation ESCAPE return to main menu with no validation (except HOME...
-
Page 15: Installing The Machine
1.2 Installing the machine 1.2.1 Prepare the mailing machine The mailing machine has to be installed on a flat, horizontal surface. It is always near an inserter, connected or not electronically. Please allow sufficient free space as follows: - above the machine to enable the opening of the covers. - at the rear of the machine for cooling. -
Page 16: Connections At The Rear Of The Machine
1.2.2 Connections at the rear of the machine Connections at the rear of the mailing machine Modem Printer Port 4 Port 2 Port 1: Port 3 Optional light be sure to install the Inserter terminator black connector terminator plug here (1) Specific optional cable provided by the production folder inserter manufacturer. - Page 17 Inserter connector AC power outlet Overall presentation 4131934X/B 19/06/2007 ORIG0060-17...
-
Page 18: Ink Reservoir And Printhead
1.2.3 Ink reservoir and printhead It is possible to replace the reservoir when the machine is OFF or while machine is running until the final "ink out" message appears. To prevent unpriming of the system, this operation should last less than one minute. - Page 19 - Remove reservoir. - Insert the new ink reservoir . - Press on the front of the ink reservoir (1), then on the left hand side (2) in order to lock it. - Close reservoir door (3). - Switch machine PRINTHEAD REPLACEMENT The machine must be switched on.
- Page 20 - Press on the front of the printhead in order to remove it. - Remove it. - Insert the new printhead. - Lock it in position by pinching the rear of the printhead. - Close top cover (the printhead is automatically reset in the “protection”...
-
Page 21: Connecting Mailing Machine To An Inserter
1.3 Connecting mailing machine to an inserter 2 modes of connection are available: - mechanical connection; - electronic connection. From the main screen, press and select USER SETUP MENU (press to confirm); the following screen will appear: USER SETUP DISPL... POSTA... -
Page 22: Protecting The Machine By An Access Pin Code
PROTECTING THE MACHINE BY AN ACCESS PIN CODE At power-up or when pressing a key if the machine is in the sleep mode, the screen may prompt you to enter a 4-digit user pin code (when access to the machine has been protected by the supervisor). -
Page 23: Entering Postage Value And Processing Mail
ENTERING POSTAGE VALUE AND PROCESSING MAIL There are 2 modes to meter mails: - LB: Letter Box mode; - BMAU: Presorted/Batch Mail Acceptance unit mode. Letter Box mode This function is designed to allow the user to print in Letter Box mode for non-presorted mail. - Page 24 There are 20 allocations for mail class regardless of the mode (letter box or presorted): - 5 are pre-defined (and can be changed by the Supervisor); - 15 are empty (to be defined by the Supervisor). See below the 10 slots for mail class and postage value: POSTAGE CLASS MAIL CLASS AMOUNT...
-
Page 25: Entering A Postage Value
3.1 Entering a postage value Five different mail classes will be embedded by default in the machine : «PresortedFirstClass / FirstClassAuto / Standard / PresortedStandard / NonprofitOrg». The other ones, if needed, may be entered manually by the supervisor. The supervisor enters manually the 20 pre-default postage (values + mail class) by pressing the MAIL CLASS and the AMOUNT area for each rate. - Page 26 By touching MAIL CLASS key: RATE 1 : MAIL CL. RATE 1 : AMOUNT PRSRT FIRST-CLASS MAIL FRIST-CLASS AUTO STANDARD PRSRT STD NONPROFIT ESCAPE MODIFY By touching MODIFY key: MAIL CLASS 24 CH. MAX SPACE ESCAPE By touching AMOUNT key: 5 DIGITS OLD VALUE : NEW VALUE :...
-
Page 27: Using Values
3.2 Using values 3.2.1 With machine electronically connected For a machine connected electronically to an inserter, the user will store in a specific memory 3 amounts among the 10 pre-set by the supervisor as references for the inserter. The inserter will be able to process with one of those 3 amounts in the same batch using the electronic protocol. -
Page 28: Processing Mail
- Press on when selection is done. 3.3.1 Inserters with electronic connection IJ-15K mailing system can be connected to Production Folder Inserter supporting the electronic protocol (PFI vendor cable needed). When the electronic connection exists, it is up to the user to activate it through the USER SETUP menu, selecting "CONNECTED":... - Page 29 USER SETUP DISPL... RATE LANGUAGE AMERICAN ENGLISH BUZZER ON ERR ON KEY CONTRAST NOT CONNECT. CONNECTED INSERTER HOME HOME LOGIN With this configuration, the metering order comes from the inserter, whatever the mode is: letterbox or presorted. The only exception concerns the labels printed from the mailing system (see §...
-
Page 30: Inserters With Mechanical Connection Only
3.3.2 Inserters with mechanical connection only For a machine not connected electronically, the user chooses directly from the display of the mailing system the postage he would like to activate among the 10 pre-set by the supervisor. To select postage, the process is the same as § 3.3.1 with setting A only. -
Page 31: Autoclean Process
45 minutes (counter reset at the end of each cleaning cycle). When electronically connected to an inserter, IJ-15K will transmit a signal to the inserter requesting to stop sending envelopes when the counter reaches the threshold. There is no time-out feature. - Page 32 HEADSET CLEANING THRESHOLD (SEC.) 2700 0015 INACTIVITY TIMER(SEC.) 0015 WARNING THRESH. (SEC.) 0015 HOME HOME LOGOUT During the autoclean cycle, rollers and motors are stopped. The supervisor can change: - Threshold : time max between two headset cleaning (by default 2700s / min=1 / max=9999) ;...
-
Page 33: Date Advance Function
TODAY + 2 TODAY + 3 TODAY + 4 HOME LOGOUT AUTO IJ-15K allows the meter to switch automatically from one day to another at a certain time. AUTOMATIC DATE ADVANCE SETUP AUTO DATE ADVANCE MODE 1100 ACTIVATION TIME 1100 ESCAPE When activated the "date advance setting"... -
Page 34: Modifying Of The Imprint
MODIFYING OF THE IMPRINT The imprint may be modified by selecting: - date; - slogan; - text; advertisement your zip code meter slogan (updated if you serial text die move) number date postage INKJET MAILING INKJET FRANKING MACHINE MACHINE IBI Lite indicia LIVE IBI Lite indicia LIVE LETTER BOX MODE with FIM mark... - Page 35 Whenever the machine is switched on or when resuming operation following a standby period, the machine restores the default values defined by the supervisor (advertisement, text, date). It is also the case when the user switches from one mode to another (Letter Box, Presorted...) Modification of the imprint 4131934X/B 19/06/2007...
-
Page 36: Connecting To Departments
CONNECTING TO DEPARTMENTS - In order to use departments, the supervisor must first activate the department mode first (see section B, paragraph "Defining security"). - The machine is defaulted with DEPT OFF. In order to use departments, select DEPT ON in supervisor mode. Total postage used and a number of pieces may be assigned to a department selected from a list, as described below. - Page 37 - Departments sharing the same access pin code make up a group. When you have entered the access pin code once, you will not be prompted to enter the pin code again within the same group. - The last department selected will be proposed by default when operation is resumed after a standby period or after the machine power-up.
-
Page 38: Connecting To Postage-On-Call® Server
® CONNECTING TO POSTAGE-ON-CALL SERVER 6.1 Adding Postage Postage may be purchased from the USPS, using the Neopost ® Postage-On-Call (POC) system. Connect one end of the telephone link cable to the Modem socket ) at the rear of the machine and the other end to an adjacent analog telephone jack. -
Page 39: Clearing A Po Lockout
6.2 Clearing a PO lockout USPS regulations require that your meter must be set at least once every three months. The IJ-15K meter has an internal timer that tracks your reset activity. After three months without adding postage, a PO LOCKOUT message is displayed and postage printing is disabled. -
Page 40: Completing An Interrupted Add Postage Transaction
6.3 Completing an interrupted add postage transaction If an Add Postage transaction is accidentally interrupted before the transfer has been completed, you will receive the following error message: "x". - From the menu, select the menu POSTAL SERVICES, then select CREDIT; - Confirm with to automatically finish the incomplete transaction. -
Page 41: Using Optional Status Lights Tower
USING OPTIONAL STATUS LIGHTS TOWER A three light device may be connected to the IJ-15K through its serial port #1 (RS232 connection). IJ-15K will activate the lights based on the following criteria: - Green light: Ready to print (as soon as the rollers are running) - Yellow light: Warning alert. -
Page 42: Pc Connection
PC CONNECTION IJ-15K supports a specific fusion PC accounting application. Please call your contact information for further details. PC Connection 4131934X/B 19/06/2007 ORIG0060-42... -
Page 43: Section B: Advanced Functions
SECTION B: ADVANCED FUNCTIONS ADDITIONAL OPERATIONS PERFORMED BY THE MA- CHINE................45 Printing on labels Date printing Message printing Report printing MACHINE CONFIGURATION PRINTING (SUPERVISOR MODE) ................55 Enabling the supervisor mode User setup (in supervisor mode) Supervisor setup 2.3.1 Security and high value alert 2.3.2 Low funds alert... - Page 44 4131934X/B 19/06/2007 ORIG0060-44...
-
Page 45: Additional Operations Performed By The Machine
ADDITIONAL OPERATIONS PERFORMED BY THE MACHINE 1.1 Printing on labels It is possible to print labels when allowed by the supervisor and chosen by the user: - Press key - If required, enter the number (from 1 to 999) of labels to be processed at the same value (default value is 1). -
Page 46: Report Printing
1.4 Report printing REPORT PRINTING IN USER MODE The following reports (or statements) may be printed with a printer or on label in user mode: - General registers : Provides the main registers of the machine. These counters are not resettable. - Batch data : Provides the number of documents printed between two reset of the counter in each mode (batch = letter box or presorted ;... - Page 47 REPORT PRINTING IN SUPERVISOR MODE The following reports (or statements) may be printed with a printer or on label in supervisor mode: - Modules details : Provides the software version, serial number and number of cycle of the different components of the mailing machine (meter, mailing system, label dispenser).
- Page 48 POSTA... DEPAR... REPORTS MODULES DETAILS SETUP REPORT DEPT SETUP REPORT DEPT SETUP REPORT PRINT VALUE HISTORY POSTAGE SET HISTORY GENERAL REGTRS BATCH DATA HOME LOGOUT POSTA... DEPAR... REPORTS THIS MONTH REPORT PREV MONTH REPORT ANNUAL REPORT ANNUAL REPORT POSTAGE SET REPORT INSERTER BATCH REGISTER HOME LOGOUT...
- Page 49 - Select a report using keys or by pressing directly the numeric key corresponding to the selection. - To confirm, press on . For example, by selecting "GENERAL REGISTERS", the below screen is displayed: GENERAL REGISTERS PRINTED ON : PRINTER DESC XXXXX NORM.ITEMS XXXXXX...
- Page 50 and selecting a batch register using keys then, when pushing on , the selected batch register is RESET reset to zero. For Presorted/BMAU mode, the user decides to start a new report and press the "PRESORT REPORT" button on the main screen: TEXT AD DIE...
- Page 51 REPORTS POSTA.. ONLIN.. GENERAL REGISTERS BATCH DATA THIS MONTH REPORT PREV MONTH REPORT ANNUAL REPORT POSTAGE SET REPORT INSERTER BATCH REGISTER INSERTER BATCH REGISTER HOME LOGIN By selecting inserter batch register on the report screen, the user may view the report information screens. INSERTER BATCH REGISTER PRINTED ON : PRINTER...
- Page 52 INSERTER BATCH REGISTERS PRINTED ON : PRINTER AMOUNT ITEMS TOTAL 1.000 1.000 0.500 1.000 0.000 00000 00000.000 0.000 00000 00000.000 0.000 00000 00000.000 0.000 00000 00000.000 0.000 00000 00000.000 (x/6) ESCAPE RESET PRINT PREV NEXT INSERTER BATCH REGISTERS PRINTED ON : PRINTER TOTAL ITEMS TOTAL POSTAGE...
- Page 53 BMAU BATCH SETUP NOT ACTIVE ACTIVE BMAU BATCH ESCAPE In this case, the BMAU BATCH button does not appear on the main screen. "NOT ACTIVE" is the default mode. As the report is limited to 20 entries (20 different postage values), an alert is raised to the user when 15 different postages have been used from the beginning of the batch activation.
- Page 54 TEXT AD DIE ERROR LOW POSTAGE MODE XX/XX/XXXX LETTER T151 YOUR REPORT IS FULL. YOU MUST TO START A NEW PRESORT BATCH. DEPT BATCH CONFIG TOI XXXXXX DEPT MARKETING BATCH RUNNING Press to acknowledge the message and display main screen. The other registers and batch counters are not impacted by the management and the process related to the BMAU/presorted data.
-
Page 55: Machine Configuration Printing (Supervisor Mode)
MACHINE CONFIGURATION PRINTING (SUPERVISOR MODE) Under this mode, the Supervisor can access to all the machine functions, except postage printing. The scrolling procedure from screen to screen is the same as in the user mode, except that the supervisor mode includes a number of extra configuration function keys. - Page 56 From the main screen press on key . The main menu in MENU the supervisor mode will appear: MENUS USER SETUP USER SETUP SUPERVISOR SETUP DISPLAY SETUP DEPARTMENTS RATE PRINTING INKER SERVICING REPORTS HOME LOGOUT CLEAN then (by pressing MENUS INK INFORMATION HEADSET CLEANING HEADSET CLEANING...
- Page 57 GENERALITIES A number of menus or selection keys can only be accessed in supervisor mode: - The function used to modify for instance names, MODIFY departments, advertisement, etc. - The function designed to select a default value. DEFLT - The key designed to do a backspace in the alphanumeric entry screen.
- Page 58 When pressing key, the following screen is DEFLT displayed: DATE TEXT ADVERT DIE NO AD DIE FLAG RECYCLE ✔ FIRST CLASS FIRST CLASS AIR MAIL SEASONS GREETINGS EMPTY HOME LOGOUT MODIFY DEFLT To activate an advertisement slogan, select it in the previous screen and press .
-
Page 59: User Setup (In Supervisor Mode)
2.2 User setup (in supervisor mode) When pressing "USER SETUP" the screen below appears: USER SETUP DISPL... RATE ✔ LANGUAGE AMERICAN ENGLISH ✔ BUZZER ON ERR ON KEY CONTRAST ✔ NOT CONNECT. CONNECTED INSERTER HOME HOME LOGIN Select the language, the buzzer function and the contrast simply by touching keys and press to validate all the selections. -
Page 60: Security And High Value Alert
2.3.1 Security and high value alert After selecting “SECURITY” in the main supervisor menu, the below menu will be displayed: SECURITY 12345 USER PIN # 1234 1234 MACHINE STATUS NORMAL LOCKED HIGH VAL ALERT 12345 12345 ESCAPE - USER PIN # : is used to define the user access code (4 digits). -
Page 61: Low Funds Alert
DEFINING THE HIGH VALUE ALERT The HIGH VALUE ALERT prevents inadvertent metering of a high postage value. In the "SECURITY" screen, after selecting the "HIGH VAL ALERT" menu, the below screen will be displayed: HIGH VALUE ALERT OLD VALUE : 1245 NEW VALUE : ESCAPE... -
Page 62: Time
SU P POS TAL C O NNEC TION S ETU P PR EF IX 18662961331 TELEPH ONE # LOW FUN DS THR ESLD POC PIN # 3321 0000 3354 ESC APE 2.3.3 Time After selecting "TIME" in the main supervisor menu, the screen below will be displayed: TIME SETUP (HHMM 0000 to 2400) OLD VALUE :... -
Page 63: Time-Out
2.3.4 Time-out Time-out, standby and sleep After selecting "TIME OUT" in the main supervisor menu, the screen below is displayed: TIMEOUT (SEC) 1800 0015 START (10 - 9999) 1800 0015 STOP (1 - 9999) 0060 STANDBY (1 - 9999) 0015 0240 SLEEP (30 - 9999) 0015... - Page 64 - STANDBY: time-out before the Printhead returns to the capping station (protection area that prevents the ink from drying in the Printhead) after the motor has stopped (recommended standby timeout: 150 sec.) - SLEEP: time-out before the machine goes into sleep mode after the Printhead returns to the capping station in standby (recommended sleep time-out: 120 sec.).
- Page 65 Timeout AUTO CLEAN To access the AUTOCLEAN TIME-OUT: - press from the main screen, and select HEADSET CLEANING - press to confirm; The following screen will appear: HEADSET CLEANING DISPL... THRESHOLD (SEC.) 2700 0015 TIME OUT (SEC.) 0015 WARNING THRESH. (SEC.) 0015 HOME HOME...
-
Page 66: Touchscreen Calibration
2.3.5 Touchscreen calibration By selecting "TOUCHSCREEN CALIBRATION" in supervisor setup screen, the calibration input box is displayed: INFO Touchscreen Calibration Aim the targets with a fine pen Touch the screen to begin Touch the screen; then four crosses will be displayed (one by one) like this: Touch the crosses;... -
Page 67: Serial Port Setup
2.3.6 Serial port setup This menu allows the user to define which peripheral is connected to a port. When selecting "SERIAL PORT SETUP", the following is displayed: SERIAL PORT SETUP LIGHT LIGHT PORT1 NOT ACTIVE LIGHT PORT2 PORT3 NOT ACTIVE LIGHT PORT4 NOT ACTIVE... -
Page 68: Departments
2.5 Departments DEPARTMENT: is used to enable the department mode. This functionality is proposed to allow the user to allocate the postage spending to the corresponding department. When this mode is activated, the DEPARTMENT menu is displayed on the main screen. The machine default is DEPARTMENT ;... - Page 69 After selecting a department using keys by pressing directly the numeric key corresponding to the selection), when pressing key from the above screen, MODIFY the following menu is displayed: DEPARTMENT MODIF OPEN CLOSED LOCKED STATUS DEPT DEPT NAME MARKETING901 MARKETING9012 MARKETING901 DEPT NUMBER 12345678...
-
Page 70: Print Alignment Setup
To clear all the registers, select in the main SETUP DEPARTMENT menu: DEPARTMENT SETUP DEPARTMENT ESCAPE RESET Then, press key and press to confirm. RESET 2.6 Print alignment setup - From the main menu, select "PRINTING INKER SERVICING"; the screen displays: PRINTING INKER SERVICING ALIGN. -
Page 71: Reports
In order to adjust the alignment, select the letter corresponding to the straightest vertical line (letter F in the above example), then press to confirm. Print alignment is required every time a new printhead is installed. 2.7 Reports After selecting "REPORTS" in the main supervisor menu, the following menu is displayed, with the list of report types: DEPAR.. -
Page 72: Ink Information
Select "DEPT SETUP REPORT" and press DEPT SETUP REPORT DATE 10-24-00 DIE N XXX YYYYYY NAME STATUS PIN CODE Accounting OPEN 0621 Marketing OPEN 6969 OPEN 1445 CLOSED 0221 Bookshop OPEN 0018 CLOSED 0277 Car park CLOSED 2012 2.8 Ink information Select "INK INFORMATION"... -
Page 73: Postal Services
HEADS.. CARTRIDGE 100% CONSUMED : 80% COLOR : BLACK STATUS : READY INSTALLATION DATE : 01/01/2003 MENU See "Ordering Supplies" section for information on re- placement Ink Reservoirs or Printheads. 2.9 Postal services The telephone number for the modem connection to the Postage- ®... - Page 74 POSTAL CONNECTION SETUP PREFIX 18662961331 123456 TELEPHONE # LOW FUNDS THRESLD 1000 POC PIN # 3321 3354 3354 ESCAPE To add or to modify a number, touch the corresponding area and enter a number using the numeric keys. Confirm with POC PIN #: is used to define the recredit access (4 digits) "0000"...
-
Page 75: Downloading An Advertisement Slogan
Simply enter the new value, using the numeric keypad (with no point or comma, e.g.:99000 corresponds to 99.000). When the postage is below the low postage threshold value, a message will be prompted in the main menu. 2.10 Downloading an advertisement slogan - From the main menu, select "SLOGAN";... - Page 76 - Modify NAME, or insert the memory card into the reader, on the right side of the machine and press to initiate the LOAD downloading operation. INFO LOADING IN PROGRESS then: INFO LOADING SUCCESSFUL - Press - The downloaded slogan is now accessible in SLOGAN menu in user mode.
-
Page 77: Text Modification
2.11 Text modification - From a menu where there is text to modify, type the text area: ENTER NAME AND PRESS OK 12 CHARS MAX SPACE ESCAPE allows to access to the following screen: ENTER NAME AND PRESS OK 12 CHARS MAX MARKETI_10_ SPACE ESCAPE... -
Page 78: Exiting The Supervisor Mode
2.12 Exiting the supervisor mode To exit the supervisor mode, select the key from the LOGOUT supervisor menu (return to the main menu) or press key which will set the machine to the sleep mode. Machine configuration printing (Supervisor mode) 4131934X/B 19/06/2007 ORIG0060-78... -
Page 79: Section C: Machine Configuration
SECTION C: MACHINE CONFIGURATION MAILING MACHINE GENERAL CONFIGURATION ..81 CONFIGURATION OF THE MAIN SCREEN DISPLAY ..82 Info Area Batch configuration area 4131934X/B 19/06/2007 ORIG0060-79... - Page 80 4131934X/B 19/06/2007 ORIG0060-80...
-
Page 81: Mailing Machine General Configuration
MAILING MACHINE GENERAL CONFIGURATION The following parameters may be set up: - the language, - the buzzer, activated in case of error and/or when pressing a key, - the display screen contrast, - the inserter mode: connected for an electronic connection with an interface cable and not connected for a mechanical connection. -
Page 82: Configuration Of The Main Screen Display
CONFIGURATION OF THE MAIN SCREEN DISPLAY This mode is accessible in both User and Supervisor modes. 2.1 Info Area In the main screen, the "INFO" area may display from 3 to 5 items with a dynamic update. TEXT AD DIE LOW POSTAGE MODE LIGHT... - Page 83 Abbreviations table ASCENDING ..... TOT ..Total money spent TOTAL ITEMS.... TOI ..Total of items printed POSTAL ITEMS ..POI ..Total number of mail metered (except 0 values) DEPT NAME ..... DEPT . Department name used DEPT TOTE ....DTO ... Amount of money spent in the active department DEPT ITEMS .....
-
Page 84: Batch Configuration Area
It is useful to select DESCENDING so that the amount of postage available in your meter is always displayed on the main menu. 2.2 Batch configuration area Postage class (mail class + amount) are indicated on the main screen, before and during the printing process: - one postage for inserter without electronic communication is displayed - one to three postages depending on the batch configuration is... -
Page 85: Section D: Maintenance
SECTION D: MAINTENANCE TROUBLE SHOOTING ............. 87 Misfeed in the mailing machine Machine problems GENERAL MAINTENANCE ..........91 Roller cleaning Printhead cleaning Removing the postage meter Touchscreen precautions 4131934X/B 19/06/2007 ORIG0060-85... - Page 86 4131934X/B 19/06/2007 ORIG0060-86...
-
Page 87: Trouble Shooting
TROUBLE SHOOTING 1.1 Misfeed in the mailing machine - With your fingers, lift and pull the handle located on the right side of the machine, in direction (1). - Remove misfed envelopes. - Push the handle into the machine to close. When more free space is required to facilitate the access to the machine, you may shift... - Page 88 - Then the drawer is fully open - After the misfeed has been cleared, firmly push the whole assembly into the machine. Trouble shooting 4131934X/B 19/06/2007 ORIG0060-88...
-
Page 89: Machine Problems
1.2 Machine problems PROBLEM TO CHECK The machine cannot get Check the power cord and the started. connection. The printer does not operate - Is it switched on? Is it connected? - Is the printer mode selected in the SETUP menu? The machine displays the - Make sure that machine covers message "COVER OPEN"... - Page 90 PROBLEM TO CHECK - See paragraph "Cleaning the Poor printing quality printhead". - Make sure that the side drawer is properly closed. - Make sure that the side drawer is Items are not properly properly closed. ejected. - Clean the rollers. Check the insertion of the meter.
-
Page 91: General Maintenance
GENERAL MAINTENANCE 2.1 Roller cleaning Shift the machine table sideways by releasing handle (see paragraph 1.1 "Misfeed in the mailing machine" in this section). rollers Clean the rollers with a damp cloth. General Maintenance 4131934X/B 19/06/2007 ORIG0060-91... -
Page 92: Printhead Cleaning
2.2 Printhead cleaning In case of poor printing quality: - Press key then , in order to run a cleaning cycle MENU CLEAN for the printhead, when the printing quality is getting poor or if the machine has remained unused for several days. - If the problem persists, remove the printhead (see paragraph "Ink reservoir and printhead"... -
Page 93: Removing The Postage Meter
2.3 Removing the postage meter - Switch off the mailing machine. - Open the cover. - Hold the handle and pull it upwards. General Maintenance 4131934X/B 19/06/2007 ORIG0060-93... -
Page 94: Touchscreen Precautions
2.4 Touchscreen precautions - Do not place items on it. - Do not give any shock or vibration to the product. - Do not apply water, organic solvent or chemicals such as acid and alkali to the machine. Do not put the product in such an environment. -
Page 95: Section E: Maintaining Your Postage-On- Call® Account
SECTION E: MAINTAINING YOUR POSTAGE- ® ON-CALL ACCOUNT ACCOUNT NUMBER ............97 ACCOUNT BALANCE ............97 POST OFFICE REGULATIONS ........97 NO DEPOSIT POSTAGE-ON-CALL ACCOUNT ....98 STANDARD DEPOSIT POSTAGE-ON-CALL ACCOUNT .. 98 4131934X/B 19/06/2007 ORIG0060-95... - Page 96 4131934X/B 19/06/2007 ORIG0060-96...
-
Page 97: Account Number
This number should be kept in a safe place, yet be readily available, because it is used for all POC account maintenance transactions. ACCOUNT BALANCE You can use the Neopost Automated Postage-On-Call ® system to check your account. Simply call 1-800-867-3738 and use your touchtone phone to enter your account number and select the Account Query menu. -
Page 98: No Deposit Postage-On-Call Account
Upon receipt of the check, your POC account will be credited with your deposit (allow 4 to 6 working days for the check to be received and posted). Note: Send only your POC deposit, Do Not include any other payments to Neopost along with your check for postage. Checks Make your check out to United States Postal Service, and write your POC account number on the check. - Page 99 Deposit Slips Always enclose your preprinted deposit slip with your check. This will assure the fastest and most accurate bank processing. You will receive a package of 24 personalized deposit slips in the mail shortly after setting up your POC account. Replacements are re- ordered automatically when you submit your 20th deposit slip with your check.
- Page 100 To: o: o: o: o: Wire T Wire T ransfers T Citibank Detail Payment Field: POC Account # CMRS / Neopost Account # 4067-8625 Routing # 021000089 A A A A A CH T CH T CH T CH T...
-
Page 101: Specifications
SPECIFICATIONS • Speed: up to 250 envelopes/minute; 15,000/hour • 500 departments • 10 preset postage values • Dimensions and weight - Mailing machine width ..... : 13 " - Depth ..........: 18 " - Height ..........: 13,5 " - Mailing machine weight .... - Page 102 ORDERING SUPPLIES Item Part Number Printhead ........... 4133781W 350 ml Ink reservoir ........4133780V Customer Equipment Care Kit ....7457283 User’s Guide..........4131934X Modem Telephone Cable ......4102525N AC Power Cord ......... RAC12379 Optional light ..........IJ15K-LT For Custom Advertisement Memory Cards: Call Consumable Supplies Order Desk for assistance.
-
Page 103: Contacting Neopost
Order online at www.neopostinc.com Postage-On-Call® Automated Account Information 1-800-867-3738 Call to check Account Balance, Last Deposit or Last Meter Resetting information via touch-tone telephone Postage-On-Call ® Modem Telephone Number 1-866-296-1331 Modem telephone number set up in meter Contacting Neopost 103 4131934X/B 19/06/2007 ORIG0060-103... - Page 104 INDEX Imprint 34 Abbreviations table 83 Ink information 72 Access code 22 Advertisement slogan change 34 Ink reservoir 12 Ink reservoir replacement 18 Inker Replacement 18 Configuration Inserter 21 Mailing machine 81 Installation 15 main screen display 82 Connections 16 Keyboard 11, 13 Dating mode 45 Default values change 57...
- Page 105 Printer Connection 16 Printhead 12 Printhead replacement 19 Printing inker servicing 70 Registers clearing 70 Reports supervisor mode 71 Screen Tactile graphic screen 11 Security 60 Serial port setup 67 Specifications 101 Supervisor mode 55 Exiting 78 Supervisor setup 59 Text modification 77 Time 61, 62 Time-out 63...
- Page 106 IJ-15K MAILING MACHINE USER' S GUIDE 4131934X/B ORIG0059-01 19/06/2007...
- Page 107 4131934X/B ORIG0059-04 19/06/2007...
Need help?
Do you have a question about the IJ-15K and is the answer not in the manual?
Questions and answers