Neopost IJ 70 User Manual
Mailing machine
Hide thumbs
Also See for IJ 70:
- Manual (107 pages) ,
- User manual (119 pages) ,
- Fitting instructions (2 pages)
Table of Contents
Advertisement
Quick Links
See also:
Manual
INTRODUCTION
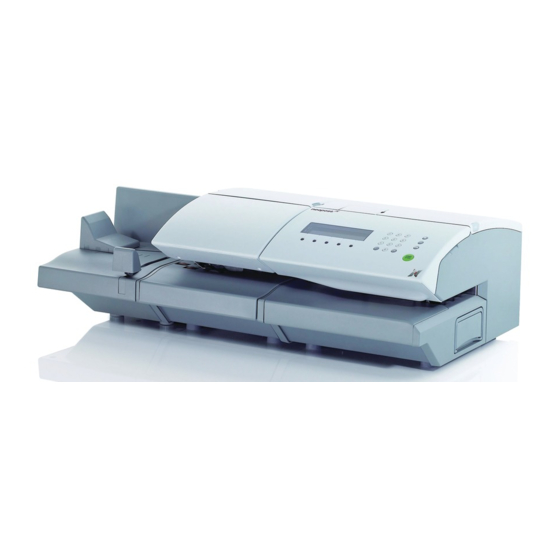
Congratulations on choosing the Neopost IJ 70 mailing machine.
The IJ 70 is the result of the expertise and innovative capabilities
of a worldwide Neopost group and, using ink jet technology, it will
integrate into your working environment to enhance your mail
processing operation.
The IJ 70 has many capabilities that will be important to your
business:
As well as being productive (until 150 letters per minute for
machine only, and until 85 letters per minute in dynamic scale
mode), the IJ 70 is designed to be a user friendly machine that
can fit into any working environment with its innovative and
attractive design, simple user settings and very low noise level.
The high volume capacity and sealed ink cartridge makes it easy
and safe to handle, and the user interface is particularly clear with
a graphic interface, pop up menus and 10 memories to store
favorite jobs.
The IJ 70 is adaptable and as such can handle many different
types of mail. The optional feeder can be used to process, in a
continuous cycle, items of different sizes (ranging from postcards
to large flats in portrait format) and thick items (up to 5/8 inch), with
automatic imprint shift. For thicker mail items or packages,
adhesive labels can be automatically dispensed.
The IJ 70 is connectable. It can exchange data with Neopost
scales and printers in order to provide optimal mail processing
and reporting.
Finally, the IJ 70 is a unique communication tool for your
company. Its high quality printing combined with its integrated
library of advertisement messages, mail class dies and free
format text will afford you extra tools to enhance your company's
image and the impact of your mail.
You will very soon discover for yourself that the IJ 70 is the ultimate
in quality and productivity for mail processing equipment.
1
4127389N/C
02/28/2007
ORIG0002-1/A
Advertisement
Table of Contents

Related Manuals for Neopost IJ 70


Summary of Contents for Neopost IJ 70
- Page 1 You will very soon discover for yourself that the IJ 70 is the ultimate in quality and productivity for mail processing equipment.
- Page 2 WARNING! Do not remove any secured covers or attempt to repair the IJ 70, there are no user serviceable parts contained and the IJ 70 product is licensed for use under the conditions of the Post Office. This license is issued subject to the product being secure at all times. Any removal...
-
Page 3: Table Of Contents
TABLE OF CONTENTS GETTING STARTED ..........8 SECTION A: BASIC FUNCTIONS ...... 11 1. OVERALL PRESENTATION ..........13 1.1 Overview ..............13 1.1.1 Overall view (mailing machine and optional feeder) ............13 1.1.2 Overall inside view ......... 14 1.1.3 Screen and keyboard ........15 1.2 Installation .............. - Page 4 3.2 Operation with an external weighing platform ..39 3.2.1 Standard Mode ..........39 3.2.2 Differential Weighing Mode ......40 3.3 Operation with an external scale ......43 3.4 Addition Of The Insurance Value Into The Rate And Job ................. 44 4.
- Page 5 SECTION B: ADVANCED FUNCTIONS ..... 65 1. FURTHER FUNCTIONS ............67 1.1 Pass through (Seal Only) mode ......67 1.2 Dater mode ............68 1.3 Mailing machine general configuration ....69 1.4 Configuration of the main screen display ....70 2.
- Page 6 4.8 Ink information ............91 4.9 Postal services ............92 4.9.1 Audit .............. 94 4.9.2 Update registers ..........94 4.10 Online services ............94 4.11 Load an advertisement slogan or a mini die .... 94 4.12 Rate configuration ..........96 4.13 Dynamic scale high accuracy configuration mode ...
- Page 7 SECTION D: MAINTAINING YOUR DIGITAL POSTAGE-ON-CALL® ACCOUNT ..... 121 1. ACCOUNT NUMBER ............123 2. ACCOUNT BALANCE ............123 3. STATEMENTS ..............123 4. POST OFFICE REGULATIONS ........123 5. NO DEPOSIT POSTAGE-ON-CALL ACCOUNT ....124 6. STANDARD DEPOSIT POSTAGE-ON-CALL ACCOUNT 124 INTERNATIONAL LETTER POST COUNTRY CODE CHART ..........
-
Page 8: Getting Started
GETTING STARTED 1 Switch on the machine; 2 Enter your PIN number using the numeric keys and validate by pressing (see "Access Pin Code" section on page 35); 3 Enter the postage print value using the numeric keys; 4 Place an envelope on the feed platform; START 5 Press STOP... - Page 9 Special icons Signals an essential piece of information that cannot be missed. Signals an important issue. Indicates an interesting idea or special function. Illustration through an example. 4127389N/C 02/28/2007 ORIG0002-9/A...
- Page 10 4127389N/C 02/28/2007 ORIG0002-10/A...
-
Page 11: Section A: Basic Functions
SECTION A: BASIC FUNCTIONS OVERALL PRESENTATION ..........13 Overview 1.1.1 Overall view (mailing machine and optional feeder) 1.1.2 Overall inside view 1.1.3 Screen and keyboard Installation 1.2.1 Preparation of the mailing machine 1.2.2 Installation with the feed platform 1.2.3 Installation of the automatic feeder (optional) 18 1.2.4 Installation of the dynamic scale (optional) 1.2.5... - Page 12 ENTERING POSTAGE VALUE AND MAIL PROCESSING 46 Entering postage value 4.1.1 Manually 4.1.2 With an external scale 4.1.3 With a dynamic scale Mail processing 4.2.1 Envelopes with Autofeed Sealer (except batch mode) 4.2.2 Envelopes with dynamic scale in batch mode 49 4.2.3 With the feed platform alone 4.2.4...
-
Page 13: Overall Presentation
OVERALL PRESENTATION 1.1 Overview 1.1.1 Overall view (mailing machine and optional feeder) accessories pre-cut ON/OFF modem memory documentation label switch connector card storage dispenser (rear) (rear) reader cover cover removable adjustable front conveyor graphic table keyboard rear side guide screen guide guide feed... -
Page 14: Overall Inside View
1.1.2 Overall inside view blue button for removable conveyor release postage water bottle device cartridge meter thickness adjustment label dispenser flap 2 positions blue button: (left) : up to 3/8 inch (right) : from 3/8 to 5/8 inch without the dynamic scale and from 3/8 to 1/2 inch with the dynamic scale Overall presentation 4127389N/C... -
Page 15: Screen And Keyboard
1.1.3 Screen and keyboard mail class postage dynamic text advertisement value scale 00.00 XX - XX - XX Low Postage RATE_NAME1 0 LB 0.0 OZ DEPT123456 MARKET DES 1235,012 RATE DEPT SEAL IMPRNT NEXT warning date moistener RTD or user message mode precut... - Page 16 : locking and standby mode : access to memories (storing into memories and memory recall) : label mode selection : input value reset (including postage) START : switching on/off envelope or label feed. STOP : numeric entry keys : validating a selection : return to previous menu with no validation ESCAPE : return to user mode (from supervisor mode)
-
Page 17: Installation
1.2 Installation 1.2.1 Preparation of the mailing machine The mailing machine should be installed on a flat horizontal surface. Allow sufficient free space as follows: - above the machine to enable the opening of the covers - at the rear for the machine cooling. With the ON/OFF switch in the “O ”... -
Page 18: Installation Of The Automatic Feeder (Optional)
1.2.3 Installation of the automatic feeder (optional) - Align the feeder with the mailing machine; - Push the feeder towards the machine, taking care to keep the centering pin aligned as indicated; - Thread the feeder screw in the mailing machine. Then, using the knurled tightening knob, push and screw to lock (if the two devices are not closing properly, slightly rotate the gear protruding from the feeder and repeat the operation). -
Page 19: Installation Of The Dynamic Scale (Optional)
1.2.4 Installation of the dynamic scale (optional) The equipment including a dynamic scale (the whole system representing approximately 120 lbs) requires the use of a steady and rigid table, in order to prevent any weighing problem.Be sure not to install the machine in an area exposed to the sunlight or to air drafts. - Page 20 tightening knob centering pin (on the side) (gear) - Assemble the feed platform with the feeder as indicated: Whole configuration When the whole system needs to be shifted manually, the mailing machine, the dynamic scale, the feeder and the platform should be separated from one another.
-
Page 21: Connections At The Rear Of The Units
Do not apply pressure on the dynamic scale tray. 1.2.5 Connections at the rear of the units Connections at the rear of the mailing machine Optional Main Connector - PC - RTD (Roll Tape Dispenser)) Port 2 - Scanner Scale - Scale - Weighing Platform - Remote Control... - Page 22 Connections with a feeder The feeder will automatically be switched on at the same time as the mailing machine. Feeder connection cable AC power outlet Connections with a feeder and a dynamic scale The feeder and the dynamic scale will automatically be switched on at the same time as the mailing machine.
-
Page 23: Ink Cartridge
1.2.6 Ink cartridge The message “ink low” is displayed when less than approximately 7,000 imprints can be printed with the installed ink cartridge. You are strongly recommended to replace the ink cartridge when the message “ink very low” is displayed. When the message “inker empty”... -
Page 24: Print Inker Servicing
1.2.7 Print inker servicing - From the main menu, select the PRINT INKER SERVICING menu; the screen displays: PRINT INKER SERVICING ALIGN. HOME CLEAN PRINT - Load short labels (in preference) and select ; the PRINT machine prints a test impression: In order to adjust the alignment, select the letter corresponding to the straightest vertical line (letter F in the above example), then press... - Page 25 GEO CODE The WP SETUP menuis accessible on Supervisor mode, to allow entering the Geo Code number. Those ones allow the settings of the standard Normal mode (AN1 code) and/or Differential weighing Mode (AN2 code): authorization, status and settings for the maximum value capacity. - Go in supervisor Mode by pressing softkey (enter the SUPERV...
- Page 26 - Press then enter the Geo Code and press WP SETUP LICENCE NUMBER : 0000000 GEO CODE GEO CODE : 10528 OLD VALUE : 2252384299 SERIAL NUMBER : 123456789 NEW VALUE : BIS RETAIL ROUNDING MODE : POSTAL CAPACITY : 10 lb DIFF WEIGH : 10 lb HOME MODIFY...
- Page 27 Overall presentation 4127389N/C 02/28/2007 ORIG0002-27/A...
- Page 28 Altitude 20 ° 10764 10771 10788 10795 10801 10818 10825 10832 10849 21 ° 10757 10764 10771 10788 10795 10801 10818 10825 10832 22 ° 10740 10757 10764 10771 10788 10795 10801 10818 10825 23 ° 10733 10740 10757 10764 10771 10788 10795...
-
Page 29: Envelope Feeding (With The Autofeed Sealer)
1.3 Envelope feeding (with the autofeed sealer) - Fan the envelopes to separate them - Bevel the edge of the stack - Place the envelopes on the feed platform, with their upper edge resting against the back of the feed platform. - Ensure that the envelopes are stacked along the side and front guides. - Page 30 - It is possible to set to portrait feed a few large size envelopes (10"x13" approx.). - The guides may be retracted when required. - Do not mix moistening and non-moistening. - Arrange the mail according to the size (the largest letters beneath).
-
Page 31: Label Feeding
1.4 Label feeding - Open the flap (1) of the label dispenser. - Press the blue key (2) and insert the labels by stacking them at the bottom of their recess, with the peel off tab facing upwards and the side to be printed facing to the right, in the dispenser. - Maximum capacity is 80 labels. -
Page 32: Filling Of The Removable Water Bottle
When there is no water left in the bottle, the feeder and the mailing machine can still be operated but no envelope sealing can be done. In case of an intensive use of the moistener and for optimal operation of your machine, use Neopost sealing solution. Overall presentation 4127389N/C... -
Page 33: Envelope Moistening
1.6 Envelope moistening Use the moistening for thin or medium letters in the A position. SETUP Press , then . In the moistening mode, the SEAL symbol is displayed on the screen. Do not insert envelopes that are already sealed when the mail machine is in the moistening mode: This might cause a stoppage. - Page 34 In this case, the automatic feeder and the mailing machine START operate continuously when key is pressed once and until STOP START is pressed again. STOP In order to use the mailing machine alone, it is necessary to select OFF. If there are double envelopes, make sure that ON has not been selected.
-
Page 35: Protection By An Access Pin Code
PROTECTION BY AN ACCESS PIN CODE At power-up or when pressing a key if the machine is in the sleep mode, the screen prompts you to enter the 4-digit user pin code (only when access to the machine has been protected by the supervisor) PIN NUMBER ? ******... -
Page 36: Using A Scale
USING A SCALE DEFAULT SCALE From the main menu, it is possible to select, in supervisor mode, the default Scale (Dynamic scale or WP in the case where both are connected), by pressing SCALE 3 DYNAMIC SCALE SCALE 5 WP SCALE 8 MANUAL WEIGHT ENTRY ESCAPE DEFLT... - Page 37 MANAGEMENT OF SCALES In the main screen, press , then press ; the NEXT SCALE screen below is displayed: WEIGHING MODE 1 DYNAMIC OFF 2 DYNAMIC WEIGHING ON 3 DYNAMIC BATCH 4 WP STANDARD ESCAPE DEFLT Select the scale (WP or Dynamic Scale). SCALE ICONS Dynamic Scale Weighing mode Dynamic Scale Batch mode...
-
Page 38: Using Dynamic Scale
3.1 Using dynamic scale In the main screen, press , then press ; the NEXT SCALE screen below is displayed: 0 DYNAMIC WEIGHING ON WEIGHING MODE 1 DYNAMIC BATCH 2 DYNAMIC WEIGHING OFF 3 WP STANDARD 4 WP DIFFERENTIAL WEIGHING ESCAPE DEFLT Select one of the 3 modes using the... -
Page 39: Dynamic Batch Mode
3.1.3 Dynamic batch mode The displayed icon is This mode allows to print a whole envelope series at the same value, weighing only the first one. After validation, the whole envelope series is printed at the defined value, at highest speed. A new envelope is weighed each time the motor has stopped and START the key... -
Page 40: Differential Weighing Mode
and the amount are recalculated with the current Rate, and are displayed on the screen. button resets the weighing platform to zero the WPZERO weight. This operation should be processed with no weight on the WP platform. 00.00 XX - XX - XX RATE_NAME1 Low Postage Low Postage... - Page 41 00.00 XX - XX - XX RATE_NAME1 DEPT123456 MARKET 0 LB 0.0 OZ DES 1235,012 MENU SCALE DIFF SUPERV NEXT - Start Differential Weighing by pressing key. DIFF 00.00 INFO XX - XX - XX REMOVE ALL ITEM ON WP RATE_NAME1 Low Postage AND PRESS OK...
- Page 42 PLEASE WAIT... RATENAME1 00.00 WGH 00lb 20oz DEPT123456 MARKET Wait for end of zeroing to remove items. REMOVE ONE ITEM ON WP OR ADD ITEMS PRESS ESCAPE TO EXIT RATENAME 1 00.00 WGH 00lb 20oz DEPT 123456 MARKET EXIT RATE When you remove one item (Envelope or parcel) the weight of the removed item and associated rate is displayed on the screen.
-
Page 43: Operation With An External Scale
Check if it is the last item to print. 3.3 Operation with an external scale The IJ 70 can be connected to an external Neopost scale to select the desired mail service. Place the letter to be weighed on the scale and select the mail service. -
Page 44: Addition Of The Insurance Value Into The Rate And Job
- Print one label (press key on the scale) or PR IN T TAPE several labels (press key on the scale, and indicate FUNCTION the number of labels if connected to an SE 37/57). When the scale and the machine are in the "department" mode, the open departments may be selected from the scale, provided that they are not protected by an access code in the machine. - Page 45 - Press - Enter the needed value. SERVICES ENTER VALUE _ _ _ _ ESCAPE - Press INSUR. - Enter the needed value. - Press Using a scale 4127389N/C 02/28/2007 ORIG0002-45/A...
-
Page 46: Entering Postage Value And Mail Processing
ENTERING POSTAGE VALUE MAIL PROCESSING 4.1 Entering postage value 4.1.1 Manually Press the key if a value different from zero is displayed and enter the postage value required, using the numeric keys. In case of error, press the key. When a dynamic scale is present, mode Dynamic Scale Off should be selected to print on envelope. - Page 47 where: - Select a rate configuration from both the user’s configuration and the configurations predefined by the supervisor, using the keys ( provides details on the MORE rate configuration selected). - Press to confirm. To modify a configuration: The USER RATE configuration may be modified by the user. Other configurations should be modified by the supervisor.
-
Page 48: Mail Processing
- if MAIL CLASS is selected: the list of available mail types appears. Select the mail type desired and confirm by pressing - if DESTINATION is selected: the list of available destinations appears. Select the desired destination and confirm by pressing - if SERVICES is selected: the list of associated services appears;... -
Page 49: Envelopes With Dynamic Scale In Batch Mode
If the selected Mail Class has a ZIP code dependant destination, perform the following steps: - select a ZIP as the destination in the rate selection screen; - put on the feeder a stack of envelopes with same desti- nation ZIP; START - when is pressed, the mailing machine will ask for... -
Page 50: Labels
START To stop the envelope feeding, press again. STOP 4.2.4 Labels - Press - If required, enter the number of labels to be processed (from 1 to 999) at the same value (default value is 1). START - Press : The machine will automatically provide the required STOP number of labels at the displayed value. -
Page 51: Modification Of The Imprint
MODIFICATION OF THE IMPRINT button is used to modify the setup of the imprint by IMPRNT selecting: - the date; - the slogan; - the text; - the mail class die; - the shift value (for thick items). TEXT SLOGAN MODE FRACTIONAL XX-XX-XX... - Page 52 - Press . Then, by pressing the selection key as IMPRNT many times as required, select the area to be modified. The area will automatically appear highlighted. TEXT SLOGAN MODE FRACTIONAL XX-XX-XX LIST HOME TAPE - Press , in order to display the available options. LIST - Select an option using the keys or by...
- Page 53 Slogans and Mail class dies: The mail class dies and standard slogans are already loaded in the machine; the supervisor may set a slogan or mail class die active to add it to the list available for use. (see example in Section B, 4.1. The procedure is the same for slogans and mail class dies).
-
Page 54: Using Departments
USING DEPARTMENTS - In order to use departments, the supervisor must have selected first the department mode (see section B, paragraph "Defining security"). - The machine is supplied with DEPT OFF. In order to use departments, select DEPT ON in supervisor mode. Total postage used and a number of pieces may be assigned to a department selected from a list, as described below. -
Page 55: Operation With An External Pc Remote Control
OPERATION WITH AN EXTERNAL PC REMOTE CONTROL Refer to your PC remote control user's guide. Using departments 4127389N/C 02/28/2007 ORIG0002-55/A... -
Page 56: Postage-On-Call® Connection
Postage may be purchased from the (POC) system. ® Post Office, using the Neopost Postage-On-Call The meter only requires connection to the telephone line outlet during the Add Postage or Clear Lockout transaction. If access to adding postage (crediting) has been protected by the supervisor, the screen prompts up to enter a 4 digit POC code. -
Page 57: Clearing A Po Lockout
8.2 Clearing a PO lockout USPS regulations require that your meter must be set at least once every three months. The IJ 70 meter has an internal timer that tracks your reset activity. After three months without adding postage, a PO LOCKOUT message is displayed and postage printing is disabled. -
Page 58: Operation With A Roll Tape Dispenser (Rtd)
OPERATION WITH A ROLL TAPE DISPENSER (RTD) 9.1 Overview label button cover (multi label release mode only) indicator power light switch tear-bar printhead Do not put your fingers on the printhead. label roll holders end of roll/ open cover no paper sensor sensor Operation with a roll tape dispenser (RTD) -
Page 59: Connections At The Rear Of The Units
9.2 Connections at the rear of the units - Turn power OFF before attaching the power module or interface cable. Plug in power Plug in interface cable module to the port 2 (secure by screwing) - Power ON the base and the RTD 9.3 Loading label roll - Open RTD cover. - Page 60 - Use approved label roll only. - Place label roll onto the label roll holder (green guides). - Close cover remove excess label by tearing it off (upward): - It is recommended to wipe off the printhead with the clean pen when replacing the roll, it is mandatory every 5 rolls (i.e.
-
Page 61: Using The Rtd
- Enter the desired number of labels (up to 99), then press STOP (You may directly type on the "multi label" keys with a Neopost external scale to get the labels) - Remove the label by pulling upwards. - Press the blinking RTD label button... -
Page 62: Maintenance
Indicator light display 1) At initialization, the display is amber when downloading infor- mation from the base. 2) When ready the RTD displays a plain green light. When printing, the light turns amber. The green is blinking if multilabelling. 3) The indicator light turns to red when: - You have reach the end of roll;... - Page 63 Jam clearing Remove the label, pull media, close the cover, and cut excess of paper. Stand alone test - Switch off the RTD. - Disconnect the RTD from the base or switch the base off. - Switch on the RTD. - Wait 10 seconds.
- Page 64 4127389N/C 02/28/2007 ORIG0002-64/A...
-
Page 65: Section B: Advanced Functions
SECTION B: ADVANCED FUNCTIONS FURTHER FUNCTIONS ............ 67 Pass through (Seal Only) mode Dater mode Mailing machine general configuration Configuration of the main screen display JOB MEMORY SAVING ........... 72 Storing in user memory "0" Recalling memories REPORT PRINTING ............73 Operating mode: Batch Registers Automatic Call List... - Page 66 4.12 Rate configuration 4.13 Dynamic scale high accuracy configuration mode 4.14 Programming memories 1 to 9 4.15 Text modification 4.16 Exiting the supervisor mode 4127389N/C 02/28/2007 ORIG0002-66/A...
-
Page 67: Further Functions
FURTHER FUNCTIONS 1.1 Pass through (Seal Only) mode - Press , the screen below will appear: IMPRNT TEXT SLOGAN MODE FRACTIONAL XX-XX-XX LIST HOME TAPE - Select MODE with the key, then , the screen LIST below will appear: IMPRINT MODE 0 NORMAL 1 PASS THROUGH 1 PASS THROUGH... -
Page 68: Dater Mode
1.2 Dater mode - Press , the screen below will appear: IMPRNT TEXT AD DIE MODE FRACTIONAL XX-XX-XX LIST HOME TAPE - Select MODE with the key, then , the screen LIST below will appear: IMPRINT MODE 0 NORMAL 1 PASS THROUGH 2 MESSAGE 3 DATER 3 DATER... -
Page 69: Mailing Machine General Configuration
1.3 Mailing machine general configuration The following parameters may be set up: - the language, - the buzzer, activated in case of error and/or when pressing a key, - the display screen contrast, - the labels selection. - In the main screen press , and select USER SETUP MENU using the... -
Page 70: Configuration Of The Main Screen Display
1.4 Configuration of the main screen display After selecting the DISPLAY SETUP menu, the following is displayed: DISPLAY SETUP 1 ASCENDING 1 ASCENDING 2 TOTAL ITEMS 3 POSTAL ITEMS 4 DEPT NAME 5 DEPT ASCENDING 6 DEPT ITEMS 7 BATCH ASCENDING HOME and the next menu is: DISPLAY SETUP... - Page 71 It is useful to select DESCENDING so the amount of postage in your meter is always displayed on the main menu. Abbreviations table ASCENDING ......TOT TOTAL ITEMS ....... TOI POSTAL ITEMS..... POI DEPT NAME ......DEPT DEPT ASCENDING ....DTO DEPT ITEMS ......
-
Page 72: Job Memory Saving
JOB MEMORY SAVING 2.1 Storing in user memory "0" After selections have been made (postage value, advertisement slogan, mail class die, moistening, shift, etc.) it is possible to take a “photograph” of the machine status. To do so, press key twice. -
Page 73: Report Printing
REPORT PRINTING Various reports (or statements) may be printed on a printer, on labels, or sent to a PC. 3.1 Operating mode: - Select the REPORTS menu. The machine indicates whether it is in the label, printer or PC mode and the below menu is displayed: 1 GENERAL REGISTERS REPORTS... -
Page 74: Batch Registers
- Choose the desired report, using the arrows and confirm by pressing - Press : the reports will be automatically printed out PRINT (press if there is more than one page). NEXT 3.2 Batch Registers Select the BATCH REGISTERS menu to view counters for items processed: BATCH REGISTER ITEMS... -
Page 75: Automatic Call List
3.3 Automatic Call List - Select the AUTOMATIC CALL LIST tab to view the report data: AUTOMATIC CALL LIST REASON CALL CALL DATE AND TIME STATIC UPLOAD MM/DD/YYYY HH:MM E.CONFIRMATION MM/DD/YYYY HH:MM FILE DOWNLOAD MM/DD/YYYY HH:MM ESCAPE The report includes all scheduled automatic calls. The automatic calls not scheduled will not be displayed on this list. -
Page 76: Modules Details
3.5 Modules Details - Select the MODULES DETAILS tab to view the report data: MODULES DETAILS MODULE SWVER SERIALS # CYCLE METER 30.11 123456789012 BASE 1.00.f 123456789012 12346 12347 RATE 04.07B ESCAPE PRINT PREV NEXT - Select to view the reference data: REFERENCE DATA MODULE SW PART NB BOARD PART NB... - Page 77 if no error occurred during the log upload, the table will be deleted. The table can also be deleted by the user on the report screen after confirmation. - Press RESET INFO DO YOU REALLY WANT TO RESET ACTIVITY REPORT ? ESCAPE - Press to reset activity report and get the confirmation.
-
Page 78: Activity History Report
3.7 Activity History Report - Select the ACTIVITY HISTORY REPORT tab to view the report data: ACTIVITY HISTORY # # T REASON CALL CALL DATE AND TIME M STATISTICS UPLOAD MM/DD/YYYY HH:MM M STATISTICS UPLOAD MM/DD/YYYY HH:MM A GENERIC MM/DD/YYYY HH:MM A GENERIC MM/DD/YYYY HH:MM ESCAPE... -
Page 79: Supervisor Mode
SUPERVISOR MODE Under this mode, the Supervisor can access all the machine functions, except postage printing. The scrolling procedure from screen to screen is the same as in the user mode, except that the supervisor mode includes a number of extra configuration function keys. - Page 80 From the main screen press . The main menu in the MENU supervisor mode will appear: MENUS 0 USER SETUP 0 USER SETUP 1 SUPERV. SETUP 2 DISPLAY SETUP 3 DEPARTMENTS 4 PRINT INKER SERVICING 5 REPORTS 6 WP SETUP HOME CLEAN then (by pressing the...
- Page 81 In the supervisor mode, the complete lists are displayed on the screen (and not only the opened elements in a list). On the screens, the default values are signaled by a tick " ". To change a default value, select a new value and press DEFLT The "...
-
Page 82: User Setup (In Supervisor Mode)
ADVERT DIE MODIF ACTIVE NOT ACTIVE STATUS STATUS NAME MARKETING NUMBER EXIST ESCAPE MODIFY LOAD Select by simply using the key and ACTIVE . Validate with MODIFY Principle for making a mail class die or text message active is the same as for advertisement slogan. -
Page 83: Security
SUPERV REPORTS 8 SERIAL PORT SETUP REPORT ON LABEL HOME 4.3.1 Security After selecting the SECURITY menu in the main supervisor menu, the below menu will be displayed: SECURITY USER PIN N0 0000 NORMAL MACHINE STATUS LOCKED 10000 HIGH VAL THRESLD LOCKED ACTIVE PC ABSENT MODE... -
Page 84: Time
DEFINING THE HIGH VALUE ALERT In the SECURITY menu screen, after selecting the HIGH VAL THRESLD menu, press ; the below screen will be MODIFY displayed: HIGH VALUE ALERT OLD VALUE : _ NEW VALUE : _ ESCAPE Simply enter the new value, using the numeric keypad (with no point or comma, e.g.:99000 corresponds to 99.000). -
Page 85: Timeout
4.3.3 Timeout After selecting the TIME OUT menu in the main supervisor menu, the below screen is displayed: TIMEOUT (SEC.) START (10-9999) 0015 STOP (1-9999) 0005 STANDBY (1-9999) 0120 SLEEP (30-9999) 0240 ESCAPE MODIFY The next delays are determined by the supervisor (between 0 and 3600 seconds, with increments of 1 second) and are expressed in seconds: - START: waiting time for the first document with the transport... -
Page 86: Roll Paper Density
4.3.4 Roll paper density See section A the chapter "Operation with a roll tape dispenser (RTD)". 4.3.5 Load rate table - Select the LOAD RATE menu in the main supervisor menu. - Insert the memory card into the reader, on the right side of the machine;... -
Page 87: Ds Tests
4.3.6 DS tests This function should only be used at the technical department’s request. DS TESTS DYNAMIC STATIC WEIGHT 01 b 0.0 oz 01 b 0.0 oz THICKNESS 0 mm 0 mm LENGHT 0 mm OVERSIZE ESCAPE MOTOR 4.3.7 Serial port setup This menu allows to define which peripheric is connected to a port. -
Page 88: Departments
4.5 Departments After selecting the DEPARTMENTS menu in the main supervisor menu, the following menu is displayed: 1 MARKETING OPEN DEPARTMENTS 1 DEPT001 2 DIRECTION 3 DESIGN 4 RESEARCH 5 D005 REPORT ON 6 D12 LABEL ESCAPE MODIFY SETUP After selecting a department using the keys (or by pressing directly the numeric key corresponding to the selection), when pressing... - Page 89 To clear all the registers, select in the SETUP DEPARTMENT menu: DEPARTMENT SETUP DEPARTMENT ESCAPE RESET Then, press and press to confirm. RESET DEPARTMENT : is used to enable the department mode. When this mode is activated, the DEPARTMENT menu is displayed on the main screen.
-
Page 90: Print Inker Servicing
4.6 Print inker servicing - From the main menu, select the PRINT INKER SERVICING menu; the screen displays: PRINT INKER SERVICING ALIGN. HOME CLEAN PRINT - Load short labels (in preference) and select ; the PRINT machine prints a test impression: In order to adjust the alignment, select the letter corresponding to the straightest vertical line (letter F in the above example), then press... -
Page 91: Ink Information
then (pressing key SUPERV REPORTS 8 THIS MONTH REPORT 9 PREV MONTH REPORT 10 ANNUAL REPORT 11 POSTAL SET REPORT 12 DEPARTMENT REPORT REPORT ON 13 ACTIVITY ERROR LIST LABEL 14 ACTIVITY HISTORY HOME SETUP Like in user mode, it is possible to select the label, roll tape or printer (a printer using the optional I/O board is connected to the machine);... -
Page 92: Postal Services
HEADSET CONSUMED : XX % COLOR : FLUO RED STATUS : READY INSTALLATION DATE 10/29/2004 MENU See "Ordering Supplies" section for information on re- placement Ink cartridge. 4.9 Postal services The telephone number for the modem connection to the Postage- ®... - Page 93 POSTAL CONNECTION SETUP PREFIX TELEPHONE # 123456 DIALTONE LOW POSTAGE THRESHOLD POC PIN # 3354 ESCAPE MODIFY To add or to modify a number, press and enter MODIFY a number using the numeric keys. Confirm pressing It may be necessary to enter a pause between the outside line digit and the new telephone number: add a "...
-
Page 94: Audit
4.9.1 Audit USPS regulations require that your meter must be set at least once every three months. The IJ 70 meter has an internal timer that tracks your reset activity. After three months without adding postage, a PO LOCKOUT message is displayed and can be cleared by performing a Clear Lockout transaction. - Page 95 0 NO AD DIE AD DIE 1 FLAG 2 RECYCLE 3 FIRST CLASS 4 AIR MAILS 5 SEASONS GREETINGS ESCAPE DEFLT MODIFY - Select a slogan, using the keys or numeric key. - Press ; the following will be displayed on the screen: MODIFY AD DIE MODIF ACTIVE...
-
Page 96: Rate Configuration
4.12 Rate configuration To set a predefined rate configuration as a default parameter, see paragraph 4.1 "Enabling the supervisor mode" in this section. To modify the name (except for "user rate") or the characteristics of a predefined rate configuration, the procedure is the same as in the user mode, followed by pressing . -
Page 97: Programming Memories 1 To 9
HIGH ACCURACY SETUP HIGH ACCURACY ESCAPE - Enable (or disable) the function ON or OFF(using the key), and confirm with 4.14 Programming memories 1 to 9 Up to 9 configurations may be stored into memories 1 to 9. - From the main menu, make all the required selections on the machine (amount, department, text, slogan, moistening, etc., verifying that they are active);... - Page 98 MEMORY SETUP NAME NUMBER ESCAPE MODIFY To modify the NAME of memory, press to have access MODIFY to the alphanumerical entry screen (see next paragraph). Validate the name change by pressing - Press again to confirm the changes to the Memory Setup screen.
- Page 99 or (if the memory "X" is already used): CONFIRM OVERWRITING OF JOB MEMORY X ESCAPE - To validate, press ; the screen displays: DEPARTMENT IN JOB MEMORY: YES OR NO - Press to validate the department previously selected. You will keep a photograph of the machine status before returning to the initial screen.
-
Page 100: Text Modification
4.15 Text modification From the main menu, press , select the text area and IMPRNT press LIST TEXT / MESSAGE NO TEXT TEXT 1 TEXT 2 ✔ TEXT 3 TEXT XXX ESCAPE MODIFY DEFLT Select the text to modify with the keys,and then press MODIFY... -
Page 101: Exiting The Supervisor Mode
- Selection of the desired character: - The arrows are used to select a character from the list proposed. - Numbers may also be defined using the numeric keys. - Validate completed name with You can use the " " character to print your text within two lines. - Page 102 4127389N/C 02/28/2007 ORIG0002-102/A...
-
Page 103: Section C: Maintenance Advice
SECTION C: MAINTENANCE ADVICE TROUBLE SHOOTING ........... 105 Misfeed 1.1.1 In the autofeed sealer 1.1.2 In the mailing machine 1.1.3 In the dynamic scale Problems machine and feeder Problems roll tape dispenser Problem dynamic scale GENERAL MAINTENANCE ..........116 Replacement of the brush and moistening sponges 116 Cleaning of the rollers Cleaning the ink cartridge Replacing the envelope pressure units (dynamic... - Page 104 4127389N/C 02/28/2007 ORIG0002-104/A...
-
Page 105: Trouble Shooting
TROUBLE SHOOTING 1.1 Misfeed 1.1.1 In the autofeed sealer - Open the feeder cover, - Unlock the conveyor. Press back on the central blue button then lift the conveyor, - Remove the misfed envelopes, - Press the conveyor to put it in place again, - Shut the cover. - Page 106 - Then the drawer is fully open - After the misfeed has been cleared, firmly push the whole assembly into the machine. Trouble shooting 4127389N/C 02/28/2007 ORIG0002-106/A...
-
Page 107: In The Dynamic Scale
1.1.3 In the dynamic scale In the event of a jam under the conveyor - Open the cover of the dynamic scale; - Press the handle on the left side in order to raise the conveyor; jammed envelope - Remove the envelope jam; - Release the handle to restore the conveyor to its position;... -
Page 108: Problems Machine And Feeder
1.2 Problems machine and feeder PROBLEM SOLUTION The machine cannot get Check the power cord and the started. connection. The printer does not - Is it switched on? Is it connected? operate (optional with I/O - Is the printer mode selected in board). - Page 109 PROBLEM SOLUTION Poor printing quality - See paragraph "Cleaning the ink cartridge". - Make sure that the side drawer is properly closed. Envelopes are stained - Make sure that the side drawer is properly closed. - Clean rollers (see “General maintenance”...
- Page 110 PROBLEM SOLUTION Labels are not properly fed. - Avoid leaving the labels too long in the machine. - Avoid placing too many labels in the dispenser (80 max.) The scale does not Make sure that it is properly communicate with the connected (see page 21).
-
Page 111: Problems Roll Tape Dispenser
1.3 Problems roll tape dispenser PROBLEM SOLUTION M267 - RTD absent or not STEP 1: Power machine off and on ready (by switching the on/off button). If Switch RTD off on. Check the fault is cleared then, print a zero the cable value label to confirm. - Page 112 PROBLEM SOLUTION R120 – RTD busy Just wait and retry. R130 – RTD motor error Turn Power machine off and on. If Call Services after 2 attempts the fault is cleared then, print a zero value label to confirm. If the fault is still not cleared, then ask for RTD exchange procedure.
- Page 113 PROBLEM SOLUTION R152 - RTD overheating Step 1: check if the RTD is close to printhead a heat source or is exposed to di- Call services rect sunlight. Step 2: if yes, move the RTD. Step 3: wait 15 mn to cool down. R160 - Communication error Step 1: turn Power machine off and Check Cables...
- Page 114 PROBLEM SOLUTION R190 – Wrong meter identi- Turn Power machine off and on. If fication after 2 attempts the fault is cleared Call services then, print a zero value label to confirm. If the fault is still not cleared, then ask for RTD exchange procedure.
-
Page 115: Problem Dynamic Scale
1.4 Problem dynamic scale MESSAGE SOLUTION S105 Oversize sensor error. Clear and clean See below window under dynamic scale unjam handle. window oversize sensor Trouble shooting 115 4127389N/C 02/28/2007 ORIG0002-115/A... -
Page 116: General Maintenance
GENERAL MAINTENANCE 2.1 Replacement of the brush and moistening sponges - Switch off the mailing machine; - Separate the feeder from the mailing machine (see "Installation of the automatic feeder" section); - Unlock the conveyor (central blue button) and lift it; - To remove the brush, raise it and lightly pull it. -
Page 117: Cleaning Of The Rollers
2.2 Cleaning of the rollers Shift the machine table sideways by releasing handle (see paragraph1.1.2 "In the mailing machine" in this section). rollers Clean the rollers with a damp cloth. General Maintenance 117 4127389N/C 02/28/2007 ORIG0002-117/A... -
Page 118: Cleaning The Ink Cartridge
2.3 Cleaning the ink cartridge In case of poor printing quality: - Press key , in order to run a cleaning cycle for the ink CLEAN cartridge, when the printing quality is getting poor or if the machine has remained unused for several days. - If it is not enough, remove the ink cartridge (see paragraph "Ink cartridge"... -
Page 119: Replacing The Envelope Pressure Units (Dynamic Scale)
2.4 Replacing the envelope pressure units (dynamic scale) - Squeeze (1) the pressure unit at the position indicated and pull (2). - Insert the new pressure unit and press firmly to lock in place. envelope pressure units Squeeze here the envelope pressure unit to remove it. -
Page 120: Removal Of The Postage Meter
2.5 Removal of the postage meter - Switch off the mailing machine, - Open the cover, - Hold the handle and pull it upwards General Maintenance 4127389N/C 02/28/2007 ORIG0002-120/A... -
Page 121: Postage-On-Call® Account
SECTION D: MAINTAINING YOUR DIGITAL POSTAGE-ON-CALL® ACCOUNT ACCOUNT NUMBER ............123 ACCOUNT BALANCE ............. 123 STATEMENTS ..............123 POST OFFICE REGULATIONS ........123 NO DEPOSIT POSTAGE-ON-CALL ACCOUNT ....124 STANDARD DEPOSIT POSTAGE-ON-CALL ACCOUNT 124 4127389N/C 02/28/2007 ORIG0002-121/A... - Page 122 4127389N/C 02/28/2007 ORIG0002-122/A...
-
Page 123: Account Number
This number should be kept in a safe place, yet be readily available, because it is used for all POC account maintenance transactions. ACCOUNT BALANCE You can use the Neopost Automated Postage-On-Call ® system to check your account. Simply call 1-800-867-3738 and use your touchtone phone to enter your account number and select the Account Query menu. -
Page 124: No Deposit Postage-On-Call Account
Upon receipt of the check, your POC account will be credited with your deposit (allow 4 to 6 working days for the check to be received and posted). Note: Send only your POC deposit, Do Not include any other payments to Neopost along with your check Maintaining Your Account 4127389N/C... - Page 125 for postage. Checks Make your check out to United States Postal Service, and write your POC account number on the check. Deposit Slips Always enclose your preprinted deposit slip with your check. This will assure the fastest and most accurate bank processing. You will receive a package of 24 personalized deposit slips in the mail shortly after setting up your POC account.
- Page 126 Wire Transfers To: Wire Transfers To: Wire Transfers To: Wire Transfers To: Citibank Detail Payment Field: POC Account # CMRS / Neopost Account # 4067-8625 Routing # 021000089 ACH Transfers To: ACH Transfers To: ACH Transfers To: ACH Transfers To:...
-
Page 127: International Letter Post Country
INTERNATIONAL LETTER POST COUNTRY CODE CHART COUNTRY TO RATE GROUP REFERENCE TABLE Country Rate Group Country Rate Group Country Rate Group Chad Great Britain & Northern Chile Ireland Afghanistan China Greece Albania Colombia Greenland Algeria Comoros Grenada Andorra Congo, Guadeloupe Angola Democratic Republic of the Guatemala... - Page 128 COUNTRY TO RATE GROUP REFERENCE TABLE Country Rate Group Country Rate Group Country Rate Group Libya Poland Tanzania Liechtenstein Portugal Thailand Lithuania Togo Luxembourg Qatar Tonga Trinidad & Tobago Macao Reunion Tristan da Cunha Macedonia, Republic of Romania Tunisia Madagascar Russia Turkey Malawi...
-
Page 129: Specifications
SPECIFICATIONS • Speed: - IJ 70 in weighing mode* ..: up to 85 envelopes/minute - IJ 70 only ......: up to 150 envelopes/minute * with dynamic scale •Ink cartridge capacity ..: 31,000 imprints with indicium only • Departments: 50 or 200 according to the option •... - Page 130 •Resolution in dynamic weighing mode: 0.1 oz • Label dimensions (pre-cut and self-adhesive) - Max. width ......: 1.6 " - Min. length ......: 6 " - Max. length ......: 8.3 " • Rolls for roll tape - Width ......... : 1.45 "...
-
Page 131: Ordering Supplies
Moistener Sponges ........EMFD530/1119 Sure Seal Solution ........7457464 Customer Equipment Care Kit ....7457283 IJ 70 User’s Guide ........4127389N Modem Telephone Cable ......4102525N AC Power Cord ......... CRAC12379 Rolls (box of 5 rolls) ........4 122 446P Cleaning pen (RTD) ........ -
Page 132: Contacting Neopost
CONTACTING NEOPOST Neopost Inc. 30955 Huntwood Avenue Hayward, CA 94544-7084 Customer Service Helpdesk 1-800-259-2678 Call for technical support or to place a service call Consumable Supplies Order Desk 1-800-735-5343 Order online at www.neopostinc.com Postage-On-Call® Automated Account Information 1-800-867-3738 Call to check Account Balance, Last Deposit or Last Meter... -
Page 133: Index
INDEX External scale 43 External weighing platform 39 Access code 35 Advertisement slogan change 51 Audit 94 Feed platform 17 Feeder 18 connection 21 Batch mode 39 Batch Registers 75, 76 Brush replacement 116 Guides adjustment 29 Cleaning of the rollers 117 High accuracy configuration mode 96 Configuration 69 High value threshold 84... - Page 134 Memories programming 72, 97 Text 51 recalling 72 Thickness adjustment 30 user memory 72 Time 84 Misfeed 105 Timeout 85 Moistening 33 Timeout setting 85 Pass through (Seal only) 67 Update registers 94 PO LOCKOUT 94 User setup 82 Postage meter removal 120 Postage value 46 Postage-On-Call connection 56, 124...
- Page 135 IJ-70 MAILING MACHINE USER'S GUIDE 4127389N/C 02/28/2007 ORIG0001-01/B...
- Page 136 ON/OFF modem memory accessories pre-cut switch connector card label (rear) (rear) reader documentation dispenser area cover cover removable adjustable front conveyor graphic table keyboard rear side guide screen guide guide feed autofeed mailing platform sealer machine thickness adjustment blue button for postage 2 positions blue button cartridge...
- Page 137 4127389N/C 02/28/2007 ORIG0001-04/B...
Need help?
Do you have a question about the IJ 70 and is the answer not in the manual?
Questions and answers