Sign In
Upload
Download
Table of Contents
Contents
Add to my manuals
Delete from my manuals
Share
URL of this page:
HTML Link:
Bookmark this page
Add
Manual will be automatically added to "My Manuals"
Print this page
×
Bookmark added
×
Added to my manuals
Manuals
Brands
Neopost Manuals
Digital Mailing system
IS-480
User manual
Neopost IS-480 User Manual
Mailing system with imeter postage meter
Hide thumbs
Also See for IS-480
:
User manual
(255 pages)
1
2
3
4
5
6
7
8
9
10
11
12
13
14
15
16
17
18
19
20
21
22
23
24
25
26
27
28
29
30
31
32
33
34
35
36
37
38
39
40
41
42
43
44
45
46
47
48
49
50
51
52
53
54
55
56
57
58
59
60
61
62
63
64
65
66
67
68
69
70
71
72
73
74
75
76
77
78
79
80
81
82
83
84
85
86
87
88
89
90
91
92
93
94
95
96
97
98
99
100
101
102
103
104
105
106
107
108
109
110
111
112
113
114
115
116
117
118
119
120
121
122
123
124
125
126
127
128
129
130
131
132
133
134
135
136
137
138
139
140
141
142
143
144
145
146
147
148
149
150
151
152
153
154
155
156
157
158
159
160
161
162
163
164
165
166
167
168
169
170
171
172
173
174
175
176
177
178
179
180
181
182
183
184
185
186
187
188
189
190
191
192
193
194
195
196
197
198
199
200
201
202
203
204
205
206
207
208
209
210
211
212
213
214
215
216
217
218
219
220
221
222
223
224
225
226
227
228
229
230
231
232
233
234
235
236
237
238
239
240
241
242
243
244
245
246
247
248
249
250
251
252
253
254
255
256
257
258
259
260
261
262
263
264
265
266
267
268
269
270
271
272
273
274
275
276
277
278
279
280
281
282
283
284
285
286
287
288
289
290
291
292
293
294
295
296
297
298
299
300
301
302
page
of
302
Go
/
302
Contents
Table of Contents
Troubleshooting
Bookmarks
Table of Contents
Table of Contents
Mailing System
1 Read this First
What You will Find in this Manual
Safety Requirements
2 Meet Your Mailing Sys- Tem
2 Meet Your Mailing System
System Layout
Accessories
Control Panel Features
Connections
Power Management
How to Turn the Mailing System to Sleep Mode
How to Turn the Mailing System to off Mode
3 Processing Mail
Choosing a Type of Stamp
Preparing and Starting Your Work Session
How to Sort Mail
How to Log in and Start a Work Session
How to Change the Current 'Type of Stamp
How to Use the Feeder
Processing [Standard] Mail
How to Apply Standard Postage (Settings)
Running Mail
How to Apply Standard Postage (Running Mail)
How to Re-Date Mail (Settings)
How to Re-Date Mail (Running Mail)
Printing [Permit] Mail
How to Process Permit Mail (Settings)
How to Process Permit Mail (Running Mail)
Printing [Received] for Incoming Mail
How to Process Incoming Mail (Settings)
How to Process Received Mail (Running Mail)
Running [No Printing] Mail
How to Process Mail Without Printing (Settings)
How to Process Mail Without Printing (Running Mail)
Remote Label Dispenser (RLD)
How to Set the RLD Status
How to Print with RLD by Default
How to Print Using the Remote Label Dispenser
How to Test the RLD
How to Change the Label Roll
Settings Details
How to Change Accounts
How to Select a Rate
How to Enter Postage Manually
How to Select a Permit
How to Change the Weighing Type
Entering Weight Manually
How to Enter the Weight Manually
How to Change the Date
How to Add (or Cancel) a Text on the Stamp
How to Add (or Cancel) an Ad die on the Stamp
How to Move the Stamp (Print Offset)
How to Use an Imprint Memory
How to Turn the Sealer On/Off
Advanced Operations
How to Enable an Emergency Stop
How to Reset Batch Counters
How to Count Mail Pieces by Weighing
How to Fill the Automatic Label Dispenser
4 Money Operations
Overview
Managing Funds
How to Check the PSD (Meter) Funds
How to Add Funds to the PSD (Meter)
Unlocking the PSD (Postal Inspection)
How to Unlock the PSD
5 Managing Accounts and Assigning Rights
Accounting and Assigning Rights Overview
Selecting an 'Account Mode
Guidelines to Setup an Account
How to Change a Shared PIN Code
Selecting an 'Account Mode
How to Display and Change the 'Account Mode
Managing Accounts
How to Create a Group or a Subgroup
How to View/Edit a Group or a Subgroup
How to Activate / Deactivate a Group
How to Delete a Group or a Subgroup
How to Create an Account
How to View / Edit Account Information
Deleting Accounts
How to Activate / Deactivate an Account
How to Delete an Account
How to Export an Account List
How to Import Accounts
Managing Operators
How to Create an Operator
How to Modify an Existing Operator
How to Assign Accounts to an Operator
How to Activate / Deactivate an Operator
How to Delete an Operator
Advanced Reporting Functions
How to Activate/Deactivate Budgets and Surcharges
How to Modify the Period or Start the Day of Budgets
6 Reports
Reports Overview
Generating a Report
How to Generate a Report (as a User)
How to Generate a Report (as Supervisor)
Counter Data
Postage Data
Funds Data
Account Data
How to Generate the Account List Report
How to Generate the Operator List Report
System Data
Advanced Reporting Reports
7 Online Services
Online Services Overview
Connecting to Online Services
How to Call Online Services Manually (as a User)
How to Call Online Services Manually (as Supervisor)
How to Test the Connection to Online Services
Uploading Statistics
How to Upload Report Data to the Online Services Server
System Online Services
Econfirmation Services
The Process in Your Mailroom
How to Process Econfirmation Items Using the WP
How to Display Econf Record List and Details
How to Modify an Econf Record Status
8 Configuring Your Mail- Ing System
8 Configuring Your Mailing System
Settings Overview
Logging in / out as the Supervisor
How to Log in as Supervisor
How to Exit the Supervisor Mode
Changing the Display Language
How to Change the Display Language
How to Change the Display Language by Default
Enabling/Disabling Sounds
How to Enable / Disable the Beeps
How to Change the Beeps by Default
Display Settings
How to Adjust the Display Contrast
How to Change the Display Contrast by Default
System Time-Outs and Settings
How to Adjust the Time-Outs
How to Change System Time-Outs
High Value, Low Funds Warnings and PIN Codes
How to Set the High-Value Warning Amount
How to Set the Low-Funds Threshold
How to Set/Cancel a Funding PIN Code
Weighing Settings
How to Change the Default Weighing Type
How to Activate the Automatic Weight Detection on the WP
How to De-Activate the Automatic Weight Detection on the WP
How to Zero the Weighing Platform
How to Tare the Weighing Platform
How to Rezero the Weighing Platform
How to Tare the Weighing Platform
How to Activate / De-Activate Checking on Zero Weight
How to Set Dynamic Scale High Accuracy Mode
How to Change the GEO Code
Postage Imprint Default Settings
How to Change the Default Rate
How to Change the Default Permit
How to Change the Default Text
How to Change the Default Ad die
How to Set the Automatic Date Advance Time
How to Set the Default Printing Offset
How to Activate / Deactivate Fractional Postage Values
Imprint Memories
How to Create an Imprint Memory
How to Edit / Modify an Imprint Memory
How to Delete an Imprint Memory
Default Sealing Mode
How to Set the Default Sealing Mode
How Set the Current Sealing Mode
Connection Settings
How to Set the Postal/Online Services Connection
How to Set LAN (High-Speed Internet) Parameters
How to Set the Analog Modem Parameters
Time and Date Management
How to Check/Adjust the Machine Time and Date
9 Options and Updates
Options and Updates Process
How to Access the Options and Updates Menu
Using the Mailbox
How to Read Messages (User)
How to Read Messages (Supervisor)
How to Delete Messages (User)
How to Delete Messages (Supervisor)
Managing Options
How to Display the Options
How to Load New Options
Managing Custom Text Messages
How to Display the List of Text Messages
How to Add a New Text Message
How to Modify or Delete a Text Message
Managing Ad die
How to Display the List of Ad dies
How to Modify or Delete an Ad die
How to Download New Ad dies
Managing Postal Rates
How to Check Your Rate Updates
How to Download New Postal Rates
Managing Permits
How to Display the List of Permits
How to Add or Delete Permits
Updating System Software
How to Update the System Software
10 Maintaining Your Mail- Ing System
10 Maintaining Your Mailing System
Maintaining the Ink Cartridge
How to Display Ink Level and Cartridge Data
How to Display Ink Level and Cartridge Data
How to Align the Print Heads
How to Clean the Print Heads Automatically
How to Clean the Print Heads Automatically
How to Clean the Print Heads Manually
How to Change the Ink Cartridge
Filling and Adjusting the Feeder Sealer
How to Fill the Sealer Bottle
How to Adjust the Sealing Water Flow
Cleaning the Mail Path
How to Clean the Brushes and Sponge (Sealer)
How to Clean the Feeder Belts and Rollers
How to Clean the Mail Path Sensors
Touchscreen Calibration
How to Calibrate the Touchscreen
Maintenance Processes
How to Run the Installation Wizard
How to Run the Registration Update
11 Troubleshooting
Paper Jamming
How to Clear Mail Jammed in the Base
How to Clear Mail Jammed in the Mixed-Size Feeder
How to Remove Mail Jammed in the Dynamic Scale
Label Jamming
How to Clear a Label Jammed in the Base
Weighing Problems
Diagnostics and System Data
How to Access Diagnostic Data
How to Display Software Data
How to Display Hardware Data
How to Display the Event Lists
How to Display the Machine Counters
12 Specifications
Mail Specifications
Recommended Operating Conditions
General Specifications
Operating Specifications
Advertisement
Quick Links
Download this manual
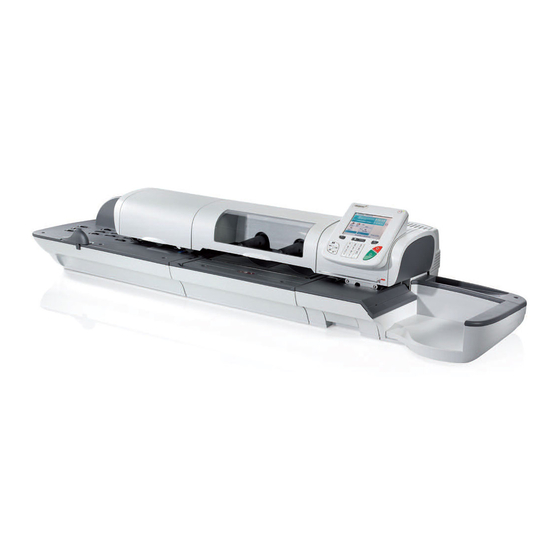
IS-480/490
MAILING SYSTEM
with iMeter
Postage Meter
TM
USER'S GUIDE
4135505S
Table of
Contents
Previous
Page
Next
Page
1
2
3
4
5
Advertisement
Chapters
Table of Contents
4
2 Meet Your Mailing Sys- Tem
18
3 Processing Mail
36
4 Money Operations
112
5 Managing Accounts and Assigning Rights
120
6 Reports
158
7 Online Services
182
8 Configuring Your Mail- Ing System
198
9 Options and Updates
238
10 Maintaining Your Mail- Ing System
258
11 Troubleshooting
278
Table of Contents
Need help?
Do you have a question about the IS-480 and is the answer not in the manual?
Ask a question
Questions and answers
Related Manuals for Neopost IS-480
Postal Equipment Neopost IS-480 User Manual
(255 pages)
Digital Mailing system Neopost IS-5000 Operator's Manual
(298 pages)
Digital Mailing system Neopost IS-5000 User Manual
Mailing machine (319 pages)
Digital Mailing system Neopost IS-5000 Installation Manual
With imeter postage meter (12 pages)
Digital Mailing system Neopost IS-420 User Manual
(202 pages)
Digital Mailing system Neopost IS-330 Installation Manual
Lan eib (10 pages)
Digital Mailing system Neopost iMeter IS-280 Internet Install Manual
Postage meter (26 pages)
Digital Mailing system Neopost IS-420 Installation Manual
(11 pages)
Digital Mailing system Neopost IS-430 User Manual
Mailing machine (204 pages)
Digital Mailing system Neopost IS-430 User Manual
Mailing systems with imeter postage meter (204 pages)
Digital Mailing system Neopost IS-330 Installation Instructions Manual
Mailmark meter (8 pages)
Digital Mailing system Neopost IS-460 User Manual
Mailing system with imeter postage meter (272 pages)
Digital Mailing system Neopost IS-460 Quick Start Manual
(1 page)
Digital Mailing system Neopost IS-330 User Manual
Mailing systems with imeter postage meter (216 pages)
Digital Mailing system Neopost IS-350 Installation Manual
(20 pages)
Digital Mailing system Neopost IS-490 User Manual
Mailing system with imeter postage meter (302 pages)
This manual is also suitable for:
Is-490
Table of Contents
Print
Rename the bookmark
Delete bookmark?
Delete from my manuals?
Login
Sign In
OR
Sign in with Facebook
Sign in with Google
Upload manual
Upload from disk
Upload from URL


Need help?
Do you have a question about the IS-480 and is the answer not in the manual?
Questions and answers