Allied Telesis AT-2400 Series Installation Manual
Network adapter cards
Hide thumbs
Also See for AT-2400 Series:
- Installation manual (126 pages) ,
- Installation manual (80 pages) ,
- Installation manual (128 pages)
Table of Contents
Advertisement
Quick Links
Installation
Guide
B
I
OOK
FOR WINDOWS 95, 98, 2000, ME, NT, AND XP
OPERATING SYSTEMS
PN 613-50241-00 Rev F
Network
Adapter Cards
AT-2400 Series
AT-2450/AT-2451 Series
AT-2500/AT-2501 Series
AT-2700/AT-2701 Series
AT-2745/AT-2746 Series
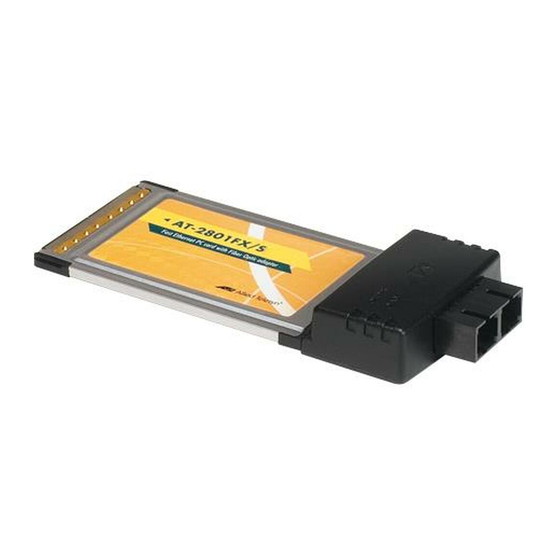
AT-2801FX Series
AT-2915 Series
AT-2916T Series
AT-2930 Series
AT-AT-2970/2971 Series
®
Advertisement
Table of Contents

Related Manuals for Allied Telesis AT-2400 Series


Summary of Contents for Allied Telesis AT-2400 Series
-
Page 1: Adapter Cards
Network Adapter Cards ® AT-2400 Series AT-2450/AT-2451 Series AT-2500/AT-2501 Series AT-2700/AT-2701 Series AT-2745/AT-2746 Series AT-2801FX Series AT-2915 Series AT-2916T Series AT-2930 Series AT-AT-2970/2971 Series Installation Guide FOR WINDOWS 95, 98, 2000, ME, NT, AND XP OPERATING SYSTEMS PN 613-50241-00 Rev F... - Page 2 Allied Telesyn, Inc. has been advised of, known, or...
-
Page 3: Electrical Safety And Emission Compliance Statement
Electrical Safety and Emission Compliance Statement Standards: This product meets the following standards U.S. Federal Communications Commission Declaration Of Conformity Manufacture Name: Allied Telesyn, Inc. Manufacture Address: 960 Stewart Drive, Suite B Sunnyvale, CA 94085 USA Manufacture Telephone: 408-730-0950 Declares that the product:... - Page 4 Electrical Safety and Emission Compliance Statement Important: Appendix A contains translated safety statements for installing this equipment. When you see the , go to Appendix A for the translated safety statement in your language. Wichtig: Anhang A enthält übersetzte Sicherheitshinweise für die Installation dieses Geräts. Wenn Sie sehen, schlagen Sie in Anhang A den übersetzten Sicherheitshinweis in Ihrer Sprache nach.
-
Page 5: Table Of Contents
Purpose of this Guide ......................................7 How This Guide is Organized ..................................... 8 Document Conventions ...................................... 9 Where to Find Related Guides ..................................10 Contacting Allied Telesyn ....................................11 Online Support......................................11 E-mail and Telephone Support ................................11 Returning Products......................................11 For Sales or Corporate Information ...............................11 Obtaining Management Software Updates ............................11... - Page 6 Overview ..........................................90 Installing an ATMUX VLAN Driver .................................. 91 Adding an Additional VLAN ..................................... 98 Removing a VLAN ......................................102 Removing the Allied Telesyn Multi-VLAN Support Protocol ......................104 Chapter 8 Troubleshooting ......................................107 Running Diagnostics ......................................108 For the AT-24xx, AT-25xx, AT-27xx, AT-2915,and AT-2930 Series....................108 For the AT-2801FX.....................................109...
- Page 7 Network Adapter Card Installation Guide - Book I Appendix A Translated Safety and Emission Information ........................... 135...
-
Page 9: Preface
Preface This installation guide contains instructions on how to install an Allied Telesyn adapter card in your computer and how to load the adapter driver. This guide also explains the AT-Setup program which simplifies the task of installing or updating an adapter driver. Purpose of this Guide This guide is intended for anyone who needs to install or update a network adapter card or driver on their PC-compatible system. -
Page 10: How This Guide Is Organized
Preface How This Guide is Organized This guide contains the following chapters and appendix: Chapter 1, Installing the Network Adapter Card, describes how to install an adapter card into your computer. Chapter 2, AT-Setup for Windows 98, 2000, Me, or XP, contains instructions on how install an adapter driver using AT-Setup. -
Page 11: Document Conventions
Network Adapter Card Installation Guide Document Conventions This guide uses several conventions that you should become familiar with before you begin to install the product. Note Notes provide additional information. Warning Warnings inform you that performing or omitting a specific action may result in bodily injury. -
Page 12: Where To Find Related Guides
Preface Where to Find Related Guides The Allied Telesyn web site at www.alliedtelesyn.com offers you an easy way to access the most recent documentation, software updates, and technical information for all of our products. The documents provided on our web site are available as PDF files. -
Page 13: Contacting Allied Telesyn
To obtain a RMA number, contact Allied Telesyn’s Technical Support at our web site at www.alliedtelesyn.com For Sales or You can contact Allied Telesyn for sales or corporate information at our web site at www.alliedtelesyn.com. To find the contact information for Corporate your country, select “Contact Us”... -
Page 15: Installing The Network Adapter Card
AT-2916T Series AT-2930 Series AT-2970/AT-2971 Series Verifying Make sure the following items are included in your package. If any item is missing or damaged, contact your Allied Telesyn sales representative Package for assistance. Contents Allied Telesyn Network Adapter Card CardAssistant CD... -
Page 16: Reviewing Safety Precautions
Installing the Network Adapter Card Reviewing Safety Precautions Please review the following safety precautions before you install the network adapter card. Warning This is a “Class 1 LED product”. Warning Do not stare into the laser beam. (AT-2450FT, AT-2450FL, AT-2451FTX, AT-2700FX, AT-2701, AT-2971SX Series only) Warning Lightning Danger: Do not work on this equipment or cables during... -
Page 17: Installing A Network Adapter Card
Network Adapter Card Installation Guide - Book I Installing a Network Adapter Card This section explains how to install a network adapter card in most PC- compatible computers. Note If you are installing an AT-2801FX PCMCIA card, refer to Installing an AT-2801FX on page 17. - Page 18 Installing the Network Adapter Card Note If you cannot locate or know how to find an PCI slot, refer to the documentation that came with your PC. Remove the network adapter card from the shipping package and store the packaging material in a safe location. Caution Wear a grounding device and observe electrostatic discharge precautions when installing the network adapter card in a PC.
-
Page 19: Installing An At-2801Fx
Network Adapter Card Installation Guide - Book I For the AT-2450, AT-2500, or AT-2700 Series adapters, to use the adapter card’s Wake-on-LAN feature in your computer using an Advanced Configuration and Power Interface (ACPI), you must connect the Wake-on-LAN cable to the Wake-on-LAN connector on the adapter card and to the Wake-on-LAN connector on the motherboard of the computer. -
Page 21: At-Setup For Windows 98, 2000, Me, Or Xp
Before running AT-Setup, be sure to read AT-Setup Guidelines on page Overview Allied Telesyn has created a special program called AT-Setup to simplify the installation of your network adapter card and driver. This program automatically installs, updates, or corrects the adapter driver on your computer. - Page 22 AT-Setup for Windows 98, 2000, Me, or XP AT-Setup is located on the CardAssistant CD included with the network adapter card or it can be downloaded from our web site at www.alliedtelesyn.com. AT-Setup can only be used to install an adapter driver on a system running Windows 98, 2000, Me, or XP.
-
Page 23: At-Setup Guidelines
Creating a Driver Installation Disk on page 31 for instructions. Allied Telesyn network adapter cards are PCI-compliant. The adapter card’s operating parameters, such as interrupt level and memory range, are set automatically by the computer so that they do not conflict with other devices in your computer. Do not change any of the operating parameters of an adapter card without a full understanding of the parameters’... -
Page 24: Running At-Setup
The CardAssistant Main Menu shown in Figure 5 is displayed. If this menu is not displayed, double-click on the My Computer icon, then double-click on the Allied Telesyn CD-ROM icon. Figure 5 CardAssistant CD Main Menu From the Driver Setup drop-down menu, select the adapter card... - Page 25 Network Adapter Card Installation Guide - Book I A window similar to Figure 6 is displayed. Figure 6 Network Adapter Card Window Under Software Support, select Load AT-Setup. The window shown in Figure 7 is displayed. Figure 7 AT-Setup Prep Window...
- Page 26 Figure 8 Security Warning Window Proceed to Step If you are installing an Allied Telesyn network adapter card from a driver installation disk, perform the steps below. Insert the driver installation disk into the floppy drive. b. Select Start from the Window’s toolbar.
- Page 27 Network Adapter Card Installation Guide - Book I d. In the Open field, type: A:\atsetup. Where ‘A’ is the letter name of the floppy drive. Select OK. This launches the AT-Setup program and displays the window shown in Figure 10. Figure 10 Security Warning Window Proceed to Step...
- Page 28 AT-Setup for Windows 98, 2000, Me, or XP The window shown in Figure 11 is displayed. Figure 11 Welcome to AT-Setup Window Select OK. When AT-Setup has finished installing the driver, it displays the prompt shown in Figure 12. Figure 12 Shut Down Prompt Select Yes and perform the following procedure: Power OFF your computer.
-
Page 29: Running At-Setup To Complete Driver Installation
Network Adapter Card Installation Guide - Book I Running AT-Setup to Complete Driver Installation If you were unable to complete the installation of the adapter driver or if an error occurred during installation, run AT-Setup again. AT-Setup will scan your operating system and correct any known problems. Refer to Running AT-Setup on page 22 for instructions. -
Page 31: Manually Installing A Network Adapter Driver
Chapter 3 Manually Installing a Network Adapter Driver This chapter contains procedures for manually installing a network adapter driver on a PC-compatible system. The chapter provides the procedure for each of the following Windows operating systems. Windows 95 on page 34 Windows 98 on page 36 Windows Me... -
Page 32: Installation Guidelines
Creating a Driver Installation Disk on page 31 for instructions. Allied Telesyn adapter cards are PCI-compliant. The adapter card’s operating parameters, such as interrupt level and memory range, are set automatically by the computer so that they do not conflict with other devices in your computer. -
Page 33: Creating A Driver Installation Disk
The CardAssistant Main Menu shown in Figure 13 is displayed. If this menu is not displayed, double-click on the My Computer icon, then double-click on the Allied Telesyn CD-ROM icon. Figure 13 CardAssistant CD Main Menu From the Driver Setup drop-down menu, select the adapter card... - Page 34 Manually Installing a Network Adapter Driver A window similar to Figure 14 is displayed. Figure 14 Network Adapter Card Window Insert a blank, formatted floppy disk into the floppy drive. Under Software Support, select Installation Disk. The window shown in Figure 15 is displayed. Figure 15 File Download Window...
- Page 35 Network Adapter Installation Guide - Book I Select Run this program from its current location, then OK. The window shown in Figure 16 is displayed. Figure 16 CardAssistant - InstallShield Wizard Window Specify the floppy drive containing the blank disk. Select Next.
-
Page 36: Windows 95
Manually Installing a Network Adapter Driver Windows 95 This section contains the procedure for manually installing a network adapter driver in a Window 95 operating system. The AT-2801, AT-2915, AT-2916T, AT-2930, AT-2970, and AT-2971 Series Adapters are not supported by Windows 95. Note Please review the Installation Guidelines... - Page 37 Network Adapter Installation Guide - Book I Where ‘D’ is the letter name of the CardAssistant CD and ‘\drivers\at2500‘ is the location of the adapter driver to be installed. The adapter driver locations on the CardAssistant CD are: Adapter Card Driver Location AT-2400T, AT-2400BT \drivers\at2400...
-
Page 38: Windows 98
Manually Installing a Network Adapter Driver Windows 98 This section contains the procedure for manually installing a network adapter driver in a Windows 98 operating system. The AT-2801, AT-2916T, AT-2970 and AT-2971 Series Adapters do not support Windows 98. Note Please review the Installation Guidelines on page 30 before... - Page 39 Network Adapter Installation Guide - Book I The window shown in Figure 18 is displayed. Figure 18 Add New Hardware Wizard Window (2 of 3) Select Search for the best driver for your device (Recommended). Select Next. The window shown in Figure 19 is displayed. Figure 19 Add New Hardware Wizard Window (3 of 3)
- Page 40 Manually Installing a Network Adapter Driver If you are using the CardAssistant CD, do the following. If you are using a driver installation disk, proceed to Step Insert the CardAssistant CD into the CD-ROM drive. Note If your computer launches the web browser when you insert the CD, minimize or close the web browser window.
- Page 41 Network Adapter Installation Guide - Book I Click Next. Proceed to the next step. Reboot the computer when prompted. The network adapter card and driver are ready for network operations.
-
Page 42: Windows Me
Manually Installing a Network Adapter Driver Windows Me This section contains the procedure for manually installing a network adapter driver in a Windows Me operating system. The AT-2801, AT-2916, AT-2970 and AT-2971 Series Adapters do not support Windows Note Please review the Installation Guidelines on page 30 before performing the following procedure. - Page 43 Network Adapter Installation Guide - Book I If you are using the CardAssistant CD, do the following. If you are using a driver installation disk, proceed to Step Insert the CardAssistant CD into the CD-ROM drive. Note If you computer launches the web browser when you insert the CD, minimize or close the web browser window.
-
Page 44: Windows 2000 And Xp
Manually Installing a Network Adapter Driver Windows 2000 and XP This section contains the procedure for manually installing a network adapter driver in a Windows 2000 or XP operating system. Note You should review the Installation Guidelines on page 30 before performing the following procedure. - Page 45 Network Adapter Installation Guide - Book I Select Next. The window shown in Figure 23 is displayed. Figure 23 Found New Hardware Wizard Window (2 of 5) Select Search for a suitable driver for my device (recommended). Select Next.
- Page 46 Manually Installing a Network Adapter Driver The window shown in Figure 24 is displayed. Figure 24 Found New Hardware Wizard Window (3 of 5) If you are using the CardAssistant CD, do the following. If you are using a driver installation disk, proceed to Step Insert the CardAssistant CD into the CD-ROM drive.
- Page 47 Network Adapter Installation Guide - Book I In the Specify a Location field, enter the drive letter and path to the adapter driver. The driver locations on the CardAssistant CD are: Adapter Card Driver Location AT-2400T, AT-2400BT \drivers\at2400 AT-2500TX, AT-2501TX \drivers\at2500 AT-2450FTX, AT-2451FTX, \drivers\at24_27...
- Page 48 Manually Installing a Network Adapter Driver Proceed to Step If you are using a driver installation disk, do the following: Insert the driver installation disk into the floppy disk drive. b. Select Floppy disk drives. Select Specify a location. d. Select Next. In the Specify a Location field, enter A:\.
- Page 49 Network Adapter Installation Guide - Book I The window shown in Figure 27 is displayed. Figure 27 Found New Hardware Wizard Window (5 of 5) 11. Select Finish. 12. Reboot your computer when prompted. The network adapter card and driver are ready for network operations.
-
Page 50: Windows Nt 4.0
This section contains the procedure for manually installing a network adapter driver in a Windows NT 4.0 operating system. The AT-2801FX, AT-2916T, AT-2970, and AT-2971 Series Adapters are currently not available for Windows NT 4.0. Please check Allied Telesyn’s website at www.alliedtelesyn.com for updates. - Page 51 Network Adapter Installation Guide - Book I The window shown in Figure 29 is displayed. Figure 29 Control Panel Window Double-click on the Network icon.
- Page 52 Manually Installing a Network Adapter Driver The window shown in Figure 30 is displayed. Figure 30 Network Window Select the Adapters tab.
- Page 53 Network Adapter Installation Guide - Book I The window shown in Figure 31 is displayed. Figure 31 Adapters Tab Window Select Add.
- Page 54 Manually Installing a Network Adapter Driver The window shown in Figure 32 is displayed. Figure 32 Select Network Adapter Window Select Have Disk. The window shown in Figure 33 is displayed. Figure 33 Insert Disk Window 10. Insert the CardAssistant CD or the driver installation disk into the appropriate drive.
- Page 55 For example, if the driver installation disk is in drive A, you would enter A:\. The window shown in Figure 34 is displayed. Figure 34 Select OEM Option Window 12. Select the appropriate Allied Telesyn network adapter card. 13. Select OK.
- Page 56 Manually Installing a Network Adapter Driver The window shown in Figure 35 is displayed. Figure 35 Adapters Tab Window 14. Verify that the correct Allied Telesyn network adapter card that you purchased appears in the list, then select OK. Note Windows NT 4.0 will prompt you to configure the protocols that...
-
Page 57: Updating A Network Adapter Driver
Chapter 4 Updating a Network Adapter Driver This chapter contains the following instructions: Manually Updating a Driver for Windows 98, 2000, Me, or XP page 56... -
Page 58: Manually Updating A Driver For Windows 98, 2000, Me, Or Xp
Updating a Network Adapter Driver Manually Updating a Driver for Windows 98, 2000, Me, or XP You can use either the CardAssistant CD or a driver installation disk to manually update an adapter driver. To create a driver installation disk, refer to Creating a Driver Installation Disk on page 31 for instructions. - Page 59 Network Adapter Card Installation Guide - Book I The window shown in Figure 37 is displayed. Figure 37 System Properties Window Select the Device Manager tab.
- Page 60 Updating a Network Adapter Driver The window shown in Figure 39 is displayed. Figure 38 Device Manager Tab Window Double-click on Network adapters.
- Page 61 Network Adapter Card Installation Guide - Book I Select the correct Allied Telesyn network adapter, then select Properties. Figure 39 Selecting the Network Adapter Card...
- Page 62 Updating a Network Adapter Driver A window similar to Figure 40 is displayed. Figure 40 Properties Window Select the Driver tab.
- Page 63 Network Adapter Card Installation Guide - Book I The window shown in Figure 41 is displayed. Figure 41 Device Manager Tab Window Select Update Driver.
- Page 64 Updating a Network Adapter Driver The window shown in Figure 42 is displayed. Figure 42 Update Device Driver Wizard Window (1 of 4) Select Next. The window shown in Figure 43 is displayed. Figure 43 Update Device Driver Wizard (2 of 4) Select Search for a better driver than the one your device is using now.
- Page 65 Network Adapter Card Installation Guide - Book I Select Next. The window shown in Figure 44 is displayed. Figure 44 Update Device Driver Window (3 of 4) 10. If you are using the CardAssistant CD, do the following. If you are using a driver installation disk, proceed to Step a.
- Page 66 Updating a Network Adapter Driver AT-2450FTX, AT-2451FTX, \drivers\at24_27 AT-2700TX, AT-2700FX, AT-2701FX, AT-2746FX, AT-2700FTX, AT-2701FTX, AT-2745FX AT-2801FX \drivers\at2801 AT-2915T, AT-2930T, \drivers\at29xx AT-2930SX AT-2916T, AT-2970SX, \drivers\at2971_16 AT-2970SX/2, AT-2970T, AT-2970T/2, AT-2971T, AT-2971SX For example, if you are updating an adapter driver for an AT-2500 Series adapter and the CD is mapped to drive D, you would enter: D:\drivers\at2500 e.
- Page 67 Network Adapter Card Installation Guide - Book I Windows starts to search for the appropriate adapter driver file. After an adapter driver has been found, the window shown in Figure 45 is displayed. Figure 45 Update Device Driver Wizard (4 of 4) 13.
- Page 68 Updating a Network Adapter Driver 15. Select Finish. The network adapter card and driver are ready for network operations.
-
Page 69: Removing A Network Adapter Driver
Chapter 5 Removing a Network Adapter Driver This chapter contains the procedures for removing a network adapter driver from the following operating systems: Windows 95, 98, or Me on page 68 Windows 2000 or XP on page 72 Windows NT 4.0 on page 75... -
Page 70: Windows 95, 98, Or Me
Removing a Network Adapter Driver Windows 95, 98, or Me This section contains the procedure for removing a network adapter driver from a Windows 95, 98, or Me operating system. Note Do not remove the network adapter card from the system until after you have performed this procedure. - Page 71 Network Adapter Installation Guide - Book I The System Properties window shown in Figure 48 is displayed. Figure 48 System Properties Window Select the Device Manager tab.
- Page 72 The window in Figure 49 is displayed. Figure 49 Device Manager Tab Window Double-click Network adapters to display a list of the adapter cards installed in your computer. Select the Allied Telesyn network adapter card whose driver you want removed. Select Remove.
- Page 73 Network Adapter Installation Guide - Book I The warning shown in Figure 50 is displayed. Figure 50 Confirm Device Removal Window Select OK. After the network adapter driver has been removed, the window in Figure 51 is displayed. Figure 51 System Settings Change Window Select No.
-
Page 74: Windows 2000 Or Xp
Removing a Network Adapter Driver Windows 2000 or XP This section contains the procedure for removing a network adapter driver from a Windows 2000 or XP operating system. From the desktop, right-click My Computer, then select Properties. The window shown in Figure 52 is displayed. Figure 52 Properties Window Select the Hardware tab. - Page 75 Network Adapter Installation Guide - Book I The window shown in Figure 53 is displayed. Figure 53 Hardware Tab Window Select Device Manager.
- Page 76 The window shown in Figure 54 is displayed. Figure 54 Device Manager Window Double-click Network Adapters to display a list of the adapter cards installed in your computer. Right-click the Allied Telesyn adapter card whose driver you want to remove. Select Remove. When prompted, select OK.
-
Page 77: Windows Nt 4.0
Network Adapter Installation Guide - Book I Windows NT 4.0 This section contains the procedure for removing a network adapter driver from a Windows NT 4.0 operating system. From the desktop, right-click the Network Neighborhood icon, then select Properties from the menu, as shown in Figure 55. Figure 55 Network Neighborhood Icon and Menu... - Page 78 Removing a Network Adapter Driver The window shown in Figure 56 is displayed. Figure 56 Network Window Select the Adapters tab.
- Page 79 Network Adapter Installation Guide - Book I The window shown in Figure 57 is displayed. Figure 57 Adapters Tab Window Select the Allied Telesyn network adapter card whose driver you want to remove. Select Remove. If prompted, select Yes to confirm that you want to remove the adapter driver.
- Page 80 Removing a Network Adapter Driver Remove the network adapter card from your computer. For instructions on removing the adapter card, refer to the documentation that came with your computer. 10. Power ON your computer. The network adapter card and driver have now been removed from your computer.
-
Page 81: Chapter 6 At-Stat
Removing AT-Stat on page 86 Overview AT-Stat is an Allied Telesyn utility designed for Windows 2000 and XP. This program provides Ethernet statistics for the Allied Telesyn network adapter card and driver installed on your computer. Figure 58 illustrates the menu structure for AT-Stat. Refer to Table 1 on page 80 for a description of these features. - Page 82 Displays the average sent and received Throughput throughputs. You can also start or stop the throughput test. Support Provides active URL links to Allied Telesyn’s home Links page, technical support, and our networking products page.
-
Page 83: System Requirements
Network Adapter Card Installation Guide - Book I System To run AT-Stat, your system must be operating in either Windows 2000 or XP and have an Allied Telesyn network adapter card and driver Requirements installed. -
Page 84: Installing At-Stat
The CardAssistant Main Menu shown in Figure 59 is displayed. If this menu is not displayed, double-click on the My Computer icon, then double-click on the Allied Telesyn CD-ROM icon. Figure 59 CardAssistant CD Main Menu From the Driver Setup drop-down menu, select the adapter card... - Page 85 Network Adapter Card Installation Guide - Book I A window similar to Figure 60 is displayed. Figure 60 Network Adapter Card Window Under Software Support, select Install AT-Stat. The window shown in Figure 61 is displayed. Figure 61 File Download Window Click on Run this program from its current location, then select...
- Page 86 AT-Stat The window shown in Figure 62 is displayed. Figure 62 Security Warning Window Select Yes. The InstallShield Wizard, shown in Figure 63, prepares to install AT-Stat. Figure 63 InstallShield Wizard Window...
- Page 87 Network Adapter Card Installation Guide - Book I When the InstallShield Wizard finishes preparing the installation, the window shown in Figure 64 is displayed. Figure 64 AT-Stat Setup Window Select Next. When the Setup program has finished installing AT-Stat on your system, the window shown Figure 65 is displayed.
-
Page 88: Removing At-Stat
AT-Stat Removing AT-Stat This section contains the procedure for removing AT-Stat from your Windows 2000 or XP operating system. From the desktop, select Start. Select Settings, then Control Panel. The window shown in Figure 66 is displayed. Figure 66 Control Panel Window Double-click on Add/Remove Programs. - Page 89 Network Adapter Card Installation Guide - Book I The window shown in Figure 67 is displayed. Figure 67 Add/Remove Programs Window Select AT-Stat from the list. Select Change/Remove. The window shown in Figure 68 is displayed. Figure 68 InstallShield Wizard Welcome Window Select Remove, then Next.
- Page 90 AT-Stat The Confirm Uninstall window shown in Figure 69 is displayed. Figure 69 Confirm Uninstall Window Select OK. The InstallShield Wizard will begin to remove AT-Stat from your system. When complete, the window shown in Figure 70 is displayed. Figure 70 AT-Stat Setup Maintenance Complete Window Select Finish.
-
Page 91: Chapter 7 Vlan
Chapter 7 VLAN This chapter contains the following sections: Installing an ATMUX VLAN Driver on page 91 Adding an Additional VLAN on page 98 Removing a VLAN on page 102 Removing the Allied Telesyn Multi-VLAN Support Protocol page 104... -
Page 92: Overview
VLAN Overview Allied Telesyn’s ATMUX protocol driver allows you to configure virtual LANS (VLANS) for the AT-2450FTX, AT-2451 Series, AT-2700/AT-2701 Series, AT-2745/AT-2746 Series, AT-2915, and AT-2930 Network Adapters. Allied Telesyn’s ATMUX driver is based upon the 802.1Q standard, a special 4-byte tag inserted into every Ethernet frame. -
Page 93: Installing An Atmux Vlan Driver
Network Adapter Card Installation Guide - Book I Installing an ATMUX VLAN Driver To install an ATMUX driver, perform the following procedure: Note ATMUX does not currently support the AT-2801, AT-2916T, AT-2970, and AT-2971 Series Adapters. From the desktop, right-click the My Network Places icon and select Properties from the menu. - Page 94 VLAN The window shown in Figure 72 is displayed. Figure 72 Local Area Connection Properties Window Select Install. The window shown in Figure 73 is displayed. Figure 73 Select Network Component Type Window Select Protocol then select Add.
- Page 95 Network Adapter Card Installation Guide - Book I The window in Figure 74 is displayed. Figure 74 Select Network Protocol Window Select Have Disk. The window in Figure 75 is displayed. Figure 75 Install From Disk Window Select Browse. The ATMUX install file is located at: <CD-ROM Drive>:/drivers/VLAN Support.
- Page 96 The statement This Driver Not Digitally Signed and the Windows logo error messages that may pop up during installation, can be ignored. Allied Telesyn is in the process of digitally signing ATMUX driver but was unable to complete the process before release of this installation guide.
- Page 97 Network Adapter Card Installation Guide - Book I The ATMUX driver is now shown in the Local Area Connection Properties window. Select Allied Telesyn Multi-Vlan Support Protocol then select Properties. Then window shown in Figure 78 is displayed. Figure 78 VLAN Setup Window 10.
- Page 98 Figure 81 Local Area Connection Properties Window You will notice that the properties for the Local Area Connection has only one Allied Telesyn Multi-VLAN Support Protocol. The other protocols are disabled. The disabled protocols are options for the Local Area Connection 2.
- Page 99 Network Adapter Card Installation Guide - Book I 13. Select OK. 14. From the Network Connections window, select Local Connection 2 then select Properties. The window shown in Figure 82 is displayed. Figure 82 Local Area Connection 2 Properties Window From the Local Area Connection 2 Properties window you can configure network properties, e.g.
-
Page 100: Adding An Additional Vlan
VLAN Adding an Additional VLAN To add an additional VLAN, perform the following procedure: From the desktop, right-click the My Network Places icon and select Properties from the menu. The window shown in Figure 83 is displayed. Figure 83 Network Connections Window Right-click Local Area Connections then select Properties. - Page 101 Network Adapter Card Installation Guide - Book I The window shown in Figure 84 is displayed. Figure 84 Local Area Connection Properties Window Select Allied Telesyn Multi-Vlan Support Protocol then select Properties. The window shown in Figure 85 is displayed.
- Page 102 VLAN It may take Windows a few moments to renumber the adapter. When this has been completed, the window shown in Figure 86 is displayed. Figure 86 Set VLAN ID Window Select or enter the correct VLAN ID. This VLAN ID is determined by the system administrator;...
- Page 103 Network Adapter Card Installation Guide - Book I The window shown in Figure 88 is dispalyed. Figure 88 Network Connections Window The new VLAN now appears. Repeat this procedure to install additional VLANs. To configure the network properties for the new connection, refer to Step 14 on page 97.
-
Page 104: Removing A Vlan
VLAN Removing a VLAN To remove a VLAN, perform the following procedure: From the desktop, right-click the My Network Places icon and select Properties from the menu. The window shown in Figure 89 is displayed. Figure 89 Network Connections Window Right-click Local Area Connection then select Properties. - Page 105 Network Adapter Card Installation Guide - Book I Select Allied Telesyn Multi-Vlan Support Protocol then select Properties. The window shown in Figure 91 is displayed. Figure 91 VLAN Setup Window (1 of 2) Select the VLAN to be removed. Select Remove. It may take Windows a few moments to renumber the adapter driver.
-
Page 106: Removing The Allied Telesyn Multi-Vlan Support Protocol
VLAN Removing the Allied Telesyn Multi-VLAN Support Protocol To remove the multi-VLAN support protocol, perform the following procedure: From the desktop, right-click the My Network Places icon and select Properties from the menu. The window shown in Figure 93 is displayed. - Page 107 Network Adapter Card Installation Guide - Book I Select Allied Telesyn Multi-Vlan Support Protocol. Select Uninstall. This VLAN capabilities have been removed from the network adapter.
-
Page 109: Chapter 8 Troubleshooting
108 Additional Diagnostics Functions for the AT-2916T/AT-2970/ AT-2971 Series Adapters on page 115 Allied Telesyn provides a Windows utility, AT-Stat, to verify network adapter card operation. Refer to AT-Stat on page 79 for information and instructions on how to use this utility. -
Page 110: Running Diagnostics
Troubleshooting Running Diagnostics For the The diagnostics utility is useful for setting the Speed/Duplex and BootROM. You can also insure proper operation of the network adapter AT-24xx, card. This utility is located on the CardAssistant CD or the driver AT-25xx, installation disk. -
Page 111: For The At-2801Fx
CardBus device. If you are unsure if your computer will support a CardBus interface, contact your PC manufacturer to determine if your computer supports CardBus Type II devices. Allied Telesyn supplies a Windows Utility, AT-Stat, to verify network adapter operation. Refer to AT-Stat on page 79 for more information on how to use this utility. -
Page 112: For The At-2916T, At-2970, And At-2971 Series
Troubleshooting For the Diagnostics Program AT-2916T, The network adapter can be tested with the supplied diagnostics AT-2970, and program (running DOS). The diagnostics program run offline, for AT-2971 Series example, normal operation of the network adapter can not be maintained. During testing the link of the tested port will be down, for example, no data can be transferred. - Page 113 Network Adapter Card Installation Guide - Book I To test the adapter, perform the following procedure: Power OFF your computer. If the computer is still connected to the network, unplug the data cable from the network adapter’s port. Connect the network adapter as follows: For the simple test, insert the protective plugs into the ports.
- Page 114 Troubleshooting Figure 96 Diagnostic Window (1 of 5) You can follow the progress of the test in the right-hand window. Each test is displayed as it is being performed (e.g. Board Register Check). If the test is successful, the word PASSED is displayed at the end of the line and the next test is started.
- Page 115 Network Adapter Card Installation Guide - Book I Repeater Test for Copper Adapters For the AT-2916T, AT-2970, and AT-2971 Series adapters the test via wrap plug is not available. However, loopback testing may be carried out by connecting the adapter to another adapter installed in a second computer running in repeater mode (further known as the repeater computer).
- Page 116 Troubleshooting 16. Press <Enter>. When the test was successful, the message All tests passed successfully is displayed. When the test fails, the message failed is displayed. The further procedure is described in section Failure of a Test. 17. Press any key to continue. 18.
- Page 117 Network Adapter Card Installation Guide - Book I The failed message does not necessarily imply that the network adapter is faulty. If a failed message is displayed, perform the following procedure: Follow the instructions that are displayed in the window below the list of tests.
- Page 118 Troubleshooting You can: read sensor data read configuration data read and write VPD data read and write Flash EPROM data Main Program. To start the main program, proceed as follows: Boot to DOS and wait for the prompt. Insert the installation CD-ROM into the CD-ROM drive of the computer in which the network adapter is installed.
- Page 119 Network Adapter Card Installation Guide - Book I This option is automatically offered for selection if you did not select a menu item previously. Reading Sensor Data. To read sensor data, perform the following procedure: Start the main program. Refer to Main Program on page 116 for instructions.
- Page 120 Troubleshooting MAC address (MAC Addr) Port type (PMD-Type) Connector (connector) Hardware revision (HW Rev) Chip ID (Chip Id) In the Main Menu, Show Configuration changes to Hide Configuration. You can close the window by selecting Hide Configuration from the Main Menu. Other windows may be displayed while this window is still open, for example, a window shown in Figure 99 will be displayed.
- Page 121 Network Adapter Card Installation Guide - Book I Reading VPD Data. To read VPD data (Vital Product Data), perform the following procedure: Start the main program. Refer to Main Program on page 116 for instructions. Select VPD Data from the Main Menu. A submenu with the following options will be displayed: EXIT (return to the Main Menu) DISPLAY VPD DATA...
-
Page 123: At-2916T, At-2970, And At-2971 Vlan And Link Aggregation
Chapter 9 AT-2916T, AT-2970, and AT-2971 VLAN and Link Aggregation This chapter contains the following sections: Installing the Adapter on page 124 Independent use of Dual Link Ports on page 125 Virtual LAN (VLAN) Support on page 126 Link Aggregation (LAGG) Support on page 127 Driver Options on page 128... -
Page 124: Overview
Allied Telesyn provides a link aggregation driver for Windows 2000 and Windows XP. In order for the AT-2916T, AT-2970, and AT-2971 link aggregation to work, a switch with 802.3ad with LACP is required. -
Page 125: Required Files
Network Adapter Card Installation Guide - Book I Independent use of the two ports of dual link adapters is available when the Redundant Link Management Technology (RLMT) is disabled for any such adapter. Details are described in the respective section below. The package supports configuration of VLANs. -
Page 126: Installing The Adapter
Double-click on Network adapters. Select the adapter you wish to update. Right-click on the adapter and select Uninstall. To install the Allied Telesyn Network Installation Package Setup execute one of the setup files below, depending on your operating system and follow the instructions: For Windows XP \drivers\at2971_16\CPA\XP\SetupAtiNetXP.exe... -
Page 127: Independent Use Of Dual Link Ports
Independent use of the two ports of dual link adapters is available when the RLMT-functionality is disabled. RLMT can be disabled with the utility program Allied Telesyn, Inc. Network Control, which will be automatically installed along with the driver. You can start it as follows: From the desktop, select Start, Settings, then Control Panel. -
Page 128: Virtual Lan (Vlan) Support
From the desktop, select Start, Settings, then Control Panel. Double-click on Allied Telesyn, Inc. Network Control. Use the online help provided by the Allied Telesyn Network Control for general information on VLANs and learn how to add, remove, and configure them. -
Page 129: Link Aggregation (Lagg) Support
Network Adapter Card Installation Guide - Book I Link Aggregation (LAGG) Support LAGG support is available after installing or updating the sklagg.sys driver. Along with the driver itself, the Allied Telesyn Network Control is automatically installed, which can be used to add, remove, and configure TEAMs. -
Page 130: Driver Options
You can modify several options of the ATGIGxx driver in order to optimize the operation of your Allied Telesyn AT-297x Series Gigabit Ethernet Adapter. The driver options and parameters can be set with the Allied Telesyn Network Control, which is automatically installed along with the driver, as follows: From the desktop, select Start, Settings, then Control Panel. -
Page 131: At-2916T And At-297X Advanced Features
Chapter 10 AT-2916T and AT-297x Advanced Features This chapter contains the following sections: High Performance on page 130 Advanced Power Management/Wake-on-LAN on page 131 Reliability on page 132... -
Page 132: High Performance
AT-2916T and AT-297x Advanced Features High Performance The Allied Telesyn AT-2916T and AT-297x Series Gigabit Ethernet Adapters are high performance and highly reliable adapters. Best performance is reached with an AT-297x 64-bit/66 MHz bus. In full- duplex mode, wire speed can be achieved. -
Page 133: Advanced Power Management/Wake-On-Lan
Network Adapter Card Installation Guide - Book I Advanced Power Management/Wake-on-LAN The Allied Telesyn AT-2916T and AT-297x Series Gigabit Ethernet Adapters support power management as defined in the PCI Bus Power Management Interface Specification v1.1 and Network Device Class Power Management Reference Specification v2.0. The power management features are implemented according to the Advanced Configuration and Power Interface Specification v2.0. -
Page 134: Reliability
AT-2916T and AT-297x Advanced Features Reliability Link Link aggregation or trucking is a method of combining physical network links into a single logical link for increased bandwidth. With link Aggregation aggregation, it is possible to increase the capacity and availability of the communications channel between devices (both switches and end stations) using existing Fast Ethernet and Gigabit Ethernet technology. -
Page 135: Redundant Switch Failover
Windows 2000 and Windows XP. The standard requires that all links of a link aggregation group (team) are connected to the same partner (usually a switch supporting 802.3ad (LACP)). With Allied Telesyn’s link aggregation driver, one team (group of logical links) can comprise of several aggregators, which are connected to separated switches, the failover feature is utilized. -
Page 136: Parity
AT-2916T and AT-297x Advanced Features Parity The PCI bus parity is checked/generated on data paths of the received/transmit data entering/leaving the chip. This includes the PCI interface and the RAM buffer. Parity on the PCI bus is generated, checked, and reported according to the PCI specifications. Sensors The on-board sensors monitor all important voltage and the temperature on the network adapter. - Page 137 Appendix A Translated Safety and Emission Information Important: This appendix contains multiple-language translations for the safety statements in this guide. Wichtig: Dieser Anhang enthält Übersetzungen der in diesem Handbuch enthaltenen Sicherheitshinweise in mehreren Sprachen. Vigtigt: Dette tillæg indeholder oversættelser i flere sprog af sikkerhedsadvarslerne i denne håndbog.
- Page 138 Translated Safety and Emission Information Standards: This product meets the following standards. U.S. Federal Communications Commission Declaration Of Conformity Manufacture Name: Allied Telesyn, Inc. Manufacture Address: 960 Stewart Drive, Suite B Sunnyvale, CA 94085 USA Manufacture Telephone: 408-730-0950 Declares that the product:...
- Page 139 Network Adapter Installation Guide - Book I Normen: Dieses Produkt erfüllt die Anforderungen der nachfolgenden Sicherheitsnormen. Hochfrequenzstörung EN55022 Klasse B Warnung: Bei Verwendung zu Hause kann dieses Produkt Funkstörungen hervorrufen. In diesem Fall müßte der Anwender angemessene Gegenmaßnahmen ergreifen. Störsicherheit EN55024 Sicherheit Elektrische Sicherheit...
- Page 140 Translated Safety and Emission Information Normes: ce produit est conforme aux normes de sécurité suivantes : Emission d’interférences radioélectriques EN55022 Classe B Mise En Garde: dans un environnement domestique, ce produit peut provoquer des interférences radioélectriques. Auquel cas, l’utilisateur devra prendre les mesures adéquates. Immunité...
- Page 141 Network Adapter Installation Guide - Book I Sikkerhetskrav: Dette produktet oppfyller følgende sikkerhetskrav: RFI stråling EN55022 Klasse B Advarsel: Hvis dette produktet benyttes til privat bruk, kan produktet forårsake radioforstyrrelse. Hvis dette skjer, må brukeren ta de nødvendige forholdsregler. Immunitet EN55024 Sikkerhet Elektrisk sikkerhet...
- Page 142 Translated Safety and Emission Information Normer: Denna produkt uppfyller följande säkerhetsnormer. Radiostörning EN55022 Klass B Varning: Denna produkt kan ge upphov till radiostörningar i hemmet, vilket kan tvinga användaren till att vidtaga erforderliga åtgärder. Immunitet EN55024 Säkerhet Elsäkerhet TUV-EN60950, UL1950, CSA 950 Laser EN60825 Detta är en “KLASS 1 LYSDIODPRODUKT”...
Need help?
Do you have a question about the AT-2400 Series and is the answer not in the manual?
Questions and answers