Phonak Dynamic SoundField User Manual
Simply redefines classroom amplification
Hide thumbs
Also See for Dynamic SoundField:
- Installation instructions (4 pages) ,
- Installation instructions manual (7 pages)
Table of Contents
Advertisement
Advertisement
Table of Contents
Troubleshooting

Related Manuals for Phonak Dynamic SoundField


Summary of Contents for Phonak Dynamic SoundField
- Page 1 www.DynamicSoundField.com...
- Page 2 User Guide...
-
Page 3: Table Of Contents
Contents 1. Welcome 2. Installation 3. General recommendations 4. Equipment and accessories 5. Important Dynamic SoundField figures 5.1 inspiro operating and charging time 5.2 Operating range 5.3 Transmission technology 6. Controls 6.1 On the inspiro transmitter 6.2 On the DigiMaster 5000 loudspeaker 6.3 The Status Indicator of the DigiMaster 5000 15... - Page 4 7.4 Wearing EasyBoom 7.5 Switching ON inspiro 7.6 Activating the key pad lock 7.7 Switching ON DigiMaster 5000 7.8 Muting the microphone 8. Adjusting the volume of Dynamic SoundField 9. Connecting a Smartboard 10. DynaMic and accessories 10.1 Controls 10.2 Charging DynaMic 10.3 Vibration alarm indication...
- Page 5 Content 12. Troubleshooting inspiro 13. Troubleshooting DynaMic 14. Dynamic SoundField pairing instructions 15. Important notices 16. Service and warranty 17. Declaration of conformity 18. Information and explanation of symbols 19. Personal notes...
-
Page 6: Welcome
Dynamic SoundField significantly improves the listening and learning performance of schoolchildren, while also saving the voices of the teachers. Dynamic SoundField is brought to you by Phonak. Phonak is the world leader in hearing and communication technology, innovation and reliability, based in Switzer- land. - Page 7 1. Welcome Further resources To find out more about Dynamic SoundField in general, we recommend visiting the following websites: www.DynamicSoundField.com These Dynamic SoundField pages feature useful product information, movies, downloads and more. www.phonak.com This is the Phonak home page. Go to the product section and click on Dynamic SoundField.
-
Page 8: Installation
2. Installation The installation procedure of the Dynamic SoundField is described in the separate installation instructions which is available online. Please check the green download section on www.DynamicSoundField.com... -
Page 9: General Recommendations
3. General recommendations 1. Activate the inspiro transmitter‘s KeyPad lock 2. Speak in a natural voice into the EasyBoom microphone 3. Do not increase your voice level if the surrounding noise increases. The transmitter‘s Dynamic features will increase your voice automatically 4. -
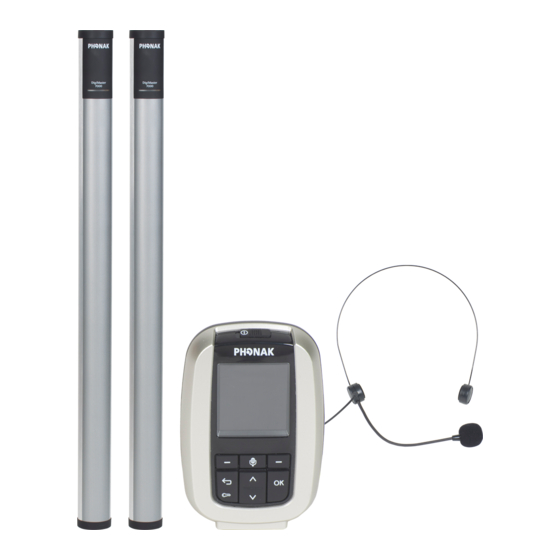
Page 10: Equipment And Accessories
4. Equipment and accessories inspiro EasyBoom microphone inspiro wearing options: Belt clip and lavalier cord Audio cable (1 m / 3 feet) USB charging unit Home and travel case... - Page 11 4. Equipment and accessories DigiMaster 5000 loudspeaker Wall fi xation Power supply Optional: Stand Optional: Audio cable (3 m /10 feet)
-
Page 12: Important Dynamic Soundfield Figures
Charging time for an 80% charge: approx. 1 hour Charging time for a 100% charge: approx. 2 hours 5.2 Operating range Dynamic SoundField has been designed for use in normal-sized classrooms. *Valid for inspiro running the application mode “FM and SoundField”... -
Page 13: Transmission Technology
The digital signal sent from the transmitter to the loudspeaker cannot be overheard by other equipment. The number of active Dynamic SoundField systems in a school building is unlimited. Dynamic SoundField systems cannot disturb each other. Automatic frequency hopping eliminates interference issues, allowing Dynamic SoundField to coexist alongside a school‘s WiFi and Bluetooth networks. -
Page 14: Controls
6. Controls 6.1 On the inspiro transmitter inspiro ON / OFF slider Color LCD 01.10.2008 06.07.10 01:57pm 01:57pm Soft Keys Keypad lock key Rebecca Woods Monitor Vol Down Vol Up Sync Microphone mute key 3.5 mm audio input mini-USB for charging... -
Page 15: On The Digimaster 5000 Loudspeaker
6. Controls Button to attach the belt clip and the lavalier Cable wrapper 6.2 On the DigiMaster 5000 loudspeaker Loudspeaker base ON / OFF switch Power socket 3.5 mm audio input AUDIO 3.2A... -
Page 16: The Status Indicator Of The Digimaster 5000
Loudspeaker top mini-USB 6.3 The Status indicator of the DigiMaster 5000 Status indicator The status indicator on the DigiMaster 5000 loudspeaker provides immediate feedback to the teacher. - Page 17 6. Controls Constant blue light: Standard operating mode The inspiro transmitter and the DigiMaster 5000 loudspeaker are ON, paired and working in normal operating mode. Blue blinking light: Power-saving stand-by mode If the inspiro transmitter has been switched OFF, DigiMaster 5000 recognizes this immediately and switches itself automatically to power-saving stand-by mode.
- Page 18 Yellow blinking light: inspiro not paired The yellow blinking light appears if no inspiro has been paired. Check chapter 14. Green blinking light: Firmware upgrade in process Appears when a firmware upgrade is in process via the mini-USB connection at the top of the DigiMaster 5000 loudspeaker.
-
Page 19: Getting Started
7. Getting Started If Dynamic SoundField has been installed according to the separate installation instructions, the DigiMaster 5000 loudspeaker has been either mounted on the wall or on the stand, and the loudspeaker is connected to the mains. In addition, your inspiro has already been paired with the DigiMaster 5000 loudspeaker. -
Page 20: Charging Inspiro
7.1 Charging inspiro inspiro contains a built-in re-chargeable state-of-the art lithium polymer battery with fast-charge capability. A fully-discharged battery will charge to 80% in one hour and 100% in 2 hours. Select an easily accessible socket outlet and plug the charging unit into the socket outlet. - Page 21 7. Getting Started Use only the original Phonak charging unit for the inspiro. The elements within the battery symbol flash during charging. The battery cannot be over-charged. If the charging unit is removed from the inspiro, 06.07.10 01:57pm the segments in the battery symbol show the actual capacity.
-
Page 22: Low Battery Alarms
7.2 Low battery alarms inspiro provides an automatic vibration alarm to signify if the battery is low. Approximately 1 hour before battery is empty: The vibrating alarm is activated. Check the message on the LCD and follow the instructions. Approximately 15 minutes before battery is empty: If inspiro has not been charged after the first alarm, the second vibrating alarm is automatically activated before the battery is completely exhausted. -
Page 23: Wearing Inspiro
7. Getting Started 7.3 Wearing inspiro inspiro can either …or around the neck be worn on the belt by using the neck-loop. by using the clip…... - Page 24 Attaching the clip to the inspiro “click” Attach the clip to the button on the back of the inspiro. Make sure the clip is secure. Fix the clip to the belt or trousers. Make sure the clip is secure.
- Page 25 7. Getting Started The clip can also be fixed to the belt or trousers before the inspiro is attached. Make sure the clip is secure. To remove the clip from the inspiro, press the button on the clip and carefully remove the clip.
- Page 26 Attaching the neck-loop to the inspiro Attach the neck-loop to the button.
-
Page 27: Wearing Easyboom
7. Getting Started 7.4 Wearing EasyBoom EasyBoom is the microphone for Dynamic SoundField. If inspiro is in “SoundField” or “SoundField+FM” application mode, an error message will appear if other microphones are used. EasyBoom is a comfortable, easy-to-use and robust boom microphone, ideal for use in classrooms. - Page 28 Make sure the head of the microphone is well positioned, as depicted opposite (A). If required you can easily bend the boom part (B). Fix the clip on your clothes as depicted and make sure the cable is not stretched between the clip and the ear, or the clip and the inspiro transmitter.
-
Page 29: Switching On Inspiro
7. Getting Started 7.5 Switching ON inspiro To switch ON, push the slider to the left until the green mark appears and the LCD is illuminated. To save power, the backlight of the inspiro LCD is switched OFF after a certain time. Press any button to activate the LCD backlight. -
Page 30: Activating The Key Pad Lock
7.6 Activating the key pad lock 06.07.10 01:57pm It is recommended to activate the key pad lock Vol Down Vol Up whenever possible. To activate the key pad lock, go to the highest menu level (shown right), press the key showing the key symbol, then press OK. -
Page 31: Switching On Digimaster 5000
7. Getting Started 7.7 Switching ON DigiMaster 5000 3.2A AUDIO After having switched inspiro ON, check whether the power adapter of the DigiMaster 5000 is properly plugged into the mains and the loudspeaker. Then switch ON the DigiMaster 5000. The DigiMaster 5000 shows the constant blue light in the status indicator. - Page 32 If the inspiro has not been paired with the DigiMaster 5000, the status indicator will show a blinking yellow light. See the pairing procedure on page 60. Status indicator...
- Page 33 7. Getting Started Talking Before you start talking to your students, make sure of the following: the EasyBoom microphone is properly positioned (see page 26) the inspiro is turned ON (see page 28) and the EasyBoom microphone is active, not muted (see page 33) We also recommend activating the Keypad lock (see page 29).
-
Page 34: Muting The Microphone
7.8 Muting the microphone The inspiro’s microphone can be muted simply by pressing the microphone key on the device. If you have forgotten to activate the microphone, inspiro will warn you with a vibrating alarm after 15 minutes (see also page 16). 06.07.10 01:57pm Vol Down... -
Page 35: Adjusting The Volume Of Dynamic Soundfield
8. Adjusting the volume of Dynamic SoundField Dynamic SoundField‘s volume adapts itself automatically to the surrounding noise level. Therefore, it is not required to adjust the volume manually. Nevertheless, if you want to adjust it for any reason, use the soft keys on the inspiro to wirelessly adjust the volume of the loudspeaker. -
Page 36: Connecting A Smartboard
DigiMaster 5000 loudspeaker. (Consult the user documentation from the Smartboard for this). Phonak offers a 1 m / 3 foot audio cable and a 3 m /10 foot audio cable. If you need a longer cable please visit your local store. -
Page 37: Dynamic And Accessories
10. DynaMic and accessories DynaMic is supplied with the following accessories: Desk stand Clamp 3/8”, 5/8” Colored rings (for easy microphone identification) These accessories can be ordered separately: DynaMic microphone Desk stand with clamp Colored rings (red, yellow, green) Charging unit Replacement microphone head... - Page 38 General: Operates only with inspiro on the MultiTalker Network Length: 21 cm (8 inches) Antenna length: 15 cm (6 inches) Weight: 110 g Operating time and charging: Operating time if the battery is fully charged: up to 10 hours Charging time for 80% charge: approx.
-
Page 39: Controls
10. DynaMic and accessories 10.1 Control Slider OFF/ MUTE /ON The slider puts DynaMic in one of its three modes. RESET button This allows DynaMic to be reset. The parameters stored are not affected by this operation. Use a pen to press the button. Built-in vibration alarm The vibration alarm provides information on the status of the battery and operation. -
Page 40: Charging Dynamic
FM Antenna mini-USB interface Interface for charging and programming. The LED indicates the following: battery status charging error states 10.2 Charging DynaMic DynaMic contains the same re-chargeable, state-of- the-art, fast-charging lithium polymer battery as inspiro. The operating time of this battery is up to 10 hours, depending on how much the microphone is used. - Page 41 10. DynaMic and accessories Use only the original Phonak charging unit for inspiro / DynaMic. To simultaneously charge your inspiro and DynaMic we recommend using the twin charger. Select an easily accessible power outlet and plug the charging unit into the socket.
- Page 42 During charging the LED flashes two short green pulses every 5 seconds. When charging is complete, the LED displays a constant green light. We recommend fully charging DynaMic. The battery cannot be over-charged. Battery status indication DynaMic activates an automatic vibration alarm when its battery level is low.
-
Page 43: Vibration Alarm Indication
10. DynaMic and accessories Approx. 15 minutes before the battery is empty, DynaMic must be charged immediately. At his time the LED displays 10 orange flashes and the vibration alarm is activated. If the battery is not charged immediately, DynaMic’s LED displays an additional 10 flashes before switching OFF automatically. -
Page 44: Switching On Dynamic
10.4 Switching ON DynaMic DynaMic is a passaround microphone designed for use with inspiro in the MultiTalker Network. It is not a standalone transmitter. To switch ON DynaMic, follow the steps below. inspiro and DynaMic are both OFF Switch ON inspiro: push the slider to the left until the green mark appears and the LCD is activated (see page 28). - Page 45 10. DynaMic and accessories Set-up the MultiTalker Network. Initiate your MultiTalker Network by pressing “OK”. Start DynaMic by pushing the slider from OFF to ON during the auto pairing time window of 8 seconds. RESET MUTE Rebecca Woods After the initiation is complete, the name of DynaMic appears.
- Page 46 After switching ON, the LED of the microphone turns OFF to save power. On the initiating inspiro‘s list of participants the microphone can be recognized. After pairing DynaMic with inspiro it is recommended to activate the key pad lock of inspiro whenever possible. MUTE: When DynaMic is turned ON it is possible to mute the microphone.
-
Page 47: Using Dynamic
Holding DynaMic in the hand Wearing the remote mic with a neck-cord – not supplied by Phonak Using a floor stand – not supplied by Phonak Passaround microphone DynaMic can be passed from one speaker to the next. Make sure DynaMic: Is recognized in the MultiTalker Network by the initiator inspiro. - Page 48 Speak into the microphone at relatively close range: 5 cm (2 inches). When speaking do not cover: the head of the microphone the antenna Colored rings With the red, blue and green rings it is possible to personalize your DynaMic for quick identifi- cation.
- Page 49 10. DynaMic and accessories DynaMic DataLogging DynaMic automatically logs its usage times. This information is saved every 15 minutes. The first log entry is stored after using DynaMic for 15 minutes. The usage data log contains information such as the device’s name, timestamp, MTN mode etc.
-
Page 50: The Multitalker Network In School
11. The MultiTalker Network in school The MultiTalker Network One or more inspiro/DynaMic transmitters can participate in a MultiTalker Network (up to ten transmitters in total). A maximum of nine DynaMic microphones can be used on the MultiTalker Network (MTN). The MultiTalker Network is available in the inspiro’s Standard Operating Mode. -
Page 51: Initiating A Multitalker Network
11. The MultiTalker Network in school Diagram of the MultiTalker Network 01.10.2008 06.07.10 01:57pm 01:57pm Rebecca Woods Monitor Vol Down Vol Up Sync The initiating inspiro displays a list of the other transmitters in the MultiTalker Network. 11.1 Initiating a MultiTalker Network MultiTalker Network initiation should be performed in the classroom before the lesson begins. - Page 52 Make sure you have all the inspiro and DynaMic transmitters you plan to include in the network in front of you on the desk. Ensure all these transmitters are switched OFF. Take the main teacher’s or main speaker’s inspiro and switch it ON. In this inspiro, select MultiTalker Network and then Set up network.
-
Page 53: How To Use A Multitalker Network
11. The MultiTalker Network in school 11.2 How to use a MultiTalker Network The inspiro that set-up (initiated) the network has first priority; all other transmitters (inspiro/DynaMic) have second priority. The teacher with first priority can interrupt any teacher or student that has second priority; a second priority teacher or student can only take over during the speech pauses of the first priority teacher. - Page 54 If you are using an inspiro that just joined a network, you can always leave the network by selecting Stop MultiTalker Network. Your inspiro will then be set to single teaching mode, but all of the other inspiro transmitters in the MultiTalker Network will remain in MultiTalker Network mode.
- Page 55 11. The MultiTalker Network in school Practical tips The MultiTalker Network setting is stored in the inspiro transmitters. If the inspiro and DynaMic transmitters have been switched OFF in MultiTalker Network mode, e. g. before lunch, when switched back ON again after lunch MultiTalker Network mode can be selected by simply turning on inspiro and pressing Continue.
-
Page 57: Troubleshooting Inspiro
12. Troubleshooting inspiro Problem The inspiro cannot be switched ON. Poor speech intelligibility. Speaker’s voice is inaudible even though the inspiro is turned ON. inspiro does not respond to commands. - Page 58 Most probable cause Solution The battery is run down. Charge the inspiro for at least two hours. The microphone is not Move the microphone positioned properly. closer to the speaker’s mouth. The microphone mute has Check the inspiro’s LCD been activated or the display and press the hearing device has not microphone mute key in...
-
Page 59: Troubleshooting Dynamic
13. Troubleshooting DynaMic Problem The DynaMic cannot be switched ON. Poor speech intelligibility. Speaker’s voice is inaudible even though DynaMic is turned ON. DynaMic is not responding to commands. - Page 60 Most probable cause Solution The battery is empty. Charge DynaMic for at least two hours. The microphone has not Move DynaMic closer to been positioned properly. the speaker’s mouth. DynaMic’s antenna or cap Uncover DynaMic’s are partially covered. antenna and cap. The colored rings are Move DynaMic’s colored covering the acoustic...
-
Page 61: Dynamic Soundfield Pairing Instructions
14. Dynamic SoundField pairing instructions In case you need to re-pair the inspiro transmitter with the DigiMaster 5000 loudspeaker, proceed as follows: A Take inspiro and make sure it is charged (see page 11). Switch ON inspiro. If the battery symbol appears, press the two buttons shown (below-left) simultaneously. - Page 62 DigiMaster 5000 has been paired. The LED color of the DigiMaster 5000 will now display a constant blue light. This blue light shows that the Dynamic SoundField system is ready for operation. C Switch OFF both inspiro and the DigiMaster 5000.
-
Page 63: Important Notices
Dynamic SoundField system in the ideal manner. Do not use your Dynamic SoundField system in a place where it is prohibited to use electronic devices. If in doubt, please ask the person in charge. - Page 64 Do not use water or other liquids to clean your Dynamic SoundField system. Use only original Phonak accessories. Use only the original Phonak charger for inspiro and DynaMic. Your Dynamic SoundField system should only be repaired by an authorized service center.
-
Page 65: Service And Warranty
16. Service and warranty Phonak provides a manufacturer’s limited warranty for your Dynamic SoundField. This covers all manu- facturing and material defects. Problems with your Dynamic SoundField arising from improper handling or care and repairs made by an unauthorized party are not covered by the warranty. -
Page 66: Declaration Of Conformity
Directive 1999/5/EC. To obtain a copy of the Declaration of conformity, please contact the local Phonak AG representative whose address can be taken from the list of Phonak distributors worldwide. These devices comply with part 15 and part 95 of the FCC rules and with RSS 210 of Industry Canada. - Page 67 (AMTS) network control communications. Two way voice communications and all other types of uses not mentioned above are expressly prohibited. Warning: Changes or modifications made to this equipment not expressly approved by Phonak may void the user’s authority to operate the equipment.
-
Page 68: Information And Explanation Of Symbols
18. Information and explanation of symbols The CE symbol is confi rmation that this Phonak product meets the requirements of the R&TTE Directive 1999/5/EC on Radio and Telecom- munication Terminal Equipment. The alert sign means that potential restrictions on its use are applicable in one or more EU Member States. - Page 69 18. Information and explanation of symbols The symbol with the crossed out disposal bin indicates that these products shall not be treated as household waste. Please hand over your old or unused product to the applicable collection point for the recycling of electrical and electronic equipment or bring your old product to your hearing care professional...
- Page 70 Operating These products have been designed conditions for trouble-free operation without restrictions when used as intended, unless otherwise stated in this user guide. Transportation Temperature should not exceed and storage limits of –20°/60° Celsius at a conditions relative air humidity of 65% for extended periods during trans- portation and storage.
-
Page 71: Personal Notes
Notes...
Need help?
Do you have a question about the Dynamic SoundField and is the answer not in the manual?
Questions and answers