Table of Contents
Advertisement
Advertisement
Table of Contents
Troubleshooting

Related Manuals for High End Systems Hog iPC

Summary of Contents for High End Systems Hog iPC
- Page 1 Handbook ® ™ Version 1.4.1...
-
Page 2: Contacting High End Systems
® Contacting High End Systems U.S. and the Americas Sales Department High End Systems, Inc. 2105 Gracy Farms Lane Austin, TX 78758 USA voice: 512.836.2242 fax: 512.837.5290 Toll Free: 800.890.8989 Customer Service High End Systems, Inc. 2105 Gracy Farms Lane Austin, TX 78758 USA voice: 800.890.8989... -
Page 3: Trademarks
Information and specifications in this document are subject to change without notice. Certain specifications may be the result of future software releases. High End Systems, Inc. assumes no responsibility or liability for any errors or inaccuracies that may appear in this manual. -
Page 4: Declaration Of Conformity
Declaration of Conformity According to ISO/IEC Guide 22 and EN45104 Manufacturer's name: High End Systems, Inc. Distributor's name: High End Systems, Inc. Distributor's address: 2105 Gracy Farms Lane, Austin, Texas, 78758 Declares that the product: Product Name: Hog iPC All Product Number: ALL... -
Page 5: Fcc Information
Umständen gegen die diesbezüglichen Sicherheitsnormen verstoßen. Avvertenza Sulla Modifica Del Prodotto I prodotti di High End Systems sono stati progettati e fabbricati per soddisfare i requisiti delle normative di sicurezza statunitensi ed internazionali. Qualsiasi modifica al prodotto potrebbe pregiudicare la sicurezza e rendere il prodotto non conforme agli standard di sicurezza pertinenti. -
Page 6: Warranty Information
Any Product unit or parts returned to High End Systems must be packaged in a suitable manner to ensure the protection of such Product unit or parts, and such package shall be clearly and prominently marked to indicate that the package contains returned Product units or parts and with an RMA number. -
Page 7: Table Of Contents
The Hog® iPC™ Console ................. 3 Features......................4 DMX Control Capability .................. 4 Hardware ....................4 Connectivity ....................4 Software ..................... 5 Hog iPC Console and Optional Accessories ............. 6 Terminology....................6 Specifications....................7 Mechanical ....................7 Console ....................7 Road Case ....................7 System Weight in Roadcase ................ - Page 8 Setting Monitor Controls in the OSD Menu System .......... 31 OSD Control Options ................... 31 Monitor Display Angle ................. 31 Using Hog® 3PC Software Differences Between Hog iPC and Wholehog 3 Consoles ......35 Networking ....................35 Patching ....................35 Trackball Preferences .................. 35 Launching Hog 3PC ..................
- Page 9 MIDI ......................40 Networking with Wholehog 3 shows ............40 Using Hog® 2PC Software Hog 2PC Backwards Compatibility..............43 Differences Between Hog iPC and Wholehog 2 Consoles ......44 Functional Differences ................. 44 Frontpanel Component Differences ..............44 Encoder Wheels ..................44 Trackball ....................
- Page 10 Cleaning the iPC Console and Touchscreens..........63 System Restore Restoring the Hog iPC System Files ............. 67 Before You Begin ..................67 Using the Hog iPC System Restore CD ............67 Upgrading Application Files and Configuration..........69 Upgrading Applications ................69 Restoring Touchscreen Configuration ............. 69 Safety Information Safety Information ..................
-
Page 11: Product Overview And Specifications
Product Overview and Specifications... -
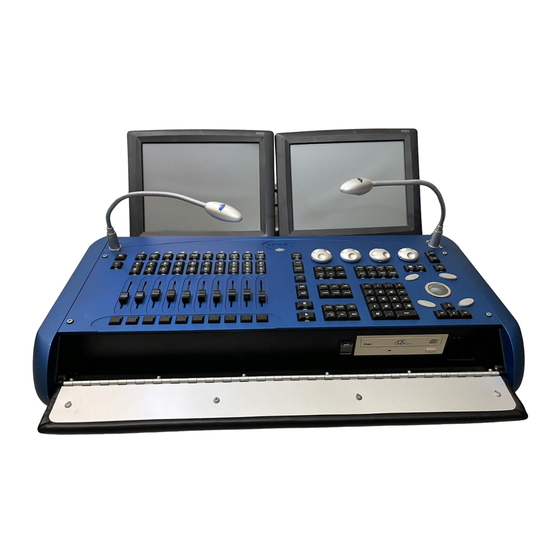
Page 13: The Hog Ipc Console
It is designed to take full advantage of the Wholehog 3 operating system’s advanced features and functionality while being backwards compatible with the discontinued, but widely-used Wholehog 2 operating system. The Hog iPC console houses a PC motherboard and hard drive optimized to operate with the ® Hog 3PC application. The Windows XP embedded (XPe) operating system —... -
Page 14: Features
Product Overview and Specifications Features Note that some of the following features will not be available on the Hog iPC console when ® operating the classic Hog 2PC software. In addition, some features may be the result of future Hog 3PC software releases. -
Page 15: Software
• Connectivity with ESP Vision and WYSIWYG via Ethernet • Wired and wireless networking ability with multiple Hog 3PC computers, Hog iPC consoles, and Wholehog 3 console systems • Remote Focus capabilities when networked with a computer or tablet PC running Hog 3PC software •... -
Page 16: Hog Ipc Console And Optional Accessories
Terminology The following describes the terminology used throughout this Handbook: Key denotes a physical key on the Hog iPC console. Button refers to a “soft key” on the graphical interface for Hog 3PC or Hog 2PC software. Hog iPC Handbook... -
Page 17: Specifications
781mm x 641mm x 311mm System Weight in Roadcase w/Aspen Monitors: 172 lbs (78 kg) w/ELO Monitors: 166 lbs (52.6 kg) 29.8" (757mm) 10.0" 10.0" (254 mm) (254mm) Hog iPC Console 10.0" 10.0" (254mm) (254mm) 5.0" (127mm) 15.2" Aspen Monitor Optional ELO Monitor (386mm) 23.8"... -
Page 18: Electrical
• Input voltage 100 –240 vac Touchscreen External Power Supply • Input voltage 100 to 240 vac • Input frequency 47 to 63 hz • Output voltage 12 vdc • Output line and load regulation +/- 2% Hog iPC Handbook... -
Page 19: System Setup
System Setup... -
Page 21: Setting Up The Console
RMA number. Using the Roadcase The Hog iPC roadcase is designed to store, and transport the Hog iPC control system including console, monitors and cabling. It also functions as a platform for the configured Hog iPC system. -
Page 22: Hog Ipc Back Panel Connections
Some additional USB devices such as keyboards, mice, and printers will also function with the Hog iPC console. Devices other than those listed above will not be recognized by the Hog iPC console. Check the following table for specific USB device type support. Plug and play devices listed below can be connected or reconnected without restarting the console. -
Page 23: Attaching An Optional Third Monitor
Attaching an Optional Third Monitor The Hog iPC console supports the addition of a 3rd monitor attached to the DVI port on the back of the console (see Hog iPC Back Panel Connections on page 12). To connect a VGA monitor, obtain a DVI to VGA adaptor from a computer store. -
Page 24: Starting The Console
Hog PC software. • A right click on the mouse stops the animation and launches the Hog iPC Configuration Panel to allow you to choose between the Hog 3PC or Hog 2PC applications. Once assigned, that version becomes the default until it is changed again. -
Page 25: Using The Hog Ipc Configuration Panel
Using the Hog iPC Configuration Panel... -
Page 27: Accessing The Hog Ipc Configuration Panel
The Hog iPC Configuration Panel is the central application for interfacing with the unique elements of the Hog iPC system. This panel provides start-up Hog PC version assignment and configuration, file management, CD burning, and software upgrading as well as hardware configuration and diagnostics. -
Page 28: Hog Ipc Console Options
You can select either for operation on the Hog iPC console. The button on the lower right hand corner of the Hog iPC Configuration Panel will change to say Launch Hog 3PC or Launch Hog 2PC. Press this button to apply the configuration changes and launch the application. -
Page 29: Hog 2Pc Option: Auto Launch
Using the Hog iPC Configuration Panel Hog 2PC Option: Auto Launch A single click on the Browse button lets you locate a Hog 2PC show folder for Auto Launch. Once you select the file, it will appear in the Select Auto Launch Folder field and the Auto Launch button will show a check mark. -
Page 30: File Management
Using the Hog iPC Configuration Panel File Management The File Management screen provides access to two folders on the local hard drive, the CD ROM drive, and any information on external drives attached to the Hog iPC console. The two default folders are: •... - Page 31 Press the Remove USB button at the top right corner of the window before removing any USB device attached to the Hog iPC. A confirmation dialog will indicate when it is safe to remove the USB device.
-
Page 32: Burn Cd
Burn CD This screen allows you to select Show folders and burn them to a recordable CD. You can select Show folders (and any sub folders) from the two system folders on the Hog iPC console or any connected external drives. -
Page 33: Upgrade Options
Using the Hog iPC Configuration Panel Upgrade Options The Hog iPC ships with the latest versions of Hog 3PC, Hog 2PC and the Hog iPC Configuration Panel software. As new versions become available, they can be downloaded from the High End Systems website. -
Page 34: Hardware Options
Using the Hog iPC Configuration Panel Hardware Options Hardware Configuration The Hog iPC console’s hardware configuration options include setting the date and time, calibrating the touchscreen monitors, and enabling the optional third monitor Setting Time and Date Touching the Change Date/Time button... -
Page 35: Touchscreen Options
The default monitors shipped from the factory with the console are pre- labeled accordingly. Note: This is the only calibration routine intended for use with the Hog iPC touchscreens. Other Touchscreen Calibration commands within the Hog 2PC application do not function with the Hog iPC console’s touchscreens. -
Page 36: Monitor 3
DVI port and its USB is connected, then it will appear in the touchscreen box as device 3. When a 3rd monitor is enabled in the Hog iPC Configuration Panel for use with Hog 3PC, no further configuration is required within Hog 3PC. -
Page 37: Hog Ipc Information
Hog iPC Information This tabbed section displays current system information. Software Version numbers for Hog 3PC, Hog 2PC, and the Hog iPC Configuration Panel are all displayed. In addition, you can find information about the installed PC and Windows XPe operating systems. -
Page 38: Aspen Monitor Controls
Aspen Monitor Controls A screen resolution of 800 x 600 at 60-75 Hz is factory set on each touchscreen for optimum performance with the Hog iPC console. No other resolutions are supported on the Hog iPC console. Set other monitor controls in the On-Screen Display (OSD) menu. All adjustments you make to the controls are saved in monitor’s RAM to avoid having to reset them every time the... -
Page 39: Osd Menu And Function
Using the Hog iPC Configuration Panel OSD Menu and Function The complete OSD Menu is shown in the table below. The Main Menu icon for each menu group is shaded, and the individual functions within the group follow. To access the OSD Menu, push the MENU button.Use the ENTER button to select a highlighted menu, and to move between... -
Page 40: Elo Monitor Controls
ELO Monitor Controls A screen resolution of 800 x 600 at 60-75 Hz is factory set on each touchscreen for optimum performance with the Hog iPC console. No other resolutions are supported on the Hog iPC console. Set other monitor controls in the On-Screen Display (OSD) menu. All adjustments you make to the controls are saved in monitor’s RAM to avoid having to reset them every time the... -
Page 41: Setting Monitor Controls In The Osd Menu System
Using the Hog iPC Configuration Panel Setting Monitor Controls in the OSD Menu System To navigate to a OSD option Press the MENU button to display the OSD Menu. Press the UP button or the DOWN button to navigate to a OSD control option. - Page 42 Using the Hog iPC Configuration Panel Hog iPC Handbook...
-
Page 43: Using Hog 3Pc Software
Using Hog 3PC Software ®... -
Page 45: Differences Between Hog Ipc And Wholehog 3 Consoles
Wholehog 3 operating system console, but NOT compatible with Wholehog 2 operating systems (such as Hog 2PC). Although the front panel of the Hog iPC console is very similar to the Wholehog 3 console, the capabilities vary in some specific ways. -
Page 46: Launching Hog 3Pc
Working with Hog 3PC Show Files Creating All Hog 3PC shows stored on the Hog iPC computer are stored in the Hog 3PC shows folder. You can create new sub-folders using the Hog iPC Configuration Panel's File Management tab or within the Hog 3PC's new show window. -
Page 47: Backing Up
Press OK. A copy of your show will be saved with _bckf appended to its file name. The backup file can then be burned to CD or copied to an external drive using the Hog iPC Configuration Panel and transferred to another Hog 3PC system or Wholehog 3 console with no concerns about corruption of the show file. -
Page 48: Configuring External Usb Dmx Widgets With Hog 3Pc
Configuring External USB DMX Widgets with Hog 3PC The Hog iPC console running Hog 3PC software can support up to eight universes. Four are internal to the console. You can connect up to four external USB DMX widgets (one universe each) or one USB DMX Super Widget (four universes) to add additional universes. -
Page 49: Usb Playback Wings
To configure a wing to a playback bar, click on the box associated with the playback bar and select the wing from the list of serial numbers that appears. Wholehog 3 Expansion Wings will appear with their serial number followed by a display number. Hog iPC Handbook... -
Page 50: Midi And Linear Timecode
This can be useful when working offline. MIDI and Linear Timecode The Hog iPC console contains a SMPTE input as well as MIDI in/out/thru. MIDI and SMPTE are both automatically configured with the Hog iPC hardware. See the Wholehog 3 User Manual for information on how to activate these features within the Wholehog 3 operating system. -
Page 51: Using Hog 2Pc Software
Using Hog 2PC Software ®... -
Page 53: Hog 2Pc Backwards Compatibility
Using Hog® 2PC Software Hog 2PC Backwards Compatibility In addition to operating optimally with Hog 3PC software, the Hog iPC console is backwards compatible with the classic Hog 2PC application. When combined with the Hog iPC console’s internal hardware, the Hog 2PC application provides four universes of DMX output (expandable to seven), one SMPTE input, and MIDI in/out/thru capabilities. -
Page 54: Differences Between Hog Ipc And Wholehog 2 Consoles
MIDI Notes output (MIDI Notes input and MIDI Show Control input and output is supported) Frontpanel Component Differences Because the Hog iPC console is designed for use with Hog 3PC, there are several programming and playback Frontpanel differences when running Hog 2PC on the Hog iPC console. -
Page 55: Key Functionality
— Press assert (on its own) to assert the currently chosen master. — Hold a choose key and press assert to assert that master without choosing it. Playback Faders The Hog iPC console's faders are arranged in the same order as the Hog 2PC on-screen Frontpanel: •... -
Page 56: Launching Hog 2Pc
Using Hog® 2PC Software Launching Hog 2PC The Hog iPC Configuration Panel allows you to set the Hog iPC console to launch the Hog 2PC application, see Start-up OS on page 18. The following launch screen will appear when the Hog 2PC application opens. -
Page 57: Configuring External Usb Dmx Widgets With Hog 2Pc
DMX outputs that a Wholehog 2 console supports when fully ‘overdriven’. The first four ports are already assigned to the internal outputs of the Hog iPC console and can not be reconfigured. They appear “greyed-out” in the Config window. Widgets can be configured on Ports 2b, 3b and 4b. -
Page 58: Configuring Usb Playback Wings With Hog 2Pc
Click on OK to confirm the selection. The controls on the external “Rock” Playback Wing operate in a similar manner to those on the Hog iPC console except that all ten faders are used as playback masters, giving a total of 18 playback masters. -
Page 59: Using An Optional 3Rd Monitor With Hog 2Pc
A new window will open and can be dragged to the 3rd monitor if desired. Note: When using the 3rd monitor with Hog 2PC, you should disable the default positions button in the Start-Up OS tab of the Hog iPC Configuration Panel prior to launching Hog 2PC. Otherwise the Hog 2PC window positions will return to the Hog iPC console’s two... -
Page 60: The Usb Device Status Panel
'not active', green indicates 'operating' and red indicates 'error'. The first four outputs will always be active on the Hog iPC console and relate to the internal DMX outputs. The other three become active as USB DMX Widgets or Super Widgets are connected and configured. -
Page 61: Working With Hog 2Pc Show Files
The show will be saved to the folder you chose at start-up. You can switch between saving or loading from the Hog iPC hard drive or an external USB drive by changing the show folder between the external drive and a folder on the Hog iPC console. -
Page 62: Printing To File
Wholehog 2 console. Any folder that is not recognized as a valid Wholehog 2 compatible show file, will not be recognized by the Hog iPC Configuration Panel or Hog 2PC. CAUTION: Altering or changing the hierarchy of any of the files within a Show file folder will corrupt the show file. -
Page 63: Advanced Operations
When this function is disabled, Hog 2PC will recall the last position of the Hog 2PC screens. The Hog 2PC screen positions are locked on the Hog iPC console. To unlock them, right click on a blue portion of the Hog 2PC Frontpanel and select “Lock Position”. Once screen positions are unlocked, you can move them on the monitor using one of the following methods: •... -
Page 64: Restoring Default Window Positions
If the Hog 2PC screens are in undesirable locations or missing when Hog 2PC is launched, select the Default Positions button in the Hog iPC Configuration Panel's Start-up OS tab to display a checkmark. This causes the Hog 2PC screens to restore factory window position settings whenever the Hog 2PC is launched. -
Page 65: Hog 2Pc Keyboard Shortcuts
Return/ Enter Load Full Main Go Minus (-) Main Stop Next Move Ctrl Next Page Plus (+) Record Numlok Release Setup Skip Down Skip Up Slash (/) TryQ Thru * or X Undo Toggle Cursor Func. \ Update Hog iPC Handbook... - Page 66 Using Hog® 2PC Software Hog iPC Handbook...
-
Page 67: Maintenance And Troubleshooting
Maintenance and Troubleshooting... -
Page 69: Basic Hardware Troubleshooting
(Wholehog 3 or Wholehog 2) you are using. If you are experiencing trouble with your Hog iPC console, refer to the following table. If the problem persists, contact High End Systems Support at 800.890.8989 or support@flyingpig.com. -
Page 70: Troubleshooting Touchscreen Problems
Changing Window Positions on page 53. • Check that the 3rd monitor is properly attached and turned on. • Enable the 3rd monitor in the Hog iPC Configuration Panel and A 3rd monitor is connected but not functioning select a resolution. -
Page 71: Hog Ipc Console Frequently Asked Questions
Can the Hog iPC console running Hog 3PC software connect directly to a Wholehog 3 DP2000 or Wholehog 3 Input/Output Processor? The Hog iPC console will NOT connect directly to a Wholehog 3 DP2000 or Wholehog 3 Input/ Output Processor. However when networked as a client to a Wholehog 3 console, the Hog iPC console may access network devices connected to the Wholehog 3 console. -
Page 72: Hog 3Pc Application
What else does the Hog iPC Configuration Panel do? The Hog iPC Configuration Panel enables you to manage files stored on the Hog iPC console, burn files to CD, update Hog 3PC, Hog 2PC, and Hog iPC software as well as perform diagnostic functions as needed. -
Page 73: Hog 2Pc Application
Maintenance and Troubleshooting Hog 2PC Application When using the Hog iPC console with Hog 2PC, how do I transfer show files without a floppy drive? The Hog iPC console supports most USB storage devices that are compatible with Windows XP. - Page 74 Maintenance and Troubleshooting Hog iPC Handbook...
-
Page 75: System Restore
System Restore... -
Page 77: Restoring The Hog Ipc System Files
Restoring the Hog iPC System Files The Hog iPC console ships with a Hog iPC System Restore CD that contains information to use in the event of a total hard drive failure. You can use this CD to restore the original installation of Windows XPe and Hog 3PC/Hog 2PC/Hog iPC software. - Page 78 Do not touch any keys or attempt to interrupt the restore process. If the process is interrupted for any reason, simply reboot and return to Step 1 to ensure the Hog iPC console is completely restored. Once the system is restored and rebooted, remove the System Restore CD and store in a safe place.
-
Page 79: Upgrading Application Files And Configuration
Upgrading Application Files and Configuration Upgrading Applications The Hog iPC, Hog 3PC and Hog 2PC applications are being upgraded continually and it is likely that there is a newer version available of one or more of these applications than exists on your system restore CD. - Page 80 If you notice that the touchscreen touch functions are switched, press the Swap Touchscreens button. A dialog box will appear listing the attached touchscreen devices. The first two devices listed are the Hog iPC console touchscreens. The third device is an optional monitor.
-
Page 81: Safety Information
S a f e t y I n f o r m a t i o n... -
Page 83: Safety Information
Class I equipment. This equipment must be earthed. Equipment suitable for dry locations only. Do not expose this equipment to rain or moisture. Disconnect power before servicing. Refer servicing to qualified personnel; no user serviceable parts inside. Hog iPC Handbook... -
Page 84: Importantes Informations Sur La Sécurité
Ne pas l'exposer à la pluie ou l'humidité. À l'intérieur de l'équipement il n'y a pas de pièces remplaçables par l'utilisateur. Confiez l'entretien à un personnel qualifié. Equipement de Classe I. Cet équipement doit être mis à la terre. Hog iPC Handbook... -
Page 85: Wichtige Hinweise Für Ihre Sicherheit
Diese Geräte sind nur zum Einbau in trockenen Lagen bestimmt und müssen vor Regen und Feuchtigkeit geschützt werden. Vor Wartungsarbeiten stets den Netzstecker ziehen. Servicearbeiten sollten nur von Fachpersonal ausgeführt werden. Das Gerät enthält keine wartungsbedürftigen Teile. Hog iPC Handbook... -
Page 86: Información Importante De Seguridad
Este equipo se adecua a lugares secos solamente. no lo exponga a la lluvia o humedad. Derive el servicio de reparación de este equipo al personal calificado. El interior no contiene repuestos que puedan ser reparados por el usuario. Equipo de Clase I. Este equipo debe conectarse a la tierra. Hog iPC Handbook... -
Page 87: Importanti Informazioni Di Sicurezza
Aparecchio di Classe I. Questa apparecchiatura deve essere messa a terra. Vigtig Sikkerhedsinformation Advarsel: Beskyttelse mod elektrisk chock. VIGTIGT! LEDEREN MED GUL/GROEN ISOLATION MAA KUN TILSLUTTES KLEMME MAERKET ELLER . Hog iPC Handbook... -
Page 88: Japanese
Safety Information Japanese • 20 A • Brown - Live • Blue - Neutral • Green/Yellow - Earth • Green/Yellow Green/Yellow • Blue • Brown Class I Hog iPC Handbook...
Need help?
Do you have a question about the Hog iPC and is the answer not in the manual?
Questions and answers