Sun Microsystems Sun Fire X4450 Installation Manual
Hide thumbs
Also See for Sun Fire X4450:
- Service manual (184 pages) ,
- Configuration manual (13 pages) ,
- Installation manual (107 pages)

Related Manuals for Sun Microsystems Sun Fire X4450


Summary of Contents for Sun Microsystems Sun Fire X4450
-
Page 1: Installation Guide
Sun Fire X4450 Server Installation Guide Sun Microsystems, Inc. www.sun.com Part No. 820-2709-11 July 2008, Revision A Submit comments about this document at: http://www.sun.com/hwdocs/feedback... - Page 2 Cette distribution peut des éléments développés par des tiers. Sun, Sun Microsystems, le logo Sun, Java, Solaris, et Sun Fire sont des marques de fabrique ou des marques déposées de Sun Microsystems, Inc. aux Etats-Unis et dans d’autres pays. Intel est une marque de fabrique ou une marque déposée de Intel Corporation ou de sa filiale aux Etats-Unis et dans d’autres pays.
-
Page 3: Table Of Contents
ESD Precautions 5 Sun Fire X4450 Server Description 6 Front Panel Features 6 Back Panel 7 Installing the Sun Fire X4450 Server Into a Rack with Slide-Rails 9 Before You Install 9 Server Installation Process Overview 10 Rail Assemblies 10... - Page 4 Modifying the Service Processor IP Address 37 Method 1: Using the BIOS 37 Method 2: Using the Serial Connection 38 Example 1: Set to Static IP address 38 Example 2: Set to DHCP IP address 39 Sun Fire X4450 Server Installation Guide • July 2008...
- Page 5 Configuring the Solaris OS 47 Redirect the Console Output to the Video Port (Optional) 48 Using the GRUB Menu 48 Configuring Sun Fire X4450 Server RAID Drives 49 RAID Drive Overview 49 RAID Drive Options 50 Mirroring the Preinstalled Solaris OS with LSI RAID 51...
- Page 6 If You Need Help 63 Powering On and Off the Server 63 Power On the Main Power 63 Power Off from Main Power Mode 64 Setup Troubleshooting 65 Contacting Support 67 Index 69 Sun Fire X4450 Server Installation Guide • July 2008...
-
Page 7: Preface
How to set up the Sun Fire X4450 server hardware. Chapter 2 How to place the Sun Fire X4450 server into a rack using the rail assembly. Chapter 3 How to connect cables and power up the Sun Fire X4450 server for the first time. -
Page 8: Typographic Conventions
Utilities Reference Manual for MSM. Support Obtain technical support, and download http://www.sun.com/support/ patches. Training Learn about Sun courses. http://www.sun.com/training/ Warranty Obtain specific details regarding your http://www.sun.com/service/support/w warranty. arranty/index.html Feedback Submit your comments. http://www.sun.com/hwdocs/feedback/ viii Sun Fire X4450 Server Installation Guide • July 2008... -
Page 9: Related Documentation
Related Documentation A Where To Find Documentation sheet lists available documents for the Sun Fire X4450 server and describes the Sun Fire X4450 server document set. The Where to Find Documentation sheet is packed with your system and is also posted at the product's documentation site. -
Page 10: Sun Welcomes Your Comments
You can submit your comments by going to: http://www.sun.com/hwdocs/feedback/ Please include the title and part number of your document with your feedback. For example, the part number of this Sun Fire X4450 Server Installation Guide is 820-2709- Sun Fire X4450 Server Installation Guide • July 2008... -
Page 11: Before You Begin
C H A P T E R Before You Begin This chapter describes how to set up the Sun Fire X4450 server hardware. It includes the following topics: “Tools and Equipment Needed” on page 1 ■ “Installation Process Flowchart” on page 1 ■... - Page 12 “Opening the Box” on page “Installing the Sun Fire X4450 Server Into a Rack with Slide-Rails” on page “Connecting the Cables” on page “Connecting to the LOM Service Processor for the First Time” on page Sun Fire X4450 Server Installation Guide • July 2008...
- Page 13 Sun Fire X4450 Server Installation Process (Part 2) FIGURE 1-2 See: “Applying Power for the First Time” on page “Configuring the Preinstalled Windows Server 2003 R2 Operating System” on page “Configuring the Preinstalled Solaris 10 Operating System” on page Sun Fire X4450 Server Operating System Installation Guide...
-
Page 14: Opening The Box
FIGURE 1-3 packing contents. Unpacking the Box FIGURE 1-3 Package Contents Inventory The following items should be packaged with the Sun Fire X4450 server: Sun Fire X4450 server ■ Sun Fire X4450 server accessory kit, including the following documentation and ■... -
Page 15: Options
Additional license, safety, and registration documentation ■ Sun Fire X4450 server Tools and Drivers CD ■ (includes drivers and additional software) DB9-RJ45 Adapter (for serial system management port) ■ Optional rackmount kit ■ Optional cable management kit ■ Options Standard server components are installed at the factory. However, ordered options such as additional memory or PCIe cards are shipped separately. -
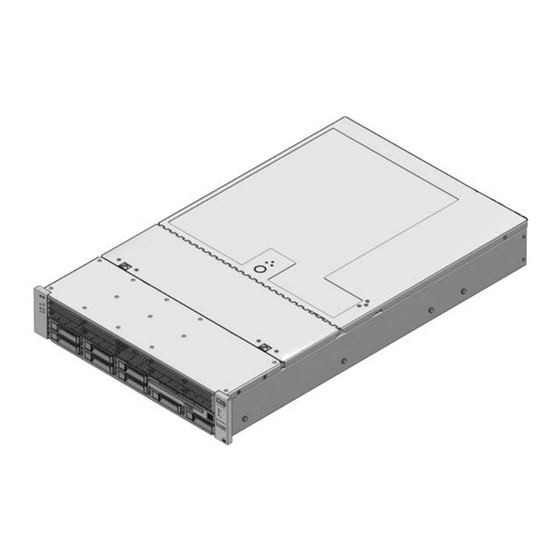
Page 16: Sun Fire X4450 Server Description
Sun Fire X4450 Server Description This section shows the Sun Fire X4450 server front and back panel features. Front Panel Features shows the front panel. describes the front panel features. FIGURE 1-4 TABLE 1-1 Front Panel - 8 drive configuration shown... -
Page 17: Back Panel
Back Panel shows the back panel describes the back panel features. FIGURE 1-5 TABLE 1-2 Back Panel FIGURE 1-5 Back Panel Legend TABLE 1-2 Label Item Label Item Power supply unit 1 connector PCI-express slot (3) PCI-express slot (0) Power supply unit 1 status indicator LEDs PCI-express slot (4) •... - Page 18 Sun Fire X4450 Server Installation Guide • July 2008...
-
Page 19: Installing The Sun Fire X4450 Server Into A Rack With Slide-Rails
Installing the Sun Fire X4450 Server Into a Rack with Slide-Rails This chapter describes how to place the Sun Fire X4450 server into a rack using the rail assembly in the rackmount kit. Perform this procedure if the rail assembly is purchased. -
Page 20: Server Installation Process Overview
Rack horizontal opening and Conforms to ANSI/EIA 310-D-1992 or IEC unit vertical pitch 60927 standards. Distance between front and rear Minimum 610 mm and Maximum 915 mm (24 mounting planes inches to 36 inches). Sun Fire X4450 Server Installation Guide • July 2008... -
Page 21: Disassembling Slide-Rails
To remove the mounting-brackets from the bolt-on slide-rail assemblies: 1. Unpack the slide-rails. 2. Locate the slide-rail lock at the front of one of the slide-rail assemblies, as shown in FIGURE 2-1 Chapter 2 Installing the Sun Fire X4450 Server Into a Rack with Slide-Rails... -
Page 22: Disassembling Tool-Less Slide-Rails
Disassembling the Slide-rail Before Installation FIGURE 2-1 Mounting-bracket release button Slide-rail lock Disassembling Tool-less Slide-Rails To remove the mounting-brackets from the tool-less slide-rail assemblies, refer to the card included with the kit. Sun Fire X4450 Server Installation Guide • July 2008... -
Page 23: Installing The Mounting-Brackets Onto The Server
(See FIGURE 2-2 Chapter 2 Installing the Sun Fire X4450 Server Into a Rack with Slide-Rails... -
Page 24: Attaching The Slide-Rail Assemblies To The Rack
If your rack does not have threaded mounting holes, insert the mounting ■ screws through both the slide-rail brackets and rack posts, then secure them with the caged nuts. Sun Fire X4450 Server Installation Guide • July 2008... - Page 25 Step 2 for the remaining slide-rail assembly. 4. From the front of the rack, set the proper width of the rails with the spacer. (See FIGURE 2-4 Chapter 2 Installing the Sun Fire X4450 Server Into a Rack with Slide-Rails...
- Page 26 5. Tighten the screws on the brackets. 6. Remove the spacer and confirm that the rails are attached tightly to the rack. 7. Repeat Step 4 through Step 6 for rear of the rack. Sun Fire X4450 Server Installation Guide • July 2008...
-
Page 27: Attaching Tool-Less Slide-Rail Assemblies
Caution – This procedure requires a minimum of two people because of the weight of the server. Attempting this procedure alone could result in equipment damage or personal injury. Chapter 2 Installing the Sun Fire X4450 Server Into a Rack with Slide-Rails... - Page 28 (approximately 12 inches, or 30 cm). Inserting the Server With Mounting-Brackets Into the Slide-Rails FIGURE 2-6 Mounting-bracket inserted into slide-rail Slide-rail release button Slide-rail Slide-rail lock assembly mounted on rack post Sun Fire X4450 Server Installation Guide • July 2008...
- Page 29 You will hear an audible click. Caution – Verify that the server is securely mounted in the rack and that the slide- rails locks are engaged with the mounting-brackets before continuing. Chapter 2 Installing the Sun Fire X4450 Server Into a Rack with Slide-Rails...
-
Page 30: Installing The Cable Management Arm
The CMA rail extension might be taped to the CMA arm. 4. Attach the CMA rail extension into the left slide-rail until the extension locks into place with an audible click. (See FIGURE 2-8 Sun Fire X4450 Server Installation Guide • July 2008... - Page 31 Support the CMA in the remaining installation steps. Do not allow the arm to hang by its own weight until it is secured by all three attachment points. Chapter 2 Installing the Sun Fire X4450 Server Into a Rack with Slide-Rails...
- Page 32 6. Insert the CMA’s mounting-bracket connector into the right slide-rail until the connector locks into place with an audible click. (See FIGURE 2-9 Inserting the CMA Mounting-bracket Into the Back of the Right Slide-Rail FIGURE 2-9 Right slide-rail CMA mounting bracket Sun Fire X4450 Server Installation Guide • July 2008...
- Page 33 (See FIGURE 2-10 Inserting CMA Slide-Rail Connector Into the Back of the Right Slide-Rail FIGURE 2-10 Assembly Right slide- rail assembly CMA slide-rail connector Chapter 2 Installing the Sun Fire X4450 Server Into a Rack with Slide-Rails...
- Page 34 FIGURE 2-11 Connecting the CMA Arm to the Rail Extension Connector FIGURE 2-11 CMA arm connector CMA extension (on left slide-rail) 9. Install and route cables to your server, as required. Sun Fire X4450 Server Installation Guide • July 2008...
- Page 35 Installing CMA Cable Straps FIGURE 2-12 CMA arm CMA cable hanger 11. Attach the right outer latch. 12. Attach the support latch to the left CMA extension. Chapter 2 Installing the Sun Fire X4450 Server Into a Rack with Slide-Rails...
-
Page 36: Verifying Operation Of The Slide-Rails And Cma
FIGURE 2-6 pull both of the slide-rail release buttons, and push the server completely into the rack until both slide-rail locks engage. 5. Adjust the cable straps and CMA as required. Sun Fire X4450 Server Installation Guide • July 2008... - Page 37 Chapter 2 Installing the Sun Fire X4450 Server Into a Rack with Slide-Rails...
-
Page 38: Setting Up The Sun Fire X4450 Server
C H A P T E R Setting Up the Sun Fire X4450 Server This chapter describes how to connect cables and power up the Sun Fire X4450 server for the first time. It includes the following topics: “Connecting the Cables” on page 27 ■... - Page 39 Service processor (SP) NET MGT Ethernet port Power supply unit 1 connector GigabitEthernet ports LAN-0, 1, 2, 3 (Intel) System status LEDs USB 2.0 ports (0, 1) Serial management/RJ-45 serial port HD15 video connector Sun Fire X4450 Server Installation Guide • July 2008...
-
Page 40: Cabling The Server
5. Connect Ethernet cables to the RJ-45 GigabitEthernet (LAN) connectors as needed (6) for OS support. 6. Connect any additional external devices, as required, to the server’s USB (7) and/or HD-15 video (8) connectors (optional). Chapter 3 Setting Up the Sun Fire X4450 Server... -
Page 41: Service Processor Overview
Do not operate the server without all fans, baffles, and the cover installed. component heatsinks, air Service Processor Overview The Sun Fire X4450 server includes one of the following Lights Out Manager (LOM) service processor (SP) firmware types: Embedded Lights Out Manager (ELOM) service processor (SP) ■... - Page 42 A console can also be started to display system output. By default, the LOM output appears. The BIOS contains these serial redirection options. See the Sun Fire X4450 server Product Notes and the Embedded Lights Out Manager (ELOM) Administration Guide for more information.
-
Page 43: Integrated Lom Service Processor Software Overview
Serves as an integration point for other management tools, such as Sun N1 ■ System Manager and third-party applications Enables the download of service processor (SP) firmware and BIOS changes ■ Sun Fire X4450 Server Installation Guide • July 2008... -
Page 44: Connecting To The Lom Service Processor For The First Time
After you configure the IP address to comply with your network IP scheme, you can access the LOM SP web browser interface using a Sun Microsystems supported Internet web browser. You can also connect to the LOM service processor through secure shell (SSH). -
Page 45: About Lom Ip Addresses
1. Power on the server (or restart the server if it is running). “Applying Power for the First Time” on page 2. When the Sun Microsystems splash screen or text prompt appears during the Power on self-test (POST) operation, press F2 to access the BIOS settings. -
Page 46: Method 2: Connect To The Sp Using A Serial Connection
Note – If you connect to the serial port on the LOM before it has been powered on or during its power-on sequence, SP boot messages may be displayed. The LOM displays a login prompt, after a short wait. login: Chapter 3 Setting Up the Sun Fire X4450 Server... - Page 47 = 129.148.53.248 ipnetmask = 255.255.255.0 macaddress = 00:1E:68:0F:4A:84 pendingipaddress = 129.148.53.128 pendingipdiscovery = static pendingipgateway = 129.148.53.248 pendingipnetmask = 255.255.255.0 9. Be sure to record the IP address assigned to the LOM. Sun Fire X4450 Server Installation Guide • July 2008...
-
Page 48: Modifying The Service Processor Ip Address
1. Power on the server (or restart the server if it is running). “Applying Power for the First Time” on page 2. When the Sun Microsystems splash screen or text prompt appears during the Power on self-test (POST) operation, press F2 to access the BIOS settings. -
Page 49: Method 2: Using The Serial Connection
8. Type the following command to determine the SP IP address: show /SP/network 9. After the status has been determined, view the output of show /SP/network. ELOM: IPSource = dhcp ■ ILOM: ipdiscovery = dhcp ■ Sun Fire X4450 Server Installation Guide • July 2008... -
Page 50: Example 2: Set To Dhcp Ip Address
(If not connected already). for the serial port position. FIGURE 1-5 6. Press Enter on the terminal device to establish a connection between the terminal device and the LOM SP. The prompt appears. -> Chapter 3 Setting Up the Sun Fire X4450 Server... -
Page 51: Method 3: Using The Service Processor (Sp) Lom Web Browser Interface
“Determining the LOM Service Processor IP Address” on page To change a static IP address, using the SP LOM web interface: 1. Open a Sun Microsystems supported Web browser, such as Internet Explorer, Mozilla, or Firefox. 2. Type the IP address of the SP in the browser address bar. -
Page 52: Applying Power For The First Time
FIGURE 1-5 f. Press Enter on the terminal device to establish a connection between the terminal device and the LOM service processor (SP). The following prompt appears: -> Chapter 3 Setting Up the Sun Fire X4450 Server... - Page 53 Shift + 9, or press Esc ( , depending on your keyboard location. ILOM: To switch back to the ILOM command-line interface from the serial console, press Esc ( , depending on your keyboard location. Sun Fire X4450 Server Installation Guide • July 2008...
-
Page 54: Configuring The Preinstalled Solaris 10 Operating System
10 operating system (OS) that ™ might be preinstalled on your Sun Fire X4450 server. This chapter assumes that your server has a hard drive installed, with the Solaris OS preinstalled. Your system might be different, depending on your hard drive configuration. -
Page 55: About The Grub Menu
1. Perform initial configuration of the SP, and determine the server’s network settings. See “Setting Up the Sun Fire X4450 Server” on page 2. Gather the information that you will need to configure the server. See “Installation Worksheet” on page 3. -
Page 56: Installation Worksheet
Installation Worksheet Fill in with information you need to configure the preinstalled Solaris 10 TABLE 4-1 OS for the server. Collect only the information that applies to your system. Installation Worksheet TABLE 4-1 Installation Information Description Enter System Configuration: Asterisk (*) indicates default. Language Choose from the list of available languages English*... - Page 57 None* The default route provides a bridge that forwards traffic between two physical networks. An IP address is a unique number that identifies each host on a network. Sun Fire X4450 Server Installation Guide • July 2008...
-
Page 58: Configuring The Solaris Os
Installation Worksheet TABLE 4-1 Installation Information Description Enter System Configuration: Asterisk (*) indicates default. Select one of the following routes: • Specify IP address. An /etc/defaultrouter file is created with the specified IP address. When the system is rebooted, the specified IP address becomes the default route. -
Page 59: Redirect The Console Output To The Video Port (Optional)
The preinstalled Solaris 10 OS image directs console output to the serial port by default. After the initial configuration of the preinstalled Solaris OS is complete, you can modify the Solaris 10 GRUB menu to direct output to the video port by default. Sun Fire X4450 Server Installation Guide • July 2008... -
Page 60: Configuring Sun Fire X4450 Server Raid Drives
After you configure the Solaris OS, you might need to configure the RAID drives. RAID Drive Overview The Sun Fire X4450 server has two optional RAID Host Bus Adapter (HBA) cards. You can access RAID configuration through the HBA card BIOS. To access the LSI card BIOS, press Ctrl-C. -
Page 61: Raid Drive Options
TABLE 4-3 Note – Configuring the Sun Fire X4450 server RAID is optional, by default the Solaris Pre-Install image is configured in a non-RAID configuration. If anything other than a basic Mirror RAID is required, it is recommended to perform a fresh install of the Solaris operating system (or other OS) in the desired RAID configuration. -
Page 62: Mirroring The Preinstalled Solaris Os With Lsi Raid
RAID The Solaris OS supports hardware RAID and cannot be installed on an existing array if one has been created. Refer to the Sun Fire X4450 server OS Installation Guide or an HBA card product guide. If you choose the preinstalled Solaris OS and want to make the OS part of a RAID set, and if you are using LSI RAID only, perform the following procedure to update the preinstalled Solaris OS to a mirrored RAID set. -
Page 63: Creating A Raid Set To Incorporate A Preinstalled Os Using The Sun Storagetek Card
(should there be more than 2) are incorporated into a DATA RAID set using the available options as shown in TABLE 4-3 You will need the Sun Fire X4450 Server Tools & Drivers CD. Follow these steps to mirror your configured Solaris OS: 1. Using your Solaris Server, log in and start Xserver. -
Page 64: Solaris 10 Os User Information
Tip – HDD0 (OS) should be Enclosure 0 Logical Volume 1. 11. To mirror the OS, right-click Logical Device 1 and choose Expand or Change Logical Device. 12. Choose the appropriate RAID option (in this example, RAID 1 for Mirror). 13. -
Page 65: Downloading Solaris 10 Os Software
If you need to install the Solaris 10 OS or reinstall the OS after removing it, you can download the CD or DVD image at: http://www.sun.com/software/solaris/get.jsp Solaris 10 8/07 is the minimum supported version for the Sun Fire X4450 server. See the Sun Fire X4450 Operating System Installation Guide for specific instructions on Solaris 10 OS installation. -
Page 66: Configuring The Preinstalled Windows Server 2003 R2
Operating System This chapter describes how to configure the Preinstalled Windows Server 2003 R2 Operating System (OS) that might be preinstalled on your Sun Fire X4450 server. This chapter assumes that your server has a hard drive installed, with the Preinstalled Windows Server 2003 R2 OS preinstalled. -
Page 67: Delivery Methods
3. Type the IP address of SP into a browser window, and then login to the web interface. 4. Click on the Remote Control tab, and then select Redirection. 5. Click Launch. The console appears. Sun Fire X4450 Server Installation Guide • July 2008... -
Page 68: Configuring The Windows Server 2003 R2 Os
Configuring the Windows Server 2003 R2 OS To configure the preinstalled Windows Server 2003 R2 Operating System: 1. Boot the preinstalled image for the first time. The EMS Connection Detected dialog box appears. 2. Click OK to continue using this local connection. An EMS (emergency management console) connection might be detected if Serial Console Redirection is enabled in the BIOS, and an EMS Connection Detected popup message might appear, as shown here. -
Page 69: Configuring Sun Fire X4450 Server Raid Drives
RAID drives. RAID Drive Overview The Sun Fire X4450 server has two optional RAID Host Bus Adapter (HBA) cards. You can access RAID configuration through the HBA card BIOS. To access the LSI card BIOS, press Ctrl-C. To access the Sun StorageTek card BIOS, press Ctrl-A:... -
Page 70: Raid Drive Options
TABLE 5-2 Note – Configuring the Sun Fire X4450 server RAID is optional, by default the preinstalled Windows Server 2003 R2 image is configured in a non-RAID configuration. If anything other than a basic Mirror RAID is required, it is recommended to perform a fresh install of the Windows Server 2003 R2 OS (or other OS) in the desired RAID configuration. -
Page 71: Mirroring The Preinstalled Windows Server 2003 R2 Os With Lsi Raid
R2 OS with LSI RAID The Windows Server 2003 R2 OS supports hardware RAID and cannot be installed on an existing array if one has been created. Refer to the Sun Fire X4450 Server Operating System Installation Guide or an HBA card product guide. -
Page 72: Storagetek Card
TABLE 5-2 You will need the Sun Fire X4450 Server Tools and Drivers CD. Follow these steps to mirror your configured Windows Server 2003 R2 OS: 1. Select Start and then Sun Link - Online Information. - Page 73 14. One more confirmation screen appears. Confirm the mirroring. The OS begins to mirror. Mirroring may take several hours, depending on the amount of data and the hard disk drive size. Sun Fire X4450 Server Installation Guide • July 2008...
-
Page 74: Powering On And Off The Server
“Contacting Support” on page 67 ■ Powering On and Off the Server Use the following procedures to power on and power off the Sun Fire X4450 server. Power On the Main Power To apply main power for all server components: 1. -
Page 75: Power Off From Main Power Mode
Caution – To completely power off the server, you must disconnect the AC power cords from the back panel of the server. Sun Fire X4450 Server Installation Guide • July 2008... -
Page 76: Setup Troubleshooting
Setup Troubleshooting This section contains information to help you troubleshoot minor server problems. If you experience problems while setting up your server, refer to the troubleshooting information in TABLE 6-2 Troubleshooting Procedures TABLE 6-2 Problem Possible solution Server powers on, •... - Page 77 Try to access your system from a different server on the network: server: No response 1. On another system, type: ping IP_address_of_server. from mouse or 2. If a response is returned, then try logging in to the Sun Fire X4450 keyboard or any server using either telnet, ssh, or rlogin. application.
-
Page 78: Contacting Support
Contacting Support If the troubleshooting procedures in this chapter fail to solve your problem, use to collect information that you might need to communicate to the support TABLE 6-3 personnel. lists the Sun web sites and telephone numbers for additional TABLE 6-4 technical support. - Page 79 1-800-872-4786 (1-800-USA-4Sun), select Option 1 Lists international telephone numbers http://www.sun.com/service/contacting/solution.html for SunService support. Warranty and contract support contacts. http://www.sun.com/service/warrantiescontracts/ Links to other service tools. Warranties for every Sun product. http://www.sun.com/service/support/warranty Sun Fire X4450 Server Installation Guide • July 2008...
-
Page 80: Index
Index Emergency shutdown, 64 ESD, 5 accessory kit, 4 external cables, 29 Applying Power, 41 Fault LEDs, 6 back panel connectors, 27 flowchart, 1 bolt-on slide-rail assemblies, 14 four-post rack, 10 front panel, 6, 29, 64 cable management arm, 10, 20 cable management assembly, 20 Graceful shutdown, 64 CMA, 10, 20... - Page 81 45 Remote Console, 31 video port, 49 remove the mounting-brackets, 11 Web browser, 34 Secure (command) shell (SSH), 33 Web Browser Interface, 40 Secure Shell (SSH), 31 Web-based graphical interface, 31 Sun Fire X4450 Server Installation Guide • July 2008...
Need help?
Do you have a question about the Sun Fire X4450 and is the answer not in the manual?
Questions and answers