Table of Contents
Advertisement
Quick Links
Advertisement
Table of Contents

Related Manuals for Eurotech VOIP² ALL SERIES


Summary of Contents for Eurotech VOIP² ALL SERIES
- Page 1 VOIP²ALL SERIES 4 Channel Gateway User Guide Version 5.38...
-
Page 2: Table Of Contents
Connecting the GUI Management ................30 4.7.2. Defining the General Settings ................. 31 4.7.3. Defining SIM Settings ....................32 4.7.4. Assigning a SIM to Work in the Gateway ..............35 4.7.5. Blocking SIMs ......................41 VoIP²ALL 4 Channel Gateway User Guide www.eurotech-communication.com... - Page 3 Appendix A: Working with COM Port ..............73 6.2. Appendix B: Sending USSD (Unstructured Supplementary Service Data) commands in the DEBUG screen ......................... 75 6.3. Appendix C: PC to Gateway Direct LAN Access ............77 VoIP²ALL 4 Channel Gateway User Guide www.eurotech-communication.com...
-
Page 4: Introduction To The Voip²All Gateway
Introduction to the VoIP²ALL Gateway 1. INTRODUCTION TO THE VOIP²ALL GATEWAY The Eurotech Communication team is glad you have chosen to use the VoIP²ALL Gateway. We are confident that due to the quality of our product, simplicity of use and excellent customer support, the VoIP²ALL Gateway will meet your communication needs. -
Page 5: About This Manual
SIM Registration - The activation of the SIM in a cellular network. The SIM must be registered to make calls. Local SIM - A SIM on a cellular card. Virtual SIM - A SIM from a SIM Server. VoIP²ALL 4 Channel Gateway User Guide www.eurotech-communication.com... -
Page 6: Installation And Setup
Input: 110/240 V AC 50-60 Hz, Output: 12 V DC adapter (2, 4 and 8ch Gateways) or power supply cable 2.3. HARDWARE INSTALLATION This section describes how to install the VoIP²ALL Gateway Hardware. VoIP²ALL 4 Channel Gateway User Guide www.eurotech-communication.com... -
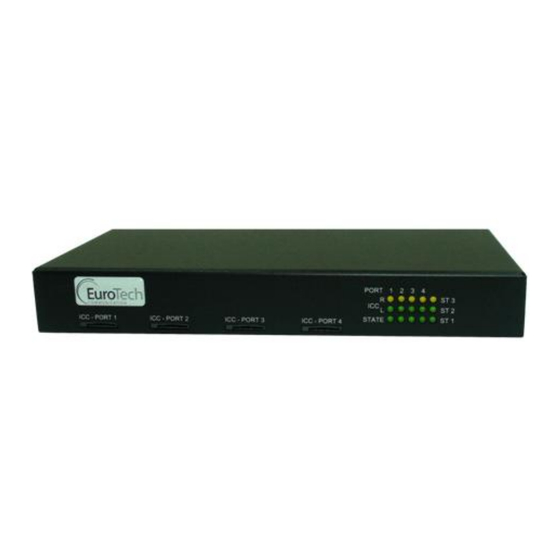
Page 7: Hardware Overview
The following sections describe how to install and remove SIMs in the VoIP²ALL Gateway. Installing Local SIMs on page 8 Removing Local SIMs on page 8 Installing SIMs in the Internal SIM Server (Optional) VoIP²ALL 4 Channel Gateway User Guide www.eurotech-communication.com... -
Page 8: Connecting Cables
COM Cable (RS323) - The COM connection is not essential for day to day use. For more details about using the COM port, see Appendix A: Working with COM Port on page 73. VoIP²ALL 4 Channel Gateway User Guide www.eurotech-communication.com... -
Page 9: Software Installation
7) Click Install. The VoIP²ALL Management application begins installation. You will be prompted when the installation is complete. 8) Click Finish and remove the CD. Note: If the VoIP²ALL icon appears on the Desktop, the application was successfully installed. VoIP²ALL 4 Channel Gateway User Guide www.eurotech-communication.com... -
Page 10: Basic System Setup
The Management application gives you access to all of the tasks you need to use VoIP²ALL system. To open the application, click the VoIP²ALL icon on the Desktop or open from the directory where the application is located (default: Start>Programs>Eurotech-Communication>VoIP²ALL Management). The first tasks you need to perform are: ... -
Page 11: Setting The Clock
PC on connection. 6) (Optional) Click Keep-Alive the Gateway Connection - this reconnects the PC software if an interruption occurred. 7) Click Write Settings to save the changes to the date and time. VoIP²ALL 4 Channel Gateway User Guide www.eurotech-communication.com... -
Page 12: Changing The Gateway's Ip Address
Before making a call from a Gateway port, the port SIM must be registered in the network. There are two basic modes for the Gateway to work: Active by Default - The Local SIM will register in the cellular network automatically when inserted. VoIP²ALL 4 Channel Gateway User Guide www.eurotech-communication.com... - Page 13 The first matched prefix on the list is selected. If more than one port has a matching prefix, the Gateway creates a prefix group of these ports and divides calls with this prefix amongst the group. VoIP²ALL 4 Channel Gateway User Guide www.eurotech-communication.com...
-
Page 14: Basic System Test
3) Check the monitor to see that the number was dialed correctly and the call was connected. Troubleshooting In case the call was not connected, check the following: Confirm that the number was compatible with the network by dialing this number directly from your mobile phone. VoIP²ALL 4 Channel Gateway User Guide www.eurotech-communication.com... -
Page 15: What's Next
Advanced Configuration on page 16 Configuring the SIM Server on page 29 Modifying System Settings on page 49 Configuring Special Features on page 54 Monitoring Calls on page 68 VoIP²ALL 4 Channel Gateway User Guide www.eurotech-communication.com... -
Page 16: Advanced Configuration
Each Local SIM can be configured with its own parameters which take effect when the Local SIM is registered on the cellular network. To configure the Local SIM: 1) On the Main Toolbar, click Ports. 2) Select a port from the port list. VoIP²ALL 4 Channel Gateway User Guide www.eurotech-communication.com... - Page 17 The rotation is performed according to the BCCH Timer, measured in seconds, between all BCCH which have better reception than the BCCH rssi. When using the BCCH Timer, the BCCH parameter must be empty. BCCH rssi The minimum reception for rotation. VoIP²ALL 4 Channel Gateway User Guide www.eurotech-communication.com...
-
Page 18: Registering The Local Sim In The Cellular Network Automatically
3) In SIM Registration Mode, select Local SIM work by default. 4) Insert the SIMs to the cellular port’s Local SIM sockets. 5) On the Main Toolbar, click Monitor. The monitor window appears displaying the status of the cellular ports. VoIP²ALL 4 Channel Gateway User Guide www.eurotech-communication.com... -
Page 19: Assigning A Local Sim To Work By Time Table
The Gateway resets the time unit count to the original definitions at the beginning of every month or week, depending on the Type selected in the Time Table. VoIP²ALL 4 Channel Gateway User Guide www.eurotech-communication.com... - Page 20 Current Balance (units) must be the number minutes X 60. To configure the SIM Call Duration parameters: 1) On the Main Toolbar, click Ports. 2) Select a port from the port list. 3) Select the Local SIM tab. VoIP²ALL 4 Channel Gateway User Guide www.eurotech-communication.com...
-
Page 21: Configuring The Internal Sip Server
2) Select the SIP tab. 3) In the Internal SIP Settings section of the window, define the following parameters: SIP Port - The TCP port of the SIP Server. The default is 5060. VoIP²ALL 4 Channel Gateway User Guide www.eurotech-communication.com... - Page 22 8) Configure the registration with this parameters: SIP Server IP Address - the IP address of the Gateway. SIP User ID - the VoIP Num of the user. Authentication Password - the Secret of the user. VoIP²ALL 4 Channel Gateway User Guide www.eurotech-communication.com...
-
Page 23: Users List
3) In Search, enter the value to search by. 4) Click Search. The list displays all the users that match the search criteria. 5) To return to the complete list click All Users. VoIP²ALL 4 Channel Gateway User Guide www.eurotech-communication.com... -
Page 24: Call Handling
To manage call prefixes: 1) From the Main Toolbar, click Ports. 2) Select a port from the list on the left. 3) Select the Prefixes tab. A prefix table for the selected port is displayed. VoIP²ALL 4 Channel Gateway User Guide www.eurotech-communication.com... -
Page 25: Handling Incoming Calls
IVR - All calls that come to this port receive the IVR message. For details, see IVR on page 58. 5) Click Save. 4.4.2.1. AUTOMATIC ROUTING This section describes how to configure the ports to automatically route incoming calls to predefined destination numbers. VoIP²ALL 4 Channel Gateway User Guide www.eurotech-communication.com... -
Page 26: Cellular Outgoing Call Configurations
Enable IPs and Deny IPs are not defined - All IPs are allowed Only Enable IPs is defined - The IPs in the defined range are allowed and all other IPs are denied VoIP²ALL 4 Channel Gateway User Guide www.eurotech-communication.com... -
Page 27: Cellular Incoming Call Configurations
Register - by checking this box the Gateway sends calls with registration 5) Click on the next line in the table and then click Save. 6) Click Register Host to register the host in the external SIP Server. VoIP²ALL 4 Channel Gateway User Guide www.eurotech-communication.com... - Page 28 3) Select the Prefixes tab. A prefix table for the selected port is displayed. 4) In Incoming Calls Handle, select Destination Num. 5) In Type select Fixed. 6) In Num1 enter the number to call in the IP PBX. VoIP²ALL 4 Channel Gateway User Guide www.eurotech-communication.com...
-
Page 29: Calling To A Sip Phone
Defining the General Settings on page 31 Defining SIM Settings on page 32 Assigning a SIM to Work in the Gateway on page 35 Blocking SIMs on page 41 VoIP²ALL 4 Channel Gateway User Guide www.eurotech-communication.com... -
Page 30: Connecting The Gui Management
Note: These tables are saved in the PC software files only and not on the Gateway. If you are connecting from another PC they will not automatically appear. 4) Check the OnLine check box. 5) Click Save List. VoIP²ALL 4 Channel Gateway User Guide www.eurotech-communication.com... -
Page 31: Defining The General Settings
In the SIM Servers Setting list, all of the SIMs from the SIM Servers are displayed: 4.7.2. DEFINING THE GENERAL SETTINGS In the General section, at the top of the list, the general settings of the SIM server appear. VoIP²ALL 4 Channel Gateway User Guide www.eurotech-communication.com... -
Page 32: Defining Sim Settings
1) From the SIM Servers List, click the + sign next to the card. The card's SIMs are displayed. 2) From the SIMs list, click the + sign next to the SIM you want to define. VoIP²ALL 4 Channel Gateway User Guide www.eurotech-communication.com... - Page 33 Current Balance - The total amount of units to be used in Call Duration mode. Recharge Value - the number of units to recharge the Current Balance at the Top Up Day. VoIP²ALL 4 Channel Gateway User Guide www.eurotech-communication.com...
- Page 34 Hide - Hides the caller ID (when the cellular network support is sending private calls). Show - Shows the caller ID. SMSC Number The number of the SMS service (view only). VoIP²ALL 4 Channel Gateway User Guide www.eurotech-communication.com...
-
Page 35: Assigning A Sim To Work In The Gateway
4.7.4. ASSIGNING A SIM TO WORK IN THE GATEWAY After configuring the SIM parameters, define when and in which port the SIM will work. There are two methods for determining when the SIM will work: VoIP²ALL 4 Channel Gateway User Guide www.eurotech-communication.com... - Page 36 SIMs in the table. For each SIM in the list you define the amount of calling units to be used. Each SIM will work for the defined calling minutes and then be replaced with the next SIM on the list. VoIP²ALL 4 Channel Gateway User Guide www.eurotech-communication.com...
- Page 37 The Gateway resets the time unit count to the original definitions at the beginning of every month or week, depending on the Type selected in the Time Table. VoIP²ALL 4 Channel Gateway User Guide www.eurotech-communication.com...
- Page 38 Current Balance (units) must be the number minutes X 60. To configure a SIM from the SIM Server to work in Call Duration: 1) On the Main Toolbar, click Virtual SIM. 2) Select the Profile tab. VoIP²ALL 4 Channel Gateway User Guide www.eurotech-communication.com...
- Page 39 S1 - the SIM socket number in the card 100\100 - units remaining\original amount of units 192.168.0.31 - the IP Address of the SIM Server 8) To unselect the cell, click it again. 9) Click Save. VoIP²ALL 4 Channel Gateway User Guide www.eurotech-communication.com...
- Page 40 If the SIM Server is working with a private IP address behind NAT, and the Gateway accesses the SIM Server from the public IP, you need to configure the secondary IP so the Gateway can contact the SIM Server. VoIP²ALL 4 Channel Gateway User Guide www.eurotech-communication.com...
-
Page 41: Blocking Sims
Reason 3 - The SIM has made the number of consecutive calls that were detected as "message announcement" defined in Number of Detection. See Network Announcement Message Detection on page 56. Reason 4 - The SIM has tried to register unsuccessfully and reached the SIM Registration Time Limit. VoIP²ALL 4 Channel Gateway User Guide www.eurotech-communication.com... -
Page 42: Setting The Auto Balance Check
The SIM balance is the amount of money remaining on the SIM. There are two methods of checking the balance: Manually - Using the Recharge screen. See Balance Check on page 54. VoIP²ALL 4 Channel Gateway User Guide www.eurotech-communication.com... - Page 43 2) Define the parameters in the following table: PARAMETER DESCRIPTION USSD When active, the Gateway will expect the balance answer to be in USSD. When active, the Gateway will expect the balance answer to be in SMS. VoIP²ALL 4 Channel Gateway User Guide www.eurotech-communication.com...
- Page 44 3) If the balance answer is "The balance of the SIM is 150.25 euro."., the balance of the SIM is 150.25 euro. In this case, the Value Format should be set to: SIM is [0-9]*\.[0-9]* . 4) The Balance Reply is set as follows: VoIP²ALL 4 Channel Gateway User Guide www.eurotech-communication.com...
-
Page 45: Monitoring The Balance Of Sim
3) In Server Profiles Selection, select a profile from the list. (0 - 9). 4) Click + next to the SIM Prepaid parameter. 5) Select Active. 6) Click + next to Balance Recharge. The following details appear: 7) Define the parameters in the following table: VoIP²ALL 4 Channel Gateway User Guide www.eurotech-communication.com... - Page 46 In the Vouchers tab you load the recharge vouchers for the SIMs. A list of vouchers can be defined for each cellular network. Each voucher contains the recharge key code and the status of the voucher. VoIP²ALL 4 Channel Gateway User Guide www.eurotech-communication.com...
- Page 47 3) In the MCC field, select the country code of the profile. 4) In the MNC field, select the network code of the profile. In the list at the left, the current vouchers for this cellular network are displayed. VoIP²ALL 4 Channel Gateway User Guide www.eurotech-communication.com...
-
Page 48: Configuring Test Call Profile
Test SMS is a function to randomly send SMS from the cellular ports to predefined destinations, allowing you to test incoming SMS to the cellular ports. SIMs that use this profile will operate like any other SIM until Start time. VoIP²ALL 4 Channel Gateway User Guide www.eurotech-communication.com... -
Page 49: Modifying System Settings
Tone Levels on page 53 Changing the Password on page 53 Resetting the Gateway on page 54 4.8.1. IP SETTINGS To configure the IP settings: 1) On the Main Toolbar, click VoIP. VoIP²ALL 4 Channel Gateway User Guide www.eurotech-communication.com... -
Page 50: Dial Settings
Important: Do not enable the VPN option. It is not supported in this Gateway. 4) Click Save. 4.8.2. DIAL SETTINGS The Dial Settings define the time intervals the Gateway uses when making calls. To configure the dial settings: 1) On the Main Toolbar, click VoIP. VoIP²ALL 4 Channel Gateway User Guide www.eurotech-communication.com... -
Page 51: Tone Settings
This section describes how to define the tone settings to your country standards. The Tone Settings tab in the System window displays a list of countries and the following tone parameters: Dial Tone Disconnect Tone VoIP²ALL 4 Channel Gateway User Guide www.eurotech-communication.com... - Page 52 2) Press Save. Note: Factory is the factory default settings. To remove a country from the list: 1) In the Tone Settings tab, in the country list, click Remove next to the country. VoIP²ALL 4 Channel Gateway User Guide www.eurotech-communication.com...
-
Page 53: Tone Levels
4.8.5. CHANGING THE PASSWORD A password is required to connect the Gateway to the PC software. By default the password is admin. To change the password: 1) From the Main Toolbar, click System. VoIP²ALL 4 Channel Gateway User Guide www.eurotech-communication.com... -
Page 54: Resetting The Gateway
SIMs. To check the SIM balance of a SIM: 3) On the Main Toolbar, click Ports. 4) In the ports list, select General. 5) Select the Recharge tab. The following window appears: VoIP²ALL 4 Channel Gateway User Guide www.eurotech-communication.com... - Page 55 17) Return to the recharge window to monitor the replies in the SIM balance shown. To recharge a SIM balance: 18) On the Main Toolbar, click Ports. 19) In the ports list, select General. 20) Select the Recharge tab. VoIP²ALL 4 Channel Gateway User Guide www.eurotech-communication.com...
-
Page 56: Network Announcement Message Detection
6) In the Number of Detections, enter the number of consecutive network messages detections before the SIM is blocked. Note: Only SIM Server SIM that work in Call Duration mode will be blocked. VoIP²ALL 4 Channel Gateway User Guide www.eurotech-communication.com... -
Page 57: Port Test Calls
If more than one port is defined, the Gateway divides the calls between the ports. If there are no available ports, the Gateway declines the call and you will hear a busy tone. Note: When using Source Routing by IP, the Gateway only routes SIP calls. VoIP²ALL 4 Channel Gateway User Guide www.eurotech-communication.com... -
Page 58: Ivr
For example in the following figure's settings, the dialing options are: When you enter the digit 1 you will reach extension 9100. When you enter the digit 2 you will reach extension 9300. VoIP²ALL 4 Channel Gateway User Guide www.eurotech-communication.com... - Page 59 Test Number - The number to dial to hear the IVR message. 4) In Dialing Sequences, list the digits to be dialed to reach the IVR extensions. Seq - the digits to dial Dest - the extension number 5) Click Save. VoIP²ALL 4 Channel Gateway User Guide www.eurotech-communication.com...
-
Page 60: Callback
Using the DISA feature, you can configure the Gateway so that a cellular mobile phone can directly access the VoIP extension that called it. To configure DISA: 1) On the Main Toolbar, click Users. VoIP²ALL 4 Channel Gateway User Guide www.eurotech-communication.com... -
Page 61: Bcch Configuration
Local SIM SIM Server To monitor the BCCH cells: 1) On the Main Toolbar, click Monitor. 2) Click on the port you want to monitor. The Port Control window appears. VoIP²ALL 4 Channel Gateway User Guide www.eurotech-communication.com... - Page 62 BCCH - The BCCH you want the SIM to lock on. When this parameter is undefined, the SIM works in Auto mode and locks on to the BCCH with the highest reception level. VoIP²ALL 4 Channel Gateway User Guide www.eurotech-communication.com...
-
Page 63: Sending And Receiving Sms
In the Gateway, you can send and receive SMS/USSD from each port. To send an SMS: 1) On the Main Toolbar, click Monitor. 2) Click on the port you want to monitor. The Port Control window appears. VoIP²ALL 4 Channel Gateway User Guide www.eurotech-communication.com... - Page 64 To send an USSD: 12) On the Main Toolbar, click Monitor. 13) Click on the port you want to monitor. The Port Control window appears. 14) Click Send SMS/USSD tab. The following window appears: VoIP²ALL 4 Channel Gateway User Guide www.eurotech-communication.com...
- Page 65 16) In USSD Command, enter the USSD command to send. 17) Click Send to send the USSD command. Receiving SMS/USSD When an SMS arrives from the cellular network an envelope icon appears in the monitor. VoIP²ALL 4 Channel Gateway User Guide www.eurotech-communication.com...
-
Page 66: Black List
5) On the Main Toolbar, click Advanced. 6) Select the Black List tab. 7) Click Black List Enable. 8) Click on an empty Phone Number box. 9) Enter the number to be black listed. 10) Click Save. VoIP²ALL 4 Channel Gateway User Guide www.eurotech-communication.com... - Page 67 18) Select the Black List tab. 19) Click on Save From File. 20) Enter the File Name and press Save. To clear the Black List: 21) Click on Delete All. 22) Click Save. VoIP²ALL 4 Channel Gateway User Guide www.eurotech-communication.com...
-
Page 68: Monitoring Calls
Net ID - the ID number of the cellular network BCCH - the number of the Broadcast Channel 2) At the bottom right of a port cell, right click the blue triangle to display the following list of options: VoIP²ALL 4 Channel Gateway User Guide www.eurotech-communication.com... -
Page 69: Call Monitor
To View active VoIP calls: 1) On the Main Toolbar, click VoIP. 2) Select the Call Monitor tab. The following window appears: The call information includes: Org Ch - The channel that originated the call. VoIP²ALL 4 Channel Gateway User Guide www.eurotech-communication.com... -
Page 70: Cdr (Call Detail Reporting)
3) (Optional) Disconnect a call by clicking Disconnect in the call's row. 5.3. CDR (CALL DETAIL REPORTING) The Gateway records the call information of the last 100 calls. The call records (CDR in short) are kept on the RAM memory of the Gateway. VoIP²ALL 4 Channel Gateway User Guide www.eurotech-communication.com... - Page 71 Dest Port - The port that the call went to. Rel Cause- The disconnection code. Calling Number - The number that initiated the call. Called Number - The number that was called. VoIP²ALL 4 Channel Gateway User Guide www.eurotech-communication.com...
- Page 72 The PC software reads the number of records from the Gateway according to the value defined in Check every. The records are exported to file and erased from the memory. Note: When the Gateway is reset, the call records in the Gateway memory are erased. VoIP²ALL 4 Channel Gateway User Guide www.eurotech-communication.com...
-
Page 73: Appendices
1) Connect the Com Cable from the Gateway to the PC RS232 COM Port. 2) In the PC, open the Hyper Terminal program. 3) Disconnect the Hyper Terminal by clicking Disconnect. 4) Click then Properties. VoIP²ALL 4 Channel Gateway User Guide www.eurotech-communication.com... - Page 74 Appendices 5) In the Connect To tab click Configure. The Port Setting should be: 6) Click OK. 7) Select the Settings tab. 8) Click ASCII Setup. The ASCII settings should be: VoIP²ALL 4 Channel Gateway User Guide www.eurotech-communication.com...
-
Page 75: Appendix B: Sending Ussd (Unstructured Supplementary Service Data) Commands In The Debug Screen
This option is used to check and recharge balances with USSD commands. To send USSD commands from the Debug screen: 1) On the Main Toolbar, click Debug. 2) In the lower left corner of the screen, click the Enable Debug. VoIP²ALL 4 Channel Gateway User Guide www.eurotech-communication.com... - Page 76 Here is example of sending the USSD command to check the balance of the SIM in port 1: The command sent from debug: C_USD11,1,*101#, Reply from the Gateway that the command sent OK: OK#11 The USSD command reply from network: A_USD11,2,"Your balance is 24.69$",15 VoIP²ALL 4 Channel Gateway User Guide www.eurotech-communication.com...
-
Page 77: Appendix C: Pc To Gateway Direct Lan Access
Connecting through an IP Switch To connect using a TCP/IP Cross Cable: 1) Connect a TCP/IP Cross Cable from the Gateway LAN to the PC Net Card. 2) In Windows, click Start and select Settings. VoIP²ALL 4 Channel Gateway User Guide www.eurotech-communication.com... - Page 78 Appendices 3) Select Network Connections. 4) Select the network card in which the PC is connected to the Gateway. 5) Click Properties. 6) Select Internet Protocol (TCP/IP) and click Properties. VoIP²ALL 4 Channel Gateway User Guide www.eurotech-communication.com...
- Page 79 1) Connect a net cable from the Gateway LAN to the PC Net Card. 2) In Windows, click Start and select Settings. 3) Select Network Connections. 4) Select the network card in which the PC is connected to the IP Switch. 5) Click Properties. VoIP²ALL 4 Channel Gateway User Guide www.eurotech-communication.com...
- Page 80 Appendices 6) Select Internet Protocol (TCP/IP) and click Properties. VoIP²ALL 4 Channel Gateway User Guide www.eurotech-communication.com...
- Page 81 Appendices Here you see the IP settings in which the Gateway is connected to the Local network. VoIP²ALL 4 Channel Gateway User Guide www.eurotech-communication.com...
- Page 82 9) In the window that appears, enter 10.16.2.244. This adds a new IP address to the PC. The Subnet Mask is filed automatically. 10) Click Add. 11) Click OK. 12) In the Internet Protocols window, click OK. 13) Close the Local Area Connection window. VoIP²ALL 4 Channel Gateway User Guide www.eurotech-communication.com...
Need help?
Do you have a question about the VOIP² ALL SERIES and is the answer not in the manual?
Questions and answers