Table of Contents
Advertisement
Quick Links
A
m
b
i
e
n
t
A
m
b
i
e
n
t
User manual
Ambient
Ambient - Black Piano Laquer
Made in Germany
clearaudio electronic
Hi-Fi Components
GmbH
Spardorfer Str. 150
D-91054 Erlangen
Tel. +49(0) 1805/059595
FAX +49(0) 09131/51683
www.clearaudio.de
www.analogshop.de
info@clearaudio.de
copyright clearaudio 2008
Version 1.2._08-04-11_E
Advertisement
Table of Contents

Subscribe to Our Youtube Channel
Related Manuals for Clearaudio Ambient


Summary of Contents for Clearaudio Ambient
-
Page 1: User Manual
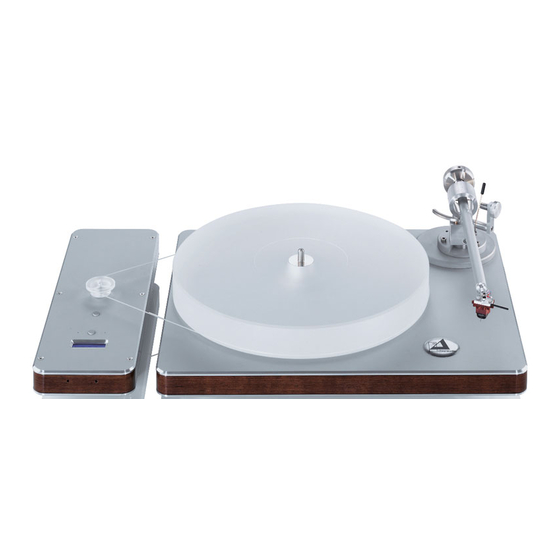
User manual Ambient Ambient - Black Piano Laquer Made in Germany clearaudio electronic Hi-Fi Components GmbH Spardorfer Str. 150 D-91054 Erlangen Tel. +49(0) 1805/059595 FAX +49(0) 09131/51683 www.clearaudio.de www.analogshop.de info@clearaudio.de copyright clearaudio 2008 Version 1.2._08-04-11_E... - Page 2 , a world class product of clearaudio electronic GmbH. The special resonance-optimised construction, the external motor-unit and the patented clearaudio - CMB-bearing-technology guarantees absolute speed stability, pure pleasure in listening and reproduction in accordance to the original. Thank you very much your confidence.
-
Page 3: Table Of Contents
Ambient User manual Contents 1. Packaging overview 2. Packing contents 3. Set-up and operation 4. Tonearm mounting 5. Special information 6. Service 7. Technical data Warranty information Seite 3 clearaudio electronic GmbH 2008... -
Page 4: Packaging Overview
1. floor: Turntablechassis 2. floor: Motorunit Power supply unit Platter incl. Upper part of bearing 3. floor Optional, if the Ambient is ordered in a package: A: Unify tonearm B: Satisfy tonearm (according your order) cartridge, accessories Seite 4 clearaudio electronic GmbH 2008... -
Page 5: Package Contents
& bottom plate High-precision turntable platter made Tonearmbase (preassambled) of solid silicon acrylic with patented CMB bearing Power supply unit(incl. 3 different plug Pulley made of acrylic including fixing screws units; EU, USA and GB) Seite 5 clearaudio electronic GmbH 2008... - Page 6 Clearaudio Clever Clamp Shynthetic bearing oil (2.5 ml) Screwdriver (for fixing the pulley) levelgauge Silent Belt Ø 1mm (2 x, Pair of white gloves therefrom 1 x spare) hexkeywrench Warranty card (not shown) Seite 6 clearaudio electronic GmbH 2008...
-
Page 7: Set-Up And Operation
After you have checked the package contents as described in section 2, lay the parts out on a Ambient clean, safe flat surface for the clearaudio assembly. Assembly is fairly simple and straight forward as many parts have been preassembled at the factory. Please use the white gloves provided to prevent scratches and/or fingerprints during assembly. - Page 8 Place the premounted chassisplate on a good turntable rack area optimised for low sensitivity of acoustical feedback. Pic. 2: Placing the Ambient turntable Unpack the turntable platter with the upper part of the platter bearing. Remove the protective security tape from the bearing housing and place this unit carefully over the spindle mounted in the turntable chassis.
- Page 9 3 mm. Tighten the three little screws inside the pulley with the aluminium screwdriver provided. 3 mm Pic. 5: Placing the pulley on the motor spindle Place now the motorunit beside your Ambient turntable. The distance between the motorunit and the turntable should be 2 - 2,5 cm! 2 – 2.5 cm Pic.
- Page 10 Should the air bubble in the level gauge not be in the black circle (see at the blow up), please ensure then that your underground so will be according aligned. Only if the turntable will be aligned you will receive the optimum on sound. Pic. 8: To align the turntable Seite 10 clearaudio electronic GmbH 2008...
- Page 11 Exactly 33 1/3 rpm shows the display 33.3! (left LED is glowing at 33 1/3) Calibration for 45 rpm. Exactly 45 rpm shows the display 45.0! (right LED is glowing at 45) Pic. 9: Calibrating the turning speed Seite 11 clearaudio electronic GmbH 2008...
-
Page 12: Tonearm Mounting
User manual 4 Tonearm mounting 4.1 Unify mounting To mount the tonearm base to the Ambient armboard, please use the screws without nuts (M4x20) and place it like the red marked screws. Pic. 10: Mounting the tonearm base Once the Carefully remove the security zip tie and unwrap the arm tube. - Page 13 Ambient User manual For the exact adjustemts should be the cartridge mounted! Please follow therefor the instructions of the cartridge user manual! Pic. 12: Mounting the tonearm Seite 13 clearaudio electronic GmbH 2008...
- Page 14 Ambient User manual Attach the clearaudio Turbo Weight on the end of the tonearm (1). Set tracking force using the clearaudio Exact stylus preassure gauge (see cartridge instructions for recommended tracking force renge). Adjusting tracking force is accomplished by moving When the weight towards or away from the pivot point on the shaft (to 1).
- Page 15 Once you loosen this screw, you´ll be able to rotate the headshell a small amount in either direction. Be sure to tighten the screw when done. Pic. 15: Azimuth adjustment Seite 15 clearaudio electronic GmbH 2008...
- Page 16 Ambient User manual 4.2 Satisfy mounting To mount the tonearm base to the Ambient armboard please use the screws without nuts (M4x20) and place it like the red marked screws. Pic. 16: Mounting the tonearm base for Satisfy Please put careful the cables and the tonearm through the armboard, pay attention that...
- Page 17 Moving the armboard in one direction or another will allow you to locate the correct position. Once located, tighten the armboard down. Shown in the picture below. You can also use the optional clearaudio cartridge alignment gauge. For the exact adjustemts should be the cartridge mounted! Pic.
- Page 18 Wind the counterweight on the tonearm-tube. You can adjust the tracking force of your cartridge by turning the counterweight (shown in the picture below) (green arrow = more tracking force red arrow = lesser tracking force). Pic. 21: Adjustment of the tracking force Seite 18 clearaudio electronic GmbH 2008...
- Page 19 You can now place a record on the platter, affix it with the enclosed clever-clamp and finish your cartridge adjustments. Now you are finally ready to play your vinyl records. Ambient We wish you a lot of pleasure with your new -turntable. Seite 19 clearaudio electronic GmbH 2008...
-
Page 20: Special Information
User manual 5. Special information To achieve the full clearaudio warranty, it is necessary that you fill out and send the corresponding part of the warranty registration card back to clearaudio, within two weeks after purchase. Only if the product is returned in it’s original packing clearaudio can provide the warranty. -
Page 21: Technical Data
5 years* (see chapter 5) Illustrations and technical information not binding Subject to change without notice. * Only if the warranty card is filled out correctly and sent back to clearaudio. Stand: April 08 Seite 21 clearaudio electronic GmbH 2008... -
Page 22: Clearaudio Electronic Gmbh
RETAIN YOUR PURCHASE RECEIPT Your purchase receipt is your permanent record of a valuable purchase. It should be kept in a safe place to be referred to as necessary for insurance purposes or when corresponding with clearaudio. IMPORTANT When seeking warranty service, it is the responsibility of the consumer to establish proof and date of purchase. Your purchase receipt or invoice is adequate for such proof.
Need help?
Do you have a question about the Ambient and is the answer not in the manual?
Questions and answers