Table of Contents
Advertisement
Quick Links
Advertisement
Table of Contents

Subscribe to Our Youtube Channel
Related Manuals for Xerox TF4025.4075


Summary of Contents for Xerox TF4025.4075
- Page 1 Office Fax TF4025.4075 User Manual...
- Page 2 © 2009 Xerox Corporation. All rights reserved. Xerox and the sphere of connectivity design are trademarks of Xerox Corporation in the US and/or other countries and is used under li- cense. Sagem Communications is an authorized Xerox licensee. Copyright protection claimed includes all forms and matters of copyrightable material and...
-
Page 3: Introduction
Dear Customer Introduction Brand Variable With the purchase of this device, you have chosen a quality Xerox product brand. Their device fulfils the most varied requirements for private use or in your office and business everyday. Your device is delivered with an already inserted free ink film for a few test pages. For this film, you do not require any Plug’n’Print card (= chip card with information regarding ink film... -
Page 4: About This User Manual
About this User Manual With the installation guide on the following pages, you can start using your device quickly and easily. Detailed descriptions can be found in the following sections of this user manual. Read the entire user manual carefully. Follow all safety instructions in order to ensure proper operation of your device. -
Page 5: Table Of Contents
Table of Contents Introduction..............3 Dear Customer ......................... 3 About this User Manual ......................4 Safety Notes ..............9 Introduction ..........................9 Warning: Electrical Safety Information ..............10 Emergency Power Off ......................10 Operational Safety Information ................... 11 Maintenance .......................... 11 Consumable Materials ....................... - Page 6 Telephone Functions ..........29 Placing a Call on the Device .................... 29 Calling Additional Telephone Functions ..............30 Getting Outside Line ......................31 Chain Dialling ......................... 32 Insert Dialling Pause ......................32 Hands-Free ..........................32 Recording a Telephone Conversation ................. 32 Telephone Book of the Device ..................
- Page 7 Copier ................55 Inserting Documents ......................55 Making a Copy ........................56 Creating Multiple Copies ....................56 SMS................. 57 SMS Requirements ....................... 57 Sending SMS .......................... 57 Notification by SMS ......................58 Receiving SMS Messages ....................59 Reading SMS Messages ..................... 59 Calling SMS Functions ......................
- Page 8 11 Service ................75 Checking the Ink Film Reserve ..................75 Changing the Ink Film ......................75 Fixing a Paper Jam ......................78 Fixing a Document Jam ....................79 Cleaning ........................... 81 Checking the Firmware Version ..................83 Using Service Codes ......................83 Power Cycling .........................
-
Page 9: Safety Notes
Safety Notes Introduction Read these safety notes carefully before using this product to make sure you operate the equipment safely. Read these safety notes carefully before using this product to make sure you operate the equipment safely. Your Sagem product and recommended supplies have been designed and tested to meet strict safety requirements. -
Page 10: Warning: Electrical Safety Information
Cleaning Your Product Cleaning Your Product Before cleaning this product, unplug the product from the electrical outlet. Always use mate- rials specified for this product. The use of other materials may result in poor performance and may create a hazardous situation. Do not use aerosol cleaners, they may be explosive and flammable under certain circumstances. -
Page 11: Operational Safety Information
Operational Safety Information Introduction To ensure the continued safe operation of your Sagem equipment, follow these safety guide- lines at all times. Do These: Operational Safety Information 1 • Always follow all warnings and instructions that are marked on or supplied with the equip- ment. -
Page 12: Consumable Materials
Consumable Materials Consumable Materials 4 • Use only original consumable materials. These are available from a specialised retailer. Oth- er consumable materials could damage the device or shorten its service life. Consumable Materials 1 • Store all consumables in accordance with the instructions given on the package or container. Consumable Materials 2 •... -
Page 13: For Fax Function
For Fax Function Europe Certification to 1999/5/EC Radio Equipment & Telecommunications Terminal Equipment Di- rective This Sagem product has been self-certified by Sagem for pan-European single terminal con- nection to the analogue public switched telephone network (PSTN) in accordance with Direc- tive 1999/5/EC. - Page 14 14 ¦ Safety Notes · Illegal Copies...
-
Page 15: Overview
Overview Overview of the Menu Functions The following functions are available on your device. There are two ways in which you can call functions: Menu Navigation Navigating in the Menu: Press OK or one of the two arrow keys [, to open the function menu. -
Page 16: Fax Switch
3 Fax 31 Polling 31 Polled reception ........................page 54 32 Polling Send 32 Polling send..........................page 54 33 Sending Fax Later 33 Sending fax later ........................page 53 34 Broadcasting 34 Sending to multiple recipients (= broadcast)..............page 52 35 Printing Fax Journal 35 Printing fax journal........................ - Page 17 7 Answering Machine (Type 2) (Office Fax TF4075) 71 Switches Answering Machine On/Off (PPF 675 · 676 · 6xx · SPFX 47) 71 Switches answering machine on/off ................page 39 72 Listening to Messages (PPF 675 · 676 · 6xx · SPFX 47) 72 Listening to messages ......................
-
Page 18: Device Overview
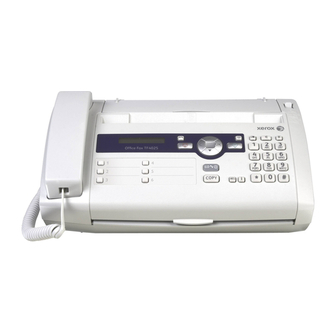
Device Overview Primo · Voice overview ‚ Handset ƒ Paper tray „ Document feeder (writing facing up) … Panel with display † ) socket—Connection socket for the telephone handset ‡ EXT socket—Connection socket for additional devices ˆ LINE socket—Connection socket for telephone cable SPFX 4x Spaltenumbruch 18 ¦... - Page 19 Internal Description ‚ Scanner glass ƒ Rollers of the automatic document feeder „ Rests of the intake rollers … Document guide / scanner film † Cover for scanner and automatic document feeder ‡ Toothed wheel for tightening the ink film ˆ...
-
Page 20: Panel
Panel Telephone Book m—Press briefly: Calling up the telephone book entries. Selecting the entries with the [ / press and hold: saving new entries Fax Switch º/»—Setting the timer and the fax reception modes (= fax switch). Modes set on the dis- ™... - Page 21 SPFX 47 Spaltenumbruch Overview · Panel¦ 21...
- Page 22 22 ¦ Overview · Panel...
-
Page 23: Initial Operation
Initial Operation Packing Contents Packing Contents Sagem Primo Voice ‚ Device ƒ Telephone handset „ Spiral cable for telephone handset … Paper tray † Mains cable with plug (country-specific) ‡ Telephone cable with plug (country-specific) ˆ Additional document support User Manual User manual with installation guide (not depicted) Verpackungsinhalt Missing Package Contents... -
Page 24: Opening The Cover
Opening the Cover Opening the Cover Pull down the cover for paper and document feeder behind the panel. Geräteklappe öffnen Attaching Paper Tray Attaching Paper Tray If you just want to insert paper temporarily, fold the paper support in the cover up (A). You can remove the paper after receiving fax or copying and close the cover again. -
Page 25: Connecting The Handset
Loading Paper Sagem Fold open the lever on the right beside the paper feed towards front. Insert paper in the paper feeder. You can use the paper support in the cover to load up to 15 sheets (A4 · 80 g/m²). In the paper tray you can insert maximum 50 sheets (A4 · 80 g/m2). -
Page 26: Connecting The Telephone Cable
Connecting the Telephone Cable Connecting the Telephone Cable Notice Analogue Fax Machine Your device is an analogue fax device (Group 3). It is not an ISDN device (Group 4), and therefore it cannot be operated directly on an ISDN connection. In order to do this, you need either an analogue adapter or a connection for analogue terminals. -
Page 27: Connecting The Mains Cable
Connecting the Mains Cable Mains Voltage at the Site of Installation CAUTION! Mains Voltage at the Site of Installation! Check whether the mains voltage of your device (indicated on the type label) matches the mains voltage available at the setup location. Connecting the Mains Cable Insert the mains cable into the connection located on the rear side of the device. - Page 28 Entering Number Page Header Your name and number are added together with date, time and page number at the top edge of each fax transmission (= header). Entering Number Enter your number. Using # or * you can enter a plus sign. Confirm with OK.
-
Page 29: Telephone Functions
Telephone Functions Help 3 · Telephone Functions Notice Printing Telephone Book Functions Press î and 3 to print an overview of the telephone book functions. Connecting Additional Telephones For information on how to connect additional telephones and which functions are available to you, please refer the chapter on Telephone Connections and Additional Devices, Page 71. -
Page 30: Calling Additional Telephone Functions
Redial List Redial List: Press @. Use [ to select an entry from the list of the dialled numbers. Outgoing Calls Notice Access Function You can also load the redial list by pressing OK, 22 and OK. Caller List: Press and hold @ (at least two seconds). Use the [ to select an entry from the list of callers. -
Page 31: Getting Outside Line
Receiving a Second Call Call Waiting During a call, you can be informed about another call by a notification tone (= call waiting) if your telephone company offers this service. The notification tone for call waiting on the de- vice is switched off in the factory. Receiving a Second Call During a call, press R to accept the new call. -
Page 32: Insert Dialling Pause
Insert Dialling Pause It may be necessary to insert a dial pause in telephone number, for example, for a direct-in- ward dialling number, a sub-address or in a long distance number. Hold R pressed (for at least – two seconds). appears on the display. -
Page 33: Telephone Book Of The Device
Saving Entry Hold m pressed (for at least two seconds). Notice Access Function You can also call the function by pressing OK, 12 and OK. Enter the name using the letter keypad. Enter capital letters by pressing and holding + key. -
Page 34: Groups
Deleting an Entry Press OK, 16 and OK. Using [ select the entry which you would like to delete. Confirm with OK. DELETE: YES with OK. Confirm Groups Groups You can combine several telephone book entries into a group. A message is sent to all mem- bers of this group in succession. -
Page 35: Short Dial
Deleting Individual or All Group Entries Deleting an Individual Entry Press OK, 13 and OK. Using [ select the group from which you would like to delete entries. Confirm with OK. DELETE MEMBER? Using [ select Confirm with OK. Using [ select the entry which you would like to delete. Confirm with OK. -
Page 36: Calling Line Identification (Clip)
Use [ to select the telephone book entry you would like to assign as a short dial entry. Confirm with OK. Deleting a Short Dial Entry The Telephone Book Entry is Deleted! CAUTION! The Telephone Book Entry is Deleted! This function not only deletes the short dial entry, it also deletes the entire entry from the telephone book. -
Page 37: Missed Calls
Missed Calls Missed Calls If you received a call while away, the ä - key flashes. Press ä. Using [, you can page through the list of missed calls. Notice Additional Messages If you have received additional messages, first select the missed calls using [ and confirm with OK. - Page 38 38 ¦ Telephone Functions · Missed Calls...
-
Page 39: Answering Machine
Answering Machine Type 2 (großer Core) (Office Fax TF4075) Help 3 · Answering Machine Notice Printing Answering Machine Functions Press î and 3 to print an overview of the answering machine functions. Switching On and Off Switching On/Off on the Device Anonymous Outgoing Message Notice Using Anonymous Outgoing Messages... - Page 40 MESSAGE: RECORD Using [ select Confirm with OK. Press OK to record an outgoing message. Wait for the confirmation tone before you say your text. Notice Length of Outgoing Message The outgoing message must be longer than ten seconds and shorter than twenty seconds.
-
Page 41: Listening To Messages
Using Announcement without Recording Message Outgoing Message Without Recording of Messages You can record an outgoing message which the caller hears for which no message can be re- corded in reply (= external memo). Press b. EXTERN. MEMO Using [ select Confirm with OK. -
Page 42: Deleting Messages
Playing Messages again Press b. MESSAGES Using [ select Confirm with OK. Notice Access Function You can also call the function by pressing OK, 72 and OK. MESSAGE: PLAY Using [ select Confirm with OK. The messages are played back. Deleting Messages Deleting Individual Message During playback, press C and OK in order to delete the currently playing outgoing message. -
Page 43: Setting Up Forwarding And Remote Access
Setting up Forwarding and Remote Access Entering Access Code Access Code You must enter an access code to be able to receive transferred messages, or listen to and control your answering machine from other telephones. Remote Control On/Off Notice Remote Control On/Off 0000 The remote control is switched off with the factory-installed access code ( Change the access code to switch on the remote control. -
Page 44: Using Remote Access
Confirm with OK. Enter the number to which the received messages should be forwarded. Confirm with OK. Use [ to select how many messages should be collected and forwarded together. Confirm with OK. Notice Overwriting Existing Outgoing Message When you record a message, you are asked, if you would like to use the old message or would like to record a new one. -
Page 45: Remote Control Functions
Remote Control Functions Aborting Current Function Notice Aborting Current Function Occasionally the answering machine might not react to your entry—for example while you are listening to a message. Cancel the current function by pressing ‰. Se- lect the next function with the appropriate number key. Listening to Messages Hearing Current Message Again: Press ‚. -
Page 46: Recording Internal Memos
Recording Internal Memos Internal Memos on the Device Internal Memos You can record voice messages (= memos), which can be played as messages. The limit on duration of recording set for messages applies even to the recording duration of memos. Recording Length for Memos Notice Recording Length for Memos... - Page 47 Setting the Recording Duration Recording Length You can limit the length of the incoming messages and internal memos. Press b. RECORD. TIME Using [ select Confirm with OK. Notice Access Function You can also call the function by pressing OK, 74 and OK. Use [ to select the desired recording length or unlimited time (automatic).
- Page 48 48 ¦ Answering Machine · Modifying the Settings...
-
Page 49: Fax
Help 4 · Fax Notice Printing Informations for Fax Transmission Press î and 4 to print instructions for sending fax messages and for configuring the fax switch. Unsuitable Documents! CAUTION! Unsuitable Documents! Do not insert any documents into the device that .. - Page 50 Insert the documents face up into the document feeder. The top most document will be fed in first. RESOL.: STANDARD Set the desired resolution. You can choose between (for doc- RESOL.: FINE uments without special features), (for texts with small print or draw- RESOL.: PHOTO (for photos).
-
Page 51: Sending Fax Manually
Short Dial: Press Ý. Select the desired entry using [ or with the numeric keys. Recalling Short Dial Number Notice Access Function You can also load short dial entries by holding the respective number key pressed (for at least two seconds). Redial List Redial List: Press @. -
Page 52: Eavesdropping While Connection Is Established
Enter the direct-inward dialling number or sub address. Press o. The direct-inward dialling number or sub address is dialled only after a short pause. Eavesdropping while Connection is Established Type 1 (kleiner Core) (Office Fax TF4025) Eavesdropping while Connection is Established You can listen while a connection is established, for example if a fax transmission constantly fails. -
Page 53: Sending Fax Later
Sending Fax Later Sending Fax Later If you would like to make use of the lower telephone tariffs or if the recipient can be reached at some specific time only, you can send the fax at a later time—within 24 hours. Insert the document. -
Page 54: Polling Faxes
Polling Faxes Fax Polling With the fax polling function, you can retrieve faxes that lie ready in the dialled device. You can keep a document ready in your device, which can be polled by others. Polling Faxes Directly Enter the desired number using the numeric keypad or select a saved entry. Hold o pressed (for at least two seconds). -
Page 55: Copier
Copier Help 5 · Copier Notice Printing Informations for Copying Press î and 5 to print the help for copying. 10 Documents · A5/A4 Use documents with sizes A5 or A4 with 60 to 100 g/m weight. You can insert up to ten doc- uments at a time. -
Page 56: Making A Copy
Notice Setting the Contrast Settings They can adjust the preset contrast (also see Chapter , page 65). Making a Copy Press COPY briefly. The copy is created. Creating Multiple Copies Hold COPY pressed (for at least two seconds). Enter the number of times you would like to copy the document (maximum of 15 cop- ies). -
Page 57: Sms
Function is not supported in all countries and networks (Function is not supported in all countries and networks) Help 8 · SMS Notice Printing Instructions for SMS Functions Press î and 8 to print the instructions for SMS functions. SMS Requirements CLIP for SMS Your device is preset for using the SMS (Short Messaging Service) services. -
Page 58: Notification By Sms
Notice SMS Templates The last five SMS messages written remain saved as templates. Press @ until the desired message appears. Enter the text using the letter keypad. Enter capital letters by pressing and holding + key. You can delete individual characters using \. You can enter space using ½. You can en- ter a line break using |. -
Page 59: Receiving Sms Messages
Use [ to select whether you would like to be informed about new messages on the an- swering machine. Confirm with OK. 10. Enter the number to which the SMS should be sent. 11. Confirm with OK. A message appears on the display stating the notification by SMS is activated. -
Page 60: Calling Sms Functions
Calling SMS Functions While reading an SMS message, press OK to load additional SMS functions. SMS Functions on the Device Use [ to select an option: You can display information about the SMS message, print or delete the message, forward the message to another recipient or send an SMS response. You can return to the list of SMS messages, or view the next or previous SMS message. -
Page 61: Modifying The Settings
Modifying the Settings Changing Transmitting and Receiving Numbers Send and Receive Numbers All numbers that you need to send and receive SMSs are stored in your device. In case you moved to another telephone service provider, you must change these numbers. You can set your device for two SMS service providers. - Page 62 Notice Cancelling Entry SURE: If you have entered the incorrect code, you can cancel the entry with Switching SMS Reception On Press OK, 45 and OK. Enter the service code 41206. Confirm with OK. SURE: YES Using [ select Confirm with OK. Notice Cancelling Entry SURE:...
-
Page 63: Settings
Settings Cursor Navigation 1 Notice Navigating in the Menu You can move the cursor using [. Use C to delete individual characters. Press j to close the menu and return to the starting mode. Entering the Date and Time Press OK, 91 and OK. Enter the time, e.g. -
Page 64: Selecting The Country
Selecting the Country Setting the Country Correctly CAUTION! Setting the Country Correctly! You must set the country in which you are operating the device. Otherwise your de- vice is not adapted to the telephone network. If your country is not included in the list, you must select a different setting and use the correct telephone cable for the country. -
Page 65: Setting The Contrast
Setting the Contrast Setting the Contrast For copying and printing of fax messages, you can select different contrast levels. Press OK, 44 and OK. Using [, select the desired contrast: CONTR.:LIGHT —For brighter copies and fax transmission CONTR.:NEUTRAL —For all types of originals (for example white text on black back- ground or documents with coloured background) CONTR.:OPTIMISED (Factory settings)—Optimized adaptation for text and photo... -
Page 66: Setting The Ring Tones
Setting the Ring Tones Selecting the Ring Tone Ring Tones You can select from among ten different ring tones. Press OK, 55 and OK. Use the number keys 0 to 9 to select a ring tone. Using [, set the volume. Confirm with OK. -
Page 67: Special Settings
(Only for devices without built-in answering machine): Using [ select the total number of rings. . The device stops the ring after these total number of rings and accepts a call or a possible silent fax. Confirm with OK. Use [ to select the number of rings for the fax switch. After the number of rings, the fax switch switches on and distinguishes between fax transmissions and telephone calls. -
Page 68: Printing Lists And Help Pages
Printing Lists and Help Pages Printing Numbers and Entries List of Numbers The list of numbers and entries contains the last ten calls received and numbers dialled as well as the saved entries and groups. Press OK, 23 and OK. The list is printed. Printing Call Log Call Log The call log contains the last 50 dialled numbers. -
Page 69: Starting Initial Installation
Printing Help Pages Help 1 · Overview Press î and 1 to print an overview of the help pages. Help 3 · Telephone Book Press î and 3 to print an overview of the telephone book and answering machine func- tions (model dependent). - Page 70 70 ¦ Settings · Starting Initial Installation...
-
Page 71: Telephone Lines And Additional Devices
Telephone Lines and Additional Devices Configuring Telephone Lines and Services PABX Systems PABX Systems Private branch exchanges (PABX) are typical in many offices and some households. You must dial an outside line access code in order to get a connection to the public telephone network (PSTN) from a PABX. -
Page 72: Connecting Additional Devices
DSL Connection DSL Connection In the event that you use a DSL modem: Connect the device to the slot intended for analogue telephones/fax machines! For additional information, please consult the operating manual of your DSL system. Ask your telephone or internet service provider if necessary. ISDN Connection ISDN Connection Your device is an analogue fax device (Group 3). -
Page 73: Using Additional Telephones (Easylink)
Direct Connection Recommended Notice Direct Connection Recommended We recommend direct connection to the device because this allows the fax switch to function optimally and to control the additional devices. Connection to the Telephone Line Order of Connections In order for the fax switch to function, the device must be first in the series if multiple devices are connected to the same telephone socket. -
Page 74: Using An External Answering Machine
Using an External Answering Machine For the best operation, the answering machine must be connected to the EXT socket of the device. The numbers of rings set for the external answering machine should be less than the FAX RINGS one set under by at least two. -
Page 75: Service
Service Disruptions Notice Troubleshooting Should disruptions occur, follow the instructions on the display and on the error re- port. Checking the Ink Film Reserve Press OK, 46 and OK. The number of pages that can still be printed with the ink film is shown on the display. Press j to return to the starting mode. - Page 76 Remove the paper from the paper feeder and take the paper tray out of the device. Open the device by lifting the panel using grip in the centre and folding it up. DANGER! Device can Close with a Snap! Lock the cover of the device completely into place when opening the device. You could be injured if the cover falls while you are working on the device.
- Page 77 Pull the used Plug’n’Print card out of the plug socket on the left hand side next to the ink film tray. The Plug’n’Print card cannot be reused. Carefully remove the rubber bands from the new ink film. Make sure that the film is not damaged! Place the larger roll with the ink film in the rear ink film tray.
-
Page 78: Fixing A Paper Jam
Break the chip card from the Plug’n’Print card. Insert the chip card in the plug socket on the left hand side next to the ink film tray. 10. Turn the blue gear wheel forward to tension the ink film. The ink film must not have any creases. -
Page 79: Fixing A Document Jam
Carefully pull out the paper. Turn the blue gear wheel forward to tension the ink film. The ink film must not have any creases. Close the device. Insert the paper tray in the opening provided for it behind the paper feeder. - Page 80 Open the scanner cover and the cover of the automatic document feeder by first push- ing the support (A) and then the support (B) inside. The cover (C) falls freely. Carefully pull the document to the front or to the back out of the device. Close the scanner cover and the cover of the automatic document feeder.
-
Page 81: Cleaning
Cleaning Instructions for Cleaning! DANGER! Instructions for Cleaning! Unplug the device from the power socket before cleaning it. Use a soft, lint-free cloth. Never use liquid or easily flammable cleansers (sprays, abrasives, polishes, al- cohol, etc.). Do not allow any moisture to reach the interior of the device. Fax Cleaning Sheets Notice Fax Cleaning Sheets... - Page 82 Lightly wipe the upper side of the scanner glass (A) and the lower side of the document feeder/scanner film (= white plastic plate) (B) with a cloth. Clean the feed roller (A) and the underside of the support pad of the feeder roller (B) with a soft, lint-free cloth moistened with cleaning alcohol (96 percent).
-
Page 83: Checking The Firmware Version
Checking the Firmware Version Press OK, 47 and OK. The model designation and the configured country appear on the display. Confirm with OK. The information on the firmware version of the device is displayed. Confirm with OK. Using Service Codes Introduction The service codes delete all the changed settings and your device is reset to factory settings. - Page 84 General Information The time and date flash on the display. You must check the time and date after a short power failure. Confirm with OK. Problems when Faxing or Printing RESOL.: Faxes sent are of poor quality. Change the resolution from STANDARD RESOL.: FINE SOL.: PHOTO...
- Page 85 Problems with the Connection Try to send the fax manually: Press l, and Fax transmissions are constantly interrupt- dial the number. If the recipient is using an answering machine, wait until you hear a whistling tone. Press o. It is possible that the recipient's device is not ready to receive.
- Page 86 86 ¦ Service · Power Cycling...
-
Page 87: Appendix
Appendix Technical Data Dimensions Dimensions (L¦×¦H¦×¦W) ....................303¦×¦126¦×¦195¦mm Weight Weight................................1,9¦kg Mains Connection Mains Connection....................220¦–¦240¦V¦~ / 50¦–¦60¦Hz Power Consumption Power Consumption Stand-by Mode Stand-by Mode..........................<¦1.5¦W Transmission Transmission ............................<¦20¦W Recommended Ambient Recommended Ambient ........................18¦–¦28¦ºC Relative Humidity Relative Humidity .....................20¦–¦80¦% (non-condensing) Connection Type Connection Type .......................... - Page 88 Paper Capacity Without Paper Tray Capacity......................15 sheets (without paper tray) Capacity with Paper Tray .........................50 sheets (with paper tray) Size Size ............................A4 · 210¦×¦297¦mm Thickness Thickness ............................0,07¦–¦0,11¦mm Weight Weight..............................60¦–¦90¦g/m² Document Feed Slot Capacity Capacity..............................10 sheets Width Width ..............................148¦–¦212¦mm Length Length ...............................
-
Page 89: Guarantee
Guarantee (Terms and Conditions for United Kingdom only) In order to supply the guarantee, you should contact your dealer or Sagem Communications Helpdesk. The proof of purchase will be required. Please make usage of your equipment for the purpose for which it was designed and under normal usage conditions. - Page 90 The repair and delivery costs will be invoiced to the customer. The foregoing shall apply unless otherwise agreed in writing with the customer and only for the United Kingdom. Helpdesk: 0871 - 711 18 82 Helpdesk of Sagem Communications, an authorized Xerox licensee. Spaltenumbruch 90 ¦ Appendix · Guarantee...
-
Page 91: Declaration Of Conformity (Doc)
The CE symbol confirms conformity with the EU directives that apply to the device. Declaration of Conformity (DoC) Hereby, Sagem Communications Austria GmbH declares that this Office Fax TF4025, Of- fice Fax TF4075 is in compliance with the essential requirements and other relevant provi- sions of Directive 1999/5/EC. - Page 92 Neither Sagem nor its affiliates shall be liable to the purchaser of this product or third parties for damages, losses, costs, or expenses incurred by the purchaser or third parties as a result of accident, misuse, or abuse of this product or unauthorized modifications, repairs, or alter- ations to this product, or failure to strictly comply with Sagem operating and maintenance instructions.
- Page 93 Appendix · Declaration of Conformity (DoC)¦ 93...
- Page 94 94 ¦ Appendix · Declaration of Conformity (DoC)
- Page 95 Appendix · Declaration of Conformity (DoC)¦ 95...
-
Page 96: Customer Information
United Kingdom Telephone: 0871 - 711 18 82 Fax: 0207 - 519 50 24 Internet Internet: www.xeroxfax.com We hope that you will have lots of joy using your new product. Office Fax TF4025.4075 253178050-A (V 1.0—04/2009)
Need help?
Do you have a question about the TF4025.4075 and is the answer not in the manual?
Questions and answers