
Related Manuals for Buffalo TeraStation III TS-IXL


Summary of Contents for Buffalo TeraStation III TS-IXL
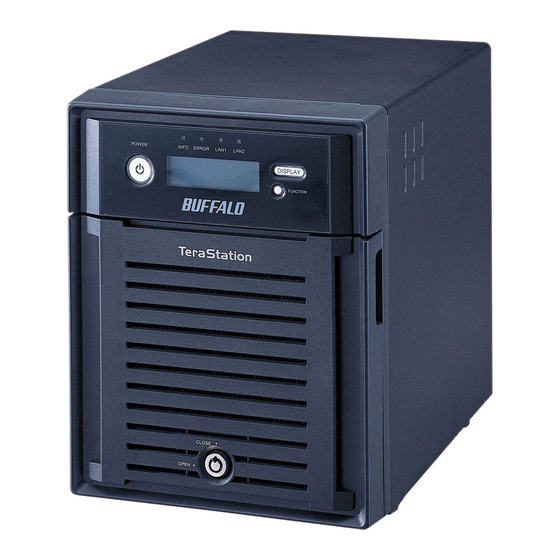
- Page 1 Network Attached Storage TeraStation III iSCSI User Manual TS-IXL TS-RIXL www.buffalotech.com 35011188 ver.01...
-
Page 2: Table Of Contents
Contents Chapter 1 Introduction ................3 iSCSI............................3 Network.Structure........................4 Installing.Microsoft.iSCSI.Initiator..................5 Setup............................6 Adding.multiple.TeraStations....................6 Using the iSCSI Hard Disk Connection Tool ..7 Chapter 2 iSCSI.Hard.Disk.Connection.Tool..................7 Disconnecting.and.Removing.TeraStations..............9 Reconnect.a.TeraStation.......................11 Mutual.Authentication......................12 Chapter 3 Configuration Utility .............. 13 Opening.the.web-based.Configuration.Utility..............13 Chapter 4 Using Logical Volume Manager (LVM) ........ - Page 3 Chapter 6 Configure Access Restrictions ..........26 Configuring.Access.Restrictions.for.the.TeraStation............26 Configuring.Access.Restrictions.for.an.Individual.Volume..........27 Chapter 7 TeraStation Maintenance ............28 Host.Name.and.Time......................28 RAID.Maintenance........................30 Mail.Notification........................31 Using.the.TeraStation.with.a.UPS..................33 Beep.Alerts..........................34 Display.Settings........................34 Administrator.Username.and.Password................35 Formatting.hard.drives......................36 Encrypting.hard.drives......................37 Removing.hard.drives......................37 Erasing.All.Data.From.the.TeraStation................38 Initializing.Settings........................39 Changing.the.IP.address.of.the.TeraStation..............41 Jumbo.Frames.
-
Page 4: Chapter 1 Introduction
Chapter 1 Introduction iSCSI iSCSI Compatible Hard Drive iSCSI ("Internet Small Computer System Interface") is a standard to transmit data on an Ethernet network by encapsulating SCSI commands in TCP/IP protocol. Connecting Ethernet cabling as iSCSI, it is recognized as a local drive by computers or servers. -
Page 5: Network.structure
Differences between NAS and iSCSI iSCSI A server creates shared folders on the iSCSI drive, and a Servers and computers directly access shared folders on a NAS. computer accesses shared folders on the server. • Create and use shared folders easily (no extra server needed) •... -
Page 6: Installing.microsoft.iscsi.initiator
Install the Microsoft iSCSI Software Initiator Windows XP/2000、Windows Server 2003/2000 Server Install the "Microsoft iSCSI Software Initiator" first. Before you can use iSCSI equipment with Windows XP, 2000, or Server 2003, you must download and install the "Microsoft iSCSI Software Initiator". 1. -
Page 7: Setup
Setup Notes: • If there is a DHCP server in the network, the TeraStation will get an IP address from it automatically. • Running the TeraNavigator software will automatically assign an unused IP address to a TeraStation. • TeraNavigator can automatically configure only one unit at a time. To reconfigure a TeraStation with TeraNavigator after its initial installation, initialize the TeraStation first. -
Page 8: Chapter 2 Using The Iscsi Hard Disk Connection Tool
When you set up the TeraStation with TeraNavigator, the iSCSI Hard Disk Connection Tool was installed. You will use this tool to connect to the TeraStation. To launch: Click “Start” - “All Programs” - “BUFFALO”-”iSCSI Hard Disk Connection Tool”-”iSCSI Hard Disk Connection Tool”. - Page 9 Current status Displays Current status of the selected volume. • Not connected. Volume is disconnected. • Connected. Volume is connected. • Connected to other computer. Volume is connected to other computer. Displays other computer's IP address. *You must register TeraStation as an iSCSI hard drive at “Target product" to display it. User Displays user authentication for the specified volume.
-
Page 10: Disconnecting.and.removing.terastations
Disconnecting and Removing TeraStation To remove an iSCSI TeraStation, disconnect any connected volumes first and then unregister the TeraStation. Click “Start”-”All Programs”-”BUFFALO”-”iSCSI Hard Disk Connection Tool”-”iSCSI Hard Disk Connection Tool”. The iSCSI Hard Disk Connection Tool will launch. Select the volume to disconnect from “Volume” and click “Remove”. - Page 11 1 Select the TeraStation to remove from “Target product” Click “Remove the registered iSCSI Hard Disk.”. Note: If a TeraStation is connected to multiple computers, unregister it from each computer. You can now power down the TeraStation and unplug its cables. Note: •...
-
Page 12: Reconnect.a.terastation
To reuse a TeraStation that you previously removed, follow the instructions below to register it and connect a volume. Connect the TeraStation and power it on. Click “Start” -”All Programs”-”BUFFALO”-”iSCSI Hard Disk Connection Tool”-”iSCSI Hard Disk Connection Tool” to open the iSCSI Hard Disk Connection Tool. 1 Select the TeraStation from “Target product”. -
Page 13: Mutual.authentication
Mutual Authentication The iSCSI TeraStation supports mutual authentication for security. Mutual authentication lets a computer only recognize a TeraStation when the mutual password set on each volume and the mutual authentication password match. To configure mutual authentication, turn to page 26. Mutual Authentication password set to the TeraStation (Entire system): Select “Basic"-”Security”... -
Page 14: Chapter 3 Configuration Utility
Configuration Configuration is done from the TeraStation’s web-based configuration utility. Click “Start” - “All Programs” - “BUFFALO” - “iSCSI Hard Disk Connection Tool" - “iSCSI Hard Disk Connection Tool". The iSCSI Hard Disk Connection Tool will launch. If 2 or more TeraStations are connected, select the one to configure. -
Page 15: Chapter 4 Using Logical Volume Manager (Lvm)
Chapter 4 Using Logical Volume Manager (LVM) Enable/Disable Logical Volume Manager (LVM) Logical Volume Manager (LVM) is disabled by default. Enabling LVM will allow you to divide volumes and extend capacity, but will degrade access speeds. Note: Ch an gi n g t he operation mode of a disk or array (such as enabling LVM) will delete all volumes and data from the disk or array. -
Page 16: Create.volume
Create Volume By default, one volume uses all available space on the TeraStation. If you delete the factory volume, you may create up to 10 volumes. Different volumes can be connected to different computers, but each volume can only be connected to a single computer. Notes: Deleting the default volume will delete all data from the TeraStation. -
Page 17: Extend.volume.space
Extend Volume Space Volume space can be extended after you create the volume. Notes: • Ext end i ng t h e v o lu me may d elet e a ll d a ta on the vol u me with s ome file sys tems . Be f o re ex t en d in g th e v olu me , b ac k u p a ny imp or ta nt da ta on th e volu me . -
Page 18: Chapter 5 Changing Raid Mode
Chapter 5 Changing RAID Mode Out of the box, your TeraStation is configured with all four hard drives in a RAID 5 array. Many other RAID array modes are available. Notes: ・ All data on your drive will be deleted if you change the RAID mode. Back up any important data before changing RAID modes. - Page 19 • RAID 0 array Combines 4 drives into one fast array. The full capacity of all drives combined is available for use. RAID 0 is fast and efficient, but includes no parity or redundancy. If any drive is damaged, all data on the array is lost. •...
-
Page 20: Configuring.normal.mode
Configuring Normal mode In the configuration utility, click “Basic” - “Storage” - "RAID Array”. Choose the array to change. Click “Delete RAID Array”. This will take several seconds, and the front panel display will show "RAID ARRAY x Creating". When "Are you sure you want to change the RAID mode?" is displayed, click “Apply". The Confirm Operation screen will appear. -
Page 21: Configuring.a.raid.5.Array.with.4.Drives
Configuring a RAID 5 array with 4 hard drives Note: This is the default configuration. Delete any preexisting array as described in "Configuring Normal mode" on page 19. In the configuration utility, click “Basic” - “Storage” - "RAID Array”. Choose the array you want to configure. Select all 4 hard disks. -
Page 22: Configuring.a.raid.5.Array.with.3.Drives
Configuring a RAID 5 array with 3 hard drives Delete any preexisting array as described in “Configuring Normal mode” on page 19. In the configuration utility, click “Basic” - “Storage” - "RAID Array”. Choose the array you want to configure. Select 3 hard disks. -
Page 23: Configuring.a.raid.10.Array
Configuring a RAID 10 array Delete any preexisting array as described in “Configuring Normal mode” on page 19. In the configuration utility, click “Basic” - “Storage” - "RAID Array”. Choose the array you want to configure. Select all four hard drives. 1 Select “RAID 10”. -
Page 24: Configuring.a.raid.1.Array
Configuring a RAID 1 array Delete any preexisting array as described in “Configuring Normal mode” on page 19. In the configuration utility, click “Basic” - “Storage” - "RAID Array”. Choose the array you want to configure. Select disk 1 and disk 2, or disk 3 and disk 4. 1 Select “RAID 1”. -
Page 25: Configuring.a.raid.0.Array
Configuring a RAID 0 array Delete any preexisting array as described in “Configuring Normal mode” on page 19. In the configuration utility, click “Basic” - “Storage” - "RAID Array”. Choose the array you want to configure. Select all 4 hard drives. 1 Select “RAID 0”. -
Page 26: Configuring.a.hot.spare
Configuring a Hot Spare A hot spare will automatically replace a failed drive in a RAID array. You must have an extra drive to configure a hot spare, so it is only usable with a RAID 5 array of 3 drives or a RAID 1 array. Configure a hot spare as follows. Note: When you change a drive from normal mode to a hot spare, or from a hot spare back to normal mode, all data on the drive is lost. -
Page 27: Chapter 6 Configure Access Restrictions
Chapter 6 Access Restrictions You may configure access restrictions for the TeraStation, or for individual volumes on it. When access restrictions are set, a username and password are required to connect to the TeraStation with the iSCSI hard disk connection tool. Configuring Access Restrictions for the TeraStation Turn of f the iSCSI Service. -
Page 28: Configuring.access.restrictions.for.an.individual.volume
Configuring Access Restrictions for Individual Volumes Turn of f the iSCSI Service. Navigate to “iSCSI Volumes” - “iSCSI Volumes”. Select the volume that you want to set access restrictions for. To restrict access by user names and passwords, enable “IP Address Restriction”, and set the user name and password. -
Page 29: Chapter 7 Terastation Maintenance
Chapter 7 TeraStation Maintenance Host Name and Time 1 Navigate to “Basic” - “Settings” in the configuration utility. 2 Under Name Settings, click “Modif y Settings”. 1 Enter a name for the TeraStation. This will identify it on the network. 2 Click “Save”. - Page 30 The default NTP Server (ntp.jst.mfeed.ad.jp) is the property of Internet Multi Feed Inc. Refer to www.jst.mfeed.ad.jp for more information. Use this service at our own risk. BUFFALO is not responsible for any loss or damage caused by using this service, stopping the service, or missing service.
-
Page 31: Raid.maintenance
RAID Scanning A RAID scan tests your RAID array for errors. If errors are found, they are fixed automatically if possible. If you are using a RAID array, regular RAID scans are recommended. Configure a schedule for RAID scans as below. 1 In the configuration utility, navigate to “Basic”... -
Page 32: Mail.notification
Mail Notification You can choose to send status report emails from the TeraStation to a specified email address. Emails are normally send when TeraStation settings are changed or an error occurs. Status emails contain the following: ・hard drive status • RAID configuration changes •... - Page 33 9 Select the conditions to send. HDD Status Report..Sends the condition of the hard drives at specified time. Fan Failure......Sends when a fan error occurs. Disk Error......Sends when a drive error occurs. System Alert....Sends when the TeraStation is rebooted or shut down, or the RAID configuration is changed.
-
Page 34: Using.the.terastation.with.a.ups
Your UPS is now configured. Notes: Consult Buffalo Technology’s website (www.buffalotech.com) for compatible UPS units. After the TeraStation has automatically shut down during a power outage, do not turn the TeraStation on again until normal power is restored. If you do, the TeraStation will run on the UPS’s battery, and will not shut down automatically a second time, even as the UPS’s battery becomes exhausted. -
Page 35: Beep.alerts
Beep Alerts The TeraStation can beep when errors occurs. Select the events that cause the TeraStation to beep as below. Navigate to “Maintenance” - “Maintenance” - “Alert Sound Settings” in the configuration utility. Click “Modif y Settings”. 1 Select the conditions to beep the alert from Overheating, Drive Error, Fan Error, or UPS Power Error. -
Page 36: Administrator.username.and.password
Changing the Admin Username and Password The admin account is used to access the configuration utility and change the TeraStation’s settings. . By default, the admin username is “admin” and the password is “password”. You may change them as shown below. 1 Navigate to “Basic”... -
Page 37: Formatting.hard.drives
A link to Microsoft’s disk management tool is available from within Buffalo’s iSCSI tool, available on your software CD. Formatting a drive will erase all data and settings from that drive. Back up any important data before formatting a drive. -
Page 38: Encrypting.hard.drives
Encrypting Drives If “Encryption” is check when a drive is formatted, the drive will be encrypted with 128 bit AES encryption. The data on the drive will only be readable when the drive is attached to your TeraStation. It will not be readable from other devices. -
Page 39: Erasing.all.data.from.the.terastation
Erasing All Data Data on the hard drive is not completely erased by just deleting it, or even formatting the drive. It could theoretically be recovered. To completely wipe all data from the drive and replace it with zeros, follow the steps below. -
Page 40: Initializing.settings
Initializing Settings Initialization Button To reset the TeraStation’s settings to factory defaults, use the key (included) to open the front cover. While the TeraStation is running and the power LED is lit, hold in the button to initialize the TeraStation. Hold down the initialization button until it beeps (about 5 seconds). - Page 41 Initialization from the Configuration Utility You can also initialize the TeraStation from the configuration utility. The following settings are reset to their factory defaults: TeraStation Name, Description, NTP setting, RAID maintenance, setting of the Initialization switch of the main unit, Mail notification setting, UPS synchronization setting, Administrator password, network settings (IP address, subnet mask, etc.), alert beep, display panel, language setting, system log 1 N avigate to “Maintenance”...
-
Page 42: Changing.the.ip.address.of.the.terastation
Note: You can only change the TeraStation’s IP address settings from a computer that is connected to the same subnet as the TeraStation. Click “Start” - “All Programs” - “BUFFALO” - “iSCSI HDD Connection Tool” - “iSCSI HDD Connection Tool”. The iSCSI HDD Connection Tool will launch. -
Page 43: Jumbo.frames
Using Jumbo Frames If all of your network devices support jumbo frames, enabling them can make your network faster. To configure jumbo frames on the TeraStation, navigate in the configuration utility to “Basic" - “Network" - “Ethernet Frame Size”, click “Modify Settings", and change the Ethernet frame size to one of the jumbo frame settings: 4102, 7422, or 9694 bytes. -
Page 44: Port.trunking
Using Port Trunking Port trunking (link aggregation) allows you to connect the TeraStation to two Ethernet ports for increased speed and reliability. Your hub or switch must support IEEE 802.1AX-2008 to use port trunking. Turn to the next page for instructions on configuring port trunking on the TeraStation. The TeraStation supports the following port trunking modes: Disabled: Port trunking is not used. - Page 45 Configuring port trunking on the TeraStation: Connect TeraStation’s LAN port 1 to a LAN port on your switch. If you’ve configured a port on the switch for port trunking, use that one. Do not connect the TeraStation’s LAN port 2 yet. Navigate to “Basic"...
-
Page 46: Chapter 8 Configuration Utility
Chapter 8 Configuration Utility The following options can be set from the configuration screens. Common Settings Common Settings (Displayed on the left side of the screen) Click “OFF" to stop iSCSI service. Click “ON" to start iSCSI service. Stop iSCSI service before iSCSI Service creating or extending volumes, Name... - Page 47 Volume Name Enter a name for the volume. * You can enter up to 12 alphanumeric characters (number of characters depends on byte of character). * You may use hyphens (-). * Do not use a number or symbol as the first character of the name. Volume Enter a description for the volume.
-
Page 48: Basic
Basic Basic Name Enter a name to identify the TeraStation on the network. * Enter up to 12 alphanumeric characters. Name * You can use alphanumeric characters and hyphens (-). * Don’t use a symbol as the first character of the name. Click “Modify Descriptions Enter a description for the TeraStation on the network. - Page 49 Network DHCP If a DHCP server is available, enable DHCP to assign IP addresses automatically. IP Address If not using DHCP, enter an IP address manually. IP Address Settings Subnet Mask Set a subnet mask. Click “Modify Settings” to Default Specify the IP address if the default gateway if it exists.
- Page 50 Security Username You may change the admin account’s username. * Enter up to 20 alphanumeric characters. * You can use single-byte alphanumeric characters and hyphens (-). * Do not use a symbol as the first character of the username. Password Change the admin password.
- Page 51 Storage Format Disk Formatting a drive or array will erase all volumes on the drive or array. After formatting a disk from the configuration utility, you must allocate a partition and format it before it is usable. Use “Disk Management” to allocate a partition and format it. Checking “Encryption”...
- Page 52 RAID A RAID scan read checks all sectors in the data area of drives in an array. If a bad sector error Scanning: is found during the scan, it is repaired automatically. Note that some kinds of errors are repaired automatically by the array even without a RAID scan. Status Descriptions repair possible...
-
Page 53: Maintenance
Maintenance Maintenance Notification Enable to use Email notification. SMTP Server Enter the address of your SMTP mail server. Address SMTP Port No. Enter the SMTP Port Number. If this is left blank, the standard port number (25) is used. If user authentication is set to “Disabled” or “POP before SMTP”, then port 25 is used regardless of the number entered in this field. - Page 54 Alert Sound Alert Sound Beep alerts can be triggered by the following conditions : “Overheating", “Disk Settings Settings Error", “FanError", and “UPS Power Error". Click “Modify Settings” to change settings. Display Select items to display on LCD display at the front of the TeraStation from “Host IP", “Disk Mode", and “Time".
-
Page 55: Status
Restore/Format Restore Click “Restore TeraStation” to initialize the following settings: TeraStation Name, NTP TeraStation settings, RAID Scanning, Restore/Format, Mail Notification, UPS Settings, Administrator Settings, Network, Alert Sound Settings, Front Panel Settings, RAID Array Error Detection Response, Management Information, Place Restore Factory You may choose to not initialize the admin username and password when other settings Defaults... -
Page 56: Appendix
Appendix Factory Defaults Initial configuration defaults: • Administrator Username: admin • Administrator Password: password • DHCP Client; automatically requests an IP address from any available DHCP server. If no DHCP server is detect- ed, the following settings are used: IP Address: 169.254.xxx.xxx (where each xxx is a random number from 1- 255). Subnet Mask: 255.255.0.0 •... -
Page 57: Main.lcd.display
Main LCD The main LCD display on the front of the TeraStation displays information about the status and operation of the TeraStation. Below is a guide to the meanings of various displayed information. Normal Display Press the Display button to cycle through the various displays available. You may configure the display settings in the configuration utility at [Maintenance] - [Maintenance] - [Front Panel Settings]. - Page 58 Status Displays the current status when changing the settings or formatting drives. Display Meaning HDx Warning I11 The bad sectors in the Xth hard drive are serious. Replace the Xth hard drive. Bad Sectors OperationModeI12 The RAID array is running in degraded mode. DEGRADE MODE RAID Formatting the Xth RAID array.
- Page 59 Contact tech support for assistance. HD ALL Hard disks are not found. If the drives are installed but this message appears, contact Buffalo’s tech support for assistance. ALL HD Not Found UPS E10 Power outage. The TeraStation is running on UPS battery power and will Dependent Mode be shut down safely.
-
Page 60: Firmware.updates
Firmware Updates Visit Buffalo's web site (www.buffalotech.com) for the latest firmware updates for your TeraStation. Download the update to your Windows desktop and run the update by double-clicking on it. It will detect TeraStations on your network and give you the option of updating their firmware. -
Page 61: Glossary
Term Lists DHCP (Dynamic Host Configuration Protocol) Server RAID (Redundant Arrays of Inexpensive Disks) A DHCP server manages network configuration A technology that allows computer users to achieve information for all the devices on a network. If high levels of storage reliability from low-cost hard a compatible client device is connected to the drives by arranging them into arrays for redundancy. - Page 62 Gateway Device, computer or software which connects networks together. Packets pass through gateways to travel between networks. Subnet mask Subnet masks divide networks into groups of computers that have common, designated IP address routing prefixes. Degraded Mode When errors occur in a RAID 1, RAID 5, or RAID 10 array because of a failing drive, the array enters degraded mode to limit data loss.
- Page 63 TeraStation User Manual Initial release 11-13-09 Issued by Buffalo Technology Inc.
Need help?
Do you have a question about the TeraStation III TS-IXL and is the answer not in the manual?
Questions and answers