Table of Contents
Advertisement
Quick Links
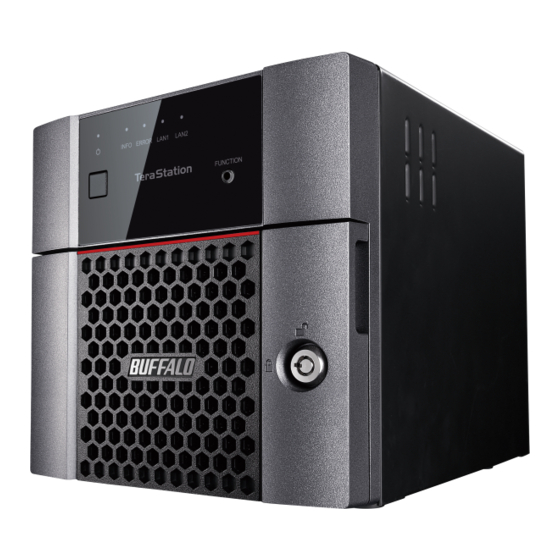
Network Attached Storage
TeraStation 3010
User Manual
Please make sure to read this manual before using and follow the procedures. If you have any inquiries about
the product, contact the number on the warranty statement or the packing box. Do not discard the included
documentations, the warranty statement, or the packing box.
Americas: www.buffaloamericas.com
Europe: www.buffalo-technology.com
Asia Pacific: www.buffalo-asia.com
35021138-14
June, 2018
Advertisement
Table of Contents

Related Manuals for Buffalo TS3210DN


Summary of Contents for Buffalo TS3210DN
- Page 1 Please make sure to read this manual before using and follow the procedures. If you have any inquiries about the product, contact the number on the warranty statement or the packing box. Do not discard the included documentations, the warranty statement, or the packing box. Americas: www.buffaloamericas.com Europe: www.buffalo-technology.com Asia Pacific: www.buffalo-asia.com 35021138-14 June, 2018...
-
Page 2: Table Of Contents
Contents Chapter 1 Getting Started ..........8 Diagrams ...................8 Turning the TeraStation On and Off..........10 Creating an Initialization Drive ............ 12 Chapter 2 Configuration ..........14 Running the Setup Wizard ............14 Setting Up Through Setup Wizard ............14 Opening Setup Wizard ................17 Opening Settings ................ - Page 3 Configuring Access Restrictions for Subfolders ......34 Enabling Subfolders’ Access Restrictions ..........34 Restoring Owner and Permission Settings ..........36 Chapter 4 Storage Management ........ 39 RAID Modes ................... 39 Working with RAID Arrays ............40 Using JBOD ....................40 Changing RAID Mode ................41 Shutting Down the TeraStation Automatically If Error Occurred..42 Configuring Actions If A Drive Used for the RAID Array Has Not Been Discovered ....................44...
- Page 4 Configuring Access Restrictions .............66 Expanding Volume Sizes .................69 Deleting Volumes ..................70 Chapter 5 Backup ............72 Backing Up to a Buffalo NAS Device ..........72 Preparing a Backup Destination .............72 Configuring a Backup Job ...............73 Backing Up to rsync-Compatible Devices ........77 Preparing a Backup Destination .............77...
- Page 5 Usage Restrictions ...................91 Configuring Failover ................92 Replacing to the Backup TeraStation Manually ........94 Reconfiguring After Failover Occurs ............94 Synchronizing between Main and Backup TeraStations Periodically .96 Backing Up Your Mac with Time Machine ........97 Chapter 6 Remote Access .......... 103 WebAccess ...................
- Page 6 Updating Antivirus Pattern Files ............135 Configuring Folders as Virus Scanning Targets ........136 Virus Scanning ..................137 Checking the Log ...................138 Online Help .....................139 Email Notification ............... 140 Sleep Mode .................. 142 Wake-on-LAN ................144 UPS (Uninterruptible Power Supply) ......... 145 Port Trunking ................146 Offline Files ..................
- Page 7 Logs ....................162 Displaying TeraStation’s Logs ...............162 Transferring Logs to the Syslog Server ..........162 Creating a Link to the Logs in the Shared Folder ........164 Changing Archive Rules for File Access Logs ........165 Updating the Firmware ............... 167 Updating Manually ................167 Updating Automatically ................167 Configuring Update Notification ..........
- Page 8 Using a Hot Spare ...................187 Replacing a Non-Malfunctioning Drive ........188 Chapter 9 Utilities ............189 NAS Navigator2 for Windows ............. 189 Mounting as a Network Drive ...............192 Changing the IP Address ...............192 NAS Navigator2 for macOS ............193 Mounting as a Network Drive ...............194 Changing the IP Address ...............194 NovaBACKUP ................
-
Page 9: Chapter 1 Getting Started
Diagrams Depending on the number or type of drives in the unit, the model name will be different. Check the sticker on the packing box for your unit’s model name. TS3210DN 3 4 5 6 TS3410DN 3 4 5 6... - Page 10 If the TeraStation beeps, pressing this button for a short period will stop the beeping. Power LED For TS3210DN and TS3410DN, the LED glows green when the TeraStation is on. For TS3410RN, the LED glows white when the TeraStation is on.
-
Page 11: Turning The Terastation On And Off
Normally, these LEDs blink green when drives are accessed. If a drive fails, its LED will turn red. Spins to avoid overheating inside. Do not block the fan. USB 3.0 Port ( Compatible Buffalo USB drives, USB memory devices, and USB UPS connections can be connected. USB hubs are not compatible. LAN Port 1 ( Connect an Ethernet cable to use this port for your network. - Page 12 Right-click your TeraStation’s icon and select Settings. For macOS, select the TeraStation’s icon while holding down the control key, then select Settings. Enter the username and password, then click OK. Note: The default username and password are “admin” and “password”.
-
Page 13: Creating An Initialization Drive
Settings will open. Click at the top-right of Settings and choose Shut Down. Click Yes. The “Confirm Operation” screen will open. Enter the confirmation number, then click OK. When the power LED on the front of the TeraStation turns off, the shutdown process is complete. Creating an Initialization Drive We recommend creating an initialization drive as soon as possible. - Page 14 prevents the unit from booting. For the detailed procedure, refer to the “Creating an Initialization Drive” subsection in chapter 7.
-
Page 15: Chapter 2 Configuration
Chapter 2 Configuration Configure and manage your TeraStation using the Settings interface, accessible from a browser window. Open the interface using the procedure below or type the TeraStation’s IP address into the URL field of your browser. Notes: • Microsoft Edge, Firefox, Google Chrome, Internet Explorer 9 or later, and Safari 9 or later are supported. If you have difficulty viewing Settings, check the following: ◦... - Page 16 The password settings page will appear. Enter the desired new administrator password and click Next. If you click Skip, the administrator password will not change from the default value (“password”). The time zone settings page will be displayed. If you need to change the time zone from that which is currently displayed on the page, select it from the drop-down list and click Next.
- Page 17 The proxy server settings page will be displayed. If you place the TeraStation under a proxy network, set your proxy settings. Click Next. The RAID settings page will be displayed. To change the RAID mode from the default mode, select the desired RAID mode and click Next, then click Start on the next page.
-
Page 18: Opening Setup Wizard
If you want to keep the RAID mode as is, select “Keep current RAID mode” and click Next. Note: The RAID settings page will not be displayed if using the TS3210DN series. The folder path to access shared folders will be displayed and the setup will finish. -
Page 19: Opening Settings
Click Execute Wizard. The “Confirm Operation” screen will open. Enter the confirmation number, then click OK. Follow the instructions on the screen and finish the setup wizard. Opening Settings Double-click the NAS Navigator2 icon ( ) to start NAS Navigator2. Right-click your TeraStation’s icon and select Settings. - Page 20 Enter the username and password, then click OK. Notes: • If the time-out period is set to “10 minutes”, you will be logged out of Settings after 10 minutes of inactivity. • Click Secure Connection to log in using an encrypted connection. Settings will open.
-
Page 21: Checking The Device Information From Dashboard
Username Password Settings Available If a user is assigned as an administrator, all settings Your username Your password are available. If assigned to another group, only system information (read-only) is available. • Click at the top-right of Settings and choose I’m here to play a tone from the TeraStation for easy location. Checking the Device Information from Dashboard When opening the Settings interface, the Dashboard page will appear first. -
Page 22: Chapter 3 File Sharing
Chapter 3 File Sharing Configuring Shared Folders Adding a Shared Folder From Settings, click File Sharing. Click to the right of “Folder Setup”. Click Create Folder. - Page 23 Configure the desired settings, then click OK. Notes: • Names may contain up to 27 alphanumeric characters, hyphens (-), and underscores (_). Multibyte characters are supported. The first character should not be a symbol. • When you click the Option 1 tab, you can enter the folder description. Descriptions may contain up to 75 alphanumeric characters, hyphens (-), underscores (_), and spaces.
-
Page 24: Recycle Bin
• Do not use any of the following words for the name of a shared folder as these words are reserved for internal use by the TeraStation: authtest, global, homes, info, lost+found, lp, msdfs_root, mt-daapd, printers, ram, spool, usbdisk x (where “x” is a number, for example: usbdisk1) •... -
Page 25: Hidden Shares
Hidden Shares If hidden shares are enabled, shared SMB folders will not be displayed in Network, and only certain users are allowed to access them. To hide a shared SMB folder, follow the procedure below. From Settings, navigate to File Sharing > Folder Setup and choose a shared folder or a USB drive to configure hidden shares. - Page 26 Click Create User.
- Page 27 Enter the desired settings, then click OK. Notes: • Usernames may contain up to 128 alphanumeric characters, hyphens (-), underscores (_), periods (.), and the symbols ! # & @ $ * ^ %. The first character should not be a symbol. •...
-
Page 28: Importing User Information
Importing User Information You can import users in File Sharing > Users by clicking Import CSV File. An example format for user data: Username (required), password (required), and user description (optional). Example 1: Importing usernames, passwords, and comments username1,password1,comment1 username2,password2,comment2 username3,password3,comment3 Example 2: Importing usernames and passwords username1,password1,... - Page 29 Click Add Group.
-
Page 30: Configuring Access Restrictions For Shared Folders
Enter the desired settings, then click OK. Notes: • Group names may contain up to 20 alphanumeric characters, hyphens (-), underscores (_), and periods (.). The first character should not be a symbol. • Group descriptions may contain up to 75 alphanumeric characters, hyphens (-), underscores (_), and spaces. Multibyte characters are supported. -
Page 31: Local Users And Groups
Notes: • Configure access restrictions through Settings. Configuring access restrictions through Windows is not supported and may cause unexpected behavior. • Shared folders with limited access can still be used as backup destinations. • If you change access restrictions for a user or group while they are accessing files, unexpected behavior may result. -
Page 32: Active Directory
: Read and write access allowed : Read access allowed : Access prohibited Click OK. Notes: • The example above shows access restriction by a user. To restrict access by group, click the Local Groups tab and select group permissions. •... - Page 33 Select “Active Directory”, then click Next. Enter the domain controller information and click Search. The domain controller on the same network will be detected and required settings will be entered into each field automatically. Or, enter the settings manually. If there is a difference of more than 5 minutes between the TeraStation’s clock and the domain controller’s clock, joining the domain or authenticating domain users and groups may fail.
- Page 34 Click the shared folder that you want to set access restrictions for. Click the Access Restrictions tab. Enable “Access Restrictions for Shared Folders”. Select the level of access for the user or group. : Read and write access allowed : Read access allowed : Access prohibited Click OK.
-
Page 35: Configuring Access Restrictions For Subfolders
• If FTP is enabled, local and domain group access restrictions from the AD network do not work. Use user access restrictions instead. • For an access-restricted shared folder, if you change the access restrictions of all users and groups from read and write or read-only to access prohibited from the user or group list page in Settings, that shared folder can only be accessed by admin users and groups. - Page 36 Click the shared folder that you want to set access restrictions for. Clear all checkboxes for “LAN Protocol Support” other than “SMB (Windows/Mac)”, “Backup”, and “NFS”. Click the Option 2 tab. Enable “Access Restrictions for Subfolders”. Note: If “Hide Non-Access Permitted Files and Folders” is enabled, non-access permitted sub-files and folders will not be displayed in shared folders.
-
Page 37: Restoring Owner And Permission Settings
You may also configure access permissions for domain users and groups. You should have the TeraStation join your Active Directory domain before configuring access permissions from File Explorer. Notes: • If enabling subfolders’ access restrictions for a USB drive, the drive should be formatted by XFS or ext3. •... - Page 38 Click to the right of “Folder Setup”. Click Advanced Settings for Subfolders.
- Page 39 Select a folder to restore permissions from the tree. Note: If you select a root shared folder from the tree, the action will not be run to the recycle bin. To run the action, select the recycle bin instead. Select actions and action range to run, then click OK. The “Confirm Operation”...
-
Page 40: Chapter 4 Storage Management
Chapter 4 Storage Management RAID Modes TeraStations support many types of RAID. The type of RAID arrays available for use depends on how many drives are installed in your TeraStation. Notes: • If you change the RAID mode, all data on the array is deleted. This is true for every procedure in this chapter. Always back up any important data before performing actions that affect your RAID array. -
Page 41: Working With Raid Arrays
RAID 0 Combines 2 or more drives into a single array. The usable drive space is the total space of all drives used. This simple RAID mode offers faster performance than RAID modes that include parity. If a single drive in the array fails, then all data in the array is lost. -
Page 42: Changing Raid Mode
Once JBOD is configured, create shared folders on each drive to use them. Changing RAID Mode To change the RAID mode, first put the drives in JBOD. From Settings, click Storage. Click to the right of “RAID”. Click the array to delete. Click Delete RAID Array. -
Page 43: Shutting Down The Terastation Automatically If Error Occurred
Choose a RAID array. Select a RAID mode and the drives to be used, then click Create RAID Array. The “Confirm Operation” screen will open. Enter the confirmation number, then click OK. Click OK when finished. Note: After changing the RAID mode, create a shared folder. Shutting Down the TeraStation Automatically If Error Occurred This function will shut down the TeraStation automatically if an error occurs on a drive that is used in a redundant RAID array. - Page 44 From Settings, click Storage. Click to the right of “RAID”. Click Options. Click Edit.
-
Page 45: Configuring Actions If A Drive Used For The Raid Array Has Not Been Discovered
Select “Shut down” for “Error Behavior” and click OK. Configuring Actions If A Drive Used for the RAID Array Has Not Been Discovered The TeraStation can configure actions if a drive used for the RAID array cannot be mounted when booting. Displaying or Hiding the Confirmation Screen Configure to display or hide the confirmation screen for selecting actions if a drive used for the RAID array cannot be mounted when booting. - Page 46 Click Options. Click Edit. Select the “Don’t prompt when a drive could not be detected” option to the right of “Drive Detection Action Settings” and click OK. When the confirmation screen is hidden, an undetected drive will automatically be dismounted from the TeraStation and the TeraStation will be in degraded mode if a redundant RAID mode is configured.
-
Page 47: Configuring A Hot Spare
RAID array will be corrupted so that data will be lost. It is recommended to proceed without changing settings that the confirmation screen appears. Selecting the Action on the Confirmation Screen When having the confirmation screen displayed, the following screen will appear after logging in to Settings if the drive used for the RAID array could not be mounted. - Page 48 Notes: • All data on the hot spare drive is deleted when it is configured as a hot spare and again when it changes from a spare to a drive in the array. • A hot spare cannot be configured for TeraStation models with only two drives. From Settings, click Storage.
-
Page 49: Rmm (Raid Mode Manager)
Click Yes. The “Confirm Operation” screen will open. Enter the confirmation number, then click OK. Click OK when finished. Note: To turn the hot spare back to a normal drive, choose Set as a normal drive. RMM (RAID Mode Manager) With RMM, you can create or expand a RAID array without erasing the data on the drives. - Page 50 Set the RAID mode to “RAID 1”. Select the “Add a drive to a RAID array with RMM. Your data will be preserved. ” checkbox. Select the drive whose data will be saved from the drop-down list. Select the drive to add to the RAID array. Click Create RAID Array.
-
Page 51: Raid Scanning
Choose a RAID array. Select one drive to add to the RAID array. If changing the RAID mode, choose the desired mode for the array from the drop-down list. If not, keep the current RAID mode as is. Click Change RAID Array. The “Confirm Operation”... -
Page 52: Adding An External Drive
The following USB devices are supported by the TeraStation: • USB storage devices • Card readers (except for card readers that can recognize two or more memory cards) Buffalo external USB drives are recommended. Supported file systems for external drives are below: • FAT32 •... -
Page 53: Dismounting Drives
Connect only one device to each USB port of the TeraStation. Note that only the first partition of a connected USB drive is mounted. Additional partitions are not recognized. Notes: • Backup data from macOS may include characters that cannot be written to FAT16 or FAT32 drives such as “.DS_ Store”. -
Page 54: Checking Drives
Select the drive to dismount and click Dismount Drive. The “Confirm Operation” screen will open. Enter the confirmation number, then click OK. When the dismounting process is complete, it is safe to unplug the drive. Disconnect the drive from the TeraStation. -
Page 55: Displaying S.m.a.r.t. Information
Select the drive or array to test, then click Check Drive. Click Check. You have the option of deleting information files from macOS during the check if desired. S.M.A.R.T. S.M.A.R.T. (Self-Monitoring, Analysis, and Reporting Technology) monitors internal drives to detect and report various indicators of reliability, in the hope of anticipating failures. -
Page 56: Checking Drive Condition
Select a drive to check and click S.M.A.R.T.. The S.M.A.R.T. information for the drive will be displayed. Different information may be displayed depending on the brand of drives in your TeraStation. Critical attributes are displayed in bold. Checking Drive Condition Attributes with the worst value that is equal to or less than the threshold value may be significant. -
Page 57: Formatting Drives
Formatting Drives Notes: • Under some circumstances, data deleted when a drive is formatted can be recovered. To ensure that data is “gone forever”, a format might not be sufficient. See the “Erasing Data on the TeraStation Completely” section below. •... -
Page 58: Encrypting Drives
The “Confirm Operation” screen will open. Enter the confirmation number, then click OK. Depending on the size and the formatted file system of your drive, the format may take several minutes or several hours to complete. “Formatting” will be displayed in Settings or NAS Navigator2 until the format is complete. -
Page 59: Drive Quotas
Click to the right of “Restore/Erase”. Click Erase TeraStation. The “Confirm Operation” screen will open. Enter the confirmation number, then click OK. All data on the TeraStation will be permanently erased. Drive Quotas You can set a drive quota to limit drive space for each user or group. You can also set a threshold. If the drive space exceeds the configured threshold, an email notification will be sent. -
Page 60: Quotas For Groups
Enable quotas, choose the alert and the maximum amount of space the user will be allowed to use, and click Note: If you change the primary group, restart the TeraStation to apply the quota settings. Quotas for Groups Follow the procedure below to limit the space for shared folders that each group can use. From Settings, click File Sharing. -
Page 61: Size Limits
Click to the right of “Users”. Select the user that will inherit the group quota settings and click Edit. If you want to add a new user to a group with a quota, create a user by referring to the “Adding a User” section in chapter 3. Select the group’s checkbox to join and change the user’s primary group to the group with the quota, then click OK. - Page 62 Click OK. Click Edit under “NAS Volume”. Click Create Volume.
-
Page 63: Using The Terastation As An Iscsi Device
Configure the desired settings, then click OK. Click OK. Click Close, then click Close again. Navigate to File Sharing > Folder Setup. Click Create Folder. Configure the settings. Select the volume that you created for “Drive/Array” on the Basic tab and click OK. Notes: •... -
Page 64: Creating An Iscsi Volume
As a NAS, the TeraStation is a server, and computers (including other servers) on the network can access shared folders on it directly. A separate server is not required, and features such as backup are built-in. Network Configuration Use gigabit or faster network equipment with iSCSI. For best results, a dedicated network for iSCSI is recommended, separate from the regular network. - Page 65 Click Create Volume. Enter a volume name, volume description, drive or array where a volume will be created, and volume size. Click OK when finished. If you enabled LVM for the target drive or array, or selected “File I/O” for the “Backstore” option, the volume size that you specify here can be changed later.
-
Page 66: Connecting Or Disconnecting Volumes
Notes: • If you click Disable Connection for the selected volume in Storage > iSCSI in Settings, the selected iSCSI volume can no longer be accessed. If you click Enable Connection, the volume will become accessible from the iSCSI initiator software. -
Page 67: Using With Multiple Computers
When the formatting process is complete, the drive will be visible as an icon in Computer or This PC and can be used as a normal drive on the computer. Disconnecting a Volume From Windows, navigate to Control Panel > System and Security > Administrative Tools > iSCSI Initiator. The status of the connecting volume will be displayed as “Connected”... - Page 68 Click Edit under “Access Control (Target Discovery)”. Enable authentication, enter the target CHAP name and secret, and click OK. Note: To enable mutual authentication in addition to target CHAP name and secret authentication, select the “Enable mutual authentication” checkbox and enter the initiator CHAP secret. To search or connect the volume which has mutual authentication enabled from Microsoft iSCSI Initiator, initiator CHAP secret settings should be configured.
- Page 69 The iSCSI volumes on the TeraStation will be listed under “Discovered targets” on the Targets tab. Select the desired volume to connect and click Connect. Click OK. When the status of the selected volume is displayed as “Connected”, the connection is established properly. Configuring Access Restrictions for Individual Volumes If access restrictions are configured for a volume, that volume cannot be accessed unless the target CHAP name and secret are authenticated.
-
Page 70: Expanding Volume Sizes
Connecting to Individual Volumes that Are Access-Restricted Open the Microsoft iSCSI Initiator. Register the initiator CHAP secret to your computer first. If you didn’t enable mutual authentication, skip this step. Click CHAP on the Configuration tab. Enter the configured initiator CHAP secret into the “Initiator CHAP secret” field and click OK. -
Page 71: Deleting Volumes
Enter the desired volume size to add and click OK. Click OK. Deleting Volumes To delete an existing volume, follow the procedure below. Note: Deleting a volume will erase all data on the volume. Back up the data before deleting the volume. From Settings, click Storage. - Page 72 Select the volume to delete and click Delete Volume. Confirm that the volume is correctly selected on the screen and click OK. The “Confirm Operation” screen will open. Enter the confirmation number, then click OK. Click OK.
-
Page 73: Chapter 5 Backup
Buffalo NAS device, either on the same network or on another network. Preparing a Backup Destination First, configure a shared folder on a Buffalo NAS device or connected USB device as a backup destination. The following procedure explains using another shared folder on a TeraStation as a backup destination. The procedure may vary depending on which Buffalo NAS device is selected as a destination. -
Page 74: Configuring A Backup Job
You can configure backup jobs by using another shared folder on the Buffalo NAS device or a USB drive connected to the TeraStation as a destination. You can also back up to a Buffalo NAS device on another network as long as the two networks are connected by a VPN or the route is configured properly. - Page 75 Enter the backup device access key and click OK. Click Add.
- Page 76 Select backup settings such as date and time to run. Refer to the differences between the backup modes in the following section, “Backup Modes”. Click Add.
- Page 77 Select the shared folder that will be the backup source and destination. Note: If you want to back up to a Buffalo NAS device on another network, follow the procedure below to add the Buffalo NAS device on another network before selecting the backup folders.
-
Page 78: Backing Up To Rsync-Compatible Devices
Type Files included The first backup job runs like a normal backup. In subsequent backups, files Overwrite (incremental) added to the source as well as files deleted from the source are kept in the backup folder. The first backup job runs like a normal backup. As each additional backup Overwrite (differential) job runs, files are added to and deleted from the backup folder. - Page 79 Click Add. Select backup settings such as date and time to run. Refer to the differences between the backup modes in the above section, “Backup Modes”. Click Add.
- Page 80 Click List of Servers. Click Add. Select “Add rsync-compatible device”; enter the IP address or hostname of the destination rsync-compatible device and port number. If your rsync-compatible device requires the username and password for backup, enter these values into the fields.
-
Page 81: Backing Up From Rsync-Compatible Devices
Click OK, then Close. Click Refresh and Yes. The folder list will be updated to include the rsync-compatible device’s folders. Select the shared folder that will be the backup source and destination, then click OK. Click OK. Jobs will be added to the backup list. Note: Up to 8 backup jobs can be configured at a time, and 25 backup source and destination folder pairs can be used in one backup job. -
Page 82: Backup Logs
Enter the admin password. If you use SSH encryption during backup, enable SSH. Click OK. Backup Logs The following backup error codes may be recorded in the backup log. Read the description and try the respective corrective actions for each error. Code Description Corrective Action... - Page 83 Code Description Corrective Action Log Example rsync error: error The drive capacity of the in file IO (code 11) backup destination TeraStation Delete unnecessary files and folders. at receiver.c(389) became full. [receiver=3.1.0] Code 11 Reduce the file size to 4 GB or less, or Files larger than 4 GB were change the file system to one other rsync: write failed on...
- Page 84 Code Description Corrective Action Log Example Change the filename or folder Invalid characters were used in name using compatible characters. the filename or folder name of Available characters are described in the backup destinations. the “Adding a Shared Folder” section in chapter 3.
-
Page 85: Replication
Code Description Corrective Action Log Example Check that the backup destination The backup destination folders folders on the backup destination B104 on the backup destination TeraStation exist in the shared folder TeraStation do not exist. list. Check that the drives are recognized properly in Settings. -
Page 86: Configuring A Replication Job
Buffalo NAS device unless it’s entered. You may create multiple folders using different backup device access keys for backup and replication, but only one access key can be used on the TeraStation. Folders that are configured with a different access key cannot be used. - Page 87 Click Edit. If you had configured a backup device access key for the replication destination folder, click Set. If you didn’t, skip to step 6. Enter the backup device access key and click OK.
- Page 88 Click Add. Select the shared folder that will be the replication source and destination, then click OK. Click OK, then Yes. Notes: • During setup, you may choose to encrypt and/or compress replication data. Encrypted data will be transferred securely on the network. Compressed data will ease network loading and is recommended for slow or heavily loaded network connections.
-
Page 89: Synchronizing Between Source And Destination Terastations Periodically
• Replication can also be used to copy all data from a share to a share on an attached external drive. Format the drive with ext3 or XFS before using it for replication. Drives with FAT32 partitions are not supported with replication. -
Page 90: Failover
Click Periodic Sync. Select “Daily” or “Weekly” from the “Schedule” drop-down list. If “Daily” is selected, configure the sync period. If “Weekly” is selected, specify the weekdays and the sync period. When the configuration is finished, click OK. Failover With failover, two TeraStations are connected to the network for redundancy. If an issue renders the main TeraStation inaccessible, operation automatically switches to the backup TeraStation. -
Page 91: Before Configuring Failover
If the backup TeraStation has not received a packet from the main TeraStation within a specified time, the backup TeraStation considers the main TeraStation to have failed. By default, it will try 5 times and wait 60 seconds. If this is triggered by accident, reconfigure failover from the main TeraStation. -
Page 92: Usage Restrictions
To update the firmware while in maintenance mode, the main TeraStation can be updated from Settings, but the backup TeraStation cannot. Download the firmware updater from the Buffalo website for the backup TeraStation and try updating the firmware on it. -
Page 93: Configuring Failover
*If the backup TeraStation took over the main TeraStation’s IP address after failover, the WebAccess settings will not be copied. Re-register your BuffaloNAS.com account for WebAccess. If the backup TeraStation kept its IP address, the settings will be copied from the main TeraStation. **The settings configured on the Trend Micro NAS Security settings page will not be copied to the backup TeraStation. - Page 94 Select a TeraStation to be the backup destination device and enter its administrator username and password (the username is “admin”, the password is “password” by default). Select the LAN port to be used for sharing files and enter a virtual IP address and subnet mask. About Virtual IP Address: A virtual IP address is an IP address that will be used for file sharing while failover is configured.
-
Page 95: Replacing To The Backup Terastation Manually
Notes: • If you want to cancel the failover settings while both the main and backup TeraStations are working properly, click Force Failover to Stop on both TeraStations and restart them. After the TeraStations are restarted, make sure that all settings such as IP address and files on the shared folders are correct. When you cancel failover settings, attributes of the shared folders on the backup TeraStation will become read- only. - Page 96 Click to the right of “Power Management”. c. Click Edit. d. Select “Sync with UPS connected to another Buffalo NAS device on the same network” and configure the main TeraStation as a sync source. e. Click OK when finished.
-
Page 97: Synchronizing Between Main And Backup Terastations Periodically
Synchronizing between Main and Backup TeraStations Periodically To copy files that are saved via other file sharing protocols such as AFP or FTP to the backup TeraStation regularly, configure “Periodic Sync” in Settings. Follow the procedure below. From Settings for the main TeraStation, click Backup. Click to the right of “Failover”. -
Page 98: Backing Up Your Mac With Time Machine
Click Edit. Select “Daily” or “Weekly” from the “Schedule” drop-down list. If “Daily” is selected, configure the sync period. If “Weekly” is selected, specify the weekdays and the sync period. When the configuration is finished, click OK. Backing Up Your Mac with Time Machine Time Machine is a backup program included with macOS. - Page 99 From Settings, click File Sharing. Move the AFP switch to the position to enable AFP. Click to the right of “Folder Setup”. Choose a shared folder as your backup destination for Time Machine. Under “LAN Protocol Support”, select the “AFP (Mac)” checkbox on the Basic tab and click OK. Click Close.
- Page 100 Select the shared folder that you enabled AFP for in the previous steps, then click OK. Click OK, then click OK again. Move the Time Machine switch to the position to enable Time Machine. From the Mac, open System Preferences.
- Page 101 Click Time Machine.
- Page 102 Click Select Backup Disk. Select the TeraStation, then click Use Disk.
- Page 103 Enter a username and password with the rights to access the shared folder of the TeraStation, then click Connect. Note: If access restrictions are not configured on the destination share, log in with the administrator account. The default username and password for the administrator account are “admin” and “password”. If access restrictions are configured, log in with an account with write privileges.
-
Page 104: Chapter 6 Remote Access
Chapter 6 Remote Access WebAccess WebAccess is a software utility for accessing the files in the shared folder of your TeraStation from your computer or mobile devices through the Internet. Be careful when configuring WebAccess. Certain settings can make the files in the shared folder available to anyone on the Internet, without any access restrictions. - Page 105 Configure the desired settings, then click OK. • To use SSL encryption for more secure data transfers, enable “HTTPS/SSL Encryption”. • You may use the BuffaloNAS.com server as a DNS server, or disable it to use a different DNS server. •...
-
Page 106: Ftp
Allow anonymous: Anyone can access (view) shared folders. (Access restrictions configured for shared folders will not work.) Allow all groups and users: All groups and users registered on the Buffalo NAS device can use WebAccess. (Access restrictions configured for shared folders will not work.) Use inherited folder permissions: Users and groups have the same access permissions with WebAccess that they do locally. -
Page 107: Cloud Storage
To access the TeraStation via FTP, configure your FTP client software with the following settings: • Hostname: IP address of the TeraStation • Username: The TeraStation’s username • Password: The TeraStation’s password • Port: 21 Accessing the TeraStation with an Anonymous User To allow anonymous access to your FTP share, disable access restrictions. - Page 108 Click Add. Select the service name and region name that you have selected when creating the bucket from the drop- down list. Enter the bucket name, access key ID, and secret access key; select the storage class and the connection protocol, then click OK.
- Page 109 Enter a remote folder name to use with the cloud storage service and click OK. Under “LAN Protocol Support”, select the “Backup” checkbox on the Basic tab. Click OK. Enter the desired characters into the backup device access key field. Configure the desired shared folder settings, then click OK.
-
Page 110: Uploading Files To Cloud Storage
Uploading Files to Cloud Storage To upload files to cloud storage, using backup job is recommended. From Settings, click Backup. Click to the right of “Backup”. If you had configured a backup device access key to the remote folder that was created through the “Configuring Cloud Storage”... - Page 111 Click Add. Select backup settings such as date and time to run. It is recommended to configure a job to run periodically. If you create a differential backup job and there are files that only exist in the destination folder, these files will be deleted when the job runs.
- Page 112 Click Add. Select the shared folder that files will be saved to as a source, and the remote folder created through the “Configuring Cloud Storage” section above as a destination. Click OK. Jobs will be added to the backup list. Notes: •...
-
Page 113: Dropbox Sync
Dropbox Sync The TeraStation supports syncing with Dropbox, the online cloud service. Once connected, you can share TeraStation files via Dropbox (or Dropbox files via TeraStation). To link your TeraStation with your Dropbox account, follow the procedure below. Note: To use Dropbox Sync, you need a Dropbox account and an available empty Dropbox folder. If you don’t have a Dropbox account, or if you need to create a new empty Dropbox folder, refer to the Dropbox website. - Page 114 Click View Dropbox Authentication Page. The authentication site that is offered by Dropbox will be displayed. Log in to the website with your Dropbox account, then click Allow. The authentication code will be displayed. Copy the authentication code and return to Settings. Authentication code reregistration should be finished within 3 minutes.
-
Page 115: Changing Dropbox Job Settings
If you enable encryption, you will need to set an encryption password. The password cannot be changed once you configure it. Please take note of the password and keep it secure. If you forget the password, create a new job using the same Dropbox account. The old job can then be deleted. Click OK. - Page 116 From the job list, click the job whose settings you want to change. Click the Options tab.
- Page 117 Click Edit.
- Page 118 Configure the desired settings and click OK. Notes: • When encryption is enabled, files uploaded to Dropbox not using Dropbox Sync will not be downloaded to the TeraStation even if the sync direction is configured to “Bidirectional” or “Download only”. •...
-
Page 119: Creating A Shared Link (Windows Only)
Creating a Shared Link (Windows Only) Buffalo offers a Windows application, “B-Sync”, that can create shared links for the files stored in the TeraStation folders. You can download the application from the Buffalo website. Refer to the application help for the usage procedure. - Page 120 Click Add. The job setup wizard will open. Enter your Azure Storage account name and access key, then click Next.
- Page 121 Enter the desired job name and click Next. Select “Backup” and click Next.
- Page 122 Select the desired shared folder on the TeraStation as the backup source folder and enter the container name for the backup destination, then click Next. Specify the sync period and click Next.
- Page 123 Select the desired action to take for files in the container that share the same name as files in the backup source after they are deleted, then click Next.
- Page 124 Configure whether to filter the backup target files. The following screen is available to configure filtering files by file size and whether they’re hidden. Configure the desired filtering settings and click Next.
-
Page 125: Creating A New Restore Job
The following screen is available to configure filtering files by extensions. Configure the desired filtering settings and click Next. Confirm that all settings are properly configured and click OK. Notes: • Regardless of whether file filtering was configured, the following files will not be backed up to an Azure Storage container: ◦... - Page 126 Move the Microsoft Azure Storage Sync switch to the position to enable Microsoft Azure Storage Sync. Click to the right of “Microsoft Azure Storage Sync”. Click Add.
- Page 127 The job setup wizard will open. Enter your Azure Storage account name and access key, then click Next. Enter the desired job name and click Next.
- Page 128 Select “Restore” and click Next. Enter the container name for the restore source and select the desired shared folder on the TeraStation as the restore destination.
-
Page 129: Changing Job Settings
Select either to restore data into the first level folder (root folder) or the second level (subfolder) of the restore destination folder, then click Next. Confirm that all settings are properly configured and click OK. Note: When deleting a completed restored job, it can be converted to a backup job. If that restore job had been configured to restore to the second level on the shared folder, restored data will automatically move to the first level. - Page 130 Click the Options tab. Click Edit.
- Page 131 Configure the desired settings and click OK.
-
Page 132: Chapter 7 Advanced Features
Chapter 7 Advanced Features Antivirus Software Trend Micro NAS Security can protect your network and data from software viruses, malware, and spyware. Virus scan by Trend Micro NAS Security is available for files in the TeraStation’s shared folders, except for the “usbdisk” folder. -
Page 133: Configuring Security Settings
Click Edit. Click Browse and select the quarantine folder. Click OK. Configuring Security Settings Use the Trend Micro NAS Security settings page to configure security settings such as updating pattern files, configuring scan schedules, and activating or expanding the license. To open the settings page, follow the procedure below. - Page 134 Click Options. Enter your username and password, then click Log On. You can log on with the TeraStation’s admin account. The default username and password are “admin” and “password”. The Trend Micro NAS Security settings page will open.
-
Page 135: Licenses
Notes: • The Trend Micro NAS Security settings page is compatible with IE 6.0 SP2 or later (Windows) and Firefox 1.5 or later (Windows or Mac). • To change the display language of the Trend Micro NAS Security settings page, change the system language to the desired settings by referring to the “Name, Date, Time, and Language”... -
Page 136: Connecting Through A Proxy Server
The new license is now registered. To check the status of the current license, open the Trend Micro NAS Security settings page and navigate to Administration > Product License on the left-side menu. Connecting Through a Proxy Server If you must pass through a proxy server to connect to the Internet in your network environment, follow this procedure to set the IP address of the proxy server and other settings. -
Page 137: Configuring Folders As Virus Scanning Targets
From the left-side menu of the Trend Micro NAS Security settings page, choose Scheduled Updates. Check “Enable Scheduled Update”. Select a time for updates to begin, an interval for updates, and an amount of time for updates to continue. Select the components to update. Click Save. The antivirus software is now configured to update automatically at the scheduled time. -
Page 138: Virus Scanning
From Settings, click File Sharing. Click to the right of “Folder Setup”. Click the shared folder that you want to exclude from the scan. If the options’ checkboxes are selected on the Option 1 tab, it means the shared folder will be scanned by those scan options. -
Page 139: Checking The Log
Click Scan now. This starts the virus scan. If the scan finds a virus, the user can be notified in two ways: • The I34 virus alert message is normally shown in Settings or NAS Navigator2. Once the virus is removed from the quarantine folder, the message is no longer displayed. -
Page 140: Online Help
Click the log item that you want to check. Click Display Log. This completes the procedure for checking the log. Online Help For more information on the antivirus software, refer to the online help. Follow the procedure below to access the online help. -
Page 141: Email Notification
Email Notification Your TeraStation can send you email reports daily, or when settings are changed or an error occurs. You can configure the events that will trigger notifications from any of the following functions: drive quota, drives (internal, external, or RAID array), fan, backup, replication, failover, antivirus, system alert Refer to the contextual help in Settings for more detailed information such as when the notification email will be sent or the differences between the notification categories. - Page 142 If you select an authentication type other than “Disable” from the drop-down list, you can enter the sender email address and credentials of the email server. To change the events of email reports, click Advanced Report Settings. On the displayed screen, select or clear the category’s checkboxes.
-
Page 143: Sleep Mode
The notification emails will be categorized into the following importance levels. Levels Details Daily Report Describes the status of the TeraStation in a daily report email. Sends a notification email if an event occurs. Info reports will contain Info just information such as capacity information, job starts/finishes, etc. Sends a notification email if a non-critical error occurs. - Page 144 Specify the timer interval, wake-up time, and time to go into sleep mode, then click OK. Notes: • Up to three timers can be set. • The time to enter sleep mode can be set from 12:00 a.m. to 3:45 a.m. of the next day. The time to wake from sleep mode can be set from 12:00 a.m.
-
Page 145: Wake-On-Lan
Timer 1: Daily 9:00–18:00 Timer 2: Wednesday 10:00–1:00 a.m. of the next day Timer 3: Not used On days other than Wednesday, normal operation begins at 9:00 a.m. and the unit goes into sleep mode at 6:00 p.m. On Wednesday, normal operation begins at 10:00 a.m. and the unit goes into sleep mode at 1:00 a.m. -
Page 146: Ups (Uninterruptible Power Supply)
• If the TeraStation is connected to a Buffalo wireless router configured for remote access, then it may be turned on from outside the local network (from the WAN side). To use this feature, connect the router to LAN port 1 or 2 on the TeraStation. -
Page 147: Port Trunking
Buffalo NAS device is connected to the UPS, select “Sync with UPS connected to another Buffalo NAS device on the same network”. After making this selection, enter the IP address of the Buffalo NAS device that will be the sync source into “Other Buffalo NAS’s IP Address”. - Page 148 Trunking Mode Characteristics Creates aggregation groups that share the network speed and duplex settings. Utilizes all slave network interfaces in the active aggregator Dynamic link aggregation group according to the 802.3ad specification. Note: To use this mode, a separate intelligent switch that supports IEEE 802.3ad is required.
-
Page 149: Offline Files
Connect the hub’s LAN port and TeraStation’s LAN port using the second LAN cable. If you are using an intelligent switch, connect to the LAN port that was previously configured for port trunking. Restart the TeraStation before use. Offline Files The “offline files”... -
Page 150: Accessing From An Nfs Client
Accessing from an NFS Client Note: (US customers only) Buffalo’s customer support will help configure the NFS settings on your TeraStation, and will support VMware and Windows clients but will not provide support for configuring your Linux or other UNIX clients. - Page 151 Click the Client Settings tab. Click Add. Note: To delete a client, select the checkboxes of the clients from the lists and click Delete.
- Page 152 Enter the hostname and IP address of the NFS client, then click OK. You should add all NFS clients to access the shared folder. Click the NFS Rules tab.
- Page 153 Click Add. Choose the folder to restrict access to, and enter the clients that will have restricted access into the “Hosts” field. Clients may be entered by hostname, IP address, or IP address range. Wildcards are supported. Separate multiple entries with commas. You may assign read-only or read and write access to the listed clients. Rules override any settings made from the Services tab.
-
Page 154: Encrypting Data Transmission
The server certificate included in the TeraStation’s default settings was created by Buffalo, and in some cases, the security certificate warning message may appear in your browser or another security software. Disregard this message and continue. -
Page 155: Snmp
server.key (SSL Private Key) This file is used as a pair with server.crt (server certificate). This is required for decrypting the data that was encrypted by the server certificate, and this is normally not revealed. Note: The passphrase for the private key must be removed before importing to the TeraStation. Updating SSL Key Files To update a server certificate and a private key for SSL, follow this procedure. -
Page 156: Saving And Applying Settings
SNMP. SNMP has been configured for the TeraStation. For further use, configure your SNMP-compatible network management software using the Buffalo-specific MIB (management information base) file. The MIB file is available from the Buffalo website. Depending on which SNMP client software you use, the procedure for configuring the software will differ. For more detailed information on configuring the client software, refer to its help or included manual. -
Page 157: Saving Settings
Settings & Restore Firmware Settings & Settings & Save Restore Firmware Firmware Settings & Restore Firmware Write down the drive configuration (number of drives, RAID, LVM, etc.) of the TeraStation whose settings were saved. Make sure that any TeraStations that you apply these settings to have exactly the same drive configuration before you apply the settings. -
Page 158: Applying Settings
Select “Save current configuration to a USB drive”. From “Target USB Drive”, select the USB drive that is connected to the USB port on the TeraStation, then click Execute. The “Confirm Operation” screen will open. Enter the confirmation number, then click OK. The TeraStation will save the settings. -
Page 159: Transferring Another Terastation's Settings
To transfer settings from TS-X series TeraStations, it will use the “NS-SHFT” software to create a config file. The NS- SHFT can be downloaded from the Buffalo website. For the procedure on creating the config file, refer to the NS-SHFT user guide. -
Page 160: Transferring Settings
Access the “usbdisk x” shared folder while connecting the USB drive to the TeraStation whose settings were saved in the previous step. The “x” in the folder name represents the USB port number you connected the drive Copy and paste the .nas_config file to the desired location on your computer. Transferring Settings Follow the procedure below to transfer settings from another series TeraStation. -
Page 161: Restoring Factory Defaults
Restoring Factory Defaults Initializing from Settings To initialize the TeraStation to its factory defaults from Settings, follow this procedure. From Settings, click Management. Click to the right of “Restore/Erase”. Click Initialize TeraStation. The “Confirm Operation” screen will open. Enter the confirmation number, then click OK. The TeraStation will restore its factory default settings. -
Page 162: Resetting The Administrator Password
Click to the right of “Configuration Management”. Select “Create a USB drive for initializing settings”. From “Target USB Drive”, select the USB drive that is connected to the USB port on the TeraStation, then click Execute. The “Confirm Operation” screen will open. Enter the confirmation number, then click OK. The TeraStation will create the initialization drive. -
Page 163: Logs
This button can be disabled in Settings; to do so, navigate to Management > Restore/Erase > Edit under “Init Button Settings”, then select “Keep current admin username and password” and click OK. Logs Displaying TeraStation’s Logs Follow the procedure to check the TeraStation’s logs. From Settings, click Management. - Page 164 Click to the right of “Logs”. Click Edit. Enable “Syslog Transfer”. Enter the IP address of the syslog server where you want to transfer the logs to. Select the type of log that you want to transfer from “Logs to Transfer”.
-
Page 165: Creating A Link To The Logs In The Shared Folder
Click OK. Creating a Link to the Logs in the Shared Folder From Settings, click Management. Click to the right of “Logs”. Click Edit. -
Page 166: Changing Archive Rules For File Access Logs
Enable “Share Link to Logs”. Click Browse and select the shared folder where the link will be created in “Target Shared Folder”. Click OK. Under the selected shared folder, a folder named “system_log” will now contain the logs. Changing Archive Rules for File Access Logs From Settings, click Management. - Page 167 Click Edit. Select the unit and version to save logs to the right of “Archive Rule for File Access Logs”. For example, if you select “Month” for the unit and enter “7” for the version, the file access logs for the next 7 months will be saved on the TeraStation.
-
Page 168: Updating The Firmware
“Update”. Click Install Update. When updating the firmware is finished, refresh the browser and log in to Settings again. You can also download the latest firmware from the Buffalo website. Updating Automatically From Settings, click Management. -
Page 169: Configuring Update Notification
Click Edit. Select “Update the firmware automatically” and click OK. Alternately, you may choose to schedule updates for a specific time of day. Configuring Update Notification Configure whether or not to receive a notification when new firmware becomes available. - Page 170 From Settings, click Management. Click to the right of “Update”. Click Edit.
-
Page 171: Name, Date, Time, And Language
The collected information will only be used for improving future firmware stability and product development and no other purpose. If update notification is enabled, it will also automatically enable sending usage feedback to Buffalo. If you don’t want to send this information to us, disable update notification. - Page 172 The name will be used for identifying your TeraStation on the network. When your TeraStation is detected, the name will be used as the hostname. The hostname may contain up to 15 alphanumeric characters and hyphens (-). The first and last characters should not be a hyphen. Click the Time tab.
-
Page 173: Beep Alerts
Click the Language tab. Select the language to be used and click OK. Note: This tab changes the language used by the TeraStation for email notifications and other functions. To change the language displayed in Settings, go to Settings and click Language from the menu bar. Choose your desired language from the drop-down list. -
Page 174: Leds
LEDs You may adjust the brightness of the LEDs on the TeraStation. From Settings, click Management. Click to the right of “Notifications”. Click Edit. Click the Front Panel tab. Configure your settings, then click OK. Proxy Server If you locate the TeraStation on the network that passes through a proxy server, configuring the proxy server settings is recommended. -
Page 175: Jumbo Frames
Click to the right of “Proxy Server”. Enable “Proxy Server”. Enter the proxy server IP address or hostname, port number, username and password, then click OK. Once you configure the proxy server settings, you may use the settings for other web services such as cloud storage or Dropbox Sync by selecting the “Configured settings”... - Page 176 Click Edit. Select or enter the desired MTU size and click OK.
-
Page 177: Changing The Ip Address
Connection Transmission Transfer data in jumbo frames. Jumbo Frame Jumbo Frame Jumbo Frame Compatible Switch Compatible PC Transfer data not using jumbo frames. Jumbo Frame Jumbo Frame Jumbo Frame Incompatible PC Compatible Switch Transfer data not using jumbo frames. Jumbo Frame Jumbo Frame Jumbo Frame Incompatible Switch... -
Page 178: Boot Authentication
Click Edit. Clear the “DHCP” checkbox and enter the desired IP address and its subnet mask. Select “User (static)” for both “Gateway Owner” and “DNS Owner” options from the drop-down list, then enter the desired default gateway address and DNS server addresses. Click OK. -
Page 179: Notes Before Use
If authentication fails, the TeraStation will stay on, but all functions and services are stopped. Users will not be able to log in to Settings to make changes or access any shares. Notes Before Use • To use boot authentication, a Windows PC is necessary to serve as the authentication server. •... -
Page 180: Configuring Boot Authentication On The Terastation
Download the application for the authentication server, “Boot Authentication Tool”, from the Buffalo website and install it onto the Windows PC. Register the specific port number that is used on the application as a firewall exception rule. Navigate to Control Panel > System and Security > Windows Firewall on the authentication server. -
Page 181: If The Terastation Cannot Be Accessed
The drive formatting process will start. Click Yes. The “Confirm Operation” screen will open. Enter the confirmation number, then click OK. The format will begin. Wait until it finishes. When formatting finishes and the TeraStation is added to Boot Authentication Tool, boot authentication setting is complete. Note: To activate, deactivate, or change the boot authentication settings, the TeraStation must be communicating with the authentication server. - Page 182 When the user tries to access the TeraStation’s Settings and the TeraStation is not available, the screen below will be displayed. Have the user forward the decryption key to the authentication server administrator. Open Boot Authentication Tool on the authentication server. From Boot Authentication Tool, right-click the target TeraStation from the list and click Decrypt Passcode.
- Page 183 The decrypted 20-digit passcode will be displayed. Send the passcode to the user. The user can then enter the 20-digit passcode into Settings and click OK. If the passcode is authenticated, the TeraStation will become available. The user can click OK to log in to Settings.
-
Page 184: Chapter 8 Drive Replacement
TeraStation may malfunction. • For the replacement drive, use a Buffalo OP-HDN series drive. The new drive should be the same size or larger. If a larger drive is used, the extra space will not be usable in a RAID array. - Page 185 Open the front cover with the included key. The failed drive’s status LED will be glowing red. Push its unlock button and swing the lock mechanism out. Drives without red status LEDs lit are still on. Do not unplug or remove them. Pull out the drive cartridge and remove it from the TeraStation.
- Page 186 Insert the new drive into the empty slot. Slide the drive in with the locking mechanism open. Swing the lock back down until it clicks into place. Close the front cover. When the replaced drive is recognized, the status LED will flash red and the I31 message will appear in Settings or NAS Navigator2.
-
Page 187: Using A Redundant Raid Mode And Terastation Is Off
The TeraStation will start rebuilding the RAID array automatically. After a few minutes, the I18 message will be displayed until the array is rebuilt. For JBOD: The drive will be formatted as an individual drive. Create a shared folder on the drive before use. Using a Redundant RAID Mode and TeraStation Is Off Open the front cover with the included key. -
Page 188: Using A Hot Spare
When the replaced drive is recognized, the status LED will flash red and the I32 message will appear in Settings or NAS Navigator2. From Settings, click Storage. Click to the right of “RAID”. Select the RAID array for which the failed drive was being used and click Delete RAID Array. The “Confirm Operation”... -
Page 189: Replacing A Non-Malfunctioning Drive
(4) Navigate to Storage > RAID. (5) Choose the RAID array to repair. (6) Click the drive that was previously configured as a hot spare, then click Recover RAID Array. This will rebuild the RAID array. Replacing a Non-Malfunctioning Drive Do not replace a drive that is not malfunctioning. -
Page 190: Chapter 9 Utilities
Chapter 9 Utilities NAS Navigator2 for Windows NAS Navigator2 is a utility program that makes it easy to display Settings, change the Buffalo NAS device’s IP address, or check its drive. To install NAS Navigator2, download the installer from http://d.buffalo.jp/TS3010/. - Page 191 I’m here Causes your Buffalo NAS device to beep. *Click on the Buffalo NAS device’s icon to display these options. When NAS Navigator2 is closed, right-click the NAS Navigator2 icon in the system tray for the following options.
- Page 192 Causes your Buffalo NAS device to beep. Refresh Searches for the Buffalo NAS devices on the network again. Open NAS Navigator2 Opens the NAS Navigator2 window. Exit Exits NAS Navigator2. The following menus may be performed from the Buffalo NAS device’s properties page.
-
Page 193: Mounting As A Network Drive
Double-click the NAS Navigator2 icon ( ) to start NAS Navigator2. Right-click your Buffalo NAS device’s icon and select Properties > IP Address. Clear the “Use DHCP” checkbox and enter the desired settings, then click OK. If the username and password... -
Page 194: Nas Navigator2 For Macos
NAS Navigator2 for macOS NAS Navigator2 is a utility program that makes it easy to display Settings, change the Buffalo NAS device’s IP address, or check its drive. To install NAS Navigator2, download the installer from http://d.buffalo.jp/TS3010/. Click the NAS Navigator2 icon ( ) in the Dock to start NAS Navigator2. -
Page 195: Mounting As A Network Drive
The shared folder is now mounted as a network drive. Changing the IP Address Click the NAS Navigator2 icon ( ) in the Dock to start NAS Navigator2. Click the Buffalo NAS device’s icon while holding down the control key, then select Configure > IP Address. -
Page 196: Novabackup
NovaBACKUP is a Windows utility that lets you back up data on your computer. The NovaBACKUP installer is available from http://d.buffalo.jp/TS3010/. Select the region and model to go to your specific model’s d.buffalo website. Download the NovaBACKUP installer and install it onto your computer. -
Page 197: Chapter 10 Appendix
Chapter 10 Appendix TeraStation Does Not Work Properly If an error occurs that prevents the TeraStation from booting up properly, one or more of the following symptoms may occur: • The power LED keeps blinking instead of turning into a solid glow; follow the procedure at the “Power LED Keeps Blinking”... -
Page 198: Booting The Terastation In Emergency Mode
TeraStation icon and “EM” is added to your TeraStation’s hostname. To recover from emergency mode, follow the procedure below. Download the firmware updater from the Buffalo website. Extract the downloaded file by double-clicking it and launch the updater. - Page 199 Open the front cover with the included key. Remove the front cover while holding the hook downward.
- Page 200 Remove the dustproof filter from the front cover and clear any dust, such as by using a vacuum cleaner. When cleaning is finished, return the filter and the front cover.
-
Page 201: Info And Error Leds
An error occurred in the fan speed. air duster, or other tools to remove them. If the error is displayed again, contact Buffalo technical support for assistance. Do not place objects in the area around A rise in the system temperature may have the TeraStation. -
Page 202: Status
Format the drive. After formatting, if the error still appears after rebooting, replace Unable to mount the drive. the drive. If the error is displayed again, contact Buffalo technical support for assistance. From the main TeraStation’s Settings, navigate to Backup > Failover to Unable to find the backup TeraStation. - Page 203 If the error is displayed again, contact Buffalo technical support for assistance. Once the virus is removed from the quarantine folder, the message is no longer displayed. If the antivirus software A virus scan found a virus.
-
Page 204: Default Settings
Code Description Corrective Action Make sure that the backup job is configured correctly, and that the NAS is on and not in standby mode. If the backup job still fails, check the status of NAS, network, and backup source and The backup job failed. -
Page 205: Specifications
Disabled TS3210DN: RAID 1 RAID Mode TS3410DN, TS3410RN: RAID 5 Specifications Check the Buffalo website for the latest product information and specifications. IEEE 802.3ab (1000BASE-T), IEEE 802.3u (100BASE- Standards Compliance TX), IEEE 802.3 (10BASE-T) Data Transfer Rates 10/100/1000 Mbps (auto sensing) - Page 206 Power Supply TS3410RN: AC 100–240 V, 2.5–1.25 A, 50/60 Hz TS3210DN: 170 x 170 x 230 mm; 6.7 x 6.7 x 9.1 in Dimensions (W x H x D, TS3410DN: 170 x 215 x 230 mm; 6.7 x 8.5 x 9.1 in excluding protruding parts) TS3410RN: 430 x 44.3 x 430 mm;...
-
Page 207: Chapter 11 Regulatory Compliance Information
Chapter 11 Regulatory Compliance Information For Customers in the United States FCC Statement This equipment has been tested and found to comply with the limits for a Class A digital device, pursuant to part 15 of the FCC Rules. These limits are designed to provide reasonable protection against harmful interference when the equipment is operated in a commercial environment. - Page 208 Brug ikke USB-kabler, der er 3 meter eller længere for at tilslutte USB enheder til denne TeraStation serie. Deutsch Dies ist ein Produkt der Klasse A. In einer häuslichen Umgebung kann dieses Produkt Funkstörungen verursachen. Um diese zu beheben, müssen ggf. entsprechende Maßnahmen ergriffen werden. Bei einer Nutzung in Wohngebieten können bei diesem Produkt Störungen auftreten.
- Page 209 Questo prodotto può causare interferenze se usato in zone residenziali. Evitare l’uso in queste zone a meno che l’utente non intraprenda azioni specifiche per ridurre le emissioni elettromagnetiche e impedire le interferenze alla ricezione di trasmissioni radio-televisive. Utilizzare esclusivamente i cavi e gli accessori inclusi nell’imballaggio. Non utilizzare altri accessori o cavi a meno che non sia specificamente indicato nella documentazione.
-
Page 210: For Customers In Taiwan
Detta är en Klass A-produkt. I en hushållsmiljö kan denna produkt orsaka radiostörningar, och användaren kan i så fall begäras att vidta lämpliga åtgärder. Den här produkten kan oraka störningar om den används i bostadsområden. Sådan användning måste undvikas om inte användaren vidtar speciella åtgärder för att minska elektromagnetiska sändningar för att förhindra störningar i mottagningen av radio- och tv-sändningar.
Need help?
Do you have a question about the TS3210DN and is the answer not in the manual?
Questions and answers