
Related Manuals for Buffalo TeraStation III iSCSI TS-IXL


Summary of Contents for Buffalo TeraStation III iSCSI TS-IXL
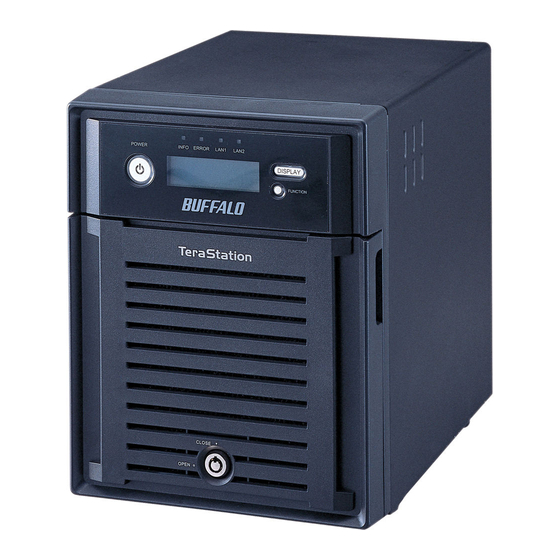
- Page 1 Network Attached Storage TeraStation III iSCSI User Manual TS-IXL TS-RIXL Buffalo Inc. www.buffalotech.com 35011188-06...
-
Page 2: Table Of Contents
Contents Chapter 1 Introduction ....................3 iSCSI ..................................3 Network Structure ............................4 Install the Microsoft iSCSI Software Initiator ..................5 Setup ..................................6 Adding multiple TeraStations ........................6 Chapter 2 Using iSCSI Connection Tool ................7 iSCSI Connection Tool ..........................7 Disconnecting and Removing TeraStation ...................9 Reconnect a TeraStation ..........................11 Mutual Authentication ..........................12 Chapter 3... - Page 3 Chapter 6 Access Restrictions ..................... 26 Configuring Access Restrictions for the TeraStation ................26 Configuring Access Restrictions for Individual Volumes ..............27 Chapter 7 Managing your TeraStation ................28 Name, Date and Time ...........................28 RAID Scanning ..............................30 Email Notification ............................31 UPS Settings ..............................33 Beep Alerts ...............................34 Display Settings ..............................34 Changing the Admin Username and Password ..................35...
-
Page 4: Chapter 1 Introduction
Chapter 1 Introduction iSCSI iSCSI Compatible Hard Drive iSCSI (Internet Small Computer System Interface) is a standard to transmit data on an Ethernet network by encapsulating SCSI commands in TCP/IP protocol. Once the iSCSI drive is connected to the network by Ethernet cables, the drive is recognized as a local drive by computers or servers on the network. -
Page 5: Network Structure
Differences between NAS and iSCSI iSCSI A server creates shared folders on the iSCSI drive, and Servers and computers directly access shared folders on a computers can then access the created folders on the NAS. servers. • Create and use shared folders easily (no extra server •... -
Page 6: Install The Microsoft Iscsi Software Initiator
Install the Microsoft iSCSI Software Initiator Windows XP, Windows 2000, Windows Server 2003, Windows 2000 Server Install Microsoft iSCSI Software Initiator first. Before using iSCSI equipment with Windows XP, 2000, Server 2003, or 2000 Server, download and install Microsoft iSCSI Software Initiator. 1. -
Page 7: Setup
Setup Notes: • If there is a DHCP server in the network, the TeraStation will get an IP address from it automatically. • Running the TeraNavigator software will automatically assign an unused IP address to a TeraStation. • TeraNavigator can only automatically configure one unit at a time. To reconfigure a TeraStation with TeraNavigator af- ter its initial installation, initialize the TeraStation first. -
Page 8: Using Iscsi Connection Tool
The iSCSI Connection Tool is automatically installed when you launch TeraNavigator, and you will use it to connect to TeraStation. To launch: Click Start - All Programs - BUFFALO - iSCSI Connection Tool - iSCSI Connection Tool. For Windows 8, click the iSCSI Connection Tool . Name... - Page 9 Status Displays Current status of the selected volume. • Disconnected: Volume is disconnected. • Connected: Volume is connected. * You must register TeraStation as an iSCSI hard drive at Target to display it. User Authorization Displays user authentication for the specified volume. •...
-
Page 10: Disconnecting And Removing Terastation
Disconnecting and Removing TeraStation To remove an iSCSI TeraStation, disconnect any connected volumes fi rst and then unregister the TeraStation. Click Start - All Programs - BUFFALO - iSCSI Connection Tool - iSCSI Connection Tool. The iSCSI Connection Tool will launch. - Page 11 1 Select the TeraStation to remove from Target. 2 Click Unregister iSCSI Device. Note: If a TeraStation is connected to multiple computers, unregister it from each computer. You can now power down the TeraStation and unplug its cables. Note: If you disconnect a TeraStation without unregistering it or changing its IP address, it will take a long time to search since the registration information is still in your computer.
-
Page 12: Reconnect A Terastation
To reconnect a TeraStation that was previously removed, register the device and connect a volume via the procedure below. Connect the TeraStation and power it on. Click Start - All Programs - BUFFALO - iSCSI Connection Tool - iSCSI Connection Tool to open the iSCSI Connection Tool. For Windows 8, click the iSCSI Connection Tool . -
Page 13: Mutual Authentication
Mutual Authentication The iSCSI TeraStation supports mutual authentication for security. Mutual authentication ensures that a computer will recognize the TeraStation only when the mutual password set on each volume and the mutual authentication password are a match. To configure Access Control via mutual authentication, refer to page 26. Mutual Authentication password set to the TeraStation (Entire system): In Settings, navigate to Basic - Security - Access Control (Whole System). -
Page 14: Chapter 3 Settings
Chapter 3 Settings Use the Settings menu to confi gure your TeraStation. Click Start - All Programs - BUFFALO - iSCSI Connection Tool - iSCSI Connection Tool. iSCSI Connection Tool will launch. For Windows 8, click the iSCSI Connection Tool. -
Page 15: Using Logical Volume Manager (Lvm)
Chapter 4 Using Logical Volume Manager (LVM) Enable/Disable Logical Volume Manager (LVM) Logical Volume Manager (LVM) is disabled by default. Enabling LVM will allow you to divide volumes and extend capacity, but will degrade access speeds. Note: Changing the operation mode of a disk or array (such as enabling LVM) will delete all volumes and data from the disk or array. -
Page 16: Create Volume
Create Volume By default, the TeraStation is configured with a single volume using all available space on the TeraStation. If you delete the factory-set volume, you will then have the capacity to create up to 32 new volumes. Different volumes can be con- nected to different computers, but each volume can only be connected to a single computer. -
Page 17: Extending Volumes
Extending Volumes Volume space can be extended after you create the volume. Notes: • Extending the volume may delete all data on the volume with some file systems. Before extending the volume, back up any important data on the volume. •... -
Page 18: Changing Raid Modes
Chapter 5 Changing RAID Modes By default your TeraStation unit is configured with all four hard drives in a RAID 5 array, with other RAID array modes available for configuration. Notes: • All data on your drive will be deleted if you change the RAID mode. Back up any important data before changing RAID modes. - Page 19 • RAID 0 mode Combines 4 drives into one fast array. The full capacity of all drives combined is available for use. RAID 0 is fast and efficient, but includes no parity or redundancy. If any drive is damaged, all data on the array is lost. •...
-
Page 20: Using Normal Mode
Using Normal mode In Settings, navigate to Basic - Storage - RAID Array. Choose the array to change. Click Delete RAID Array. This will take several seconds, and the front panel display will show “RAID ARRAY x Creat- ing”. When “Are you sure you want to operate RAID Operation?” is displayed, click Apply. The Confirm Operation screen will appear. -
Page 21: Using Raid 5 Mode (4 Hard Drives)
Using RAID 5 mode (4 hard drives) Note: This is the default configuration. Delete any preexisting array as described in “Using Normal mode” on page 19. In Settings, navigate to Basic - Storage - RAID Array. Choose the array you want to configure. Select all 4 hard disks. -
Page 22: Using Raid 5 Mode (3 Hard Drives)
Using RAID 5 mode (3 hard drives) Delete any preexisting array as described in “Using Normal mode” on page 19. In Settings, navigate to Basic - Storage - RAID Array. Choose the array you want to configure. Select 3 hard disks. 1 Select RAID 5. -
Page 23: Using Raid 10 Mode
Using RAID 10 mode Delete any preexisting array as described in “Using Normal mode” on page 19. In Settings, navigate to Basic - Storage - RAID Array. Choose the array you want to configure. Select all four hard drives. 1 Select RAID 10. 2 Click Create Raid Array. -
Page 24: Using Raid 1 Mode
Using RAID 1 mode Delete any preexisting array as described in “Using Normal mode” on page 19. In Settings, navigate to Basic - Storage - RAID Array. Choose the array you want to configure. Select disk 1 and disk 2, or disk 3 and disk 4. 1 Select RAID 1. -
Page 25: Using Raid 0 Mode
Using RAID 0 mode Delete any preexisting array as described in “Using Normal mode” on page 19. In Settings, navigate to Basic - Storage - RAID Array. Choose the array you want to configure. Select all 4 hard drives. 1 Select RAID 0. 2 Click Create Raid Array. -
Page 26: Configuring A Hot Spare
If a drive in the TeraStation fails, open the front cover and check the Status LED lights. If a drive’s Status LED is lit or flashing red, it is malfunctioning and needs to be replaced. For replacement, use Buffalo OP-HD series drives of the same size. -
Page 27: Access Restrictions
Chapter 6 Access Restrictions You may configure access restrictions for the TeraStation, or for individual volumes on it. When access restrictions are set, a username and password are required to connect to the TeraStation with iSCSI Connection Tool. Configuring Access Restrictions for the TeraStation Turn off iSCSI Service on the left side of Settings. -
Page 28: Configuring Access Restrictions For Individual Volumes
Configuring Access Restrictions for Individual Volumes Turn off iSCSI Service on the left side of Settings. Navigate to iSCSI Volumes - iSCSI Volumes. Select the volume that you want to set access restrictions for. To restrict access by user names and passwords, enable Access Control, and enter Username and Password. -
Page 29: Managing Your Terastation
Chapter 7 Managing your TeraStation Name, Date and Time Turn off iSCSI Service on the left side of Settings. 1 Navigate to Basic - Settings - Name. 2 Click Modify Settings. 1 Enter TeraStation Name. This will identify it on the network. 2 Click Save. - Page 30 • The default NTP Server (ntp.jst.mfeed.ad.jp) belongs to Internet Multi Feed Inc. For more information, please visit www.jst.mfeed.ad.jp. • Use NTP at your own risk. Buffalo Technology is not responsible for any loss or damage caused by using of this service, stopping the service, or missing service.
-
Page 31: Raid Scanning
RAID Scanning Regular RAID scans are recommended for your RAID array. A RAID scan will scour your RAID array for errors, and some detected errors may be automatically corrected. Follow the procedure below to configure RAID scanning schedule. 1 In Settings, navigate to Basic - Storage - RAID Scanning. 2 Click Modify Settings. -
Page 32: Email Notification
Email Notification The TeraStation can be configured to automatically send an email notification whenever its settings are changed or if an error occurs. Common notifications include: • Hard drive status update (at scheduled intervals) • Changes to current RAID configuration •... - Page 33 9 Select the conditions to send. • HDD Status Report Current status of the hard drives at the specified time. • Fan Failure When a fan failure occurs. • Disk Error When a hard drive error occurs. • System Alert When the TeraStation is rebooted or shut down.
-
Page 34: Ups Settings
Your UPS is now configured. Notes: • Refer to Buffalo Technology’s website (www.buffalotech.com) for compatible UPS units. • If the TeraStation unit has automatically shut down due to a power outage, do not turn the unit on until power is restored. -
Page 35: Beep Alerts
Beep Alerts The TeraStation can be configured to emit a beep if an error occurs. Follow the below procedure to select the events that can trigger the beep. In Settings, navigate to Maintenance - Maintenance - Alert Sound Settings Click Modify Settings. 1 Select the conditions to beep the alert from Overheating, Disk Error, Fan Er- ror, or UPS power Error. -
Page 36: Changing The Admin Username And Password
Changing the Admin Username and Password The admin account is used to access Settings and change the TeraStation’s settings. By default, the admin username is “admin” and the password is “password”. You may change them as shown below. 1 In Settings, navigate to Basic - Security - Administrator Settings . 2 Click Modify Settings. -
Page 37: Formatting Drives
After a successful drive format, you must create a partition and format it from within the operating system. A link to “Disk Management” on Windows is available from Buffalo’s iSCSI Connection Tool. 1 In Settings, navigate to Basic - Storage -Disks. -
Page 38: Encrypting Drives
Encrypting Drives If Encryption is selected during formatting, the drive will be encrypted with 128-bit AES. The data on the drive will be accessible only when the drive is attached to the TeraStation, and not other devices. To unencrypt the hard drive, uncheck Encryption and format the drive again. -
Page 39: Erasing All Data
Erasing All Data Data on the hard drive is not completely erased by just deleting it, or even formatting the drive. It could theoretically be recovered. To completely wipe all data from the drive and follow the steps below. In Settings, navigate to Maintenance - Restore/Erase - Erase. Click Erase. -
Page 40: Initializing Settings
Initializing Settings Reset Button To reset the TeraStation’s settings to factory defaults, use the included key to open the front cover to access the reset button. While the TeraStation is running and the power LED is lit, hold down the reset button until it beeps (about 5 seconds). - Page 41 Initialization from Settings You can also initialize the TeraStation from Settings. The following settings are reset to their factory defaults: TeraStation Name, NTP Settings, RAID Scanning, Upon restore, Email Notification Settings, UPS Settings, Administrator Settings, Network Settings (IP Address, Subnet Mask, etc.), Alerts Sound Settings, Front Panel Settings, RAID Array Failure Settings, Management Information, Language Settings, Syslog.
-
Page 42: Changing The Ip Address
TeraStation. Turn off iSCSI Service on the left side of Settings. Click Start - All Programs - BUFFALO - iSCSI Connection Tool - iSCSI Connection Tool. For Windows 8, click the iSCSI Connection Tool. Select your TeraStation from the Target dropdown menu, then click Configuration, then Change IP Address. -
Page 43: Jumbo Frame
Jumbo Frame If all of your network devices support Jumbo Frame, enabling them can make your network faster. To configure Jumbo Frame on the TeraStation, navigate to Basic - Network - Ethernet Frame Size in Settings. Click Modify Settings, and change the Ethernet frame size to one of Jumbo Frame settings: 4120, 7422, or 9694 bytes. -
Page 44: Port Trunking
Port Trunking Port trunking (link aggregation) allows you to connect the TeraStation to two Ethernet ports for increased speed and reliability. Your hub or switch must support IEEE 802.1AX-2008 to use port trunking. Refer to the next page for instructions on configuring port trunking on the TeraStation. The TeraStation supports the following port trunking modes: Off: Port trunking is not used. -
Page 45: Update The Terastation's Firmware
Disable notification of updates. ● Update by Downloading File from Buffalo’s Web Site You can also update the TeraStation’s firmware manually. Visit www.buffalotech.com to download the latest TeraStation firmware updater. Double-click the file you downloaded to unzip it. The unzipped folder will include the program to update your TeraStation’s firmware. -
Page 46: List Of Items In Settings
Chapter 8 List of Items in Settings The following options can be set from Settings. Common Items (left side of the screen) Common Items (Displayed on the left side of the screen) Click OFF to stop the iSCSI service; ON to start it. Always stop the iSCSI service before creating or iSCSI Service extending volumes. - Page 47 Volume Name Enter a name of the volume. * You can enter up to 12bytes (UTF-8). Do not use multi-byte characters. * Alphanumeric characters, and -(hyphen) may be used. * Do not use a number or symbol as the first character. Volume Description Enter a description for the volume.
-
Page 48: Basic
Basic Settings TeraStation Name Enter a name to identify the TeraStation on the network. Name * You can enter up to 15 bytes (UTF-8). Do not use multi-byte characters. Click Modify Settings to * Alphanumeric characters, and -(hyphen) may be used. change settings. - Page 49 Network DHCP If a DHCP server is available, enable DHCP to assign IP addresses IP Address Settings automatically. Click Modify Settings to change Primary IP Address If not using DHCP, enter an IP address manually. settings. Subnet Mask Set a subnet mask. *The LAN cable connected to Default Gateway Address Specify the IP address if the default gateway if it exists.
- Page 50 Security Username You may change the admin account’s username. * You can enter up to 20 bytes (UTF-8). Do not use multi-byte characters. * Alphanumeric characters, and -(hyphen) may be used. * Do not use a symbol as the first character. Administrator Settings Password Change the admin password.
- Page 51 Storage Format Disk Formatting a drive or array will erase all volumes on the drive or array. After formatting a disk from Settings, you must allocate a partition and format it before it is usable. Use Disk Management on Windows to allocate a partition and format it. Checking Encryption before formatting encrypts the drive or array with 128 bit AES encryption.
- Page 52 RAID Scanning A RAID scan read checks all sectors in the data area of drives in an array. If a bad sector error is found during the scan, it is repaired automatically. Note that some kinds of errors are repaired automatically by the array even without a RAID scan. Status Descriptions repair possible...
-
Page 53: Maintenance
Maintenance Maintenance Notification Select whether using Email notification feature or not. SMTP Server Address Enter mail server address in SMTP Server Address field. SMTP Port No. Enter SMTP Port No. If this is left blank, the standard port number (25) is used. If Authentication Type is set to Disabled or POP before SMTP, then port 25 is used regardless of the number entered in this field. - Page 54 Alert Sound Settings Alert Sound Settings Beep alerts can be triggered by the following conditions : Overheating, Disk Error, Fan Error, and UPS power Error. Click Modify Settings to change settings. Display Select items to display on LCD display at the front of the TeraStation from Host IP, Disk Mode, and Time.
-
Page 55: Status
Restore/Erase Restore TeraStation Click Restore TeraStation to initialize the following settings: TeraStation Name, NTP Settings, RAID Scanning, Upon restore, Email Notification Settings, UPS Settings, Administrator Settings, Network Settings (IP Address, Subnet Mask, etc.), Alert Sound Settings, Front Panel Settings, RAID Array Failure Settings, Management Information, Languages Settings, Syslog Restore Factory Defaults You may choose to not initialize the admin username and password when other... -
Page 56: Appendix
Appendix Default Settings The following settings are factory defaults for the TeraStation. Username admin Password password DHCP Client Normally, the TeraStation will get its IP address automatically from a DHCP server on the network. If no DHCP server is available, then an IP address will be assigned as follows: IP Address: 169.254.abc.abc (abc is assigned randomly when booting the TeraStation). -
Page 57: Specifications
Drive configuration: By default, a RAID 5 array using all drives. Internal Hard Drive Note: If a hard drive in the TeraStation malfunctions, replace it with a Buffalo Technology OP-HD series drive of the same capacity, available from www.buffalotech.com. TS-IXL: AC 110 - 240 V, 50/60 Hz, max ~86 W... -
Page 58: Backup
Back up your data! Even the most reliable NAS device may lose data from a sudden drop or just the passage of years. Your data should always be backed up to another location. Buffalo external hard drives like the DriveStation series make it simple to back up your data. -
Page 59: Compliance Information
Compliance Information FCC Warning This equipment has been tested and found to comply with the limits for a Class A digital device, pursuant to Part 15 of the FCC Rules. These limits are designed to provide reasonable protection against harmful interference when the equipment is operated in a commercial environment. This equipment generates, uses, and can radiate radio frequency energy and, if not installed and used in accordance with the instruction manual, may cause harmful interference to radio communications. - Page 60 기종별 사 용 자 안 내 문 A 급 기기 이 기기는 업무용 (A 급 ) 전자파적합기기로서 판 ( 업무용 정보통신기기 ) 매자 또는 사용자는 이 점을 주의하시기 바라 며 , 가정외의 지역에서 사용하는 것을 목적으 로 합니다 . BSMI 警告使用者...
Need help?
Do you have a question about the TeraStation III iSCSI TS-IXL and is the answer not in the manual?
Questions and answers