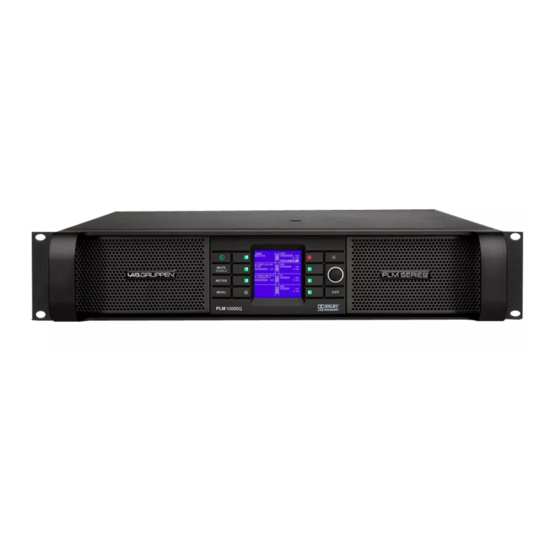
Lab.gruppen PLM series Operation Manual
Plm series powered loudspeaker management systems
Hide thumbs
Also See for PLM series:
- Operation manual (107 pages) ,
- Quick start manual (38 pages) ,
- Network configuration manual (17 pages)

Related Manuals for Lab.gruppen PLM series


Summary of Contents for Lab.gruppen PLM series
- Page 1 Operation Manual Series ™ Powered Loudspeaker Management systems ™ Rev 1.1.9 Item: OM-PLM...
-
Page 2: Important Safety Instructions
21. An experienced user shall always supervise this professional audio equipment, especially if inexperienced adults or minors are using the equipment. 22. The US National Differences clause 16.3 requires that network cables must be flame rated VW-1. PLM Series Operation Manual rev 1.1.9... -
Page 3: Warning
▸ Reorient or relocate the antenna. ▸ Increase the separation between the equipment and receiver. ▸ Connect the equipment to an outlet on a circuit different from that to which the receiver is connected. PLM Series Operation Manual rev 1.1.9... -
Page 4: User Responsibility
There is also a risk that the unit will malfunction since it is dependent on constant airflow from front to rear. If the dust filters are not clean and the unit malfunctions, any resulting problems will not be covered by the warranty. PLM Series Operation Manual rev 1.1.9... -
Page 5: Table Of Contents
Lake Processing and Control ......................28 Modules and Frames ........................28 Loudspeaker Crossover Configuration Overview ................29 Files and Presets ..........................30 Front Panel Interface ..........................31 Overview ............................31 Front Panel Key Lock ..........................32 Power Button ..........................32 Mute Enable Button ..........................33 PLM Series Operation Manual rev 1.1.9... - Page 6 10.6 Digital Audio Connections ........................86 10.7 Digital Clock Configuration .........................90 11. Technical Specifications ........................92 12. Warranty and Support ..........................93 12.1 General ..............................93 12.2 International Warranties ........................93 12.3 Technical Assistance and Service ......................93 12.4 Trademarks ............................94 PLM Series Operation Manual rev 1.1.9...
-
Page 7: Welcome
For fast installation and use of this product, your welcome package includes a printed copy of the PLM Series Quick Start & Field Reference Guide which contains the information required to safely install the product and place it in service. Control and editing features are accessible via the front panel interface or via the included Lake Controller software. -
Page 8: Lake Analyzer Bridge
Welcome 2.2.2.1 Input Gain (Sensitivity) Input gain (sensitivity) is set in the digital domain for PLM Series devices, and may be controlled via the Lake Controller software or front-panel interface. 2.2.2.2 ISVPL ™ The Inter-Sample Voltage Peak Limiter (ISVPL) tailors each power output to the characteristics of the connected load. -
Page 9: Additional Documentation
Audio Network ™ PLM Series devices include Dante digital audio networking as standard. Utilizing the latest advances in Ethernet technology, Dante offers simplified system configuration and extremely low latency while deliver- ing very high quality uncompressed digital audio across the Lake network. The Zen automatic configuration ™... -
Page 10: Installation
Carefully open the shipping carton and check for any damage to the device or the supplied accessories. Every Lab.gruppen product is tested and inspected before leaving the factory and should arrive in perfect condition. If any damage is discovered, please notify the shipping company immediately. Only the consignee may initiate a claim with the carrier or their insurers for damage incurred during shipping. - Page 11 Installation Figure 3-1: Rear Support Bracket and Mounting Hardware Figure 3-2: Use the Washer for Fixed Installations Figure 3-3: Use Tube for Slide-On Installation PLM Series Operation Manual rev 1.1.9...
-
Page 12: Cooling
If installing one or more PLM Series devices in a rack with other fan-cooled equipment, be sure that all the other equipment also uses front-to-rear airflow for cooling. If this precaution is not observed, there is a risk of overheating, as units with the reverse airflow will be drawing in air which has already been heated by the PLMs. -
Page 13: Grounding
The Iso-Float feature is activated by default, but may be disabled via the Lake Controller software, or via the front panel menu. PLM Series Operation Manual rev 1.1.9... - Page 14 Installation Use correctly-shielded balanced audio input connections to minimise hum and interference. Please refer to section 8.2.4 for further information. NEVER disconnect the earth (ground) pin on the mains cable (AC power cord). PLM Series Operation Manual rev 1.1.9...
-
Page 15: Product Overview
Two dust filters are fitted behind metal covers. To remove the covers, loosen the thumbscrews located behind the handles. Once detached, the dust filter elements can be removed for cleaning; please refer to section 9.2 for further information. NEVER operate this device without the dust filters in place. PLM Series Operation Manual rev 1.1.9... -
Page 16: Meter Button
Please refer to chapter 7 for further details. Standby PLM Series devices are powered on and to standby using the top-left button, or via the Lake Controller. Mute Enable Select MUTE ENABLE to allow the dynamic function buttons to operate as mute controls for the Module inputs and power output channels. -
Page 17: Exit Button
The EXIT button is used primarily while navigating the menu system in Menu Mode; pressing EXIT will return the menu up one level. In Meter Mode, pressing EXIT returns the metering display to the default Home View. PLM Series Operation Manual rev 1.1.9... -
Page 18: Back Panel Overview
Product Overview Back Panel Overview Figure 4-2: Back Panel Layout Options for Four-channel PLM Figure 4-3: Back Panel Layout Options for 2-Channel PLM PLM Series Operation Manual rev 1.1.9... -
Page 19: Input And Link Connectors
+26 dBu. Analog Links Two latching XLR3M connectors are fitted adjacent to the analog input connectors. These are paralleled to the input connectors to provide an unprocessed analog loop-through to feed additional PLM Series units, or other equipment. AES/EBU Inputs A latching XLR3F connector is provided which accepts an AES/EBU digital audio signal. - Page 20 The Ethernet ports automatically switch to operate at Ethernet data rates of 100 Mbps or 1000 Mbps, and allow straight or crossed network cables. Two LEDs above each port indicate valid network connection (LINK) and network activity (ACT). PLM Series Operation Manual rev 1.1.9...
- Page 21 Product Overview Secondary Connector The secondary network connector can be used to daisy-chain multiple PLM Series, LM 26 and legacy Lake devices. Alternatively, a dual-network topology can be created by connecting all secondary network connec- tors to a separate Ethernet switch, ensuring full redundancy in the event of a network component failure.
-
Page 22: Operation And Performance
Operation and Performance 5. Operation and Performance This chapter provides comprehensive information on PLM Series connection, setup, operation and perfor- mance. The detailed information included here is essential to realizing the full functionality of the PLM Series devices. Operation Precautions Make sure that the Standby button on the PLM’s front panel is either unlit (OFF), or red (STANDBY), before... -
Page 23: Asymmetrical Power
Power ratings are based on a duty cycle of 25 ms full power every 400 ms. Between bursts, a lower signal level applies, such that the continuous average power is 1/8th of the rated power. PLM Series Operation Manual rev 1.1.9... -
Page 24: Amplifier And Load Protection Systems
VCL and CPL. ▸ Sub/LF – The Sub/LF profile is tuned for frequency bands below 600Hz. It has longer attack and release times and is less conservative when it comes to acting upon VCL and CPL. PLM Series Operation Manual rev 1.1.9... - Page 25 1722 1292 1225 17.8 Table 5-3: ISVPL-to-output examples These ratings shown in Table 5-3 are limited by the CPL (Current Peak Limiter) functions, not by ISVPL settings, due to power output channel current capacity. PLM Series Operation Manual rev 1.1.9...
- Page 26 The ISVPL threshold may be set at any level between 17.8 V and 194 V via the PLM’s menu system. For further details, please refer to section 7.11.2.5 of this manual, and also to the PLM Series chapter in the Lake Controller User Manual.
- Page 27 If this occurs the VCL acts rapidly to prevent clip- ping on the subsequent peaks. Limiting is performed by the ISVPL limiter in conjunction with the selected ISVPL profile. Indication of this condition is shown on the output LEDs. PLM Series Operation Manual rev 1.1.9...
-
Page 28: Temperature Protection
Temperature Protection 5.3.8.1 Overview PLM Series devices are equipped with a sophisticated temperature sensing system that provides protection from overheating which may occur as a result of inadequate ventilation or excessive power output. Thermal measurements are made at several points within each power output channel along with measure- ments in the power supply and DSP areas. -
Page 29: Vhf Protection
When continuous output power above the threshold line is detected, VHF protection becomes active. Figure 5-2: VHF Protection Frequency Sensitivity The attack time of the VHF protection circuitry also changes with frequency, becoming shorter at higher frequencies. This is shown in Figure 5-3. PLM Series Operation Manual rev 1.1.9... -
Page 30: Short Circuit Protection
70 to 265 volts allowing it to function worldwide in many different configurations. The PFC reduces current peaks on the lines and reduces the requirements placed on the mains distribution system. The PLM 20000Q has an unparalleled power factor extremely close to one. PLM Series Operation Manual rev 1.1.9... - Page 31 If insufficient power is available to allow simultane- ous power-up, then there is probably insufficient capacity for full power output during operation. It is recommended that additional capacity is added to the mains power distribution system. PLM Series Operation Manual rev 1.1.9...
-
Page 32: Signal Flow And Lake Processing
Important information regarding correct setting of the gain structure can be found in section 10.3. Figure 6-1: Signal Flow Diagram (PLM Series Part 1) 6.1.1 Level Adjustments & Mute Points... - Page 33 PLM and also sent as messages over the control network. In the rare event that maximum ratings are significantly exceeded, the PLM will shut down until the condition has PLM Series Operation Manual rev 1.1.9...
-
Page 34: Lake Processing And Control
Please refer to section 5.3 on page 18 further details. Table 8.1 lists PLM Series analog input sensitivity in dBu and Vrms for various Amp Gain settings and maximum/minimum ISVPL settings, assuming an analog input headroom of 26 dBu. Please refer to on page 58 for further details. -
Page 35: Super Modules
Loudspeaker Crossover Configuration Overview The Lake Processing system within PLM Series devices may be configured with up to two inputs and up to six Module outputs, although the number of power outputs will be either two or four depending on the PLM model being used. -
Page 36: Files And Presets
LM 26, PLM, Mesa Quad EQ, Contour Pro 26, and Dolby Lake Processors. This enables fast retrieval and switching of entire system configurations as minimal data is being sent between the Controller and Processors. PLM Series Operation Manual rev 1.1.9... -
Page 37: Front Panel Interface
Please note that the same LEDs also indicate the mute status of inputs (left) and outputs (right). A full list, description and priority of the fault and warning indications is provided in section 7.8.5.2. PLM Series Operation Manual rev 1.1.9... -
Page 38: Front Panel Key Lock
AC mains and the unit is in standby mode. It turns green when the button is pressed to turn the processor on. A subsequent press of this button returns the unit to standby mode. PLM Series Operation Manual rev 1.1.9... -
Page 39: Mute Enable Button
Menu Mode is used for processor configuration, or for editing a parameter. Please refer to section 7.11 for further details. Exit Button In Menu Mode, pressing the EXIT button returns back one menu level. In Meter Mode, pressing EXIT returns the display to the Home View. PLM Series Operation Manual rev 1.1.9... -
Page 40: Dynamic Buttons, Controls And Leds
Additional faults and warnings are reported in the Event Log of the Lake Controller only. All faults and warnings recorded in the Event Log are listed in section 9.1 along with scenarios that may have arisen to cause them. PLM Series Operation Manual rev 1.1.9... -
Page 41: Rotary Encoder
PLM. Each button contains a tricolor LED which conveys fault and warning indications in addition to the mute status. The LED color does not necessarily correspond to the currently selected function. PLM Series Operation Manual rev 1.1.9... -
Page 42: Mute Functions
The PLM Input Mute is within the Lake Processing system, post input type selection, and pre input mixing and routing. Please refer to the Lake Controller User Manual for details of mute selection via the software. PLM Series Operation Manual rev 1.1.9... -
Page 43: Module Input Mute
When a PLM power output is muted, the LED turns red and the text AMP CH. MUTE is displayed on the LCD. When unmuted, the LED turns green (unless any other output warning conditions are active). PLM Series Operation Manual rev 1.1.9... - Page 44 Output Clip All output channels are monitored by a suite of protection circuits that include a Current Peak Limiter (CPL) and an Inter-Sample Voltage Peak Limiter (ISVPL). Please refer to section 5.3 for further information. PLM Series Operation Manual rev 1.1.9...
-
Page 45: Warning And Fault Indications
LoadSmart: Load not verified SpeakerSafe Precision Low Channel LM PREC. LOW SpeakerSafe: Precision Low Controller/Frame Offline Frame CTRL OFFLINE Frame Offline SpeakerSafe Not Started Channel SPKSAFE INACT SpeakerSafe Not Started Table 7-2: Warning Conditions (Yellow LED) PLM Series Operation Manual rev 1.1.9... - Page 46 Channel MOD. OUT MUTE Module Output Mute Amp CH Mute Channel AMP CH. MUTE Amp Channel Mute Analog Input Fault Frame ANALOG IN FAULT Frame Fault: Analog input Table 7-3: Fault Conditions (Red LED) PLM Series Operation Manual rev 1.1.9...
-
Page 47: Meter Mode
Power output 4 label, gain & limiter meters, faults, warnings, clips & mutes. Please refer to Table 7-2 and Table 7-3 on page 40 for full details on the faults and warnings that could be displayed in any of the above locations. PLM Series Operation Manual rev 1.1.9... - Page 48 Output 2: V - Voltage Meter I - Current Meter P - Power Meter L - Gain Reduction Meter Output 3: V - Voltage Meter I - Current Meter P - Power Meter L - Gain Reduction Meter PLM Series Operation Manual rev 1.1.9...
- Page 49 Output 3: AMP - Temp of power output VC - Temp of voicecoil MAG - Temp of magnet Output 4: AMP - Temp of power output VC - Temp of voicecoil MAG - Temp of magnet PLM Series Operation Manual rev 1.1.9...
- Page 50 Module A Input Mixer: Input 1/2 Connection Status, Module A input level meter Module B Input Mixer: Input 1/2 Connection Status, Module A input level meter Combined channel status summarizing faults and warnings for all power outputs PLM Series Operation Manual rev 1.1.9...
-
Page 51: Menu Mode
All parameters are editable via the Lake Controller unless specified otherwise. 7.11.1.1 Parameters with Individual Values and Group Totals The following parameters display two values: ▸ MODULE > GAIN ▸ MODULE > DELAY ▸ MODULE > LIMITERS > MAXRMS LEVEL PLM Series Operation Manual rev 1.1.9... - Page 52 FRAME PRESETS (See section 7.11.7) ▸ Preset Recall ▸ LOAD MONITOR (See section 7.11.8) ▸ Configure No. of Cabinets in Parallel ▸ LoadSmart Verification ▸ Estimated No. of Cabinets ▸ DANTE (See section 7.11.9) PLM Series Operation Manual rev 1.1.9...
-
Page 53: Module Submenu
After selecting the Module Menu, the screen shown in Figure 7-9 is displayed. Press the illuminated button adjacent to the required option to view or edit the associated parameters. Figure 7-9: Module Submenu 7.11.2.1 Gain MENU > MODULE > GAIN Figure 7-10: Module Gain Edit Screen PLM Series Operation Manual rev 1.1.9... - Page 54 35 dB, variable in 0.1 dB increments from 22 dB to 44 dB. Care should be taken in altering Amp Gain, which should be adjusted in conjunction with the Gain controls and limiter thresholds. PLM Series Operation Manual rev 1.1.9...
- Page 55 ISVPL Limiter and Voltage Clip feedback, with SUB/LF being more suitable for subwoofers or very low frequency drivers. The default ISVPL Profiles differ depending on the PLM Series model: ▸ PLM 10000Q / 20000Q: UNIVERSAL ▸...
- Page 56 Input Config Submenu MENU > INPUT CONFIG Figure 7-11: Input Config Submenu This menu provides configuration options for input routing, along with settings for AES Termination and Iso-Float as described in the following sections. PLM Series Operation Manual rev 1.1.9...
- Page 57 Figure 7-12: Input Router 1 Figure 6-1 on page 26 shows that there are two Input Routers available on PLM Series devices. The input that is selected within the router can be used by the input mixer for either Module A or Module B.
- Page 58 UNTERMINATED. If an AES3 distribution amplifier (DA) is being used to distribute the digital audio signals, with one DA output per processor, then all terminations should be on. However, if the AES3 is daisy-chained, only terminate the last processor in the chain. PLM Series Operation Manual rev 1.1.9...
-
Page 59: Attenuation Submenu
It may be necessary to change this setting to resolve ground loop problems when using analog inputs. 7.11.4 Attenuation Submenu MENU > ATTENUATION Figure 7-15: Attenuation Menu The default setting of 0.00 dB (i.e. no attenuation) is adjustable in 0.25 dB increments down to -100 dB. PLM Series Operation Manual rev 1.1.9... -
Page 60: Frame Submenu
MENU > FRAME > FRAME INFO Frame Info provides information about the device settings and configuration. All data in this front panel menu is read-only; some parameters are fixed, some can be changed only via the Lake Controller software. PLM Series Operation Manual rev 1.1.9... - Page 61 A Factory Reset will reset all settings and parameters to the original factory-defined default values. This includes the deletion of any Frame Presets stored within the device. It also resets the IP Address and all network related settings; a hard power cycle is required to complete this reset. PLM Series Operation Manual rev 1.1.9...
- Page 62 When Latency Match is ON the LM 26 adds delay to match the overall processing delay of legacy Lake Contour Pro 26 and Mesa Quad EQ products. Please refer to the Lake Controller Operation Manual for further information. PLM Series Operation Manual rev 1.1.9...
- Page 63 To adjust the order in which both inputs and outputs are displayed on the front panel in all views, select this option then use the rotary encoder to change the value between TOP-DOWN (default) and BOTTOM-UP. 7.11.7 Frame Preset Menu MENU > FRAME PRST Figure 7-18: Frame Preset Menu PLM Series Operation Manual rev 1.1.9...
-
Page 64: Loadsmart Verification
7.11.8.2 LoadSmart Verification Select this option to initiate LoadSmart verification, then select YES to continue. LoadSmart performs a rapid test of all output channels, and displays the results on the LCD a few seconds later. PLM Series Operation Manual rev 1.1.9... - Page 65 If the range of displayed voicecoil temperatures contains one or more anomalous results, the Lake Controller should be used to manually enter the starting temperature for SpeakerSafe. Please refer to the PLM Series chapter in the Lake Controller Operation Manual for further information .
- Page 66 Pressing the DANTE button from the main menu will display this screen only if Dante has previously been enabled via the Lake Controller software. Please refer to the Lake Controller Operation Manual for further details regarding Dante implementation. PLM Series Operation Manual rev 1.1.9...
-
Page 67: Back Panel Interface
8.1.1.1 Two-channel PLM Speakon Connections Two-channel models provide both power output channels simultaneously on two 4-pole Speakon connec- tors. Both connectors carry both channels; the second connector offers the channels in reverse order. PLM Series Operation Manual rev 1.1.9... - Page 68 Four-channel models, the power outputs are simultaneously available on a single 8-pole Speakon connector, and on two 4-pole Speakon connectors. The two 4-pole connectors carry the outputs of channels 1 & 2 and 3 & 4 respectively. PLM Series Operation Manual rev 1.1.9...
- Page 69 Table 8-2: Speakon Wiring and Pinouts for Four-channel PLMs PLM Output Channels 1 & 2 PLM Output Channels 1 - 4 PLM Output Channels 3 & 4 Figure 8-5: Speakon NL4/NL8 Configuration for Four-channel PLMs PLM Series Operation Manual rev 1.1.9...
- Page 70 3. Crimp 4 mm insulated spade terminals onto the ends of the wires and push into the binding post assembly from above (Ch. 1 & 3) or below (Ch. 2 & 4). The hole in the post is ignored. Hand tighten plastic turrets, being careful not to overtighten. PLM Series Operation Manual rev 1.1.9...
-
Page 71: Analog Inputs And Outputs
Analog & AES3 XLR Wiring and Pin Out All XLR connections are wired to IEC268 as shown in Figure 8-9. Figure 8-9: IEC268 XLR Wiring and Pin Out Pin 1: Ground / Shield Pin 2: Hot (+) Pin 3: Cold (-) PLM Series Operation Manual rev 1.1.9... -
Page 72: Unbalanced Operation
High-quality transformers and opto-isolators create a barrier between the device and possible grounding aberrations from the outside electrical environment. Iso-Float settings are adjustable via the front panel menu or the Lake Controller software. PLM Series Operation Manual rev 1.1.9... -
Page 73: Aes3 Digital I/O
Tests indicate that up to 20 PLMs may be have their AES3 inputs daisy-chained together, however circumstances and cabling used may reduce this figure. Please refer to section 10.6. PLM Series Operation Manual rev 1.1.9... -
Page 74: Rj45 Ethercon ® Network Connections
When the device is connected to an active network, the yellow LINK LED illuminates above the connector in use. Data activity on the network is indicated by illumination of the green ACT LED. It is normal for the ACT LED to flicker either sporadically or continuously. PLM Series Operation Manual rev 1.1.9... -
Page 75: Power Inlet
(AC) plug specific to your country to be fitted to the other end. The wiring an pinout details are shown in Table 8-4. powerCON 230 V 115 V Version Version Brown Black Blue White Green/Yellow Green Table 8-4: powerCON Connector Wiring and Pinout PLM Series Operation Manual rev 1.1.9... -
Page 76: Appendix
Module input of the Dolby Lake processor. MOD. OUT MUTE Module Output Mute Mute Module Output Mute The audio signal has been muted in status the output stage of the Dolby Lake processor. PLM Series Operation Manual rev 1.1.9... - Page 77 TEMP FLT:MAG Temp Fault: Speaker Fault Speaker Magnet The temperature of the speaker Magnet temperature fault magnet estimated by SpeakerSafe, has exceeded the manufacturers’ recommended maximum. PLM Series Operation Manual rev 1.1.9...
- Page 78 Fault Load type mismatch LoadSmart is measuring load Mismatch characteristics which differ from those of the assigned speaker type. Table 9-1: Warning, Fault and Mute Indications (alphabetical by LCD Text / Event Log Text) PLM Series Operation Manual rev 1.1.9...
-
Page 79: Maintenance
0 ms Polarity: Positive (In phase) MaxRMS: 20 dB MaxPeak: 21 dB Amp Gain: 35 dB ISVPL: 153 V [PLM 10000Q] 193 V [PLM 14000] 194 V [PLM 20000Q] Input & Output EQ: Flat PLM Series Operation Manual rev 1.1.9... -
Page 80: Current Draw And Thermal Dissipation Specifications
No Load Model Current Draw and Thermal Dissipation Specifications The tables in this section provide measured current consumption and calculated heat dissipation for five different operating conditions for each PLM Series device. 1. Standby Mode 2. Power On (Idle - No Signal) 3. - Page 81 Appendix Table 9-2: PLM 14000 Current Draw and Thermal Dissipation PLM Series Operation Manual rev 1.1.9...
- Page 82 Appendix Table 9-3: PLM 10000Q Current Draw & Thermal Dissipation PLM Series Operation Manual rev 1.1.9...
-
Page 83: Glossary Of Terms, Acronyms And Abbreviations
Relevant only to PLM Series devices. Short for Current Peak Limiter, a Lab.gruppen protection technique which ensures that the amplifier’s output transistors can never attempt to deliver more than their rated current. - Page 84 Switches. Relevant only to PLM Series devices. When power is applied to a piece of electronic equipment, the initial current taken by the PSU can be very high as the various capacitors in the circuitry charge up; this is called the in-rush current. In the case of power amplifiers, which In-Rush Current contain numerous very large capacitors, the in-rush current can be enough to blow mains breakers.
- Page 85 Secondary Ethernet Port connection of a separate second network for full redundancy. Relevant only to PLM Series devices. A Lab.gruppen proprietary protective circuit designed to mute a channel when a short circuit is Short Circuit Protection detected at its output terminals to prevent damage to the device.
-
Page 86: Application Guide
For professional applications it is recommend that the sum of the available mains power is above 3000 W per PLM (e.g. 230 V x 16 A, 120 V x 32 A). As PLM Series devices are equipped with PAL, the power supply will limit its mains current draw (both momentary current draw and current draw over time) to be less than 28 A for the 230 V version and less than 53 A for the 115 V version. -
Page 87: Gain Structure
10.3 Gain Structure The PLM Series architecture provides gain adjustments at various points in the signal path and therefore, various places for muting and level adjustment. Each mute or gain adjustment point serves a different purpose. - Page 88 0 dB during use. To adjust, navigate to I/O CONFIG > EVENTS & CONTROL > STATUS in the Lake Controller. Please refer to the Lake Controller Operation Manual for further details. PLM Series Operation Manual rev 1.1.9...
-
Page 89: Gain / Level Optimization
Figure 10-2 illustrates the recommended configuration of the PLM when using an AES or Dante digital input. ▸ Input Clip: 0 dBFS ▸ Amp Gain: 35 dB ▸ SNR: 114.2 dB ▸ Absolute Noise Floor: -71.3 dBu PLM Series Operation Manual rev 1.1.9... - Page 90 0.6 dB; it is therefore not recommended to optimize performance in this manner. 10.4.3.2 Analog Input Gain Structure Examples Figure 10-4 illustrates how to minimize absolute noise while limiting the available SPL. Input Clip: 12 dBu ▸ Amp Gain: 22 dB ▸ SNR: 105.5 dB PLM Series Operation Manual rev 1.1.9...
- Page 91 This makes it possible to increase the average SPL by utilizing internal compression capabilities. ▸ Input Clip: 0 dBFS ▸ Amp Gain: 35 dB ▸ SNR: 114.2 dB PLM Series Operation Manual rev 1.1.9...
-
Page 92: Speaker Configurations
The primary cause of signal distortion and signal delay (latency) is the digital-to-analog and analog-to-digital conversion process. Therefore, using digital inputs normally provides higher quality audio with lower latency. PLM Series Operation Manual rev 1.1.9... -
Page 93: System Latency And Delay Compensation
An AES3 input signal is connected to the XLR3F connector labelled INPUT 1-2 in the AES3 input section on the rear panel. An XLR3M connector, labelled LINK 1-2 is provided as a loop-through output for daisy- chaining multiple PLM Series devices. PLM Series Operation Manual rev 1.1.9... -
Page 94: Interconnection Options
10.6.3.2 Interconnection Options If multiple PLM Series devices are receiving the same AES3 signal, connections may be configured in two ways: 1. Daisy-Chain – Connect the signal source (e.g. mixing console, digital snake or distribution amplifier) to the AES3 input on the first PLM. -
Page 95: External Signal Distribution Hardware
Attenuation is minimal, but there is no refreshing of the signal. 10.6.5 Additional Reference Material Complete technical information on the AES/EBU (AES3) standard can be downloaded from the AES web site at http://www.aes.org/publications/standards/. PLM Series Operation Manual rev 1.1.9... -
Page 96: Digital Clock Configuration
The PLM digital clocking system can either generate its own internal clock, or synchronize to an incoming external clock source via the AES3 digital input. 10.7.2 Clock Source Priorities There are two options for clock source configuration: Manual Configuration or Automatic Detection. PLM Series Operation Manual rev 1.1.9... - Page 97 The front panel Input View indicates if that device is selected as Dante Clock Master. Confirmation of Dante Master / Slave status is also displayed in the Lake Controller. For further information on Digital Clock configura- tion and the Lake Controller user interface, please refer to the Lake Controller Operation Manual. PLM Series Operation Manual rev 1.1.9...
-
Page 98: Technical Specifications
Technical Specifications 11. Technical Specifications S cifi cat ons PLM Series PLM 20000Q PLM 14000 PLM 10000Q Model Number of input channels Number of output channels Peak total output all channels driven 20000 W 14000 W 10800 W Max. Peak output voltage per channel... -
Page 99: Warranty And Support
12. Warranty and Support 12.1 General This product is manufactured by Lab.gruppen, and it is warranted to be free from any defects caused by components or factory workmanship, under normal use and service, for a period of three (3) years from date of purchase from an authorized Lake dealer. -
Page 100: Trademarks
Warranty and Support 12.3.2 Factory Service In the event a Lab.gruppen product requires factory service, you may contact Lab.gruppen’s service depart- ment for return instructions and a Return Authorization number. Please note for product return: Use the original packing. Include a copy of the sales receipt, your name, return address, phone and fax number, email address and description of the defect. - Page 101 L A B . G R U P P E N A B ► S W E D E N I N T E R N A T I O N A L C O N T A C T ► I N F O @ L A B G R U P P E N . C O M U S &...
Need help?
Do you have a question about the PLM series and is the answer not in the manual?
Questions and answers