Falcon Professional+ 110 Dual Fuel with FSD User Manual & Installation & Service Instructions
Installation & service instructions
Hide thumbs
Also See for Professional+ 110 Dual Fuel with FSD:
- Instructions for use and installation (52 pages) ,
- User manual & installation & service instructions (44 pages) ,
- User's manual & installation instructions (44 pages)
Table of Contents

Subscribe to Our Youtube Channel
Related Manuals for Falcon Professional+ 110 Dual Fuel with FSD


Summary of Contents for Falcon Professional+ 110 Dual Fuel with FSD
-
Page 1: User Guide
� ������������ ArtNo.000-0012 Professional + logo 110 Dual Fuel with FSD 110 Mixte avec DSS User Guide & Installation & Service Instructions Mode d'emploi & Instructions d'installation & d'entretier ArtNo.000-0008 Falcon logo shaded U109772-05... -
Page 2: Table Of Contents
Contents Before you start... Cooker Overview The Griddle The Glide-out Grill The Ovens The Clock Tips on Cooking with the Timer General Oven Tips Oven Cooking Guide Oven shelves The Handyrack Main Oven Light The Browning Element Storage Cleaning your Cooker Troubleshooting Installation Conversion to LP gas... -
Page 3: Before You Start
Before you start... If you smell gas • DO NOT turn electric switches on or off. Thank you for buying the Professional cooker. It should give • DO NOT smoke you many years trouble-free cooking if installed and operated correctly. It is, therefore, important that you read this section •... -
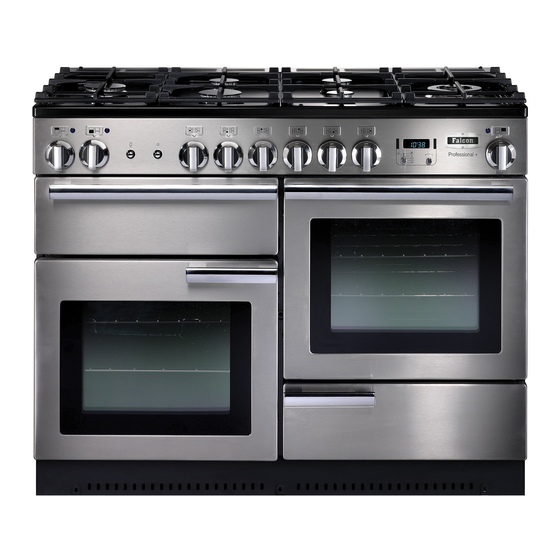
Page 4: Cooker Overview
Cooker Overview Do not use aluminium foil to cover shelves, linings or the oven roof. Never heat unopened food containers. Pressure build up may make the containers burst and cause injury. Do not use unstable saucepans. Always ensure that ... -
Page 5: Wok Burner
When the igniter button is pressed in, sparks will be made at every burner – this is normal. Do not attempt to disassemble or clean around any burner while another burner is on, otherwise an electric shock could result. To light a burner, press the igniter button, and push in and turn a knob to the high position indicated by the large flame symbol ( ... -
Page 6: The Griddle
ArtNo.311-0006 Correct wok sizes DO NOT put it crossways – it will not fit properly and will be unstable. DO NOT put it on the Wok burner on the left-hand Rapide burner – it is not designed to fit the end pan supports. -
Page 7: The Glide-Out Grill
The Glide-out Grill The Ovens The clock must be set to the time of day before the right- Open the door and pull the grill pan carriage forward using the handle: hand oven will work. See the following section on ‘The Clock’... -
Page 8: The Clock
The Clock The oven indicator light will glow until the oven has reached the temperature you selected. It will then cycle on and off during cooking: Setting the time of day ArtNo.270-0006 Proplus ArtNo.300-0004 2-button clock annotated oven control light �... -
Page 9: Manual Cooking
To stop the oven at a specific time of day Turn the Timer knob to the ( ) position. The display will show the current time of day plus the ‘cook time’ you just set. Turn the Timer knob to the ( ) position. -
Page 10: Tips On Cooking With The Timer
Tips on Cooking with the Timer The oven is now locked, as is confirmed by the display showing the time of day alongside the key symbol: If you want to cook more than one dish, choose dishes that ArtNo.301-0013 2BC require approximately the same time. -
Page 11: Oven Cooking Guide
Oven Cooking Guide The oven control settings and cooking times given in the table below are intended to be used only as a guide. Individual tastes may require the temperature to be altered to provide a preferred result. ArtNo.050-0007 Centre When baking in the right-hand fanned oven, use the minimum cooking time shown in the table. -
Page 12: Oven Shelves
Oven shelves The Handyrack The maximum weight that can be held by the Handyrack is 5.5kg (12lb). It should only be used with the supplied roasting � tin, which is designed to fit the Handyrack. Any other vessel could be unstable. Additional roasting tins are available from our cookware collection –... -
Page 13: Main Oven Light
Main Oven Light Cleaning your Cooker Press the button to turn the light on: Essential Information Isolate the electricity supply before carrying out any thorough cleaning. Then allow the cooker to cool. Never use paint solvents, washing soda, caustic cleaners, ArtNo.320-0026 biological powders, bleach, chlorine based bleach cleaners, - Oven light... - Page 14 The Wok Burner The Wok Cradle The Wok burner is a little more complicated but it can also be Recommended cleaning materials are hot soapy water, a taken apart for cleaning. moistened soap pad, cream cleaner or a nylon scourer. ArtNo.311-0014 Wok burner details Glide-out Grill �...
-
Page 15: Troubleshooting
Removing the Oven Linings If you need to remove the side rails to facilitate the cleaning of the grill chamber, you can unhook them from the grill Some of the lining panels can be removed for cleaning. You chamber sides and wipe the sides clean with a soft cloth and will need to remove the shelves before removing the panels. - Page 16 Food is cooking too slowly, too quickly, or Before removing the existing bulb, turn off the power burning. supply and ensure that the oven is cool. Open the oven Cooking times may differ from your previous door and remove the oven shelves. oven.
-
Page 17: Installation
INSTALLATION Check the appliance is electrically safe and gas sound when you have finished. Installation Provision of Ventilation This appliance is not connected to a combustion products evacuation device. Particular attention shall be given to the Dear Installer relevant requirements regarding ventilation. Before you start your installation, please complete the details In the UK BELOW. - Page 18 INSTALLATION Check the appliance is electrically safe and gas sound when you have finished. Checking the parts You will need the following equipment to complete the cooker installation satisfactorily: 4 pan supports Levelling tool and Allen keys STABILITY BRACKET If the cooker is to be supplied with gas ArtNo.000-0002 Classic tools through a flexible hose, a stability bracket or chain must be fitted.
-
Page 19: Positioning The Cooker
INSTALLATION Check the appliance is electrically safe and gas sound when you have finished. Positioning the Cooker A clearance of 130mm is required if the cooker is near a corner of the kitchen to allow the oven doors to open. The The diagrams below show the minimum recommended actual opening of the doors is slightly less but this allows for distance from the cooker to nearby surfaces. - Page 20 INSTALLATION Check the appliance is electrically safe and gas sound when you have finished. Fit the levelling tool on the rectangular adjuster as shown below. ArtNo.010-0009 Pushing the cooker � �� ArtNo.010-0008 Lowering the front rollers Conversion to LP If the appliance is to be converted to LP gas do the conversion at this point.
-
Page 21: Fitting A Stability Bracket
INSTALLATION Check the appliance is electrically safe and gas sound when you have finished. Fitting a stability bracket flexibility in the positioning of the bayonet and make moving the cooker easier. The hose should be fitted so that both inlet A stability bracket or chain (not supplied by with the cooker) and outlet connections are vertical so that the hose hangs should be fitted when the cooker is connected to a flexible... -
Page 22: Electrical Connection
INSTALLATION Check the appliance is electrically safe and gas sound when you have finished. Electrical Connection Hotplate This appliance must be installed by a qualified electrician Check each burner in turn. Push in tap and turn to the large to comply with the relevant Institute of Electrical Engineers flame symbol. -
Page 23: Conversion To Lp Gas
INSTALLATION Check the appliance is electrically safe and gas sound when you have finished. Conversion to LP gas Clear the holes from the inner panel and pull the control panel forward: Check in the 'Technical Data' section at the back of the instructions that the cooker is convertible to the gas you want to use. -
Page 24: Servicing
WARNING - SERVICING TO BE CARRIED OUT ONLY BY AN AUTHORISED PERSON Disconnect from electricity and gas before servicing. Check appliance is safe when you have finished. Servicing Taking care not to damage the burner electrodes, carefully lift the hotplate, from underneath disconnect the earth lead at the right-hand rear from the rear cross member and withdraw BEFORE SERVICING ANY GAS CARRYING ... - Page 25 WARNING - SERVICING TO BE CARRIED OUT ONLY BY AN AUTHORISED PERSON Disconnect from electricity and gas before servicing. Check appliance is safe when you have finished. Feed the thermostat capillary out of the oven. Disconnect 12. To Replace an Oven Door the wiring from the thermostat.
- Page 26 WARNING - SERVICING TO BE CARRIED OUT ONLY BY AN AUTHORISED PERSON Disconnect from electricity and gas before servicing. Check appliance is safe when you have finished. 16. To Change an Oven Door Seal 19. To Change the Fan in the Right-hand Oven Open the oven door.
- Page 27 WARNING - SERVICING TO BE CARRIED OUT ONLY BY AN AUTHORISED PERSON Disconnect from electricity and gas before servicing. Check appliance is safe when you have finished. 22. To Remove the Left-Hand Oven Bottom and Top Elements Disconnect from the electricity supply. Bottom Element Pull the cooker forward to access the cover boxes at the rear of the unit.
-
Page 28: Circuit Diagram
Circuit Diagram � � � � � � � � �� �� � �� � � � � � � � � � � �� �� �� � � �� �� �� �� �� � � �� � �� � ��... -
Page 29: Technical Data
Technical Data This cooker is category II2H3+ It is supplied set for group H natural gas. A conversion kit from NG to LP gas is packed with the cooker. INSTALLER: Please leave these instructions with the User. DATA BADGE LOCATION: Cooker back, serial number repeater badge below oven door opening. Country of Destination: GB Gas ( Electric...
Need help?
Do you have a question about the Professional+ 110 Dual Fuel with FSD and is the answer not in the manual?
Questions and answers