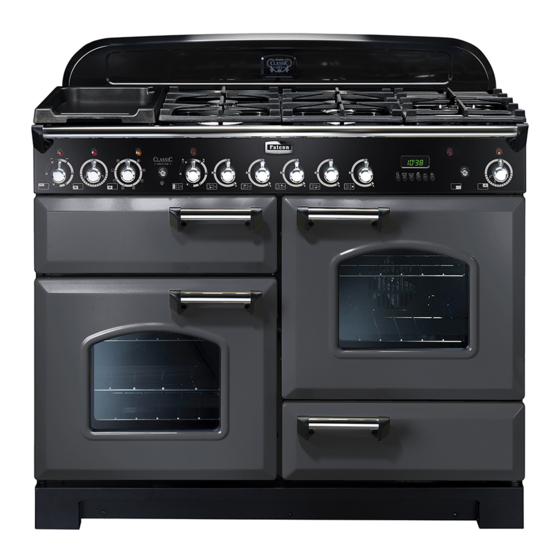
Falcon Professional 110 Dual Fuel User Manual
Hide thumbs
Also See for Professional 110 Dual Fuel:
- Instructions for use and installation (52 pages) ,
- User manual & installation & service instructions (44 pages) ,
- User's manual & installation instructions (44 pages)

Related Manuals for Falcon Professional 110 Dual Fuel


Summary of Contents for Falcon Professional 110 Dual Fuel
- Page 1 110 Dual Fuel 110 Dual Fuel Professional 110 Dual Fuel Falcon 110 Dual Fuel Users Guide Installation & Service Instructions Australia U108600 01...
-
Page 2: Peculiar Smells
Australia Pease note This instruction covers 4 diff erent models. Although the some of the illustrations may look diff erent to your particular model we hope the meaning is clear. Be safe Warning Accessible parts will become hot in use. To avoid burns and scalds children should be kept away You need clean fresh air - so does your cooker. -
Page 3: Table Of Contents
Australia Contents Hotplate burners Page 4 The Griddle Page 5 Warmer Page 5 The Grill Page 6 The Ovens Page 7 The Clock Page 8 Cooking using the timer Page 9 Oven cooking Page 10 Oven shelves Page 10 The Handyrack Page 11 Oven light Page 11... -
Page 4: Hotplate Burners
Australia Hotplate burners Avoid using unstable and misshapen pans that may tilt easily and pans with a very small base diameter e.g. milk pans, single egg poachers. The minimum pan diameter recommended is 120mm. Pans and kettles with down turned base rims should not The drawing by each knob indicates which burner that be used. -
Page 5: The Griddle
Australia The Griddle Always leave space around the griddle for the gases to escape. Never fi t two griddles side by side. Large pans should also be spaced well apart. The maximum pan The griddle fi ts a single pan support, front to back. It is base diameter is 250mm. -
Page 6: The Grill
Australia The Grill Caution: Accessible parts may be hot when the grill is in use. Young children should be kept away. Before using for the fi rst time, to dispel manufacturing odours, turn on the grill and run For best results preheat for 2 minutes with the grill pan for 30 minutes with the grill pan in position, in position. -
Page 7: The Ovens
Australia The Ovens During use the appliance becomes hot. Care should be taken to avoid the touching heating elements inside the oven. Before using for the fi rst time, to dispel manufacturing odours, turn the ovens to 240°C and run for an hour. Turn the oven knob to the temperature you need. -
Page 8: The Clock
Australia To start and stop the oven The Clock automatically You can use the timer to turn the ovens on and off . Before you set the clock, you must have two The clock must be set to the time of day before the numbers clearly in mind. -
Page 9: Cooking Using The Timer
Australia Clock Special Features Cooking using the timer Key Lock The timer can be used to turn just one oven or When the key lock is activated, the clock can be both on and off automatically. The start and stop operated as usual but the oven is locked and will time must be the same for both ovens but diff... -
Page 10: Oven Cooking
Australia Oven cooking Oven shelves The wire shelves should always be pushed fi rmly to the back of the oven. Baking trays meat tins etcetera should be placed level centrally on the oven’s wire shelves. Keep all trays and containers away from the sides of the oven, as overbrowning of the food may occur. -
Page 11: The Handyrack
Australia The Handyrack Oven light The maximum weight that can be held by the Handyrack is 5.5kg (12lb). It should only be used with the supplied meat tin, which is designed to fi t the Handyrack. Any other vessel could be unstable. Press the appropriate button to turn on one of the oven lights. -
Page 12: Moving Your Cooker
Australia The oven control settings and cooking times given in the table opposite are intended to be used only as a guide. Individual tastes may require the temperature to be altered to provide a preferred result. When baking in the right hand fanned oven, use the minimum cooking time shown in the table. -
Page 13: Oven Cooking Guide
Australia Oven cooking guide LH Convection Oven RH Fan Oven Shelf Food Temperature Position Temperature Approximate Cooking Time FISH 190°C 180°C Fillets 15-20mins. 190°C 180°C Whole 10mins.per 500g + 10mins. 190°C 180°C Steaks according to thickness. ROAST MEATS Beef with bone 160°C 150°C 20-25mins. -
Page 14: Cleaning Your Cooker
Australia The Wok burner Cleaning your cooker The Wok burner is a little more complicated but it also can be taken apart for cleaning. Essential information Before thorough cleaning isolate the electricity supply. Remember to switch on the electricity supply before use. Never use paint solvents, washing soda, caustic cleaners, biological powders, bleach, chlorine based bleach cleaners,... -
Page 15: Control Panel And Doors
Australia To fi t the small inner burner, fi nd the larger electrode notch in the burner rim. Line this up with the white ignition electrode and place the inner burner on the large base ring. stainless steel window doors only Carefully lift off... -
Page 16: Cleaning Table
Australia Cleaning Table Hotplate Part Finish Recommended Cleaning Method Hotplate Top Enamel or Hot soapy water, soft cloth. Any stubborn stains remove Stainless Steel gently with a nylon scourer. Pan Supports, Wok Cradle (some Enamel coated Cif Cream Cleaner- Faberge Lever and a nylon scourer. models only) Cast Iron or Dishwasher. -
Page 17: Troubleshooting
Australia The side panels of either oven can be removed. Troubleshooting Each side of the oven is fi xed with four fi xing screws. You don’t have to remove the screws to Hotplate ignition or hotplate burners faulty remove the oven linings. Lift each side panel Is the power on? Is the clock illuminated? If not upwards and they will slide off... - Page 18 Australia If there is an installation problem and I don’t get Is the key symbol ( ) showing in the display? See my original installer to come back to fix it who the Clock section of the instructions for more pays? information on the key lock feature of the clock.
-
Page 19: General Safety Instructions
Australia General Safety Instructions This appliance must be installed by a Authorised allow the cooker to cool and then switch off at Person in accordance with the installation the mains and before cleaning or carrying out any instructions. The installation must comply with maintenance work, unless specifi... - Page 20 Australia This includes some cleaning solvents and Only certain types of glass, glass-ceramic, chemicals used in dry cleaning. earthenware or other glazed containers are suitable for hotplate cooking; others may Do not use water on grease fi res. Never pick up break because of the sudden change in a fl...
-
Page 21: Service And Spares
Australia Service and spares Firstly, please complete the appliance details below and keep them safe for future reference - this information will enable us to accurately identify your particular appliance and help us to help you. Filling this in now will save you time and inconvenience if you later have a problem with your appliance. -
Page 22: Installation
Australia Installation Dear Installer Before you start your installation, please complete the details BELOW. If your customer has a problem relating to your installation they will be able to contact you easily. Thank you Installer’s Name Installer’s Company Installer’s Telephone number... -
Page 23: Ventilation Requirements
Australia You must be aware of the following safety requirements & regulations Safety Requirements/Regulations Ventilation Requirements The cooker must be installed in accordance with Ventilation must be as specifi ed by these instructions by an authorised person. ‘AS 5601/AG 601 - Gas Installations’. The installation must be in accordance with The room containing the appliance should have AS 5601/AG 601 - Gas Installations, local gas fi... - Page 24 Australia You will need the following equipment to complete the cooker installation satisfactorily Anti-tip bracket Gas Pressure Tester Flexible Gas Hose Multimeter If the cooker is to be (for electrical checks) A suitable hose and supplied with gas through restraining chain are a fl...
-
Page 25: Positioning The Cooker
Australia Positioning the Cooker Clearances (see AS 5601/AG 601) 3 Side clearances - Measurement E Where D, the distance from the periphery of the nearest 1 Overhead - Measurement A burner to a horizontal combustible surface is less than The minimum height of any surface above the cooker is 200 mm, then E shall be 10 mm or more, or the horizontal 650mm above the hotplate surface shall be above the trivet. -
Page 26: Moving The Cooker
Australia Moving the Cooker The cooker is very heavy. Take great care. We recommend two people manoeuvre the cooker. Ensure that the fl oor covering is fi rmly fi xed, or removed to prevent it being disturbed when moving the cooker around. You will need the levelling tool. - Page 27 Australia Kit contents Fitting the splash back (Classic model only) Key No No Of Description The cooker can be installed with or without the supplied Anti-Tip Bracket Base splashback. To fi t the splash follow the instructions below. Anti-Tip Bracket extension M5 screw The cooker must be set to the correct height and leveled before the anti-tip bracket is installed.
-
Page 28: Gas Connection
Australia Wall Attachment When fl oor attachment is impracticable and provided that the anti-tip bracket base can be securely fi xed to a solid wall or wall stud. Discard Key No 2. For both fl oor and wall attachment it is essential to use the appropriate fi... -
Page 29: Pressure Testing
WARNING SERVICING TO BE CARRIED OUT ONLY BY AN AUTHORISED PERSON Disconnect from electricity before servicing. Check appliance is safe when you have finished. Hook the other end of the chain to the wall fi xing. Make sure that the mains characteristics (voltage, nominal, power, etc.) match the ratings indicated on the data plate affi... -
Page 30: Customer Care
WARNING SERVICING TO BE CARRIED OUT ONLY BY AN AUTHORISED PERSON Disconnect from electricity before servicing. Check appliance is safe when you have finished. Oven check The clock must be set to the time of day before the ovens will work. -
Page 31: Servicing Notes
WARNING SERVICING TO BE CARRIED OUT ONLY BY AN AUTHORISED PERSON Disconnect from electricity before servicing. Check appliance is safe when you have finished. 2. To Remove Hotplate Trays Servicing Notes Disconnect from electricity supply. This appliance must be serviced by a Authorised Person in Pull the cooker forward to gain access to the rear accordance with the instructions. - Page 32 WARNING SERVICING TO BE CARRIED OUT ONLY BY AN AUTHORISED PERSON Disconnect from electricity before servicing. Check appliance is safe when you have finished. 3. To Remove Side Panels 8. To Change Control Taps Remove the Control Panel (see 1). Lift up the appropriate Disconnect from electricity supply.
- Page 33 WARNING SERVICING TO BE CARRIED OUT ONLY BY AN AUTHORISED PERSON Disconnect from electricity before servicing. Check appliance is safe when you have finished. 14. To Change Oven Door Outer Panel 16. To Adjust an Oven Door Catch Keep Move the cooker forward to gain access to the sides.
- Page 34 WARNING SERVICING TO BE CARRIED OUT ONLY BY AN AUTHORISED PERSON Disconnect from electricity before servicing. Check appliance is safe when you have finished. 20. To Remove RH Oven Inner Back. 23. To Remove LH Oven Elements. Open RH oven door and remove the screws and washers Disconnect from electricity supply.
-
Page 35: Technical Data
Australia Technical Data This cooker is designed for use on Natural Gas:- A conversion for LP (LPG X Propane (2.75kPa)) gas is available.. INSTALLER: Please leave these instructions with the User. DATA BADGE LOCATION : LOWER RIGHT HAND COOKER UPRIGHT (Remove storage drawer) Country of Destination: Australia Electric Natural Gas... -
Page 36: Conversion To Another Gas
WARNING SERVICING TO BE CARRIED OUT ONLY BY AN AUTHORISED PERSON Disconnect from electricity before servicing. Check appliance is safe when you have finished. Tap adjustment Conversion to another gas Disconnect from electricity supply. Conversion from Natural gas (1.0kPa) Classic model only to LPG X Propane (2.54kPa) Remove the handrail by removing the 2 end bracket... -
Page 37: Stick On Label
WARNING SERVICING TO BE CARRIED OUT ONLY BY AN AUTHORISED PERSON Disconnect from electricity before servicing. Check appliance is safe when you have finished. Gas Governor Check the appliance is gas sound. Unscrew the hexagonal nut in the front of the governor. The Check operation of all the burners. -
Page 38: Circuit Diagram
WARNING SERVICING TO BE CARRIED OUT ONLY BY AN AUTHORISED PERSON Disconnect from electricity before servicing. Check appliance is safe when you have finished. Circuit Diagram Connection shown in circuit diagram is for single phase. Ratings are for 230V 50Hz A Active M Right hand oven fan Wire colours...
Need help?
Do you have a question about the Professional 110 Dual Fuel and is the answer not in the manual?
Questions and answers