Table of Contents
Advertisement
Advertisement
Table of Contents

Related Manuals for Endurance T10


Summary of Contents for Endurance T10
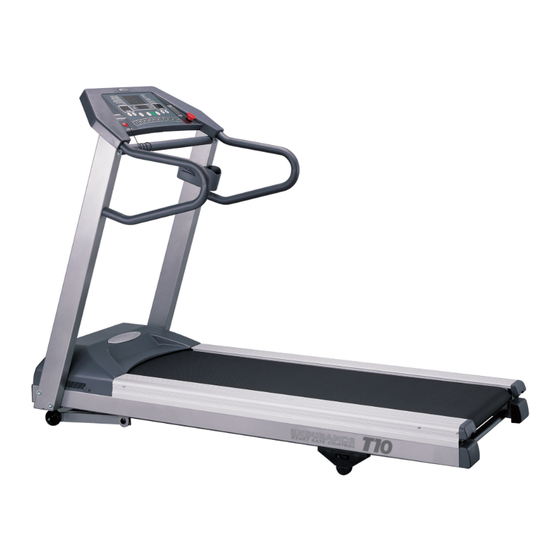
- Page 1 Endurance T10 Treadmill ® User Manual...
- Page 2 GROUNDING INSTRCTION'S This product must be grounded. A temporary adapter such as the one illustrated below may be used to connect this plug to a 2-pole receptacle as shown, if a properly grounded outlet is not available. If it should malfunction or breakdown, grounding provides a path of least resistance for electric current to reduce the risk of electric shock.
- Page 3 FCC WARNING - POSSIBLE RADIO / TEVEVISION INTERFERENCE NOTE: This equipment has been tested and found to comply with Part 15 of the FCC rules. These limits are designed to provide reasonable protection against harmful interference in a residential installation. Any changes or modifications not expressly approved by the party responsible for the compliance could void the user's authority to operate the equipment.
-
Page 4: Table Of Contents
TABLE OF CONTENTS Introduction ..........Using This Manual . - Page 5 Endurance 30 Minutes........
-
Page 6: Introduction
INTRODUCTION Thank you for purchasing the ENDURANCE treadmill. With proper use and maintenance this product will last for years of great workouts! Using this Manual Please read this entire manual to become familiar with your treadmill. This will ensure proper and comfortable use of the product. -
Page 7: Important Safety Instructions
There are no user serviceable parts. CAUTION: ENDURANCE firmly recommends that you have a complete medical exam by a qualified physician before beginning any exercise program, particularly if you have a family history of high blood pressure or heart disease, are over the age of 45, or if you smoke, have high cholesterol, are obese or have not exercised regularly in the past year. -
Page 8: Power Sources
Power Sources DO NOT pull the power cord to move this product. Keep the power cord away from heated surfaces. Supervision of children, invalid or disabled persons is mandatory when they are using or are near this product. Connect this product only to a properly grounded electrical outlet. Ventilation Always keep the ventilation slots located on this product clear of obstruction. -
Page 9: Installation
INSTALLATION ELECTRICAL REQUIREMENT Your ENDURANCE treadmill is intended for use in the country to which it was shipped. Electrical supplies outside of this country may differ and may not be compatible with the product. Please consult Customer Support before using the treadmill in a different country. -
Page 10: Leveler Legs
DANGER! A risk of electrical shock may result from improper connection of the equipment- grounding conductor. Check with a qualified electrician if you are in doubt as to proper grounding technique. DO NOT MODIFY the plug provided with this product. If it will not fit an electrical outlet, have a proper outlet installed by a qualified electrician. -
Page 11: Treadmill Overview
TREADMILL OVERVIEW POWER SWITCH The power switch is located in the front of the treadmill near the powercord. The power switch has two positions -ON and OFF. The display console will beep when the treadmill is plugged in and the power switch is pressed ON. -
Page 12: The Display Console
THE DISPLAY CONSOLE Dimentions A. The Information Windows B. The Speed and Incline Arrows Buttons C. The Select Button D. The Start Button E. The Enter Button F. The Stop Button G. The Cool Down Button H. The Safety Key I. -
Page 13: The Information Windows
THE INFORMATION WINDOWS LED Matrix Window The LED Matrix window (or LED window) is located at the top of the Display Console. This window displays graphical information such as the Virtual Track to chart your progress and prompt and display information such as your weight, age and Maximum Heart Rate. -
Page 14: The Speed And Incline Arrows Buttons
FEEDBACK WINDOW The Feedback window displays the time, calories, heart rate and distance during a workout. The information continually cycles, alternating between time, calories, heart rate and distance. A red LED next to the Feedback window lights signaling which information is presently being displayed. SPEED WINDOW The Speed window displays the current belt-speed setting. -
Page 15: The Start Button
DO NOT continually press the Speed + Arrow button to increase the belt speed. Enter a known, comfortable value and wait for the running belt to reach that speed. Use care when further increasing the speed. Use either the Speed or Incline Arrow buttons to increase or decrease the weight setting shown in the Feedback window. -
Page 16: The Enter Button
THE ENTER BUTTON Located in the center of the Display Console it is used to accept information you are prompted for and to finalize your selection of a preprogrammed workout or effort level. THE STOP BUTTON The Stop buttons are located at the bottom of the Display Console and perform the same task. -
Page 17: The Safety Key
Belt Condition Inspect the Running belt monthly to check it's condition. Look for loose pieces, tears or extremely worn areas. If these conditions occur, replace the running belt immediately. Please call ENDURANCE Customer Support to purchase a replacement running belt. -
Page 18: The Basics Of Operation
THE BASICS OF OPERATION GETTING STARTED After the treadmill is correctly installed and plugged in, it's time to start our workout. Begin by depressing the power switch, located in the front of the treadmill near the powercord, to the ON position. SET WEIGHT After the power switch is depressed to the ON position, the Set Weight LED will light and the display console will read the last weight entered from the previous... -
Page 19: Changing The Incline
CHANGING THE INCLINE Press the Incline + Arrow button to increase the incline and the Incline - Arrow button to decrease the incline of the treadmill to the desired setting. As the buttons are pressed the Incline window will display the value in "percentage of grade" comparable to the measurement of the grade of a hill. -
Page 20: Manual
WORKOUTS MANUAL (includes SET-TIME, SET-CALORIE and SET-DISTANCE) The Manual workout let's you control the effort. Change your effort level and speed to challenge yourself. Press the MPH Bar and Start button and you're working out instantly. After entering your weight, the LED next to MANUAL will be lighted. Press the Start button to begin a basic, manual workout. -
Page 21: Set Time (Manual Workout Withe Time Goal)
SET TIME (MANUAL WORKOUT WITH TIME GOAL) Set the duration of your workout and get to it! The count down of the time goal is displayed in the Main window and keeps you motivated. After entering your weight the Manual workout will be selected. Press the Select button until the LED next to SET TIME is lighted. -
Page 22: Set Caiories (Manual Workout Withe Time Goal)
Press Stop button to pause the workout. SET DISTANCE (MANUAL WORKOUT WITH DISTANCE GOAL) Training for your marathon? Increase your endurance by gradually increasing your distance. After entering your weight the Manual workout will be selected. Press the Select button until the LED next to SET DISTANCE is lighted. -
Page 23: Custom Learn (1 & 2)
CUSTOM LEARN (1&2) Do you like to work hard in the beginning of your workout and coast towards the end? Or do you like an easy warm-up and gradually increase the effort level? Create your perfect workout with the Custom Learn workout. The first time you use this workout the treadmill will remember or "learn"... -
Page 24: Walking Courses (3)
WALKING COURSES (3) The walking courses add a lower degree of effort to your workout but are still very beneficial. Low impact with high results. After entering your weight, the Manual workout will be selected. Press the Select button until the LED next to WALKING COURSES is lighted. Press the Speed or Incline Arrow buttons to choose an effort level - Beginner, Noviceor Expert. -
Page 25: Cardio 15 Minutes
The Running Courses' workout profile consist of one session of 10 segments. Each segment is four (4) LEDs each - each LED repre-sents 15 seconds. After the 10-minute session is completed, it automatically begins again (for workouts over 10 minutes in duration). CARDIO 15 MINUTES The first step to a healthier heart! A workout profile to raise your heart rate to a higher level effectively helping your heart become stronger. -
Page 26: Interval 20 Minutes
INTERVAL 20 MINUTES Want a slightly greater challenge? Tone-up and continue your exercise regiment with the Interval 20 Minute workout. The Interval 20 Minute workout has eleven sessions. The first session is the Warm-Up and the eleventh session is the Cool-Down. They are preprogrammed and you cannot change them. -
Page 27: Fat Burn 25 Minutes
FAT BURN 25 MINUTES Really get into the zone! Raise your heart rate to the proper level and use the duration to burn away! Twenty-five minutes to really feel the progress. The Fat Burn 25 Minute workout has thirteen sessions. The first session is the Warm-Up and the thirteenth session is the Cool-Down. -
Page 28: Endurance 30 Minutes
After entering your weight, the Manual workout will be selected. Press the Select button until the LED next to ENDURANCE 30 MIN is lit. Press the Arrow buttons to choose an effort level - Beginner, Noviceor Expert. -
Page 29: Heart Rate Control
HEART RATE CONTROL Choose your Maximum Heart Rate (MHR) for proper control of your workout! ENDURANCE firmly recommends that you have a complete medical exam by a qualified physician before beginning any exercise program, particularly if you have a family history of high blood pressure or heart disease, are over the age of 45, or if you smoke, have high cholesterol, are obese or have not exercised regularly in the past year. - Page 30 Press the Enter button to accept the percentage of Maximum Heart Rate. When display console shows your heart rate, press Start button. The treadmill will automatically adjust level to maintain the targeted heart rate. You can use the speed "+" or "-" button to adjust the speed. Note: If no heart rate is detected, running belt will not start.
-
Page 31: Maintenance
Instead, place the non-abrasive cleaning solution on a soft cloth and wipe down the unit. Customer Service Contact the Customer Service group at: Endurance-Warranty Department 1900 S. Des Plaines Ave. Forest Park, IL 60130 Phone: 1-800-556-3113 Fax: 1-708-427-3598 service@bodysolid.com... -
Page 33: Flexibility
Stretching / Flexibility Adequate flexibility is the ability to move your limbs and joints easily (through a complete range of motion) the way you need to in order to meet the challenges of daily life. Fortunately thereʼs a positive reinforcing cycle between flexibility and activity. - Page 34 Lower Back, Hips, Groin, and Hamstrings 1. Stand with the feet about shoulder- width apart and pointed straight ahead. If you are pretty flexible and need more of a stretch, cross one leg in front of the other for a few stretches, then switch legs. 2.
- Page 35 Groin (inside of thigh) 1. Sit on the floor with the soles of your feet together. Gently push knees down toward the floor with your elbows. 2. Stand with your feet three to four feet apart and turned out slightly. 3.
-
Page 36: Exercise Guidlines
Very easy, conversational 50-60% well-being, decrease pace. stress, reduce risk factors, Weight management and Easy pace, longer duration 60-70% optimal fat burning to bulid endurance. Faster pace, 70-80% Aerobic fitness, improve stamina. Aerobic/ Anaerobic fitness Increase speed and 80-85% improve stride. -
Page 37: Achieving Your Fitness Goals
Each of us are individuals with possibly different fitness goals. It is critical to determine what your goals are when deleloping a long term fitness program. ENDURANCE fitness products are pleased with your decision in using our quality products to help reach your fitness goals. Below are some benefits of exercising. - Page 38 Diary Week # Date:___________________ Number hours of sleep:__________________ Weekly Goals:_______________ Sheduled work out time:_______________ Reward:_______________ Level of intensity by % of your predicted maximal heart rate: _________________ Rating of your percieved exertion (R.P.E., Borg Scale) Some What Hard Very, Very Light Hard Very Light Very Hard...
-
Page 39: Heart Rate Conversion Chart
Heart Rate Conversion for 10 Seconds (Use as reference) 11 = 66 19 = 114 27 = 162 12 = 72 20 = 120 28 = 168 13 = 78 21 = 126 29 = 174 14 = 84 22 = 132 30 = 180 15 = 90 23 = 139... - Page 40 Endurance-Warranty Department 1900 S. Des Plaines Ave. Forest Park, IL 60130 Phone: 1-800-556-3113 Fax: 1-708-427-3598 service@bodysolid.com...
Need help?
Do you have a question about the T10 and is the answer not in the manual?
Questions and answers