TechniSat HDFS Owner's Manual
Satellite hd digital receiver
Hide thumbs
Also See for HDFS:
- Specification (2 pages) ,
- Instructions manual (25 pages) ,
- Quick start manual (8 pages)
Table of Contents
Advertisement
Quick Links
Download this manual
See also:
Instruction Manual
Advertisement
Table of Contents

Subscribe to Our Youtube Channel
Related Manuals for TechniSat HDFS


Summary of Contents for TechniSat HDFS
- Page 1 TechniSat HDFS Satellite HD Digital Receiver Owner’s Manual...
- Page 2 This Owner’s manual is intended to ensure you gain the optimum experience by carefully explaining the comprehensive features and functions of your HDFS. With its wealth of functionality, we believe the HDFS will become an essential element of your home entertainment system.
-
Page 3: Table Of Contents
Contents Contents ..................3 Disposal Advice ................. 8 Safety advice ................9 When not in operation ..............9 Connecting the Receiver ............10 Connection (a) ................10 External input (b) ................11 Connection to a TV (c and d) .............11 Connection to a VCR or DVD Recorder (e) .......11 Audio connection to Hi-Fi or surround sound system (f) ...11 The receiver front and back panel ........ - Page 4 Software update ................ 21 AV Output .................. 21 Screen format ................22 Regional postcode entry ............22 Channel searching ..............23 Programme information banner ..........24 Navigator .................. 26 10.1 Status ..................27 10.1.1 Transponder Information ............27 10.1.2 Audio/Video ................28 10.1.3 Programme information .............
- Page 5 11.3.5 Go up one folder level ............... 35 11.3.6 Stop/End playback ..............35 11.3.7 Slideshow .................. 35 11.3.8 Pause ..................36 11.3.9 Show next/previous picture ............36 11.3.10 Adjusting image changeover speed .......... 36 Electronic Programme Guide (EPG) ........37 12.1 EPG Menu .................
- Page 6 Sorting channels in a TV list............. 81 14.5.7 Replacing customisable channels ..........82 14.5.8 Setting Parental control ............. 83 14.6 Radio lists organiser ..............84 TechniSat operating mode ............. 85 15.1 Channel search ................. 85 15.1.1 Automatic search ..............86 15.1.2 Satellite ..................87 15.1.3...
- Page 7 15.2 Settings ..................90 15.2.1 Programme guide ..............91 15.2.2 Basic Settings ................93 15.2.3 Antenna configuration ............... 94 15.2.4 Use with a Motor Rotating Antenna (DiSEqC 1.2) ....94 15.2.5 Service Settings ..............104 15.3 TV/Radio Lists Organiser ............104 15.4 Menu language ...............
-
Page 8: Disposal Advice
2 Disposal Advice The packaging for your unit consists entirely of recyclable material. Please sort the items appropriately for disposal via your local waste disposal system. This product cannot be disposed of at the end of its useful life along with stan- dard household refuse. -
Page 9: Safety Advice
3 Safety advice For your own protection, please read the safety instructions carefully before commencing operation of your new unit. The manufacturer accepts no respon- sibility for damage caused by inappropriate operation, or by non-compliance with safety precautions. > To ensure sufficient ventilation, position the device on a flat, even surface and do not place any objects on the lid of the device. -
Page 10: Connecting The Receiver
4 Connecting the DVB Receiver > Mains connection. > Connection between the satellite dish LNB and the receiver LNB input. > HDMI connection between the receiver and the TV. > Optional SCART connection between the receiver and the TV. > Optional SCART connection between the receiver and a VCR. -
Page 11: External Input (B)
4.2 External input (b) > Connect the satellite cable from the external antenna to the LNB input of the receiver. 4.3 Connection to a TV (c and d) > Connect the receiver HDMI output and TV HDMI input using an HDMI cable. -
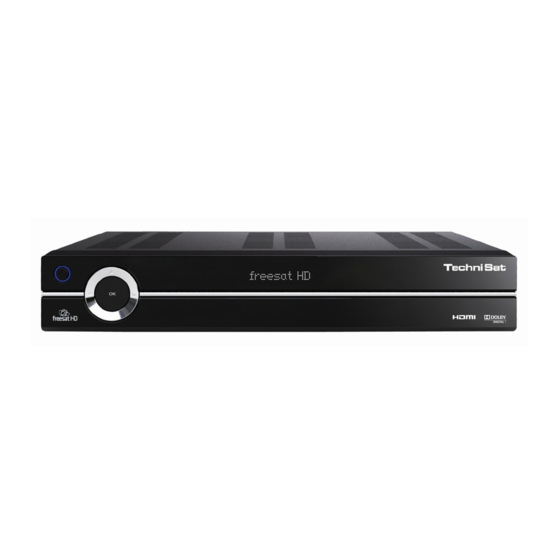
Page 12: The Receiver Front And Back Panel
5 The Receiver front and back panel On/Standby Alphanumeric display Arrow Keys USB socket MS/SD/MMC Compact fl ash reader card reader TV SCART Ethernet Port HDMI USB Mains Audio/Video Output Input Input Output SCART Digital Audio... -
Page 13: Remote Control
6 Remote Control Remote control On/Standby Mute Keypad Back Option Function keys Arrow keys Information (i) TV/Radio mode Channel change up (+) / down (-) Volume up (+) / down (-) MENU Digital Text Subtitles Audio Description Timer Sleep RCU mode switch... -
Page 14: Everyday Use
Everyday Use The following sections explain basic operation of the receiver using the remote control and front panel features. 7.1 Switching on and off > Press the On/Standby key either on the receiver or the remote control to switch the receiver on. >... -
Page 15: Access Electronic Programme Guide (Epg)
7.5 Access Electronic Programme Guide (EPG) > Press the ‘guide’ key on the remote control. > The Channel genre screen is displayed. Select a genre using the arrow keys and press OK. > The Electronic Programme Guide then appears on the screen. The channels you have selected, or those of the factory default settings, will be shown with their current programmes. -
Page 16: Optional Features - Using The 'Tick' Key
7.9 Optional features – using the ‘tick’ key The ‘tick’ key on the remote control helps you access extra optional features in certain situations. These are documented where applicable in this manual. Extra features are listed below: 7.9.1 Additional programme information When you change channels, an information box will be displayed briefly, show- ing the channel and the name of the programme selected. -
Page 17: Getting Help
7.10 Getting Help If you need additional help while using the menus or using a receiver function then you can usually access a help page by pressing the blue function key. Help can also be accessed via ‘Help’ menu options on menus, where appli- cable. -
Page 18: Initial Installation (Autoinstall)
Initial Installation (AutoInstall) When switching on the unit for the first time, a start window will be displayed, with the installation assistant AutoInstall. > Press the green or the OK key to start the auto installation process. 8.1 Antenna configuration The Antenna configuration step allows you to adjust the receiver to the configu- ration of your antenna. -
Page 19: Modifying Antenna Settings (Diseqc)
> For standard installations accept the antenna settings by pressing the green accept key or the OK key. > If the configuration of your receiving installation does not correspond with the standard setting press the yellow key to select Modify. See below for details. -
Page 20: Configuring The Antenna
> B/B – Position B/Option B – Use the OK key to select the satellite you wish to receive at the DiSEqC setting position B/B from the drop down option list. If you want to configure the satellite, highlight ‘Proceed’ using the arrow keys and press OK. -
Page 21: Software Update
8.2 Software update The receiver will automatically scan for software updates. > If newer updates are found they will be downloaded automatically. > Press the green or the OK key to continue the installation steps. 8.3 AV Output The AV Output step screen allows you to specify whether your TV is connected via SCART or HDMI. -
Page 22: Screen Format
8.4 Screen format The Screen format step allows you to specify your TV screen format (aspect ratio) to either normal 4:3 or 16:9 widescreen format. > To specify your TV screen format move the orange highlight with your arrow keys, and press green or OK to confirm. 8.5 Regional postcode entry The next installation step allows you to configure the receiver with your post- code to receive the correct regional programmes. -
Page 23: Channel Searching
8.6 Channel searching This final step will now scan the satellite for freesat channels. > Press the OK key when all the channels are found. > Press the green or the OK key to complete the installation. -
Page 24: Programme Information Banner
Programme information banner > You can access programme information when you press the ‘i’ key while tuned to a channel. This will display a programme information banner. When you change channel, the information banner will also briefly be dis- played, this time with some extended regional programme information. To change the length of time the banner remains visible for see section 14.3.6.1. - Page 25 possible: > Use the up/down arrow keys to scroll through all programmes in the current channel list. The banner information will change with each new programme displayed. > Press the OK key to switch to the channel currently displayed in the programme information banner.
-
Page 26: Navigator
10 Navigator The navigator gives a quick list of all channels. > Press the OK key to see a list of channels. The current programme name is displayed on the right panel. > Use the up/down arrow keys to scroll through the channels. >... -
Page 27: Transponder Information
> Press the red key to view Transponder information. See section 10.1.1 for more details. > Press the green key to view Audio/Video information. See section 10.1.2 for more details. > Press the blue key to view Programme information. See section 10.1.3 for more details. -
Page 28: Programme Information
10.1.3 Programme information This screen contains information about the current programme. 11 NAV Menu The NAV Menu provides a quick way to navigate channel lists and other fea- tures of the receiver. -
Page 29: Nav Menu
> Press the blue key when in the Navigator to access the NAV Menu. > Use the up/down arrow keys to scroll through the menu options and press the OK key to select one of the following: NAV Menu > TV –... -
Page 30: Mpeg Movie Player
11.1.1 Playing an MPEG movie > Press the blue key to open the NAV Menu. > Use the up/down arrow keys to highlight the ‘Movies’ option and con- firm by pressing the OK key. > A list showing the movie files and folders available will be displayed. >... -
Page 31: Zoom
> The menu will disappear and the movie will continue to play. 11.1.5 Zoom > Press the ‘tick’ key. A Zoom mode text will be displayed at the bottom of the screen. > Press the blue Zoom key to toggle through the various screen zoom factors. -
Page 32: Playing Mp3 Files
> Press the OK key to display a list of the MP3 files contained on the storage device. > Use the up/down arrow keys to highlight the folder containing the desi- red MP3 file and confirm by pressing the OK key. >... -
Page 33: Fast Forward And Rewind
> While using the 64× speed, press the Fast Forward or Rewind button to go forwards or backwards in 10-minute steps. > Once the desired place has been reached, you can access normal playback by pressing the Pause / Play key. 11.2.7 Go up one folder level >... -
Page 34: Picture Viewer
> The following options are available: • off – turns off shuffle mode. • o n – turns on shuffle mode, which will play tracks within a folder at random. > Use the up/down arrow keys to highlight the desired shuffle mode and confirm by pressing the OK key. -
Page 35: Creating A Picture Playlist
and press Playlist+ on the green key. A file called ‘Picture.plp’ will be created. 11.3.3 Show next/previous picture > Press the up/down arrow keys to skip to the next or previous picture. 11.3.4 Rotate image > Press the blue or red function key to rotate the image in a clockwise or anticlockwise direction, respectively. -
Page 36: Show Next/Previous Picture
11.3.9 Show next/previous picture > Press the up/down arrow keys to skip to the next or previous picture more quickly. 11.3.10 Adjusting image changeover speed > Press the left/right arrow keys to adjust the image changeover speed between 5 and 100 seconds. >... -
Page 37: Electronic Programme Guide (Epg)
> Use the up/down arrow keys to move through the genres and press OK to select. The view will change to a grid showing all the channels in the chosen genre. > To return to the Channel genre list, press the Back key on the remote control. - Page 38 Depending on the EPG viewing mode you are in; Grid, Programme or Over- view, the EPG Menu will be contextual, displaying appropriate options for that view. > Press the blue key to access the menu while in the EPG and a popup menu will appear.
-
Page 39: Epg Grid - Viewing Channels And Programmes
12.2.1 Scrolling through programmes in the grid > The orange highlight will show the current programme. Use the left/ right arrow keys to navigate later in the channel schedule. A summary of programme information is displayed, including start and end times at the top of the screen. -
Page 40: Epg Overview List
> To view the schedule for the remaining 7 days press the number keys 2-8. 12.3 EPG Overview List The EPG Overview mode displays a vertical list of channels and the current programme on now, next or in the future for each of those channels. By default, the current channel and programme on ‘NOW’... - Page 41 yellow (MORE) key repeatedly. > Press the ‘i’ key to view further information about each programme. Press the ‘i’, OK, or green ‘Back’ key to return to the EPG Overview. 12.4 EPG Programme List The EPG Programme TV List provides a quick view of the list of programmes for every channel.
-
Page 42: Epg Programme List
The grey list highlight will default to the current programme broadcasting on the current channel. A yellow bar shows the progress of each programme. 12.4.1 Viewing the programme channel list Moving the highlight down the Programme List will eventually change the day and allow you to scroll through 8 days of listings. -
Page 43: Epg Genres
> Press the left/right arrow keys to scroll a page of channels at a time. > Press the OK key to view the programme list for the currently selected channel. The channel list will close and the new list of programmes for your chosen channel will be displayed. -
Page 44: Epg Search
The following options are available: > Use up/down arrow keys and the OK key to select a genre on the left panel. The list on the right will display a list of programmes in that cho- sen genre. > Press OK or the yellow ‘Genres’ key to view the default genres channel list. -
Page 45: New Search For A Programme Using The Keyboard
> Press the green ‘Edit Mode’ key to edit an existing search. See section 12.6.1 for details of using the keypad to edit the search term. > Press the yellow ‘select search’ key to view a search list. See section 12.6.2 for details. -
Page 46: View A Previous Search
> Press the OK key to select the highlighted character and it will be dis- played in the field above. > Press the red ‘Delete’ key to delete a single character from the current search term displayed in the search field. >... - Page 47 From this view the following options are available: > Press the red ‘Timer’ key to access timer functions on a programme in your search query, as you would using any EPG view. See section 13 for details of how to set timers. >...
-
Page 48: Timer
13 Timer The Timer menu provides functions to set various timers. 13.1 Ways to set a timer There are various ways to set a timer in the receiver: > Via the Main Menu. See section 13.2 for details. > Via the EPG. See section 13.3 for details. >... -
Page 49: Timer Overview
> New wake up timer – sets a timer to bring the receiver out of standby. See section 13.2.4 for details. > Timer settings – allows you to set the time to start and end recording times. See section 13.2.5 for details. >... -
Page 50: New Video Recorder Timer
13.2.2 New video recorder timer The video recorder timer allows you to set the receiver so that it switches to the correct channel and prevents you from changing channel, so you can video a programme with an external recording device. Set the video recorder timer as follows: >... -
Page 51: New Channel Change Timer
> Press the green ‘Accept’ key to confirm your options and save your timer. > Press the blue ‘Help’ key to view a help screen. The new Video Recorder Timer will be displayed in the Timer Overview list, indicated by a video tape image to the right of the timer description, as shown below: At any time before the start time of the timer is reached, you can edit the timer settings by choosing the timer from the Timer Overview and following the steps... - Page 52 Set the channel change timer as follows: > Use the up/down arrow keys and the OK key to select either TV List or Radio List from the dropdown. > Use the up/down arrow keys and the OK key to select the channel from the channel list dropdown.
-
Page 53: New Wake Up Timer
At any time before the start time of the timer is reached, you can edit the timer settings by choosing the timer from the Timer Overview list and following the steps above. The timer will activate at the start time of the timer and switch to the correct channel. -
Page 54: Timer Settings
> Use the up/down arrow keys and the OK key to specify the repeat opti- on from the ‘Repeat’ dropdown. The options are as follows: • 1x – activate the timer only once. • D – activate the timer at the same time every day. • 1 W –... -
Page 55: Timer Menu In The Epg
and ensures your receiver is ready on the correct channel in good time so that your recording equipment does not miss the start or end of your programme. The following options can be set: > Use the up/down arrow keys to select ‘Timer pre-roll time [min]’ and type in the number of minutes you want to activate any timer before the defined Start time. -
Page 56: Creating A New Timer In The Epg
13.3.1 Creating a new timer in the EPG To create a new timer for a programme while in any EPG mode do the fol- lowing: > Select a channel and a programme you want to set a timer for. > Press the red ‘Timer’... -
Page 57: Editing A Timer In The Epg
13.3.2 Editing a timer in the EPG You can edit an existing timer in the EPG via the popup timer menu (while in any view mode) in two ways: > Use the arrow keys to select an existing programme with a timer displayed next to it (a bell, video tape image or anything highlighted in blue or red) in any EPG view and press the red ‘Timer’... -
Page 58: Main Menu
14 Main menu The Main menu provides access to various settings and features of your recei- ver. 14.1 How to navigate the menus The following functions can be used in the menus: > Press the menu key on the remote control to open the Main menu. >... -
Page 59: Automatic Channel Search
See section 14.3 for details. > Timer organiser – See section 14.4 for details. > TV lists organiser – See section 14.5 for details. > Radio lists organiser – See section 14.6 for details. 14.2 Automatic channel search This option automatically rescans the freesat home transponder for any availa- ble TV and radio channels. -
Page 60: Settings
14.3 Settings The Settings menu provides access to various settings to configure your recei- ver. To access this menu option: > Press the menu key and select ‘Settings’ from the menu with the up/ down arrow keys and the OK key. >... -
Page 61: Parental Control
14.3.1 Parental control The Parental control screen allows you to restrict access to channels and also the main menu by setting a PIN. To access this menu option: > Press the menu key and select ‘Settings’ - select ‘Parental control’ from the menu with the up/down arrow keys and the OK key. - Page 62 Use the number keys to type in your existing PIN. When this is correct specify another 4 digit PIN and repeat the number to confirm. Your PIN will now be changed. > Select TV programmes – press the OK key to go to the TV channel selection screen.
- Page 63 > To lock multiple channels in a row at once press the OK key and a cross (x) will appear before the channel name, as shown below: Moving the highlight up and down will now mark all channels with a cross. You can now lock all of the cross marked channels by pressing the yellow key as above.
-
Page 64: Basic Settings
14.3.2 Basic Settings To access this menu option: > Press the menu key and select ‘Settings’ – select ‘Basic settings’ from the menu with the up/down arrow keys and the OK key. > Press the blue ‘Help’ key to view a help screen. The basic settings are as follows: Standby clock –... -
Page 65: Picture Settings
14.3.3 Picture settings To access this menu option: > Press the menu key and select ‘Settings’ – select ‘Picture settings’ from the menu with the up/down arrow keys and the OK key. > Press the blue ‘Help’ key to view a help screen. You can set the following picture settings: Screen format –... -
Page 66: Sound Settings
14.3.4 Sound Settings To access this menu option: > Press the menu key and select ‘Settings’ – select ‘Sound settings’ from the menu with the up/down arrow keys and the OK key. > Press the blue ‘Help’ key to view a help screen. You can set the following sound settings: Audio language –... -
Page 67: Special Functions
14.3.6 Special Functions To access this menu option: > Press the menu key and select ‘Settings’ - select ‘Special functions’ from the menu with the up/down arrow keys and the OK key. > Press the blue ‘Help’ key to view a help screen. The following menu options are available: >... - Page 68 14.3.6.1 This screen allows you to change various options relating to the menus and on-screen displays. To access this menu option: > Press the menu key and select ‘Settings’, followed by ‘Special func- tions’ – select ‘OSD’ from the menu with the up/down arrow keys and the OK key.
-
Page 69: Media Player
14.3.6.2 Media Player This screen allows the location of media files to be specified. To access this menu option: > Press the menu key and select ‘Settings’, followed by ‘Special func- tions’ - select ‘Media Player’ from the menu with the up/down arrow keys and the OK key. - Page 70 Network settings - WLAN This screen allows you to set the network settings of the receiver so it can be added to a local area network via a wireless connection. Please note that a TechniSat USB-WLAN adaptor is required for this functionality...
- Page 71 To access this menu option: > Press the menu key and select ‘Settings’, followed by ‘Special func- tions’ - select ‘Network settings - WLAN’ from the menu with the up/ down arrow keys and the OK key. > A screen appears showing the search results for available WLANs. >...
-
Page 72: System Configuration
> A shared folder needs to be created on the PC from which multimedia files can now be accessed and played using the NAV menu. See sec- tion 11 for details. > Press the blue ‘Help’ key to view a help screen. 14.3.7 System configuration This screen shows system information about the hardware and software in your... -
Page 73: Service Settings
14.3.8 Service settings This menu provides access to service features of your receiver. To access this menu option: > Press the menu key and select ‘Settings’ – select ‘Service settings’ from the menu with the up/down arrow keys and the OK key. >... -
Page 74: Update Software
‘Update time’ your receiver will download it. Please note: the update can take up to 90 minutes. 14.3.8.3 Operating mode This screen allows you to change the default operating mode to access the advanced features provided by TechniSat mode. -
Page 75: Timer Organiser
Operating mode – by default the receiver is in ‘freesat’ mode. To > access the advanced features use the OK key to toggle the option to ‘TechniSat’ mode. See section 15 for details of TechniSat mode. 14.3.8.4 HDCP setting This screen allows you to set high definition encryption on the HDMI output. -
Page 76: Tv Lists Organiser
14.5 TV lists organiser This screen allows you to customise channels or create your own TV channel list. To access this menu option: > Press the menu key and select ‘TV lists organiser’ from the menu with the up/down arrow keys and the OK key. >... -
Page 77: Viewing The Tv List
The options are as follows: • All channels – lists all possible channels. • G enre lists – displays another popup, which allows you to list the channels in a particular genre, as shown below: • Alternative Channels – displays all regional alternative channels. Choosing one of these options will close the popup and relist the channel list on the left according to your chosen channel filter. -
Page 78: Creating A New Tv List And Adding Channels
The options are as follows: • TV list – this is the default channel list that is created after the Autoin- stallation procedure (see 8.6) or when scanning for channels via the Main menu (see 14.2). • TV list 2 – a blank channel list designed for you to customise to your requirements. - Page 79 > Press the green key and select either ‘TV list 2’ or ‘TV list 3’ from the drop down list. > The grey highlight will jump to the channel list on the left and the yellow bar at the bottom of the screen will changed to ‘> add’ by default. >...
-
Page 80: Removing Channels From A Tv List
14.5.4 Removing channels from a TV list You can remove a channel from your favourites list while in the ‘TV lists orga- niser’ screen (either TV list 2 or TV list 3) while navigating the main channel list or when in your own favourites list. In either list, you can remove a channel as follows: >... -
Page 81: Sorting Channels In A Tv List
14.5.6 Sorting channels in a TV list. To sort channels into a different order in your favourites do the following: > Press the green ‘TV list’ key to move focus to the right TV list channel column. > Press the blue ‘Functions’ key to open the popup menu and use the up/ down arrow keys and the OK key to select the ‘Sort’... -
Page 82: Replacing Customisable Channels
> Follow the steps above to move any other channels into a new positi- > If you want to move (sort) multiple channels press the OK key and use the up/down arrow keys to mark selective channels with a cross. Then follow steps above to move the selected channels. -
Page 83: Setting Parental Control
> If you want to change any other channels in your customisable chan- nels list, press the green key again to move focus to the right channel list and follow the steps above. > When you switch to a customised channel, you will now see the regio- nal alternative you have chosen. -
Page 84: Radio Lists Organiser
> Use the up/down arrow keys to specify a channel to lock and press the yellow key. A padlock image will be displayed next to locked channels as shown below: > To mark multiple channels in a row, press the OK key to mark a cross next to a channel and use the up/down arrow keys to select multiple channels. -
Page 85: Technisat Operating Mode
15 TechniSat operating mode The receiver can function in two modes: freesat and TechniSat. By default the receiver is in ‘freesat’ mode. TechniSat mode provides extra features and advanced functionality within the main menus. To switch to this mode do the following: >... -
Page 86: Automatic Search
To access this menu option: > Press the menu key and select ‘Channel search’ from the menu with the up/down arrow keys and the OK key. > Press the blue ‘Help’ key to view a help screen. The channel search menu provides the following options: >... -
Page 87: Satellite
15.1.2 Satellite The following options are available: > Satellite – search ‘All satellites’ or pick a specific satellite from the drop down list. > Search mode – select either ‘Free channels’ (all unencrypted chan- nels) or ‘All channels’ (includes encrypted channels). >... -
Page 88: Manual Search
The following options are available: > Transponder frequency [MHz] – use the number keys (left arrow to delete) to change frequency number. > Polarisation – use the left/right arrow keys or the OK key to select either ‘h’ (horizontal) or ‘v’ (vertical). >... -
Page 89: Start Search Screen
15.1.5 Start search screen Starting a search using any of the channel search functions will display the following screen and initiate an automatic search for TV and radio channels. > Press the red ‘Abort’ key to cancel the channel search process and return to the previous screen or menu. -
Page 90: Settings
Press the blue ‘Help’ key to view a help screen. 15.2 Settings In TechniSat mode, the Settings menu has extra menu options and also adds extra functionality to some existing menus. The new features are documented in the following sections. -
Page 91: Programme Guide
15.2.1 Programme guide This screen allows you to configure settings for programme information for the EPG. To access this menu option: > Press the menu key and select ‘Settings’ from the menu – select ‘Pro- gramme guide’ with the up/down arrow keys and the OK key. >... - Page 92 Press the red ‘TV list’ or ‘Radio list’ key to open a drop down menu. In TechniSat mode, you can access the TV lists or Radio lists like the ‘freesat’ mode, but it gives you an extra item called ‘Provider lists’, which allows you to select a channel list from a particular channel provider.
-
Page 93: Basic Settings
> Press the blue ‘Help’ key to view a help screen. 15.2.2 Basic Settings To access this menu option: > Press the menu key and select ‘Settings’ - select ‘Basic settings’ from the menu with the up/down arrow keys and the OK key. >... -
Page 94: Antenna Configuration
The satellites can be specified using the dropdown fields, as shown below: In TechniSat mode you can also control a motorised rotating antenna if you have one. Details can be found below in section 15.2.4. - Page 95 > Use the up/down arrow keys to select ‘Motor Antenna’ from the list and press the OK key to confirm. > If an existing satellite service is active and you are changing it to ‘Motor Antenna’ from the list, a popup message will appear that gives you the choice to delete all your existing channels or to leave them as they are.
- Page 96 15.2.4.1 Setting motor antenna East and West limits To avoid mechanical damage to the satellite antenna or the LNB by physical obstacles, you must first set the maximum degree of rotation to both East and West. If there are any obstacles in the rotating field of the antenna (e.g. a wall or chimney), these must be considered when setting the East-West limits.
- Page 97 15.2.4.4 Setting a new West limit > Use the arrow keys to move the highlight to the ‘Save’ field. > Now press the left arrow key to rotate the antenna to the maximum West position possible. > Press the blue ‘Actions’ key and use up/down arrows and the OK key to select ‘Set west limit’.
- Page 98 15.2.4.5 Geo-positioning If you have a suitable motor, and if the geographical coordinates of your loca- tion are known, this function can facilitate finding the individual satellite posi- tions. Note! Only switch on the geo-positioning function if your DiSEqC motor supports this function.
-
Page 99: Setting A Satellite Position
and seconds, these must be converted to decimal values as follows: The value for degrees is not affected by the conversion. The minutes are divided by 60, and rounded to one decimal place. The result of this division is added to the value for full degrees. The seconds are not taken into consideration, as they do not affect the first decimal place. - Page 100 15.2.4.7 Selecting a pre-programmed satellite position > To add a satellite position to the satellite list, use the arrow keys to move the highlight to the field labelled ‘Sat new’ and press the OK key. > A list of the available satellite positions will be displayed, as shown below: >...
-
Page 101: Adjusting The Satellite Antenna
> Use the arrow keys to move to the orbital position field and use the numeric keys to enter the orbital position of the user satellite. > Use the arrow keys to move the highlight to the ‘W’ or ‘E’ field. Now press the OK key appropriately to indicate whether this is a westerly (W) or an easterly (E) orbital position. -
Page 102: Positioning Antenna Manually
details of configuring the antenna. > In this menu, enter the data of the test transponder as well as of the LNB used (see 8.1.2 for more details). > Press the red ‘Back’ key to return to the settings for the motorised an- tenna. -
Page 103: Current Satellite List
15.2.4.14 Current satellite list The saved satellite positions can be found in the satellite list. > To rotate the antenna to a position included in the satellite list, use the arrow keys to highlight the field under the label ‘Current satellite list’ and press the OK key. -
Page 104: Service Settings
15.3 TV/Radio Lists Organiser Using the TV/Radio Lists in TechniSat mode is the same as in freesat mode (see section 14.5 for details) except the option menu for the complete list of channels provides a larger range of options to filter the channel list. -
Page 105: Menu Language
Languages – displays a popup menu to list channels in a specific lan- guage. 15.4 Menu language This TechniSat menu option allows you to change the menu language. To change the menu language do the following: > Press the menu key and select ‘Menu language’ from the menu with the up/down arrow keys and the OK key. -
Page 106: Troubleshooting Guide
16 Troubleshooting Guide 16.1 The receiver display is blank. Power may not be connected > Check that power lead is plugged into the rear of the receiver. > Check that power lead is plugged into a mains outlet and that this is switched on at the wall. -
Page 107: No Sound
16.3 No sound The receiver or the TV may be muted > Check that the mute button on the remote control or the TV has not been pressed. The volume may be level may be too low > Check the volume setting by using the remote control 16.4 ‘No signal’... -
Page 108: Remote Control Unit Does Not Work
16.6 Remote control unit does not work. Infrared signal may not be received by the receiver > Ensure that remote control is pointed directly at the receiver > Check that the receiver front panel is not obscured by furniture or cabi- net doors. -
Page 109: Cannot Access Files On Pc In Wlan Mode
16.10 Unresolved problems There are several methods of receiving technical assistance for unresol- ved problems > Consult the FAQ section of our website at www.technisat.co.uk > Contact our customer service department by telephone or e-mail: 0845 467 1935 supportuk@technisat.co.uk... -
Page 110: Main Menu Structure
17 Main Menu Structure... - Page 111 11, rue Pierre Werner 6832 Betzdorf Luxemburg Research and Development: TechniSat Digital GmbH Gewerbepark Merbitz Nr. 5 01156 Dresden Deutschland TechniSat Digital UK Ltd 45 Sunningdale House Caldecotte Lake Drive Milton Keynes MK7 3HT United Kingdom Support: Customer service helpline:...
- Page 112 081107 V5 1124 2233560000400...
Need help?
Do you have a question about the HDFS and is the answer not in the manual?
Questions and answers