Table of Contents
Advertisement
Available languages
Available languages
Quick Links
Advertisement
Chapters
Table of Contents

Related Manuals for TechniSat HD-S 261


Summary of Contents for TechniSat HD-S 261
- Page 1 HD-S 261...
- Page 2 CONTENTS DEUTSCH ............3-17 ENGLISH ............20-35...
- Page 3 Bedienungsanleitung HD-S 261 HDTV-Receiver für den Empfang von unverschlüsselten digitalen TV- und Radioprogrammen via Satellit.
-
Page 4: Table Of Contents
Inhaltsverzeichnis Abbildungen ..................7 Bildeinstellungen .....................13 Zeiteinstellungen....................13 Front ........................7 6.5.1 Region ........................13 Rückseite .......................7 Fernbedienung ................... 8 6.5.2 GMT-Nutzung .....................13 Timer ........................13 Tasten der Fernbedienung ................8 Batterien einlegen .................... 8 Kindersicherung ....................13 Benutzung der Fernbedienung ..............8 6.7.1 Menüsperre......................13 Anschlüsse ................... 9 6.7.2 PIN ..........................13 Erste Inbetriebnahme ............... - Page 5 Rechtliche Hinweise Bitte zuerst lesen Hiermit erklärt TechniSat, dass der Funkanlagentyp HD-S 261 der Bevor Sie das Gerät anschließen und in Betrieb nehmen, überprüfen Sie Richtlinie 2014/53/EU entspricht. zunächst die Lieferung auf Vollständigkeit und machen Sie sich mit den Der vollständige Text der EU-Konformitätserklärung ist Sicherheitshinweisen vertraut.
- Page 6 Wir empfehlen vor Abgabe des Receivers zu Wartungszwecken bei Ihrem Fachhändler alle Speichermedien bzw. Datenträger zu entfernen. Die Wiederherstellung von Daten ist nicht Bestandteil der Wartungs- und Reparaturarbeiten. TechniSat übernimmt keine Gewähr für den Verlust oder die Beschädigung von Daten während der Reparatur.
-
Page 7: Abbildungen
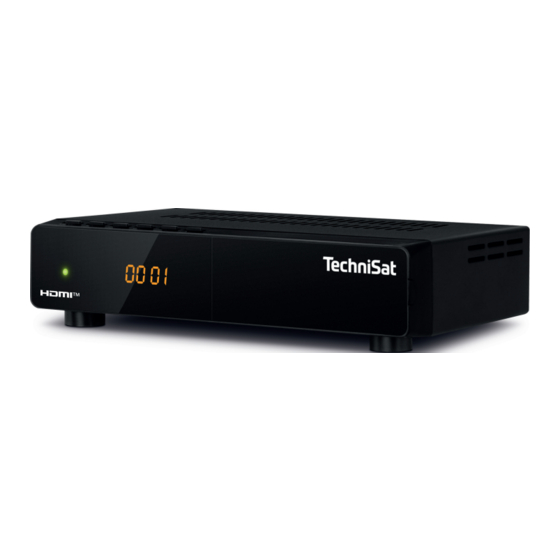
Infrarotsensor: Empfängt die Signale der Fernbedienung. Für eine eventuell erforderliche Einsendung des Gerätes verwenden Sie DISPLAY: Zeigt die aktuelle Programmplatznummer (im Betrieb) bitte ausschließlich folgende Anschrift: und die Uhrzeit (im Standby). TechniSat Digital GmbH Tastenfeld auf der Oberseite: Service-Center Nordstr. 4a 39418 Staßfurt 1.2 Rückseite... -
Page 8: Fernbedienung
2 Fernbedienung 21) 0-9 (Zifferntasten): Auswahl eines Programms. 22) FWD: Vorspulen (Medienwiedergabe). 23) REV: Zurückspulen (Medienwiedergabe). 2.1 Tasten der Fernbedienung 24) PLAY: Wiedergabe starten (Medienwiedergabe). 25) PAUSE: Wiedergabe pausieren (Medienwiedergabe). MUTE: Stummschaltung des Tons. 26) Farbtasten: Ruft die Funktion auf, die auf dem Bildschirm INFO: Erweiterte Kanalanzeige. -
Page 9: Anschlüsse
3 Anschlüsse 4 Erste Inbetriebnahme Nachdem Sie den Receiver ordnungsgemäß angeschlossen und mit dem Stromnetz verbunden haben, schalten Sie zuerst Ihr TV-Gerät ein. Zum Einschalten des Receivers, drücken Sie die Taste Ein-/Standby auf der Fernbedienung. Hinweis: Eventuell müssen Sie noch den entsprechenden Eingang am TV wählen, an dem sich der Receiver befindet. -
Page 10: Lautstärkeregelung/Stummschaltung
5.3 Lautstärkeregelung/Stummschaltung 5.7 Videotext Regeln Sie die Lautstärke mit den Pfeiltasten rechts/links. Der Videotext kann mit der Taste TTX aufgerufen und verlassen werden. Mit der Taste MUTE können Sie zwischen der Tonstummschaltung und Die Eingabe der Videotextseite erfolgt mit den Zifferntasten. -wiedergabe wechseln. -
Page 11: Programm Zu Favoriten Hinzufügen/Entfernen
6.1.1 Programm zu Favoriten hinzufügen/entfernen 6.1.3 Programm überspringen Drücken Sie die Taste FAVOURITE, um die Favoritenlistenbearbeitung Sie können Programme markieren, welche bei der zu starten. Programmumschaltung durch die Pfeiltasten auf/ab übersprungen Markieren Sie das entsprechende Programm und drücken Sie die werden sollen. -
Page 12: Programm Umbenennen
6.1.6 Programm umbenennen 6.2.1 Bediensprache Drücken Sie die blaue Taste und anschließend die grüne Taste. Wählen Sie unter [Sprache] aus, in welcher Sprache das OSD dargestellt Markieren Sie ein Programm, welches Sie umbenennen möchten. werden soll. Drücken nun OK, um die Namenseingabe zu öffnen. 6.2.2 Audiowiedergabe Geben Sie den gewünschten Namen mit den Zifferntasten (SMS-Tastatur) ein bzw. -
Page 13: Bildeinstellungen
6.4 Bildeinstellungen 6.7 Kindersicherung Im Menü [System] > [Bild] können Sie Einstellungen zur Helligkeit, dem Unter Menü [System] > [Kindersicherung] können Sie die Menüsperre Kontrast, der Sättigung, dem Farbton und der Schärfe vornehmen. und die PIN-Abfrage ein-/ausschalten sowie die einzugebende PIN abändern. -
Page 14: Favoritenlisten
6.9 Favoritenlisten 6.11.2 Tonsignal Unter Menü [System] > [Favoritenlisten] können Sie die Favoritenlisten Wenn Sie das Tonsignal einschalten, wird bei aufgerufenem Menü der umbenennen, indem Sie diese Auswählen und mit OK die virtuelle Antenneneinstellung (siehe Punkt 6.12.3) ein Tonsignal wiedergegeben Tastatur öffnen. -
Page 15: Antenneneinstellung
Programmsuche: Wählen Sie, ob Programme des Typs [TV], [Radio] USB-Updates dar. Um eine verfügbare neue Software-Version auf diese oder [TV + Radio] abgespeichert werden sollen Weise zu Installieren, laden Sie diese von der TechniSat Homepage Netzwerksuche: Aktivieren Sie hier die Netzwerksuche (nur in www.technisat.de... -
Page 16: Netzwerkeinstellungen
6.16 Netzwerkeinstellungen Es wird nur Ton, SCART-Kabel falsch SCART-Kabel richtig aber kein Bild eingesteckt einstecken Unter Menü [Einstellung] > [Netzwerkeinstellungen] > wiedergegeben [Netzwerkeinstellungen] können Sie Einstellungen zum LAN-Anschluss Radioprogramm Drücken Sie die Taste Ihres Receivers vornehmen. gewählt TV/Radio Schalten Sie in der Zeile Netzwerkauswahl die Netzwerkverbindung an [Ethernet] oder aus [Kein]. - Page 17 MPEG2 Transport MP@ML.HL MPEG4 AVC/H.264 HP@L4 Audio MPEG2 Audio Layer I&II, AAC, AC-3 down mix auf PCM 2.0 (Stereo) Allgemein Modell HD-S 261 Artikel-Nr. 0000/4814 4019588048140 Abmessung (B x T x H) 18,0 x 13 x 4,4 cm Gewicht 516 g Umgebungstemp.
-
Page 18: Notizen
9 Notizen... - Page 20 Instructionmanual HD-S 261 HDTV receiver for the reception of unencrypted digital TV and radio channels via satellite.
- Page 21 Table of contents 6.3.3 Digital audio output ..................29 Illustrations ..................24 Picture settings ....................30 Front ........................24 Time settings ....................30 Back ........................24 6.5.1 Region ......................... 30 Remote control ................. 25 6.5.2 GMT usage ......................30 Buttons on the remote control ..............25 Timer ........................
- Page 22 Legal notices Please read this first TechniSat hereby declares that the HD- S 261 radio equipment complies Before connecting and using the device, check that everything has been with Directive 2014/53/EU. supplied and familiarise yourself with the The full text of the EU declaration of conformity is available the safety instructions.
- Page 23 Before handing your device to your supplier for maintenance purposes, we recommend that you remove all USB storage media. The recovery of data is not part of the maintenance and repair work. TechniSat accepts no responsibility for the loss of, or damage to, data during repair work.
-
Page 24: Illustrations
Should you wish to return the device, please do so to the following DISPLAY: Shows the current channel position number (in operation) address only: and the time (in standby). TechniSat Digital GmbH Keypad on the top: Service Center Nordstr. 4a 39418 Stassfurt, Germany 1.2 Back... -
Page 25: Remote Control
2 Remote control 21) 0-9 (number keys): Selection of a channel. 22) FWD: Fast forward (media playback). 23) REV: Rewind (media playback). 2.1 Buttons on the remote control 24) PLAY: Start playback (media playback). 25) PAUSE: Pause playback (media playback). MUTE: Mutes the sound. -
Page 26: Connections
3 Connections 4 First use After you have properly connected the receiver and plugged it in, first turn on your TV. To switch on the receiver, press the on/standby button on the remote control. Note: You may still need to select the appropriate input on the TV where the receiver is located. -
Page 27: Volume Control/Mute
5.3 Volume control/mute 5.7 Teletext Adjust the volume with the right/left arrow keys. Teletext can be called up and exited using the TTX key. Use the MUTE button to switch between mute and playback mode. The Teletext page is entered using the numeric keys. 5.4 Sound playback/subtitle selection 5.8 Video/Music/Picture Playback You can open the sound selection via the AUDIO key or the subtitle... -
Page 28: Adding/Removing A Channel To Favourites
6.1.1 Adding/removing a channel to Favourites 6.1.3 Skipping channels Press the FAVOURITE button to start programming the favourites list. You can mark channels which should be skipped when switching Highlight the relevant channel and press the OK button.. channels by using the up/down arrow keys. Then mark, one by one, the respective favourite list to which you Start the marking process with the green button. -
Page 29: Renaming A Channel
6.1.6 Renaming a channel 6.2.1 Operating language Press the blue button and then the green button. Under [Language], select the language in which the OSD is to be Select a channel that you want to rename. displayed. Press OK to open the name input. 6.2.2 Audio playback Enter the desired name with the numeric keys (SMS keyboard) or change the existing name. -
Page 30: Picture Settings
6.4 Picture settings 6.7 Child lock In the [System] > [Picture] menu, you can carry out the settings for In the [System] > [Parental block] menu, you can switch the menu block brightness, contrast, saturation, hue and sharpness. and PIN query on/off, and change the PIN you need to enter. The PIN (factory setting 0000) must always be entered to open this 6.5 Time settings menu. -
Page 31: Favourites Lists
6.9 Favourites lists 6.11.2 Sound signal Under menu [System] > [Favourite Lists] you can rename the favourite If you switch on the audio signal, an audio signal is played back when lists by selecting them and opening the virtual keyboard with OK. the antenna setting menu is called up (see section 6.12.3), which you can Note: Note the colour keys shown for their other functions. -
Page 32: Antenna Setting
Select whether channels of the type [TV], [Radio] or here is the USB update option. To install an available new software version [TV + Radio] are to be saved in this way, download it from the TechniSat Homepage www.technisat.de Network search: Activate the network search here (only available in and follow the instructions provided with the update file. -
Page 33: Network Settings
6.16 Network settings Only sound is SCART cable inserted Insert SCART cable played back, but incorrectly correctly Under the menu [Setup] > [Network Settings] > [Network Settings] you no picture can make settings for the LAN connection of your receiver. Radio channel Press the TV/radio In the network selection line, switch the network connection on... - Page 34 MPEG2 Transport MP@ML.HL MPEG4 AVC/H.264 HP@L4 Audio MPEG2 Audio Layer I&II, AAC, AC-3 down mix to PCM 2.0 (Stereo) General points Model HD-S 261 Article no. 0000/4814 4019588048140 Dimension (W x D x H) 18.0 x 13 x 4.4 cm Weight 516 g Ambient temp.
-
Page 35: Notes
9 Notes... - Page 36 TechniSat Digital GmbH Julius-Saxler-Str. 3 D-54550 Daun www.technisat.com...
Need help?
Do you have a question about the HD-S 261 and is the answer not in the manual?
Questions and answers
I have just purchased two TechniSat HD-S 261 Compact Digital HD Satellite Receivers. My satellite dish is set to Astra 28.2°E so I can pick up English tv channels. Will this satellite receiver be able to show English tv stations like the BBC & ITV. I am living in Luxembourg.
The TechniSat HD-S 261 supports DVB-S and is compatible with satellites like Astra 28.2°E. However, receiving English TV channels like BBC and ITV in Luxembourg depends on the satellite signal footprint, dish size, and local reception conditions. Astra 28.2°E mainly targets the UK, and its signal may be weak in Luxembourg, requiring a larger dish. If signal reception is adequate, the receiver can display free-to-air channels like BBC and ITV.
This answer is automatically generated
@Mr. Anderson
Thank you for your answer, my satellite picks up UK channels with my Sky HDD box (which now is no longer working) & my other TV has a satellite tuner & picks up all the UK channels on Astra 28.2 E, regards