Table of Contents
Advertisement
Advertisement
Table of Contents

Related Manuals for Olympus SC30


Summary of Contents for Olympus SC30
-
Page 1: User Manual
User Manual 3 MegaPixel CMOS Color Camera for Light Microscopy SC30... - Page 2 Olympus Soft Imaging Solutions GmbH will from time to time revise the software described in this manual and reserves the right to make such changes without obligation to notify the purchaser.
-
Page 3: Table Of Contents
Contents The SC30 Camera................5 Image Acquisition Software getIT ..........7 Camera and light microscope............8 White Balance ....................8 Monitor Settings for White Balance .............9 Executing White Balance ..............9 The (GUI) User Interface of getIT ..........10 Acquiring and saving images ............. 13 Set Input ....................14... - Page 4 Contents Appendix III: In case of problems with the camera........... 59 Appendix IV: WEEE declaration................61 Appendix V: EMC declaration - SC30 ..............62 Appendix VI: RoHS declaration - SC30 .............. 63 Index ....................64...
-
Page 5: The Sc30 Camera
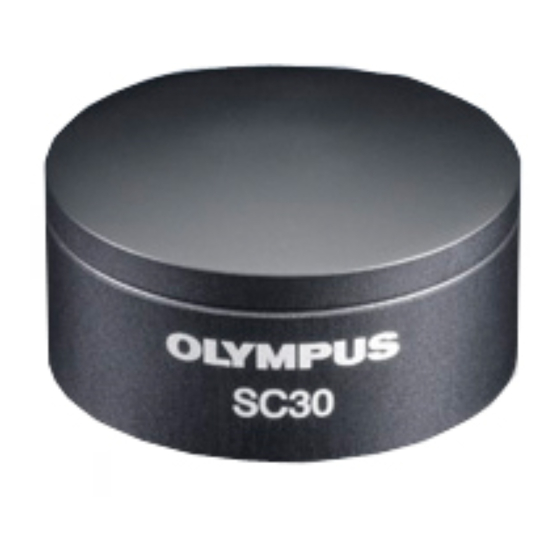
The SC30 Camera The SC30 Camera What is the SC30? The SC30 is a quick, high resolution CMOS color camera used for biomedical and material sciences applications. It was especially developed for acquisitions using light microscopy, has a special compact design, and can be connected to all types of light-microscopes via the C-mount. - Page 6 The SC30 Camera System To ensure that you can use your SC30 properly, the following system require- Requirements ments for your PC and your software need to be met: Hardware / Software Processor Intel® Pentium D better than, or equal to, 3.0 GHz Intel®...
-
Page 7: Image Acquisition Software Getit
For more complicated tasks, you can connect your camera to a special software environment for image analysis and management. Olympus offers you a wide range of imaging system solutions which can be adapted to your individual needs in many different fields of application in the areas of sciences, industry, and medicine. -
Page 8: Camera And Light Microscope
Camera and light microscope Click the button with the cross located in the upper right corner of the Input dialog box to close it. Camera and light microscope Both the correct camera settings and the correct microscope settings are essential prerequisites for acquiring high quality images. The most important rules for the microscope settings are mentioned here;... -
Page 9: Monitor Settings For White Balance
Camera and light microscope Monitor Settings for White Balance Monitor Settings The monitor settings are decisive for the image you see on the monitor. Set your monitor to the appropriate color temperature, should your device allow this. To do this, compare the image's color impression on the monitor and in the eyepiece. -
Page 10: The (Gui) User Interface Of Getit
The (GUI) User Interface of getIT The (GUI) User Interface of getIT GUI The graphical user interface influences the appearance of a program. It deter- mines which menus there are, how the individual functions can be called up, how and where files, e.g., images, are displayed, and much more. This chapter describes the basic elements of GUI. - Page 11 The (GUI) User Interface of getIT...
- Page 12 The (GUI) User Interface of getIT Optimizing display Use the [Ctrl + Alt + T] shortcut to create a test image. The image window contains a button bar with which you can quickly alter the appearance of the images in the image window. Press [Ctrl + Alt + T] to generate a test image.
-
Page 13: Acquiring And Saving Images
Examples for this are MS-Word and Adobe Photoshop. Note If you are using an imaging system solution provided by Olympus instead of the image acquisition software sent with your order, your camera will not require the TWAIN interface. Your camera will then be controlled directly by the correspond- ing software and entirely incorporated into the respective procedures. -
Page 14: Set Input
Acquiring and saving images Click the Define calibration button to determine the calibration data required for the X/Y calibration of your images. This step is only necessary if you would like to carry out a XY calibration of your images and the required calibration data is not yet available. Click the Apply calibration button. - Page 15 Acquiring and saving images New Channel com- mand opens a dialog box in which all of the image sources, that can be currently selected by your image acquisition software, are listed. Select the desired image source. To dis- play all image sources, click on the plus symbol.
-
Page 16: Acquire Image
That depends on the camera type. The frame rate is increased both for binning and for subsampling. In addition the camera is more sensitive for binning. The SC30 type camera is able to use resolutions of 2048 x 1532, 1024 x 768, 680 x 512 and 508 x 384 pixels, for example. - Page 17 Based on the type of camera you are using, this may be done via numerous slide controls. This is what the Color Settings dialog box looks like for the SC30 camera. Related Topics White Balance 8...
- Page 18 Acquiring and saving images Red, Green, Blue The Red, Green Blue slide controls can be moved from 0,00 to 10,0. The set value is the factor with which the signals of the corresponding color channel are multiplied. Gamma Use the Gamma slide control to result in a nonlinear contrast enhancement.
- Page 19 Acquiring and saving images To adjust the numerical value of the sharpen filter parameter, use the mouse to move the slide control to the right or left. Whether the contours of the image appear to be sharper or softer when you apply the sharpen filter, depends on the position of the Sharpen filter parameter slide control.
-
Page 20: Define Calibration
Acquiring and saving images Define calibration Click this button to determine the calibration data required for the X/Y calibration of your images. Such a calibration is only necessary and reasonable if you use your camera with a microscope or with a macro stand with one or more definite magnification ranges. - Page 21 Acquiring and saving images Click the Unit... button. Select (for meters) in the Basic unit list in the Set Unit dialog box. Select, e.g., µ in the Scale list if you wish the calibration length to be shown in µm. Confirm by clicking OK. Enter this magnification level into the Magnification field.
- Page 22 Acquiring and saving images Confirm by clicking OK. Calibrate Image dialog box will be closed. A magnification is now available in the Define Calibration dialog box. You will be asked whether or not you want to replace the old data with the new ones, should data about the calibration already exist for this magnification.
-
Page 23: Apply Calibration
Acquiring and saving images Confirm by clicking OK. A new entry is added to the Camera name list located in the Define Calibration dialog box. Since there are no calibration data for this camera, the Magnification list will be empty. Delete Click the Delete button to delete the active set of calibration data. -
Page 24: Save As
Acquiring and saving images Save As Click this button to save the active image to a storage medium under a new file name or path name. Before calling up the command, select the image you would like to save from the image buffer box. -
Page 25: Image Information
Acquiring and saving images You can alter the compression method and quality of the images. To do so, select either the Tagged Image Format (*.tif), JPEG (JFIF) (*.jpg) JPEG 2000 (*.jp2) file type. Click the Options... button and open the Save Image Options dia- log box. - Page 26 Acquiring and saving images When saving an image, your software will automatically suggest the image name for use as the name of the file. Warning Image name and file name are not the same. If you assign the name "Pollen 04.05.2006 Image 23"...
-
Page 27: Additional Commands
Additional commands Additional commands This chapter describes the buttons which have not been described yet in the pre- vious chapter, as well as the commands which cannot be accessed by a button. Open Click this button to load images from a data medium. Before opening the command, select the image buffer into which the first image is to be loaded. - Page 28 5 images. The image type and image name will be shown directly in the image buffer box. You will, for example, acquire "true-color images" when using the SC30 camera. A true-color image consists of 2 color values (24 Bit).
-
Page 29: Print Directly
Additional commands You can view the thumbnails of all of the loaded images in the image buffer box. Using the mouse to drag images into image buffers Click the Open button. Leftclick on the image file you wish to load. Drag the file directly onto the desired image buffer, while keeping your left mouse button depressed, (drag&drop). -
Page 30: Print Setup
Additional commands Print Setup... Use this command from the File menu to determine a certain printer and printer settings as a default for your image acquisition software. The selected printer and the corresponding settings remain for future applica- tions using your image acquisition software. Printer From the Printer group, select the... -
Page 31: Print
Additional commands Print... Use this command from the File menu to print images. Printer From the Printer group, select the Name of the desired printer from the list as well as the corresponding properties using the Properties... button. These set- tings are lost after closing the program. -
Page 32: File List
Additional commands Two page layouts are predefined. Print either one or six images on a page. Each image has its own header when using numerous images. Single Image Select the Single Image entry when wanting to print one image per page. The Multiple Images header contains the image name, while the footer contains the date and time of print. -
Page 33: Exit
Additional commands Exit Use the command from the File menu to end the program. Alternative Click the button with the cross located at the upper right edge of the program win- dow. Warning Save all of the loaded images you want to keep. Any unsaved images will be deleted without prior warning. -
Page 34: Delete Image
Additional commands Position and length The scale bar is burnt into the lower right hand corner. The length of the scale bar corresponds to the length which is displayed in the viewport when using a zoom factor of 100%. Delete Image Use this command from the Image menu, in order to delete the image from the... -
Page 35: Standard Button Bar
Additional commands Standard Button Bar Use this command from the Window menu to display or hide the standard button bar. What will happen... The command name is marked by a check mark in front of the command when the standard button bar is displayed. About... - Page 36 Additional commands More Info Click the More Info button to open the System information Windows dialog box. This enables you to take a look at the assembly and configuration of your com- puter, as well as your operating system's settings and components and the loaded Microsoft programs.
-
Page 37: Appendix I: Microscope Settings
Appendix I: Microscope settings Appendix I: Microscope settings Your digital camera can only achieve high image quality if the microscope has been optimally set. A subsequent correction to the software can never correct deficiencies in the image resulting from faulty settings made to the camera and microscope. - Page 38 Appendix I: Microscope settings Tungsten-halogen Tungsten-halogen lamps comply with their functionality to a conventional light- lamps bulb. Electricity flowing through a metal wire heats the wire to the extent that light is produced (thermal emitter). In doing so, the wire emits a continuous spectrum, hence a broad spectral band is emitted.
-
Page 39: Objective, Total Magnification And Useful Magnification
Appendix I: Microscope settings Focus the image in the field diaphragm by using the condenser's height adjustment. Adjusting the condenser Now the illuminated area is optimally set. Open the field diaphragm so that its edge is still completely within the visible area. - Page 40 Appendix I: Microscope settings Useful You can determine the total magnification by dividing the length of the object magnification shown by the set length on the micrometer. The useful magnification of the optical systems microscope depends on the numerical aperture of the objective being used (engraved on the objective).
-
Page 41: Appendix Ii: Installing The Camera
Appendix II: Installing the camera Appendix II: Installing the camera Warning Please read the following carefully before attempting installation of camera. General Warnings Warning CMOS image sensors are easily damaged by static discharge. Do not disassemble the camera housing. Warning Do not attempt to touch the internals of the camera with your bare hands. -
Page 42: Before The Installation
Appendix II: Installing the camera Before the installation The SC30 can be used with the operating systems Windows XP and Windows Vista. The installation procedure for the camera will be described separately for the Windows XP and the Windows Vista operating systems. - Page 43 Appendix II: Installing the camera USB Controller on a board Should your PC's USB controller not be on the motherboard, but is built in on a separate board, no guarantee can be made that the camera can be used without any problems.
-
Page 44: Installing The Camera With Windows Xp
The following step-by-step instructions describe the installation procedure for the SC30 getIT software under the Microsoft Windows XP operating system. These XM10 instructions apply for the following Olympus light microscopy cameras: XC10 SC20, SC30, XM10, XC10, UC30, XC30, UC50, XC50. UC30... - Page 45 Select Twain Driver dialog box opens. Select the TWAIN driver for your camera. Please note: a special driver is required for the SC20 and the SC30 cameras. Select the SC20, resp. SC30, check box. Select the Olympus Soft Imaging Solutions Firewire Cameras check box with all the other cameras (XM10, XC10, UC30, XC30, UC50, XC50).
- Page 46 Appendix II: Installing the camera If you want to change the directory on which the getIT image acquisition software is to be installed, click the Browse... button. Select the desired directory. Click the Next > button. Choose Folder dialog box opens. Select the installation folder.
- Page 47 Appendix II: Installing the camera Select the Yes, install it option if you want to automatically install the Acrobat Reader program. You'll need this program in order to read the getIT software manual. Select the No, do not install it option for instance if the Acrobat Reader program is already installed.
- Page 48 Appendix II: Installing the camera Mounting the camera Warning Install the image acquisition software before connecting your camera to your PC. This is necessary so that the operating system does not install the wrong TWAIN camera driver. The diagram shows a typical installation on a light microscope. You should have all of the required components ready at hand.
- Page 49 Appendix II: Installing the camera focus of the camera image with that of the eyepiece image. These settings can be done later when you are able to obtain an image on the screen. Plug the end of the camera's USB 2.0 cable into a free socket of your PC. Should more than one USB slot be available, you can make an arbitrary choice of which jack you use.
- Page 50 Appendix II: Installing the camera Insert the image acquisition software CD and select the Install the software automatically (Recommended) option and click the Next > button. The installation begins. After a little while, the Hardware Installation dialog box will pop up. Click the Continue Anyway button.
- Page 51 Appendix II: Installing the camera Click the Finish button. In doing so, the registration of your camera driver with Windows XP is not yet finished. Windows XP opens the Found New Hardware Wizard dialog box a second time. Repeat steps 2 to 5. In doing so, the registration of your camera driver with Windows XP is finished.
-
Page 52: Installing The Camera With Windows Vista
The following step-by-step instructions describe the installation procedure for the SC30 getIT software under the Microsoft Windows Vista operating system. These XM10 instructions apply for the following Olympus light microscopy cameras: XC10 SC20, SC30, XM10, XC10, UC30, XC30, UC50, XC50. UC30... - Page 53 Appendix II: Installing the camera Enter your MS-Windows user name and your password and confirm them with OK. The installation of the getIT image acquisition software will be prepared. The following dialog box opens. Select the language of your getIT software. The default language is your operating system's language.
- Page 54 Appendix II: Installing the camera Select the TWAIN driver for your camera. Please note: a special driver is required for the SC20 and the SC30 cameras. Select the SC20, resp. SC30, check box. Select the Olympus Soft Imaging Solutions Firewire Cameras check box with all the other cameras (XM10, XC10, UC30, XC30, UC50, XC50).
- Page 55 Appendix II: Installing the camera Select the installation folder. You can either browse to an existing folder or create a new one. Click the Next > button. The getIT software manual is available as a PDF file. In the next dialog box you decide whether the Acrobat Reader program should be installed automatically together with the getIT image acquisition software.
- Page 56 Appendix II: Installing the camera Wait until the following dialog box opens. Click the Finish button to finalize the installation. The getIT image acquisition software has now been installed. Mounting the camera Warning Install the image acquisition software before connecting your camera to your PC. This is necessary so that the operating system does not install the wrong TWAIN camera driver.
- Page 57 Appendix II: Installing the camera USB connecting cable Camera C-Mount Adapter PC with image acquisition software and USB 2.0 interface USB 2.0 plug Remove the protective cap from the camera. Firmly screw the TV adaptor and the C-Mount (0.5x or bigger") onto the camera.
- Page 58 Appendix II: Installing the camera Selecting the camera driver After connecting the camera to your PC, the Found New Hardware Wizard will automatically start. Click the Locate and install driver software (recommended) entry. Microsoft Windows Vista will then ask to be allowed to activate the device driver.
-
Page 59: Appendix Iii
Appendix III: In case of problems with the camera... Most problems with the SC30 camera are due to the PC's USB system. Should a problem crop up, please check the following points before you turn to our customer service. •... - Page 60 About dialog box, to our customer service address. support@olympus-sis.com • The quickest and most convenient way is to use the automatic e-mail settings for your customer service query: Via the ? >...
-
Page 61: Appendix Iv: Weee Declaration
Appendix IV: WEEE declaration Appendix IV: WEEE declaration Waste Electrical In accordance with European Directive 2002/96/EC on Waste Electrical and and Electronic Electronic Equipment, this symbol indicates that the product must not be Equipment disposed of as unsorted municipal waste, but should be collected separately. Refer to your local distributor for return. -
Page 62: Appendix V: Emc Declaration - Sc30
Appendix V: EMC declaration - SC30 Appendix V: EMC declaration - SC30... -
Page 63: Appendix Vi: Rohs Declaration - Sc30
Appendix VI: RoHS declaration - SC30 Appendix VI: RoHS declaration - SC30... -
Page 64: Index
Index Index Image display Optimize 12 Single view, Tile view 12 Brightness 18 Image information 25 Image name 25, 26 Image window 10 Input, Set 14 Calibration Installation of software and camera driver 7 Apply 23 Define 20 Camera driver 7 Camera, Select 14 Köhler illumination, microscope 38 Color settings 17... - Page 65 Index Resolution 16 Saturation 18 Save 24 Scale bar Burn into image 33 Show in viewport 33 Scan 19 Serial Number 60 Sharpen filter 18 Special 9 System Info 35, 60 System requirements 6 Total magnification, microscope 8 TWAIN dialog box 16 TWAIN interface 13 Useful magnification, Microscope 40 User Interface 10...
- Page 66 OLYMPUS SOFT IMAGING SOLUTIONS GMBH Johann-Krane-Weg 39, 48149 Münster, Germany Phone: +49 (251) 7 98 00-0, Fax: +49 (251) 7 98 00-6060, info.osis@olympus-sis.com OLYMPUS SOFT IMAGING SOLUTIONS CORP. 200 Union Blvd, Suite 202, Lakewood, CO 80228, U.S.A. Phone: +1 (303) 234-9270, Fax: +1 (303) 234-9271, info.osis@olympus-sis.com OLYMPUS SOFT IMAGING SOLUTIONS PTE.
Need help?
Do you have a question about the SC30 and is the answer not in the manual?
Questions and answers