Table of Contents
Advertisement
Quick Links
Advertisement
Table of Contents

Related Manuals for Becker Active 43 Series


Summary of Contents for Becker Active 43 Series
- Page 1 OPERATING GUIDE...
-
Page 2: Table Of Contents
Deleting characters (for certain models only) (depending on the model, optional) Inserting spaces Cable for vehicle integration Memory card The Becker key (for certain models only) Inserting memory card Radio remote control Headset (depending on the model) Ejecting memory card... - Page 3 INDEX >>> Removing the remote control The New or New Destination Menu The Route options button Selecting the vehicle profile Connecting the remote control to the (depending on device) > D Selecting the route type Navigation device Layout of the New destination menu Time-dependent route guidance Replacing the battery Enter address...
- Page 4 >>> INDEX Structure of the map display Automatic call acceptance TELEPHONE MODE Map display without route guidance Telephone volume Calling up the telephone mode > D Map display with route guidance Updating phonebook (only selected models) Spilt screen with route guidance Bluetooth name >...
- Page 5 INDEX >>> Settings Selecting system settings > D The system settings menu Operation > GB Selection options > F Closing the settings menu The individual menu items > I Battery Day/night display > E Calibration Brightness > PL Language Automatic on/off >...
-
Page 6: Safety Information
>>> SAFETY INFORMATION Safety information > D ¤ Safety information > GB • The unit may only be operated if the traffic situation allows for this and if you are absolutely certain that you yourself, your fellow passengers or other road users will not be put at risk, encumbered or disturbed by this. >... - Page 7 Dispose of defective units and the rechargeable battery according to the applicable legal requirements. > PL • No warranty is granted in the case of improper use. These safety instructions also apply to genuine BECKER original > CZ accessories.
- Page 8 The Navigation device Navigation Thanks to GPS = Global Positioning Sys- > D Your Becker Navigation device is descri- This Navigation device provides you with tem, you no longer need to spend hours bed in this user manual. This manual de- a powerful PND (Personal Navigation >...
-
Page 9: Delivery Contents
THE NAVIGATION DEVICE >>> Unpacking the Navigation device Music* Delivery contents Thanks to the integrated MP3-Player, you > D can listen to your favourite tracks when on Note: > GB the go. Your Navigation device is supplied in sta- ble packaging. Do not unpack the unit in >... -
Page 10: Handling The Packaging
>>> THE NAVIGATION DEVICE Description of unit Complaints procedure Basic device Please contact your local stockist if you The basic unit contains all the electronics: > D The navigation device comprises the basic have any complaints. The device can also •... -
Page 11: Cable For Power Supply From Cigarette Lighter
THE NAVIGATION DEVICE >>> Cable for power supply from cigarette USB connection cable External GPS antenna (for certain models only) lighter You can use an external antenna to im- With the USB connection cable provided, > D This cable allows the unit to be connected prove reception in vehicles where only it is possible to connect the Navigation de- >... -
Page 12: Headset (Depending On The Model)
Navigation of any new updates and other news. device. Quick start guide > F You can register online on the Becker The Quick Start Guide is designed to pro- ¤ Danger! homepage www.mybecker.com. vide a brief introduction to operating your >... -
Page 13: Overview Of Scope Of Supply
OVERVIEW OF SCOPE OF SUPPLY >>> > D > GB > F > I > E > PL > CZ > H > RU OVERVIEW OF SCOPE OF SUPPLY Scope of supply 1 Basic device - PND (Personal Navigation Device) 2 USB connection cable 3 Unit holder with carrier plate (Design depending on the model) 4 Cable for power supply via the vehicle cigarette lighter... -
Page 14: Overview Of Navigation Device
Front of unit with controls and displays Rear of unit 5 Connection available for external GPS antenna (depending 1 Becker button ( on the model, external antenna not included) Press = Back function in most applications Press and hold = Calls up the main menu... - Page 15 OVERVIEW OF NAVIGATION DEVICE >>> > D > GB > F > I > E > PL > CZ > H > RU Top of the unit Underside of the unit 1 Switch-on and Switch-off (standby) 2 Slot for Micro SD card 3 Mini USB connection / connection for power supply 4 3.5-mm connection for headset (depending on the model, headset not included)
-
Page 16: General Operation
>>> GENERAL OPERATION Maintenance and care Your mobile navigation system was de- • Do not store your mobile navigation General operation signed and manufactured with great care system in cold environments. During > D The unit is maintenance-free. and should be treated with equal care. You operation, when the unit warms up to For proper care, a commercially available >... -
Page 17: Battery Quality Declaration
GENERAL OPERATION >>> Battery quality declaration Display quality declaration Power supply > D The capacity of the rechargeable battery in In some cases, for technical reasons, a few Note: your mobile navigation system decreases discoloured dots (pixels) may be visible on >... -
Page 18: Using The Battery
>>> GENERAL OPERATION Using the battery Connection for the cigarette lighter The internal power supply is via the inte- > D Note: grated rechargeable battery. The recharge- If the cigarette lighter has recently been > GB able battery is maintenance-free and does used and is still hot, wait until the lighter not require any particular care. -
Page 19: Connection To The Mains Outlet
GENERAL OPERATION >>> TMC antenna (depending on the GPS-antenna Connection to the mains outlet > D model) ¤ Danger! Unit antenna > GB The supplied TMC antenna is integrated Ensure that you do not have wet hands The GPS antenna is integrated into the into the cable for power supply. -
Page 20: Connecting Up External Antenna
>>> GENERAL OPERATION Cable for vehicle integration Connecting up external antenna To enable reception under adverse recep- > D (depending on the model, tion conditions, an external GPS antenna optional) > GB can be connected (depending on the mo- del, not included). For this purpose, a >... -
Page 21: Memory Card
GENERAL OPERATION >>> Memory card Inserting memory card > Remove the memory card from its > D Your Navigation device has a slot for a mi- packaging without touching or soiling cro SD memory card. > GB the contact bar. As the map data is stored in an internal >... -
Page 22: Unit Bracket
>>> GENERAL OPERATION Unit bracket > D The Navigation device can be attached di- rectly to the windscreen with the unit > GB holder. > F Note: > I The Navigation device and unit bracket must not be exposed to long periods of >... -
Page 23: On The Windscreen
GENERAL OPERATION >>> Switching the Navigation device On the windscreen Adjusting the unit holder’s position The unit holder can be attached directly > Loosen the fastening screws > D on/off to the windscreen using the suction mech- until the carrier plate can be moved >... -
Page 24: Switching On
>>> GENERAL OPERATION > Press the button for the required Switching on language. > Set the On/Off switch on the underside > D > The selection is confirmed by pressing of the unit to On. > GB > Press the button on the top of the Navigation device. -
Page 25: Switching Off
GENERAL OPERATION >>> Basic information about the Switching off Operation You can switch the unit off at any time. When you touch a button on the touch- > D touch screen > Press the button on the top of the screen, the button in question is briefly >... -
Page 26: The Main Menu
>>> GENERAL OPERATION Basic information about the You can tell whether a telephone is already If route guidance is already active, the cur- rent destination address and a button for connected by the symbol on the Phone > D menus button. -
Page 27: Entries Made With The Entry Menu
GENERAL OPERATION >>> Entries made with the entry menu Entering characters Accepting proposals Characters are entered by pressing the During entry, the Navigation device Some applications require entries to be > D keys in the central area. makes proposals in the uppermost line. made via the entry menu. -
Page 28: Scrolling Through The Lists
>>> GENERAL OPERATION The selection list appears. Scrolling through the lists If you have already entered some of the > D letters of the selection you want, you can > GB use the selection list to display all the des- tinations containing the combination of >... -
Page 29: Other Character Sets
GENERAL OPERATION >>> Other character sets Entering numbers Switching between upper and lower case Different character sets can be selected for Switch to the numbers keyboard in order During free text entry, it is possible to > D the keyboard of the Navigation device. to enter figures. -
Page 30: Deleting Characters
>>> GENERAL OPERATION Radio remote control Deleting characters The Becker key To delete the last character, use the back The key is integrated in the bottom > D key. left hand corner of the casing. Note: > GB It is not absolutely essential for the func- tion of the Navigation device to install >... - Page 31 GENERAL OPERATION >>> This unlocks the base plate, which can now be removed. > D > GB > F > I > E > Position the base plate so that the word > Press the remote control onto the base UP is pointing in the direction of travel.
-
Page 32: Removing The Remote Control
>>> GENERAL OPERATION Removing the remote control Connecting the remote control to the Replacing the battery Navigation device > D You can remove the remote control again, If the Navigation device stops responding Connecting for the first time to change the battery for example. to commands from the remote control, >... -
Page 33: Operating The Navigation Device Using The Remote Control
GENERAL OPERATION >>> > Remove the old battery and replace it Operating the Navigation device using But- Basic function the remote control with a new type CR2032/DL2032 bat- > D tery. You can control most functions and the Starts up the voice entry. >... -
Page 34: Content Manager
>>> GENERAL OPERATION When using the remote control and, Content Manager Installing the Content Manager for example, using the control ring You can install the Content Manager on > D The Content Manager is a PC-based ap- your computer with the following steps: scroll through a menu, the active menu plication containing a number of impor- >... -
Page 35: Starting The Content Manager
> H version is found, the Content Manager Note: gives you the option of installing it. We When you connect the Becker Naviga- > RU recommend that you always agree to the tion device to the PC for the first time, upgrade, if one is available. -
Page 36: Transferring Music Tracks Pictures And Videos
Note: problem in the FAQ in the Support area tial backup copy. > CZ on the Becker homepage (www.mybeck- We recommend that you give files and Note: er.com). directories self-explanatory names so that >... -
Page 37: Navigation Mode
NAVIGATION MODE >>> What is navigation? Signals from at least three satellites are re- Navigation mode ¤ Safety instructions quired to determine your position; your > D The term "navigation" (lat. navigare = to • Road traffic regulations always take height above sea level can be calculated if travel by sea) is generally understood to priority. -
Page 38: Selecting Navigation
>>> NAVIGATION MODE Selecting navigation Note: > D The menu items Navigation mode is called up from the Set current position (fast main menu. New destinations can be en- Select from last destinations > GB access mode) can also be used to select a tered in the menu New or New destinati- >... -
Page 39: Last Destinations List
NAVIGATION MODE >>> Last destinations list The destination list Icons used The destination list displays, line by line, The following icons are used in the desti- > D The last destinations visited and saved all destinations available for fast dialling. nation list: destinations are displayed in the Last des- >... -
Page 40: Operating The Last Destinations List
>>> NAVIGATION MODE Operating the last destinations list Displaying or editing a destination Option Meaning Any destination stored in fast access mode > D The destination is pro- Protect entry Entering an address using speech can be displayed and edited. tected against automatic Voice entry is activating by pressing the >... -
Page 41: Personal Destinations
NAVIGATION MODE >>> Personal destinations Selecting a destination from Personal A list of the available destinations will be destinations Using the button Personal destinations > D displayed. you can call up Google points of inter- You can call up Google points of in- Press the arrow buttons >... -
Page 42: Selecting A Destination From Contacts
>>> NAVIGATION MODE Select if you wish to delete 10 entries, a list of contacts is displayed Selecting a destination from Contacts Delete entry the destination from the list. straight away. You can call up Microsoft Outlook > D ® ®... -
Page 43: Layout Of The New Destination Menu
NAVIGATION MODE >>> The New or New Destination Layout of the New destination menu > D Menu (depending on device) Enter address The various steps from selecting an ad- > GB dress to starting route guidance can be car- > F ried out using the button. -
Page 44: Enter Geo-Coordinates
>>> NAVIGATION MODE Enter geo-coordinates Entering the address Selecting a country The geographic coordinates for a destina- You can select a country from those avail- button in the destina- > D Enter address tion can be entered and route guidance able using the button for the country of tion input menu opens the menu for en- >... -
Page 45: Selecting An Address And Starting Route Guidance
NAVIGATION MODE >>> Selecting a town Selecting an address and starting route Note: guidance The destination can be entered by either > D If required, press the arrow keys You can enter the exact destination using the name or ZIP code. on the right of the screen to >... - Page 46 >>> NAVIGATION MODE Using the town list Selecting the street Note: Once a few letters of the desired town In the Street menu field the street and > D If two words need to be entered you must have been entered you can display a list of house number can be entered separately separate them with the character >...
- Page 47 NAVIGATION MODE >>> Using the street list Selecting the Intersection Selecting a house number Once a few letters of the desired street After entering the destination town and After entering the destination town and > D have been entered you can display a list of street, you can enter a junction so as to street, you can enter a house number so as >...
- Page 48 >>> NAVIGATION MODE Displaying the route Storing a destination Note: Once the address has been entered, the ad- but- In the address input menu, the Save > D The symbols above the progress bar refer dress input menu allows the route to the ton opens a menu where a name can be to restrictions that you may have acti- >...
- Page 49 NAVIGATION MODE >>> If the route guidance is already running Entering address by language (selected models) Note: and a waypoint has already been entered You can start address entry using speech > D If there is no GPS signal when the route you will be asked whether the new desti- from the fast access function or from the is calculated, the following will be dis-...
- Page 50 >>> NAVIGATION MODE If your entry is unique, after a short time If your entry was not unique or the Navi- the menu for entering addresses will be gation device was not able to uniquely as- > D displayed with your entry filled in. sign your entry, you will be shown >...
-
Page 51: Points Of Interest
NAVIGATION MODE >>> Entries identified with the symbol Points of interest open up a further list when they are select- Points of interest (POI) are included in > D ed. This can be necessary if, for example, the map and can be displayed there. >... -
Page 52: Point Of Interest Near To An Address
>>> NAVIGATION MODE Point of interest near to an address Note: > Press POI near location > D You can also press the but- All categories ton. An input menu will then open and > GB you can enter the name of a point of in- >... -
Page 53: Point Of Interest Near To Destination
NAVIGATION MODE >>> The points of interest categories available Point of interest near to destination for the entered town are displayed. button. > Press the POI nearby > D > Select the desired point of interest as de- > GB scribed under “Point of interest in the vicinity”... -
Page 54: Additional Point Of Interest Information
>>> NAVIGATION MODE > Press the button to begin route Additional point of interest information Travel Guide Start guidance to the point of interest straight The MARCO POLO travel guide is simi- Any additional information that is pro- > D away. -
Page 55: Route Planning
NAVIGATION MODE >>> By pressing you can now add a Route planning Add stage stage to the route. The route planning menu allows you to > D After pressing you can give Rename route create and select individual routes. To do >... -
Page 56: Creating A New Route
>>> NAVIGATION MODE You can call up the route options using Creating a new route button. > In the route menu, press Options Create new > D You can optimise the order of the destina- route > GB tions to be travelled to by pressing the button. -
Page 57: Editing A Route
NAVIGATION MODE >>> Editing a route Option Meaning > Select the route you wish to edit. > D The stage is moved for- Move up > Press the button in front of the wards by one position. > GB stage you wish to edit. The stage is moved back- Move down wards by one position. -
Page 58: Optimising A Route
>>> NAVIGATION MODE Optimising a route Selecting a destination from the map If you have entered several destinations for You can select a destination straight from > D a route, you can use the Navigation device the map. > GB to optimise the order of the destinations >... -
Page 59: Coordinate Entry
NAVIGATION MODE >>> > Press the button. > Then enter the desired values using the Coordinate entry Details buttons You can also enter your destination using > D You can enter coordinates in three differ- geographic coordinates. > GB ent ways. >... -
Page 60: Navigation Settings
>>> NAVIGATION MODE Navigation settings This will take you to the navigation set- The Guidance info button tings menu. In the Guidance info settings window you > D The navigation settings contain all the set- can select which additional information tings that are relevant to the navigation >... -
Page 61: The Route Options Button
NAVIGATION MODE >>> The Route options button Setting Meaning Note: You can edit your driving profile in the > D When this function is ac- Signposts This information can only be displayed if Route options settings window. The set- tivated, you receive addi- it is contained in the map material. -
Page 62: Selecting The Vehicle Profile
>>> NAVIGATION MODE Saved profile lorry with trailer Selecting the vehicle profile Selecting the route type This setting influences the calculation of > After pressing the button next to Saved bus profile Route > D the expected time of arrival and blocks select one of the following options. - Page 63 NAVIGATION MODE >>> Time-dependent route guidance Avoiding particular types of road The TMC button If this function ( ) is After pressing the button next to Use traffic patterns Avoid You can configure settings for the recep- > D switched on ( ), information (statistical you can exclude various types of road, e.g.
- Page 64 >>> NAVIGATION MODE The Map view button Setting Meaning Setting Meaning You can select whether the map is to be > D This button allows you Rerouting Choose whether to run Auto-select displayed in 3D or 2D mode, in a split to choose whether the an automatic search for station...
- Page 65 NAVIGATION MODE >>> > Press the button to select > Press the button in the 3D Buildings whether to use 2D or 3D mode. map mode menu and turn the function > D > Press the button to select the entire or off >...
-
Page 66: Setting Poi Categories
>>> NAVIGATION MODE The following setting options are available Autozoom Setting POI categories in the extended settings: button in the ex- > Press the You can select which POI symbols are to Auto zoom > D tended settings. be displayed on the map. •... - Page 67 NAVIGATION MODE >>> • The Warnings button Speed info You can select whether speed limits are In the Warnings settings window you can > D displayed in parallel to the navigation. select which warnings are to be displayed > GB You can also receive an audible warning by the Navigation device or which warn- about exceeding the speed limit.
- Page 68 >>> NAVIGATION MODE The following signs are available in the The Driver alerts button The Speed info button If this information is saved in the map ma- The Speed info settings window allows individual categories: > D terial and is supported by your navigation you to display speed limits parallel to the •...
- Page 69 NAVIGATION MODE >>> The Voice guidance button Setting Meaning In the Voice guidance settings window > D Select the amount over Out of city you can make settings relating to the voice the speed limit at which > GB guidance of the Navigation device. you would like to receive >...
- Page 70 >>> NAVIGATION MODE • The Voice button The Volume button Volume You can select the standard volume for In the Voice settings window you can set With the Volume settings window, you > D voice announcements for each start of the voice that will make the navigation an- can set the standard volume for voice an- >...
- Page 71 NAVIGATION MODE >>> If the automatic function is switched off, The Format button The Time button you can select the desired time zone by In the Format settings window you can You can select the time zone relevant for > D pressing the button below Time zone set the measurement units to be used for...
- Page 72 >>> NAVIGATION MODE > Select the blocked road you want. > Press the buttons with the days on The Blocked roads button which the road should not be blocked In the Blocked roads settings window you > D (the clock symbol under the day disap- can unblock previously permanently >...
-
Page 73: Traffic Announcements Using Tmc (Depending On The Model)
NAVIGATION MODE >>> Traffic announcements using TMC The Reset button Note: You can reset the navigation settings to > D (depending on the model) Press the button to set a block Block 24 h their factory settings. for an entire day. >... -
Page 74: Displaying Tmc Messages On The Map
>>> NAVIGATION MODE Displaying TMC messages on the map Using TMC Note: Current TMC messages are displayed on When the Navigation device has been at- > D As the traffic announcements are trans- the map graphically. Sections of the route tached to the carrier plate (power supply mitted by radio stations, we cannot as- >... -
Page 75: Reading A Message
NAVIGATION MODE >>> Expected duration of the obstruction Reading a message > Press on the desired message in the list. > D If a TMC message lies on your route, the The message display appears. message is indicated by the sign >... -
Page 76: Display The Relevant Road In The Map
>>> NAVIGATION MODE If, after displaying the traffic message, the Display the relevant road in the map Taking announcements into considera- tion when calculating routes > Press the button in the message navigation system detects that a sensible > D display. -
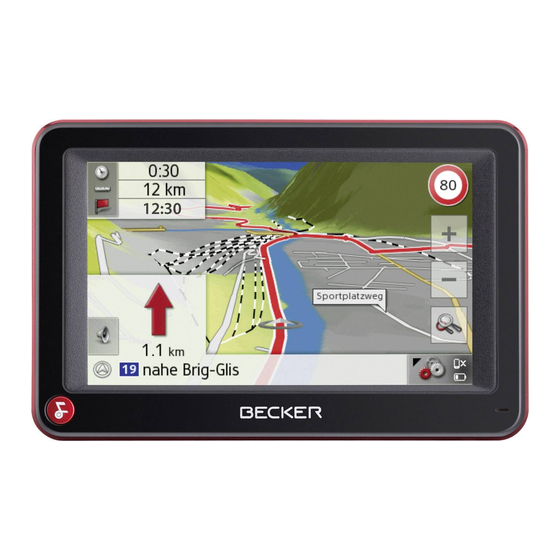
Page 77: The Map Display
NAVIGATION MODE >>> > Now either press the button to use The map display The map display will then appear and, if the alternative route or press the GPS reception is available, will show your reject > D The map display is used primarily for button to continue using the existing current position. - Page 78 >>> NAVIGATION MODE Speed limit on the road currently be- Power level/telephone status (depen- Your current position is displayed on the ing driven on (display not available ding on the model) map via the position icon. > D for all roads), signs for the driver Button for calling up the options alerts will also be displayed >...
- Page 79 NAVIGATION MODE >>> Information is also displayed in the bot- Models with TMC reception: The symbol Spilt screen with route guidance tom left corner in the preview area. below is displayed on the left of the pre- > D view area if there is a TMC announce- >...
- Page 80 >>> NAVIGATION MODE Next driving manoeuvre Traffic lane recommendation (only Route guidance with arrow display appears on some multi-lane roads; Displays POIs on the route > D black arrows = recommended lanes) Current road, or road to which the > GB next driving manoeuvre leads Note: Distance to next driving manoeuvre...
- Page 81 NAVIGATION MODE >>> Map display with Junction View Using the map display You can display a detailed and realistic > D Repeating the last announcement view of the lane situation at many motor- During route guidance, the system an- > GB way junctions.
- Page 82 >>> NAVIGATION MODE Map zooming Moving the map Map display options The map can be zoomed into in steps via You can move the map to any point. In the map display options, you can > D the zoom buttons. >...
-
Page 83: Point Of Interest On The Route
NAVIGATION MODE >>> The symbols on the right let you see at a Point of interest on the route Note: (Only available when route guidance is ac- glance if the detour for driving to the re- > D The scope of the displayed functions de- tive.) spective point of interest is small ( pends on whether route guidance or a... -
Page 84: Basic Information About The Menus
>>> NAVIGATION MODE Point of interest near destination/on en- Cancel route guidance Note: tire route (Only available when route guidance is > D Also displayed are the TMC messages > In the point of interest on the route active.) that have led to a change in the route. >... -
Page 85: Changing Route Options
NAVIGATION MODE >>> > Select the length of block you want by Changing route options Block route (Only available when route guidance is ac- pressing one of the buttons. You can block a stretch of road ahead. > D tive.) This determines a certain stretch of road Notes: >... -
Page 86: Switching The Map Mode
>>> NAVIGATION MODE By pressing buttons you can change Switching the map mode Changing the map orientation You can select whether the map is to be You can view your surroundings in 3D the size of the displayed map area. >... - Page 87 NAVIGATION MODE >>> Travel time without breaks in the Route calculator (depending on the model) journey The route calculator provides a data dis- > D Travel time with breaks in the jour- play with average speeds, maximum > GB speeds, etc. and a stopwatch with the op- Compass tion to record laps.
-
Page 88: Setting Day/Night Display
>>> NAVIGATION MODE Press the button to stop the record- Setting day/night display Selecting/setting the vehicle profile Stop ing. The time continues if you press the You can switch the Navigation device dis- You can select or set the vehicle profile. >... - Page 89 NAVIGATION MODE >>> > Confirm the currently selected profile For the general lorry profile or saved lorry ¤ Danger! by pressing or select profiles (depending on the model): Change profile > D to change the profile. The information in the map data may >...
- Page 90 >>> NAVIGATION MODE Adjusting truck profiles Setting the size > Select one of the saved truck profiles or > In the profile settings press the button > D the general truck profile. for setting the size. > GB > F >...
- Page 91 NAVIGATION MODE >>> > Enter the desired weight. Selecting the truck symbol and name > Press the button to change the > Confirm the entry in the input menu by If you have changed one of the saved truck symbol displayed. >...
-
Page 92: Entering A Destination
>>> NAVIGATION MODE Entering a destination Enter/delete waypoint (Only available when route guidance is (Only available when route guidance is ac- > D not active.) tive.) > GB You can enter a destination. With this function, you can enter a way- >... -
Page 93: Displaying The Entire Route
NAVIGATION MODE >>> By pressing the button you You can also display a list version of the Displaying the entire route (Only available when route guidance is ac- can simulate the entire route quickly or but- directions by pressing the List view >... - Page 94 >>> NAVIGATION MODE You can now set whether or not the road Note: should be blocked for each day of the > D Press the button to set a block Block 24 h week. for an entire day. > GB >...
-
Page 95: Displaying The Destination List
NAVIGATION MODE >>> Displaying/selecting different routes You can use the buttons in Displaying the destination list You can use the Navigation device to dis- the bottom line to scroll through the indi- If a planned route with a number of desti- >... -
Page 96: Skipping Destination
>>> NAVIGATION MODE • Use to start guidance By pressing the button you Displaying current position Start guidance Country info for the selected stage. can display country-specific information You can display your current position and > D store this position. You can also display such as the maximum permitted speed for •... -
Page 97: Saving A Position
NAVIGATION MODE >>> Saving a position Calling up the telephone (depending on the Defining fast access buttons You can save the current position. The Navigation device has four freely as- model) > D > Call up the options menu for the map You can call up the telephone function. - Page 98 >>> NAVIGATION MODE > D > GB > F > I > Select the desired function from the > E displayed list. > Confirm your selection by pressing the > PL button. The map display is opened and the fast >...
-
Page 99: Telephone Mode
TELEPHONE MODE >>> If your navigation device has an integrated Calling up the telephone mode If Bluetooth is activated and the Naviga- TELEPHONE MODE Bluetooth ® interface, you can connect it to tion device is already connected with a cell >... -
Page 100: Dialing A Number
>>> TELEPHONE MODE The Navigation device now attempts Telephone menu (only selected In the upper area of the telephone menu, again to connect the cell phone last con- if available, the signal strength of the cell > D models) nected. When the connection is estab- phone, the charging level of the cell >... -
Page 101: Phonebook
TELEPHONE MODE >>> > In the telephone menu, press the Phonebook Dial Note: button. In the phonebook, the system displays the > D phonebook entries loaded from the SIM Press the button to delete the > GB card and from the memory of the cell characters entered. - Page 102 >>> TELEPHONE MODE > In the input menu, select the first letters Note: Icon Significance of the entry you are looking for. > D You may also first have a list displayed Private phone number Note: that corresponds to the letter combina- >...
-
Page 103: Text Messages (Sms Only Selected Models)
TELEPHONE MODE >>> • Text messages (SMS) (only selected Call back models) By pressing the button you Call back > D If this function is supported by the mobile can start a call to the sender’s number. > GB phone, all the received text messages on •... -
Page 104: Incoming Text Message
>>> TELEPHONE MODE Each line of the number list is divided into Incoming text message Number lists You will receive notification of any text two fields. Each list field is designed as a In the number lists, the telephone num- >... -
Page 105: Icons Used
TELEPHONE MODE >>> Icons used Dialing an available number Selection Significance The following icons are used in the You may select directly the numbers/ > D The data for the entry is Show details number list. names available in the number list. displayed (number and >... -
Page 106: Lists Loaded From Cell Phone
>>> TELEPHONE MODE The device list shows line by line all cell Lists loaded from cell phone Connecting Bluetooth telephones > In the number list, call the respective phones that were already connected to the So that you may make and receive calls >... -
Page 107: Automatic Connection
TELEPHONE MODE >>> Automatic connection Searching for cell phones After activation, your Navigation device > D Note: attempts to establish a connection to the Prior to a search, switch on Bluetooth® > GB cell phone last connected. on the cell phone to be searched for. Note: >... -
Page 108: Connecting From Device Lists
>>> TELEPHONE MODE Connecting from device lists Connecting a mobile phone From within the device list, you may ini- You can also attempt to establish a con- > D tiate a connection to a cell phone. If a cell nection to the Navigation device from the >... -
Page 109: Disconnecting A Connected Telephone
TELEPHONE MODE >>> Telephone calls Disconnecting a connected telephone Accepting a call You may disconnect the connection to a For an incoming call, a ringing tone will > D In the telephone calls section, you can cell phone currently connected via Blue- sound. -
Page 110: Ending A Call
>>> TELEPHONE MODE If you have switched on the automatic call Ending a call During a call acceptance as described in "Automatic call You can end an active call. During a call, you have various control > D acceptance" on page 113, the time to call options. -
Page 111: Telephone Settings
TELEPHONE MODE >>> > To call the options menu of the call • Telephone settings Private mode Hands free screen, press the button. You can transfer a call back to the cell Options > D The telephone settings include all the set- phone. -
Page 112: Switching Bluetooth On And Off
>>> TELEPHONE MODE You will branch to the menu for the tele- Switching Bluetooth on and off Visibility phone settings. With the button, you can With the button, you can switch > D Bluetooth Visibility switch Bluetooth on or off. on or off whether or not for a search other >... -
Page 113: Automatic Call Acceptance
TELEPHONE MODE >>> Automatic call acceptance Telephone volume Updating phonebook With this function, you can set whether or With this function, you can set the vol- With this function, you can update or re- > D not or after which time an incoming call is ume of the ringtone and the volume of the transfer the stored phonebook entries in >... -
Page 114: Bluetooth Name
>>> TELEPHONE MODE • Bluetooth name Text message notification (depending Read out automatically on the model) An incoming text message will be read With this function, you can assign a name > D With this function you can set how the out automatically. -
Page 115: Extras
EXTRAS >>> Under Tools, the following functions are MP3 player* Extras Selecting a track grouped together, depending on the Tracks can be selected from the selection > D The MP3 Player can play MP3 tracks model: menu. saved on an inserted micro SD memory >... - Page 116 >>> EXTRAS • Selection using is described here Genres Folders When you select the tracks on as an example. The other selection options Genres > D the memory card are listed sorted by are similar in functionality. > GB genre (e.g. rock, pop). >...
-
Page 117: The Playback Menu
EXTRAS >>> At the top right of the display, you can see The playback menu Track skip The names of the next and previous track the elapsed time. Next to that, the elapsed You can use the playback menu to control >... -
Page 118: Track Repeat / Random Play
>>> EXTRAS Track repeat / random play Setting the volume Closing the MP3 player You can set a track to repeat on a loop, or You can set the volume of the MP3 play- Pressing the button closes the MP3 >... -
Page 119: Image Viewer
EXTRAS >>> Image viewer* The image viewer menu In the image viewer menu, you can select > D images, start a slide show and call up the Note: > GB settings. The image viewer cannot be called up when route guidance is active. >... -
Page 120: Selecting An Image
>>> EXTRAS Press the buttons to the left and right of Selecting an image Enlarging the image the image to move to the next or previous > Show the image menu. > D image. > Press the button. Zoom > GB Press the centre of the image to hide the image menu. -
Page 121: Displaying Image Information
EXTRAS >>> Displaying image information Slide show > Show the image menu. In the slide show, all the pictures in the > D > Press the button. EXIF current folder level are automatically dis- > GB played sequentially. > Press in the image viewer Slide show >... -
Page 122: Video Player
>>> EXTRAS Video player* > D Note: > GB The video player cannot be called up when route guidance is active. > F The video player must not be operated > I during driving. A message is displayed stating that the vid- The selected video is played in full-screen >... -
Page 123: Displaying The Video Menu
EXTRAS >>> Displaying the video menu Playback Interrupting playback The displayed video is played using the You can pause and resume playback at any You can use the video menu to control the > D following button: time. playback of the video. >... -
Page 124: Setting The Volume
>>> EXTRAS Country information Setting the volume You can set the volume of the MP3 play- > D The country information enables you to back. display country-specific information for > GB ¤ Warning. numerous countries (maximum permitted > F Always adjust the volume so that you speed, alcohol limits, etc.). - Page 125 EXTRAS >>> Symbol Meaning > D Speed limit in built-up areas > GB Speed limit outside built-up > F areas > I Speed limit on motorways > E Alcohol limit > PL > CZ Reflective jacket requirement > H Driving lights requirement >...
-
Page 126: Settings
>>> SETTINGS Selecting system settings Settings The system settings menu Operation You can select the various settings options > D You can change various basic settings for Selection options from the system settings menu. all applications on the Navigation device. Select the desired menu item by pressing >... -
Page 127: The Individual Menu Items
SETTINGS >>> The individual menu items Day/night display You can set the Navigation device display > D Battery to day, night or automatic. Your Navigation device may be operated > GB The automatic setting changes automati- using an external power supply unit or an cally between day and night display de- >... -
Page 128: Calibration
>>> SETTINGS Calibration Brightness Language If the touch screen responds incorrectly You can set the brightness of the display The texts on the touch screen can be dis- > D when buttons are pressed, it needs to be separately for day and night display. played in a variety of languages. -
Page 129: Automatic On/Off
SETTINGS >>> Scrolling The following display is shown during au- Automatic on/off Using the buttons, it is possi- The Navigation device can switch auto- tomatic switch-off. > D ble to scroll through the list in the direc- matically to sleep mode when the vehicle >... -
Page 130: Setting The Colour
Always > Select the required colour using the slid- quote these details in enquiries to the serv- at the bottom of the display. ice provided by Harman/Becker. > Press the button. button dis- The Navigation device is reset to the fac-... -
Page 131: My Xtras
SETTINGS >>> My XTRAS You can display the content installed on > D your Navigation device, the content that > GB has already been updated, the content that has been purchased and the content that > F can be additionally purchased via the Content Manager. -
Page 132: Specialist Words
>>> SPECIALIST WORDS ID3-Tag SD Card Specialist words (Greenwich Mean Time) „Index of Contents" of an MP3 title. (Secure Digital) > D Central European Time Contains information such as title, artist, The Secure Digital Card was developed in > GB The standard time at 0 degrees of longi- album, year and genre. - Page 133 SPECIALIST WORDS >>> (Traffic Message Channel) > D Traffic announcements transmitted by > GB most FM stations via RDS. Basis for dy- namic navigation. > F > I (Universal Serial Bus) > E The Universal Serial Bus (USB) is a bus sytem for interconnection of a computer >...
-
Page 134: Keywords
Keywords >>> KEYWORDS Coordinate entry ....59 Numerics Country information ..61, 124 3D buildings ....65 Economical route . - Page 135 KEYWORDS >>> Measurement units ....71 Points of interest Call ..... . .54 Memory card .
- Page 136 >>> KEYWORDS Safety information ....6 Telephone menu ....100 Warnings > D Safety instructions .
-
Page 137: Model Overview And Technical Specifications
MODEL OVERVIEW AND TECHNICAL SPECIFICATIONS >>> MODEL OVERVIEW AND TECHNICAL SPECIFICATIONS : standard Navigation system > D -: not available Ready 43 Ready 43 Active 43 Active 43 Active 43 Professional Ready 43 : optional Traffic V2 Talk V2 Traffic Talk Traffic Talk... -
Page 138: Notice
>>> NOTICE Dear customer, NOTICE In conformance with current EC guidelines, any person may operate this unit. This unit con- > D forms to the current valid European or harmonised national standards. This designation is > GB your guarantee that the unit conforms to the applicable specifications regarding electromag- netic compatibility. -
Page 139: Disposal Of The Unit
NOTICE >>> Disposal of the unit > D Customer information on the disposal of electrical and electronic devices (private households) > GB In accordance with the self-imposed company principles of United Navigation GmbH your > F product has been developed and manufactured from high-quality and recyclable materials and components. -
Page 140: Disposal Of The Battery
>>> NOTICE Disposal of the battery > D Duty to supply information according to battery legislation (BattV) > GB Batteries must not be disposed of in household waste. It is the duty of the user to return used batteries. Please only dispose of batteries >... - Page 141 NOTICE >>> > D > GB > F > I > E > PL > CZ > H > RU > Completely discharge the battery (leave the unit switched on with no power supply until it automatically switches off). > Remove the two rubber covers from the screw holes.
- Page 142 - Allemagne...
Need help?
Do you have a question about the Active 43 Series and is the answer not in the manual?
Questions and answers