Table of Contents
Advertisement
Quick Links
Advertisement
Table of Contents

Related Manuals for Becker Highspeed II


Summary of Contents for Becker Highspeed II
- Page 1 Operating instructions...
-
Page 2: Table Of Contents
Index Emissions Vertical movements The Traffic Assist Highspeed II Horizontal movements Overview Traffic Assist Adding the Traffic Assist Navigation Highspeed II Highspeed II Music Maintenance and care Basic information about the Pictures Battery quality declaration touch screen Unpacking the Traffic Assist... - Page 3 Index Navigation menu: Navigation The Home adress key Navigational mode Destination selection window The TMC button What is navigation? Destination: select country The Smart Speller button Selecting navigation Destination: select address The Factory settings key Aids for navigation Navigation menu: Status and start Rapid access Stopping navigation...
- Page 4 Turn the page Pictures mode purpose whatsoever without the express Selecting the language Selecting pictures display written consent of HARMAN/BECKER Cancelling the language selection The Picture Viewer Automotive Systems GmbH. Moodlight Operating the Picture Viewers ©...
-
Page 5: Safety Information
!Safety information • The unit may only be operated if the traffic situation allows for this and if you are absolutely certain that you yourself, your fellow passengers or other road users will not be put at risk, encumbered or disturbed by this. •... - Page 6 Dispose of defective units and the rechargeable battery according to the applicable legal requirements. • No warranty is granted in the case of improper use. These safety instructions also apply to genuine BECKER original accessories.
-
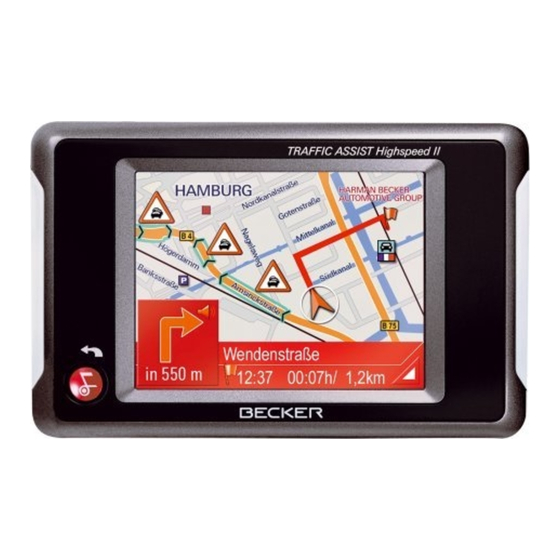
Page 7: The Traffic Assist Highspeed Ii
Navigation Music Thanks to GPS = Global Positioning Thanks to the integrated MP3-Player, The Traffic Assist Highspeed II is a po- System, you no longer need to spend you can listen to your favourite tracks werful PND (Personal Navigation De- hours searching through road atlases. -
Page 8: Unpacking The Traffic Assist Highspeed Ii
The unit can also be sent directly to Harman/Becker in its Note: original packaging. Your Traffic Assist Highspeed II is sup- 4010 plied in stable packaging. Do not un- Handling the packaging pack the unit in full if you discover any... -
Page 9: Description Of Unit
• "Technical Data" on page 84 ting the Traffic Assist Highspeed II to the power supply. For this purpose, connect the unit to a computer via the USB connecting cable,... -
Page 10: Sd Memory Card
This power supply allows connection of The card supplied with the unit can hold You can charge the Traffic Assist High- the Traffic Assist Highspeed II to a one set of roadmaps. If you intend to lis- speed II using the USB cable. However, mains outlet. -
Page 11: Headset
The Quick Start Guide is designed to updates and other news. cluded). provide a brief introduction to operating your Traffic Assist Highspeed II. The You can register online on the Becker Danger! most important basic functions of the homepage (www.becker.de). -
Page 12: Repairs
Repairs The unit must not be opened if damaged. Please contact your local stockist. Disposal Note: The unit, including the parts supplied with it and the batteries and accesso- ries, must be disposed of correctly in accordance with national regulations for electrical / electronic devices. -
Page 13: Overview Traffic Assist Highspeed Ii
Overview Traffic Assist Highspeed II Overview Traffic Assist Highspeed II Scope of supply 1 Traffic Assist Highspeed II - PND (Personal Navigati- on Device) 2 Memory card (containing navigational data) 3 USB connection cable 4 Cable for power supply from car's cigarette lighter... - Page 14 OverviewTraffic Assist Highspeed II 4001 Front of unit with controls and displays 1 Touch screen showing the main menu selected 2 Touch screen key Press = activates the corresponding key command 3 Back key Press = returns to numerous applications...
- Page 15 Overview Traffic Assist Highspeed II 4003 Rear of unit 1 Point for connecting up an external antenna (external antenna not included in the scope of supply) 2 Memory card slot 3 Sound piece for loudspeaker...
- Page 16 OverviewTraffic Assist Highspeed II 4002 Side of unit 1 ON/OFF switch 2 Mini USB connection 3 3.5 mm connection for headset/Connection socket for TMC antenna (headset not included in scope of supply)
-
Page 17: Maintenance And Care
General operations • "Protect your mobile navigation sys- • Never use corrosive or aggressive che- Maintenance and care tem from water and moisture. If your micals, cleaning solutions or aggressi- The unit is maintenance-free. unit is exposed to moisture, switch it ve detergents for cleaning. -
Page 18: Battery Quality Declaration
Traffic Assist cycle. Improper storage at excessively also appear brighter or darker. However, Highspeed II or want to view images, high or low temperatures may also cause such instances do not represent a product you must save these to a separate card a gradual deterioration of capacity. -
Page 19: Inserting Memory Card
General operations Inserting memory card Ejecting memory card 10101 The card slot ejects the card so that you 10102 10129 can pull it out with two fingers. 5011 Use your finger to gently press the me- mory card against the spring force into the card slot and then release it. -
Page 20: Power Supply
Danger of Death! First always switch off the Traffic Assist Make sure that your hands are not damp Highspeed II before connecting up or and that the mains section is dry. Only removing the power supply. connect the mains section to a mains supply with which such purposes are permitted. -
Page 21: Connecting To The Cigarette Lighter
Note: specialist dealer. If the engine is switched off, using the vehicle's power supply through the cigarette lighter will slowly drain the vehicle battery! Do not therefore operate the Traffic Assist Highspeed II for extended periods with the engine off. -
Page 22: Connecting Up External Antenna
Open the closure by pulling gently on the OK key. its upper surface. Connect the external antenna up as de- Note: scribed in the manufacturer''s instruc- The Traffic Assist Highspeed II may tions. only be used in accordance with the ap- plicable national road traffic act! -
Page 23: Switching Off
Press the back key for a few seconds. Note: The unit will enter sleep mode. Switch the On/Off switch to Off for fi- The Traffic Assist Highspeed II and 5016 nal deactivation of the unit. unit bracket must not be exposed to long periods of direct sunlight. -
Page 24: Fitting The Unit Bracket
(3) upwards and remove the find residue from the glue on your dash- Traffic Assist Highspeed II is installed adapter plate (4) downwards for this board. and ensure that the unit is outside the purpose. -
Page 25: Adjusting The Unit Bracket
Before mo- Retighten the locking screw (1) again Slide the unit holder downwards to the ving, always take the Traffic Assist so that the Traffic Assist Highspeed II stop. Highspeed II off the unit bracket. is secure for travel. -
Page 26: Basic Information About The Touch Screen
Some applications require entries to be The Traffic Assist Highspeed II is fitted be touched off-centre in order to be actu- made via the entry menu. The entry with a touch screen. -
Page 27: Entering Characters
6008 compares the entry with the set of data on the memory card. The Traffic Assist Highspeed II then only makes those let- ters which are possible available for se- lection and adds a sensible suggestion to To accept the suggested entry, press the letters already entered. -
Page 28: Special Characters And Umlauts
5004 have to used when entering the names of key. towns and streets. The Traffic Assist Highspeed II will change entries from 6007 AE, OE and UE if necessary. If e. g. you are searching for the town Enter the special character you want. -
Page 29: The Back Key
Traffic Assist Highspeed II is Map loaded prohibited! The map currently loaded can be called... -
Page 30: Transferring Using The Usb Port
The USB port is used to link the Traffic Since the map data takes up virtually all volves the following stages: Assist Highspeed II directly to a perso- the 1GB memory capacity of the memo- switch off Traffic Assist Highspeed II. -
Page 31: Faults
These should be ack- nowledged. If the activated function cannot then be executed, the Traffic As- sist Highspeed II must be restarted using the ON/OFF switch or the reset button. If the messages reappear or the unit... -
Page 32: Navigational Mode
For safety, directions to the designation tellites. gational system issuing incorrect are mainly provided verbally. The di- The Traffic Assist Highspeed II uses its details. rection display and map diagram on the GPS receiver to find the vehicle's positi- • When first started up, it may take touch screen are further aids. -
Page 33: Selecting Navigation
Navigational mode Selecting navigation Navigation menu Rapid access If necessary, the navigation menu can be Navigational mode is called up from the Rapid access allows you to select called up from rapid access, e.g. to enter main menu. from the key functions to quickly start a new destination not yet provided. -
Page 34: Structure Of Rapid Access
Navigational mode Structure of rapid access The list of destinations Icons used The list of destinations displays all the The following icons are used in the list destinations available for quick selection of destinations. Navigation menu and map display In rapid access, the Navigation menu key line-by-line. -
Page 35: Operating Rapid Access
Navigational mode Operating rapid access Displaying or editing destination Change to map display Each destination in the destinations me- You can change to map display from ra- mory can be displayed or edited. pid access using the following key. Starting using an existing destination Press the icon to the left of the destina- Destinations already in the destinations tion required. -
Page 36: Displaying Current Position
Navigational mode Displaying current position TheNavigation menu Structure of the navigation You can have your current position dis- menu If you do not want to select a destination played in the map display. quickly or if the planned destination is In rapid access, press the key featuring Navigation not yet available in the destinations me-... -
Page 37: Status
6002 The destination country button offers Load map you all the countries available on the The Traffic Assist Highspeed II operates memory card for navigation. Once a using the map material saved on the SD 6003 country has been selected, it is automati- card. -
Page 38: Destination: Select Address And Start
Traffic Assist Highspeed II The following details can be entered in rules out all impossible combinations of Press the key of the country you want. - Page 39 (e.g. Italy), the "prefix" (e.g. question. time a new letter is entered. via Gran Mundo) needs to be entered Traffic Assist Highspeed II rules out all afterwards (e.g. Gran Mundo_via). impossible combinations of letters and only activates those letter boxes which...
- Page 40 Navigational mode The OK key Using the list of streets Selecting the Intersection The OK key can be used to transfer If you have already entered some of the After you have entered the destination the destination selected into the route letters of the street you want, you can city and street, you can use the junction use the List function to display all the...
- Page 41 Navigational mode Press the following boxes one after ano- Options for the drive profile Short route With this option, the You can set your drive profile in the Op- ther: shortest route is calcula- tions settings window. The setting made ted in terms of kilomet- •...
-
Page 42: Stopping Navigation
Navigational mode Saving destination Stopping navigation Destination: Points of interest select The Save button opens an entry menu for There are three ways in which you can Points of interest, or POI for short (Point entering a name for the destination ente- stop directions to the destination. -
Page 43: Point Of Interest: Near Gps Position
Navigational mode From the All categories box, select a The search area selection window Point of interest: nationwide Touch the Nationwide button. appears. main category (e.g. car hire). Only those points of interest currently near- by are displayed. Touch the box next to this and select a 6011 6055 sub-category (e.g. - Page 44 Navigational mode You will find information about scrol- Touch the box next to this and select a Once you have selected a point of inte- ling in lists in the "Scrolling through the sub-category (e.g. museum). rest, the keys in the lower area can be Touch the Point of interest key to go to lists"...
-
Page 45: Destination: Selecting From The Map
Navigational mode Gently press the screen surface until When directions to the destination is ac- Destination: selecting from the map tive, the Interim destination button If the destination required cannot yet a circle of dots is drawn around the or can no longer be found in the destina- destination requested. -
Page 46: Navigation Menu: Route Planning
Navigational mode Navigation menu: Route plan- Route list Displaying route details Routes already stored in the system are Press button to display the route ning selected from the route list. details. The route planning menu allows you to Press the button with the name of the The Route details window opens. -
Page 47: Using A Route
Navigational mode Once all the entries have been made in Using a route The New route button The following buttons are available: You can create a new route by pressing the route planning window, save the the New route button. destination data by pressing the OK Meaning Press New route. -
Page 48: The Edit Key
Navigational mode Press the button to have the total dis- The Edit key The Calculate key Existing routes can be changed in the A planned route can also be calculated tance and probable length of the jour- Edit menu. without GPS reception so that you can ney calculated for this route. -
Page 49: The Start Key
Navigational mode The Start key Navigation menu: Settings Structure Press the Start key in the route plan- Various buttons are available in the set- The settings of relevance to the navigati- ning menu. ting menu: on functions can be found in the Settings The route options are displayed again. -
Page 50: The Signpost Info Key
Navigational mode The following settings are possible. The Signpost info key The Routing options key You can use the Signpost info button to You can set your drive profile in the Setting Meaning choose whether or not to display infor- Routing options settings window. -
Page 51: The Volume Key
Navigational mode The Volume key Setting Meaning Setting Meaning Use the Volume configuration window Fast route With this option, the Allowed With this option, the to set the volume of all voice prompts shortest route possible corresponding road type every time the Traffic Assist Highspeed 6059 for the time required is is included in the route... -
Page 52: The Map Info Key
Navigational mode The Map info key The Automode key Setting Meaning You can perform the following settings You can choose the following settings in Start setting Decide whether in the Map info configuration window. the Automode configuration window: wish to have a 3D dis- play or 2D display of the map as the default 6015... -
Page 53: The Time Zone Key
Navigational mode The Time Zone key The Route planning key 2D autozoom Decide whether Set the relevant time zone for your regi- Use the Route planning configuration wish to work with Low- on in the Time Zone configuration win- window to specify whether or not you range autozoom, Nor- dow. -
Page 54: The Format Key
Navigational mode The Warning outside The Format key The Speed key Warning out- built-up areas button in- Using the Format configuration win- Use the Speed configuration window to side built-up dow, you can specify which units of choose whether or not you wish to have areas dicates the speed limit measurement to use for time and dis-... -
Page 55: The Home Adress Key
Navigational mode Press the Set button. Press a button and choose the setting The Home adress key you require. Enter your Home adress to navigate au- The address is copied and displayed in the Home adress window. Confirm your selection by pressing tomatically from any location to your the OK key. -
Page 56: The Tmc Button
Navigational mode The TMC button The Smart Speller button Setting Meaning You can adjust the following settings in The Smart Speller allows you to enter Rerouting This button allows you the TMC settings window: towns, roads or other destinations that to choose whether route you are searching for more quickly using changes are made auto-... -
Page 57: The Factory Settings Key
Navigational mode The Factory settings key Navigation menu: Status Navigation menu: Load map You can use the Factory settings confi- The Status menu shows the number of The Load map menu shows the map guration window to cancel all new set- satellite signals picked up, your current that is currently loaded. -
Page 58: Navigation Menu: Home
Navigational mode Navigation menu: Home What is dynamic route Note: If you have entered a home address, guidance? As the traffic announcements are trans- the system automatically starts route mitted by radio stations, we cannot as- Dynamic route guidance calculates the planning to this address. -
Page 59: Displaying Tmc Messages On The Map
Navigational mode Displaying TMC messages on Using TMC Once you have connected the TMC the map 6071 antenna, your Traffic Assist Highspeed Current TMC messages are displayed on will receive current traffic the map in graphic form. Sections of the announcements and dynamic route route where there are problems with calculation will be enabled (traffic jam... -
Page 60: Station Selection
Press the information on the traffic announcement Your Traffic Assist Highspeed II can button at the top right of the screen to appears. take traffic announcements into switch between the three options. -
Page 61: Map Display
You can call the map display from various ignore an announcement at any time. current mode of operation of the Traffic applications using the miniature map Press the icon on the map display Assist Highspeed II. 6075 icon. open list announcements. -
Page 62: Map Display With Driving Guidance
Navigational mode Information appears in the bottom left Map display with driving guidance Map display with toolbar corner of the preview area. Press the following key to activate the toolbar. Press again to deactivate the toolbar. 6029 6032 6031 The distance remaining is indicated by If the navigation function has been acti- The following function keys are display- means of the number of kilometres (or... -
Page 63: Using The Map Display
Navigational mode The following function keys appear in Using the map display Adjust voice prompt volume the toolbar: You can adjust the volume of the voice prompts. Repeat the last voice prompt Icon Meaning During route guidance, the system an- See "Display route (tool- nounces important information, e.g. -
Page 64: Information Rows
Navigational mode Display route (toolbar) 6033 Important! With this map, the map is automatically Make sure that you adjust the volume so zoomed out so that the entire route is dis- you can still hear all ambient noise pro- played. The Display route function is Select your information rows in the perly. - Page 65 Navigational mode Choose this function whenever Displaying TMC messages (toolbar) Daytime - Night-time design (toolbar) you want, for example, to locate your You can choose between daytime Press this button to display all TMC traf current position again after the map or night-time design to adapt the touch- fic announcements received from the display has shifted.
-
Page 66: Change Display (Toolbar)
Navigational mode To activate move mode, select the key Change display (toolbar) Point northwards (toolbar) You can show the map using either 2D Use the compass key to orient the map with the hand icon. display (bird's eye view) or 3D display on the touchscreen towards the north. -
Page 67: Call Options Menu
The driving directions The Options menu offers a range of use- planned by the Traffic Selection Meaning ful functions. Assist Highspeed II may Main menu Terminates driving Press on the map briefly. be hindered by unantici- guidance and allows you The Options menu is displayed. -
Page 68: Position Information (Toolbar)
Navigational mode Mute mode Position information (toolbar) The voice prompt for You can call up the information window driving manoeuvres can if you require information on a particular 6012 be activated or deactiva- point on the map display. If information ted. -
Page 69: Music Operations
Music operations Music operations In the upper section of the MP3-Players Selecting music playback The MP3 player the title of the piece of music currently Music playback is called up from the The MP3 files saved on a memory card loaded is displayed along with the artist main menu. -
Page 70: Operating The Mp3-Players
Music operations Operating the MP3-Players Play Pause The pieces of music starting from the Playback can be paused at any time and Various key panels are arranged around track displayed in the track line are play- then continued. the track line to simplify operations. ed when the following key is pressed. -
Page 71: Repeat Current Track
Music operations Repeat current track Setting volume Warning! The piece of music currently being play- The control bar for volume is displayed Set the volume so that you can still hear ed is repeated continuously when the in the lower part of the MP3-Players by all ambient noise clearly. -
Page 72: Navigation During Mp3 Player Operation
Music operations Navigation during MP3 player opera- Folder overview Shutting down the MP3-Player tion All the music folders saved on the SD Press the back key to shut down the You can start or continue an active navi- card are listed next to the folder button. MP3-Player. -
Page 73: Pictures Mode
Traffic tions. Assist Highspeed II (JPG) can be called up and displayed. The Picture Viewer is Scrolling shown below along with its standard dis-... -
Page 74: Full Screen
Pictures mode A prompt appears once all images have Full screen Folder viewing mode been displayed. In full screen mode, the current picture is Under the picture displayed in the Pictu- If you wish to repeat the slide show, enlarged to fill the entire touch screen. re Viewer, the picture's folder level is press Full screen mode can be started using... -
Page 75: Operating Folder Viewing Mode
Pictures mode Operating folder viewing mode Changing folder levels Press to change to the uppermost 8015 folder level. All subfolders containing Subfolders image files are displayed here. All folders containing image files are in- Press the appropriate button to display a cluded in the folder overview. -
Page 76: Settings
Selection possibilities Energy for all applications of the Traffic Assist The desired selection is chosen by Your Traffic Assist Highspeed II may be Highspeed II. pushing the desired button. The funtio- operated using an external power supply nality of the buttons varies according to... -
Page 77: Ending The Status Display
Settings Brightness Calibration The following button allows switching If the touch-screen reacts incorrectly 9021 between the maximum and minimum to the touching of the screen in specific brightness of the screen. areas, calibration is required. Starting calibration 9030 9024 The calibration can be started using the The charge condition is displayed using following button. -
Page 78: Language
9020 guage to . Note: In order to accept the selected langua- Please deactivate Becker ge, push the button moodlights while driving in your 5059 In order not to accept the selected lan- vehicle in order to prevent visual guage, push the button... -
Page 79: Information
Settings Information Information concerning the Traffic As- sist Highspeed II is displayed using the following buttons. 9023 Push the button Information. The information display appears. 9018 Please note particularly the product desi- gnation and the details of the software version. Always quote these details in the event of queries with Harman/Becker service department. -
Page 80: Specialist Words
HDOP states the quality of the positional A re-writable storage card. In the Traffic dtermination. In theory, values from 0 to Assist Highspeed II it is a SD card. 50 are possible, whereby the following applies: the smaller the value the more... - Page 81 Specialist words File Index (Traffic Message Channel) File on a CD/storage card/microdrive Traffic announcements transmitted by which contains MPS titles. most FM stations via RDS. Basis for dy- namic navigation. SD Card (Secure Digital) The Secure Digital Card was developed (Universal Serial Bus) in 2001 by SanDisk on the basis of The Universal Serial Bus (USB) is a bus...
-
Page 82: Keywords
Keywords Keywords Destinations memory ... .34 changing ....34 Active Sync ....29 HDOP . - Page 83 Keywords Main menu ....25 Operating folder viewing mode ..74 Safety information ... 4 Map display .
- Page 84 Keywords Time format ....53 Time of arrival ....49 Time zone .
-
Page 85: Technical Data
Technical Data Technical Data • AC Adapter (not included): • Dimensions: 110 - 230 Volt (W x H x D) in mm 127 x 81.2 x 49.4 0.2 Ampere • Weight: 50 - 60 Hz 187 grams • Output Voltage: •... -
Page 86: Fact Sheet
FACT SHEET In accordance with current EU guidelines, this unit can be operated by any person. This unit conforms with the currently applicable European and harmonised national standards. The marking of the unit gives you the guarantee that the electromagnetic compatibility specification applicable to the unit is maintained.
Need help?
Do you have a question about the Highspeed II and is the answer not in the manual?
Questions and answers